

Employment & Income
Overview
Incorporating Argyle makes the borrower experience truly paperless:- Borrowers connect their payroll accounts through Argyle within Consumer Connect.
- Payroll data shared by the borrower populates supported loan application fields.
- Imported payroll documents and verification reports are made available in the Encompass® integration for the borrower’s loan file.
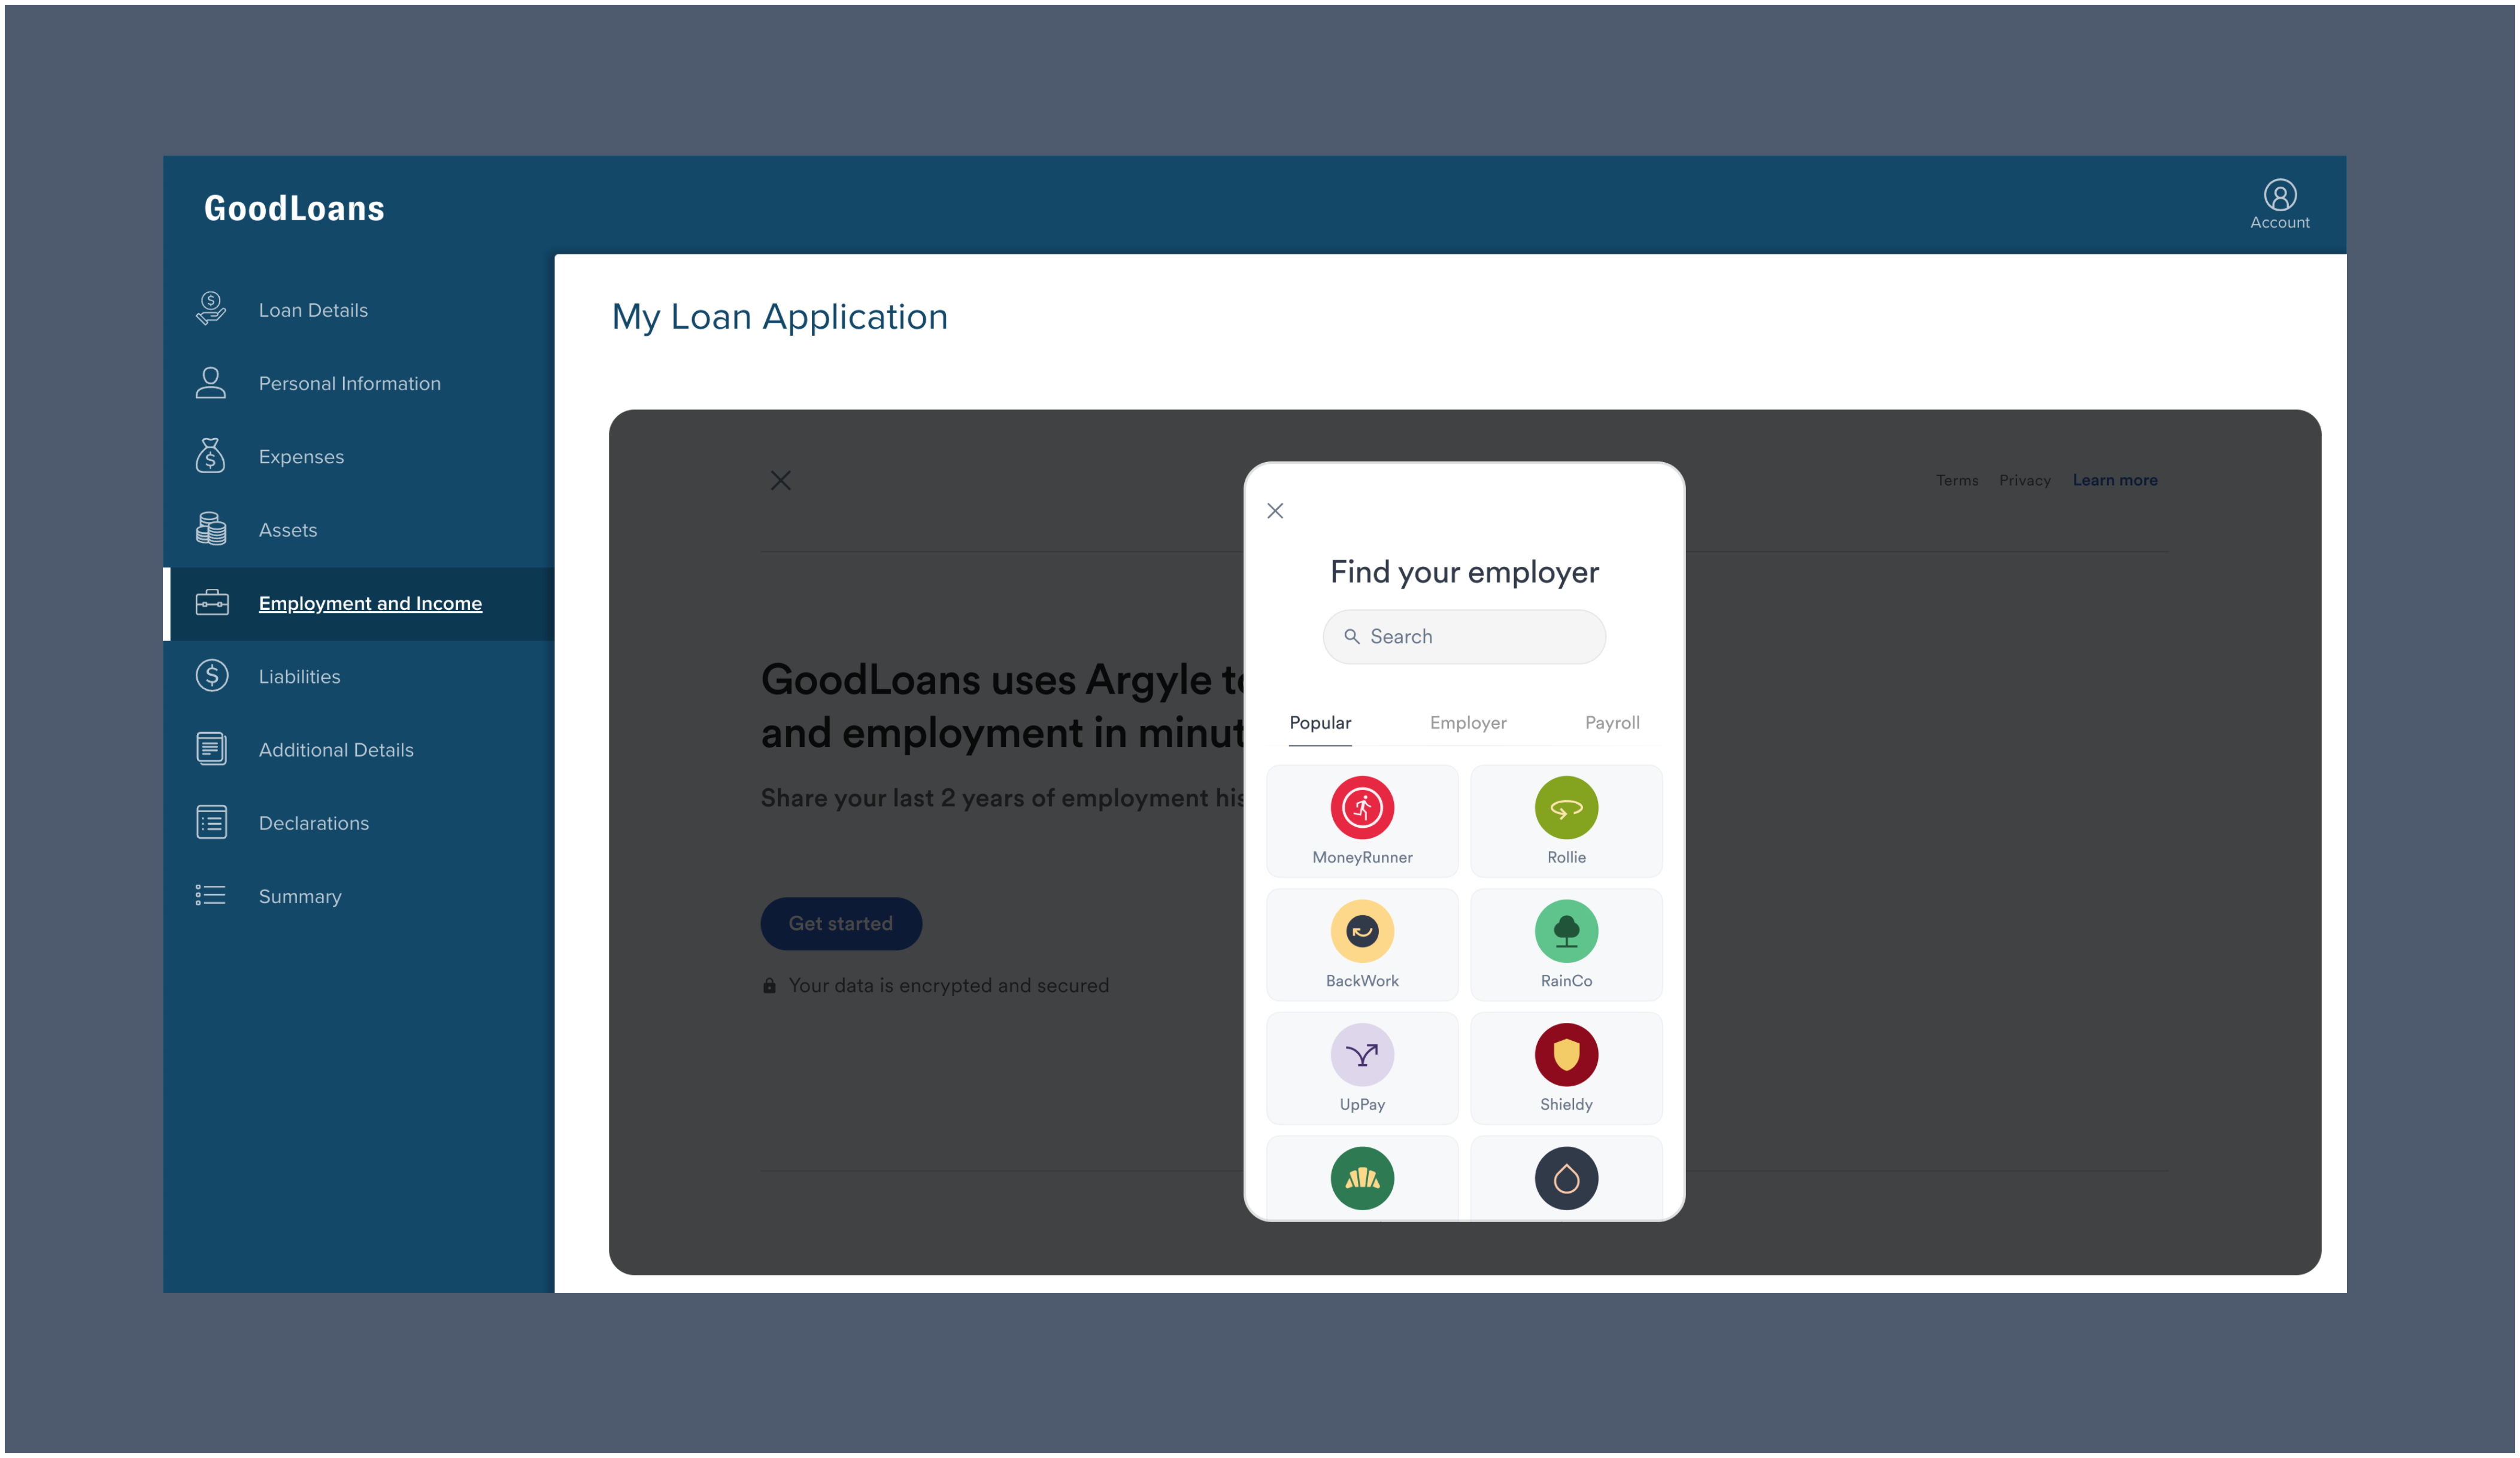
Borrower experience
Starting a new loan application
- Borrowers apply through your Consumer Connect site.
- Borrowers register for an account or log in to an existing one.
Borrowers must be registered and logged in to their account to access third-party services such as Argyle.
Importing employment and income
- When borrowers arrive at the Employment and Income section of the application, they first need to provide their consent to having their employment and income data imported by a third-party provider.
-
After consent, borrowers must select
Import Employment/Income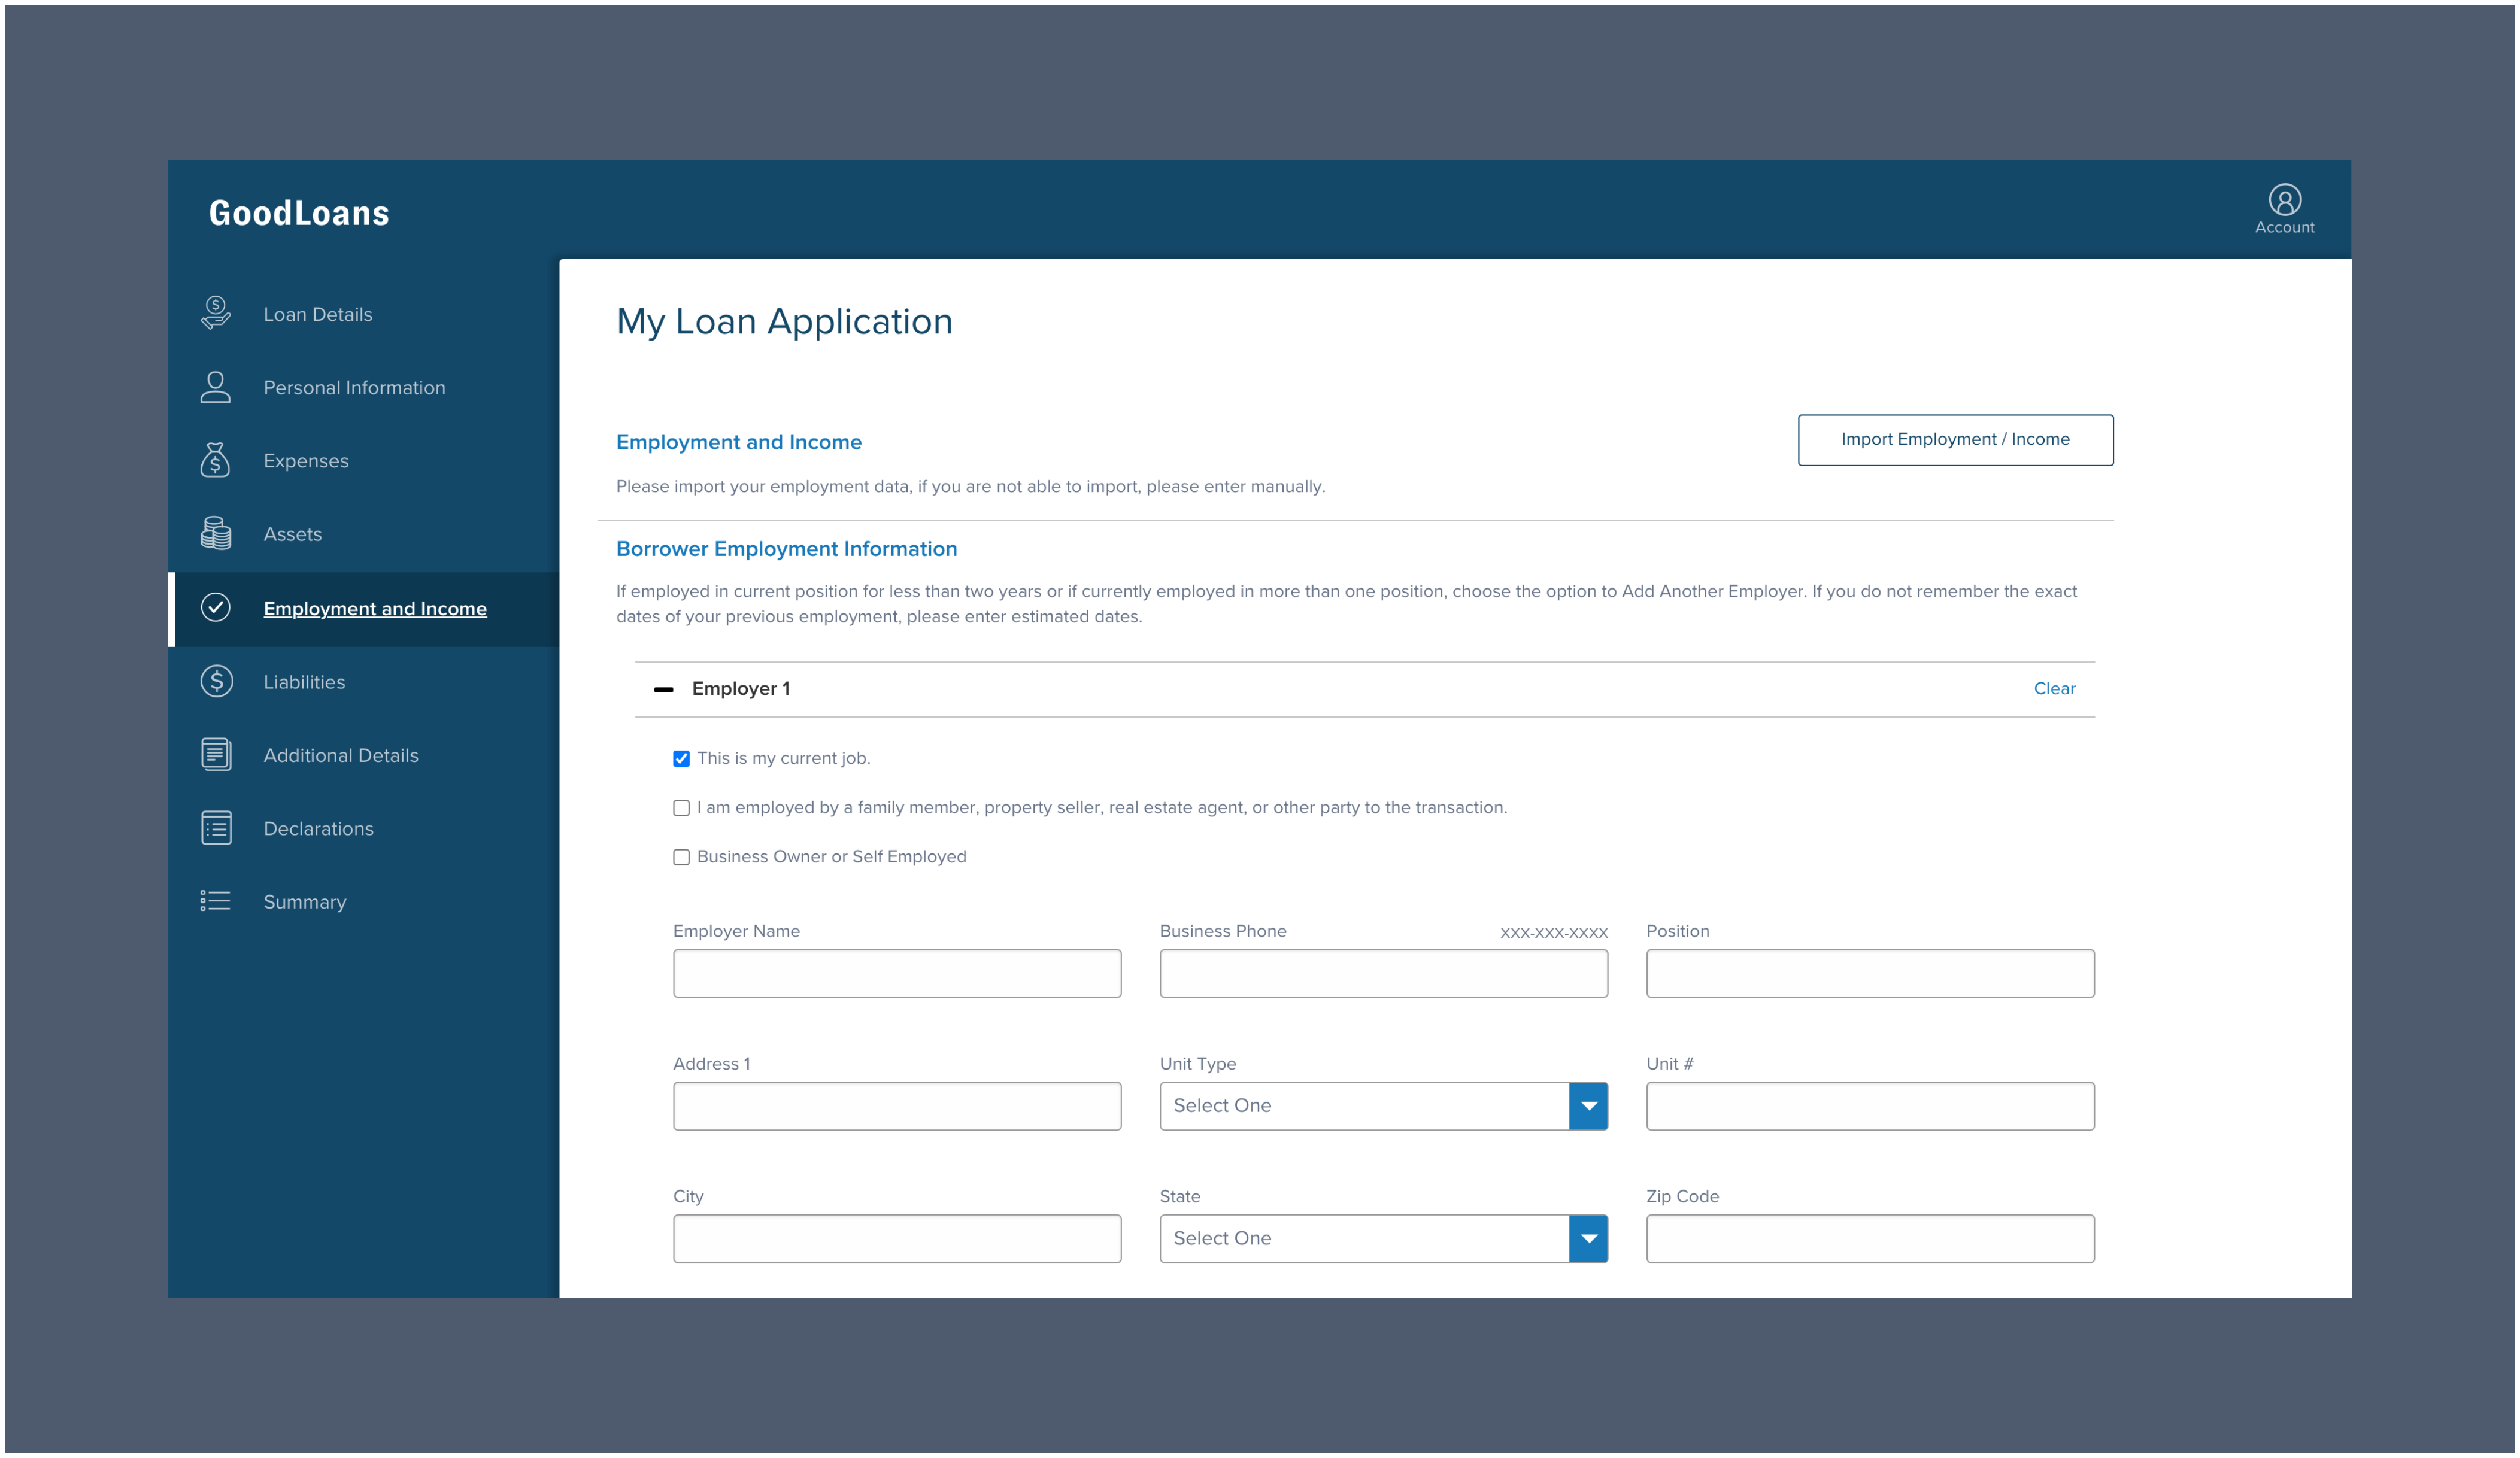
-
The borrower will then fill out preliminary information such as their name, social security number, and date of birth (this information is typically pre-filled). Once completed, the borrower must click
Nextto open the Argyle interface: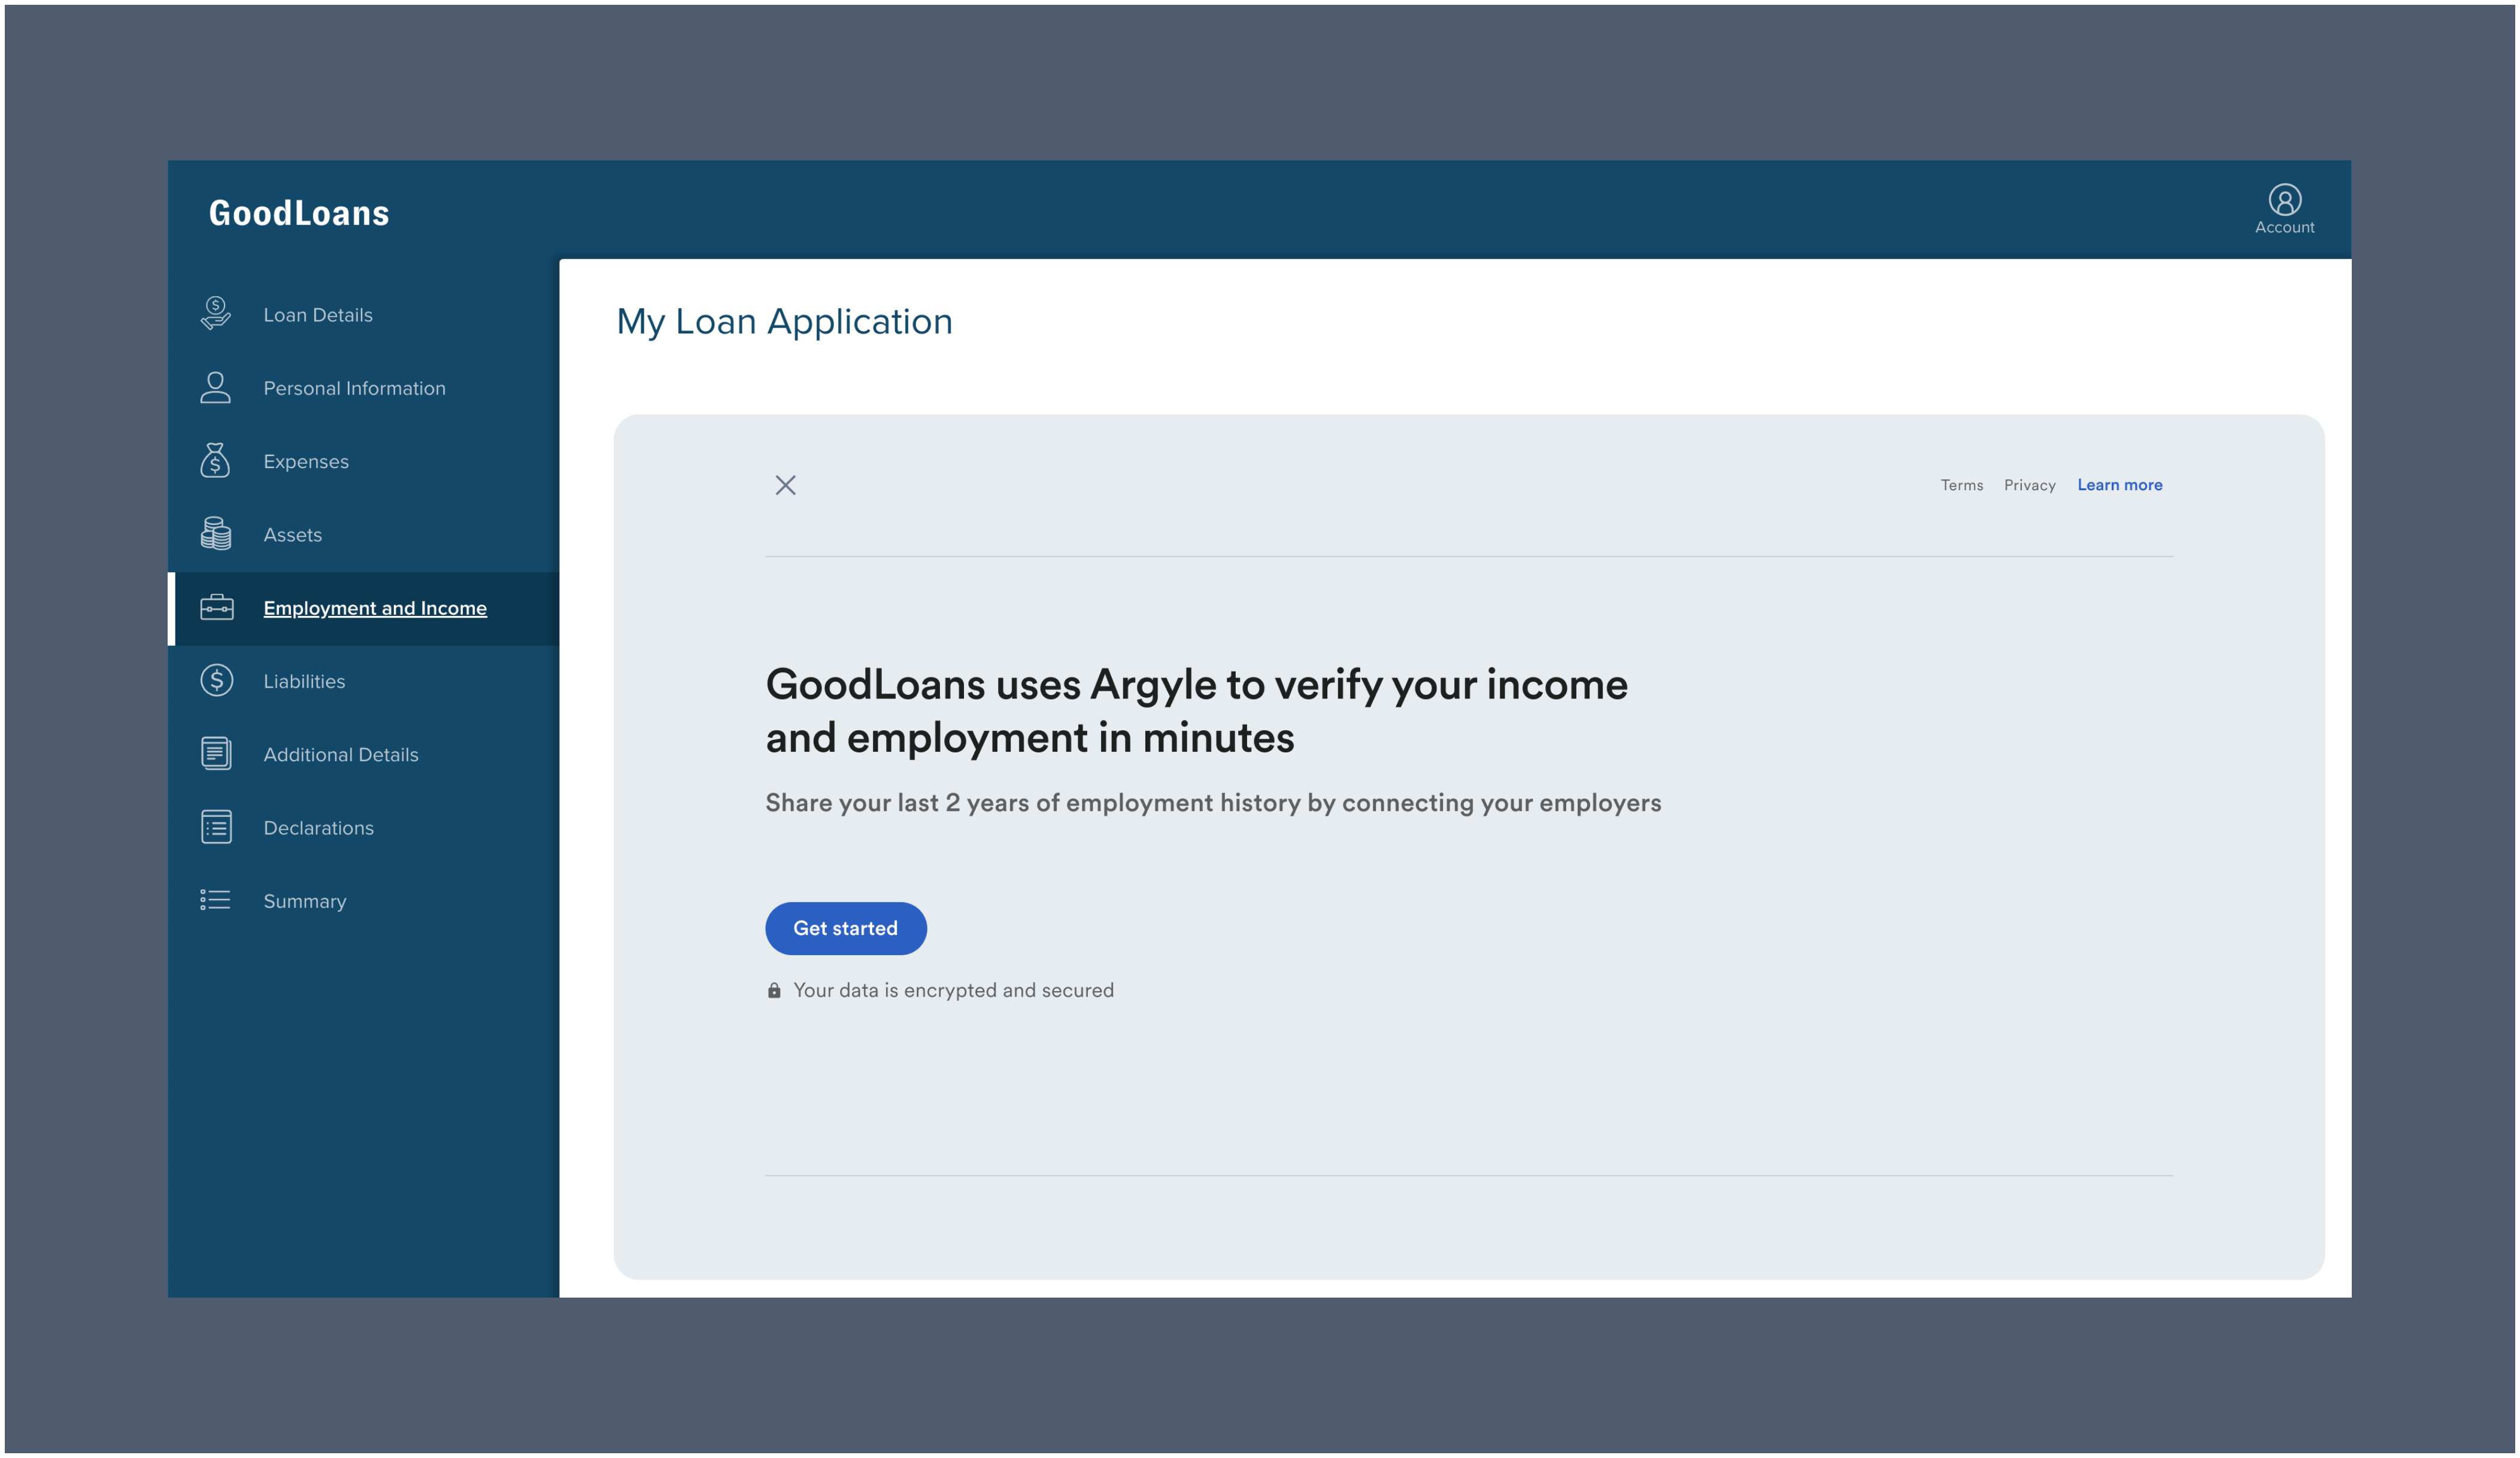
Connecting payroll via Argyle
-
Argyle’s interface will guide the borrower through the process of logging in to their employers or payroll providers to establish a data connection.
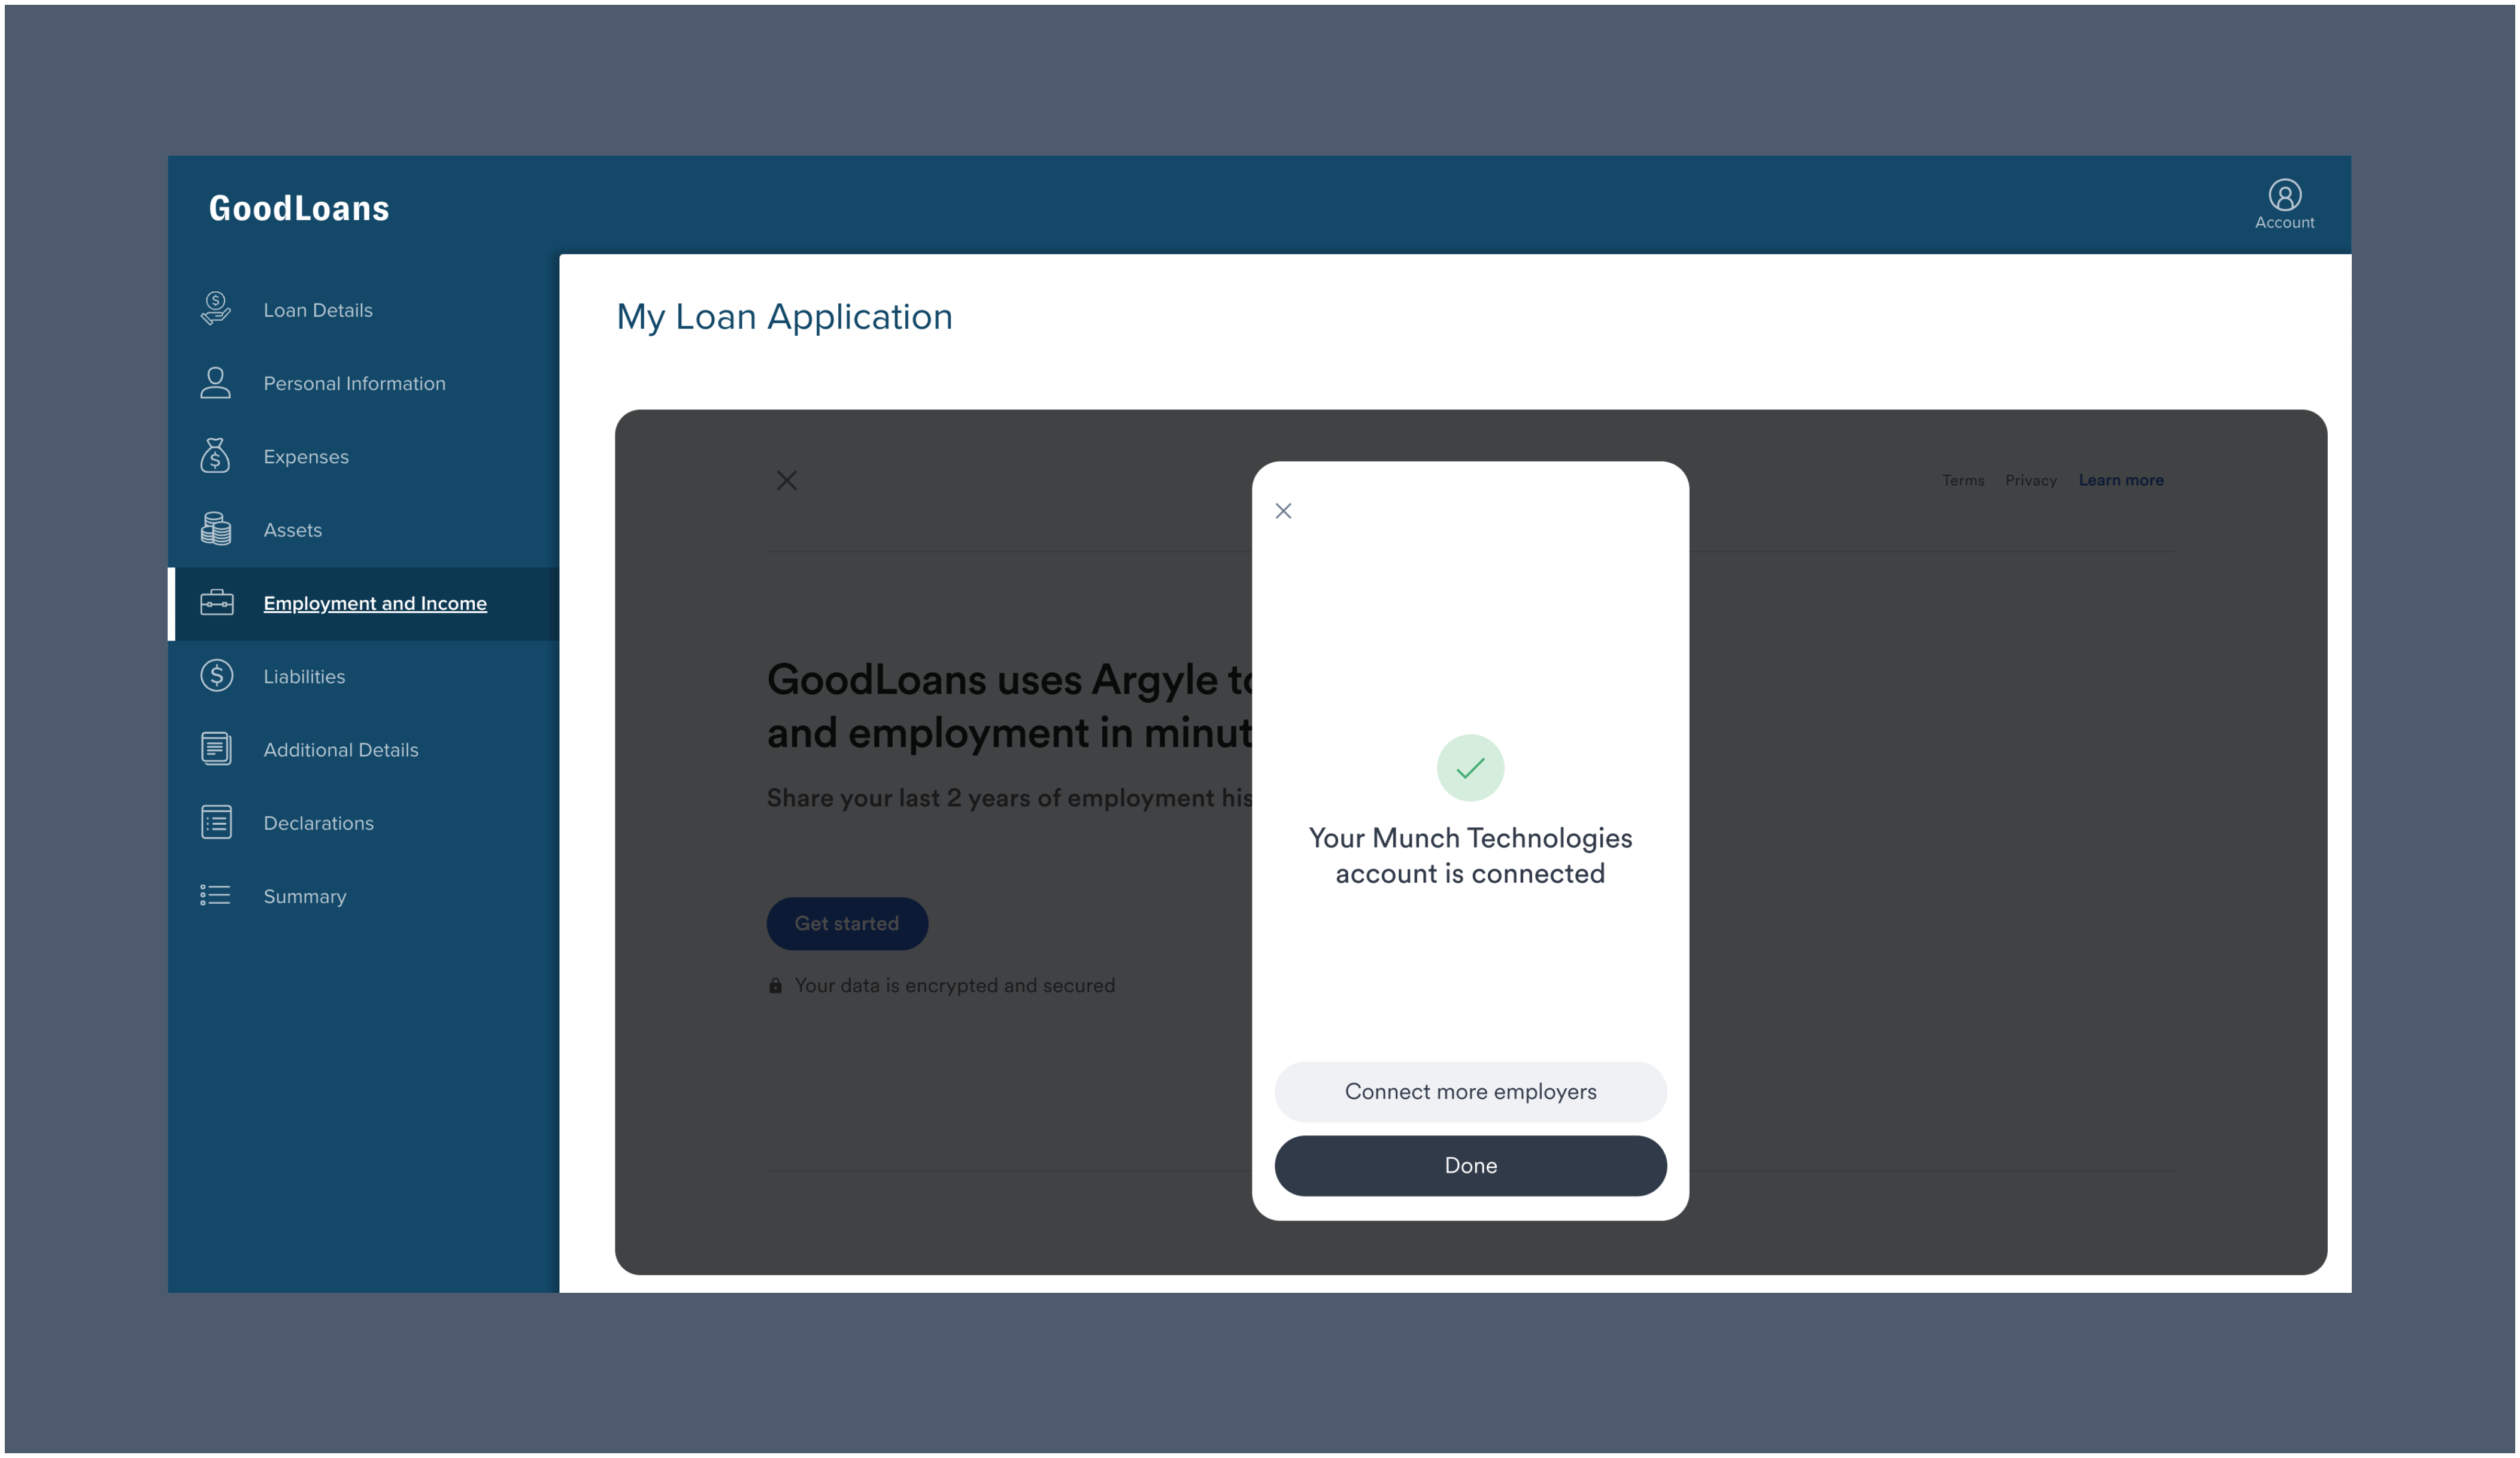
-
After the account connects, payroll data begins importing. If more employment history is required, the borrower is prompted to connect another account. Otherwise, the borrower can select
Doneand return to the application.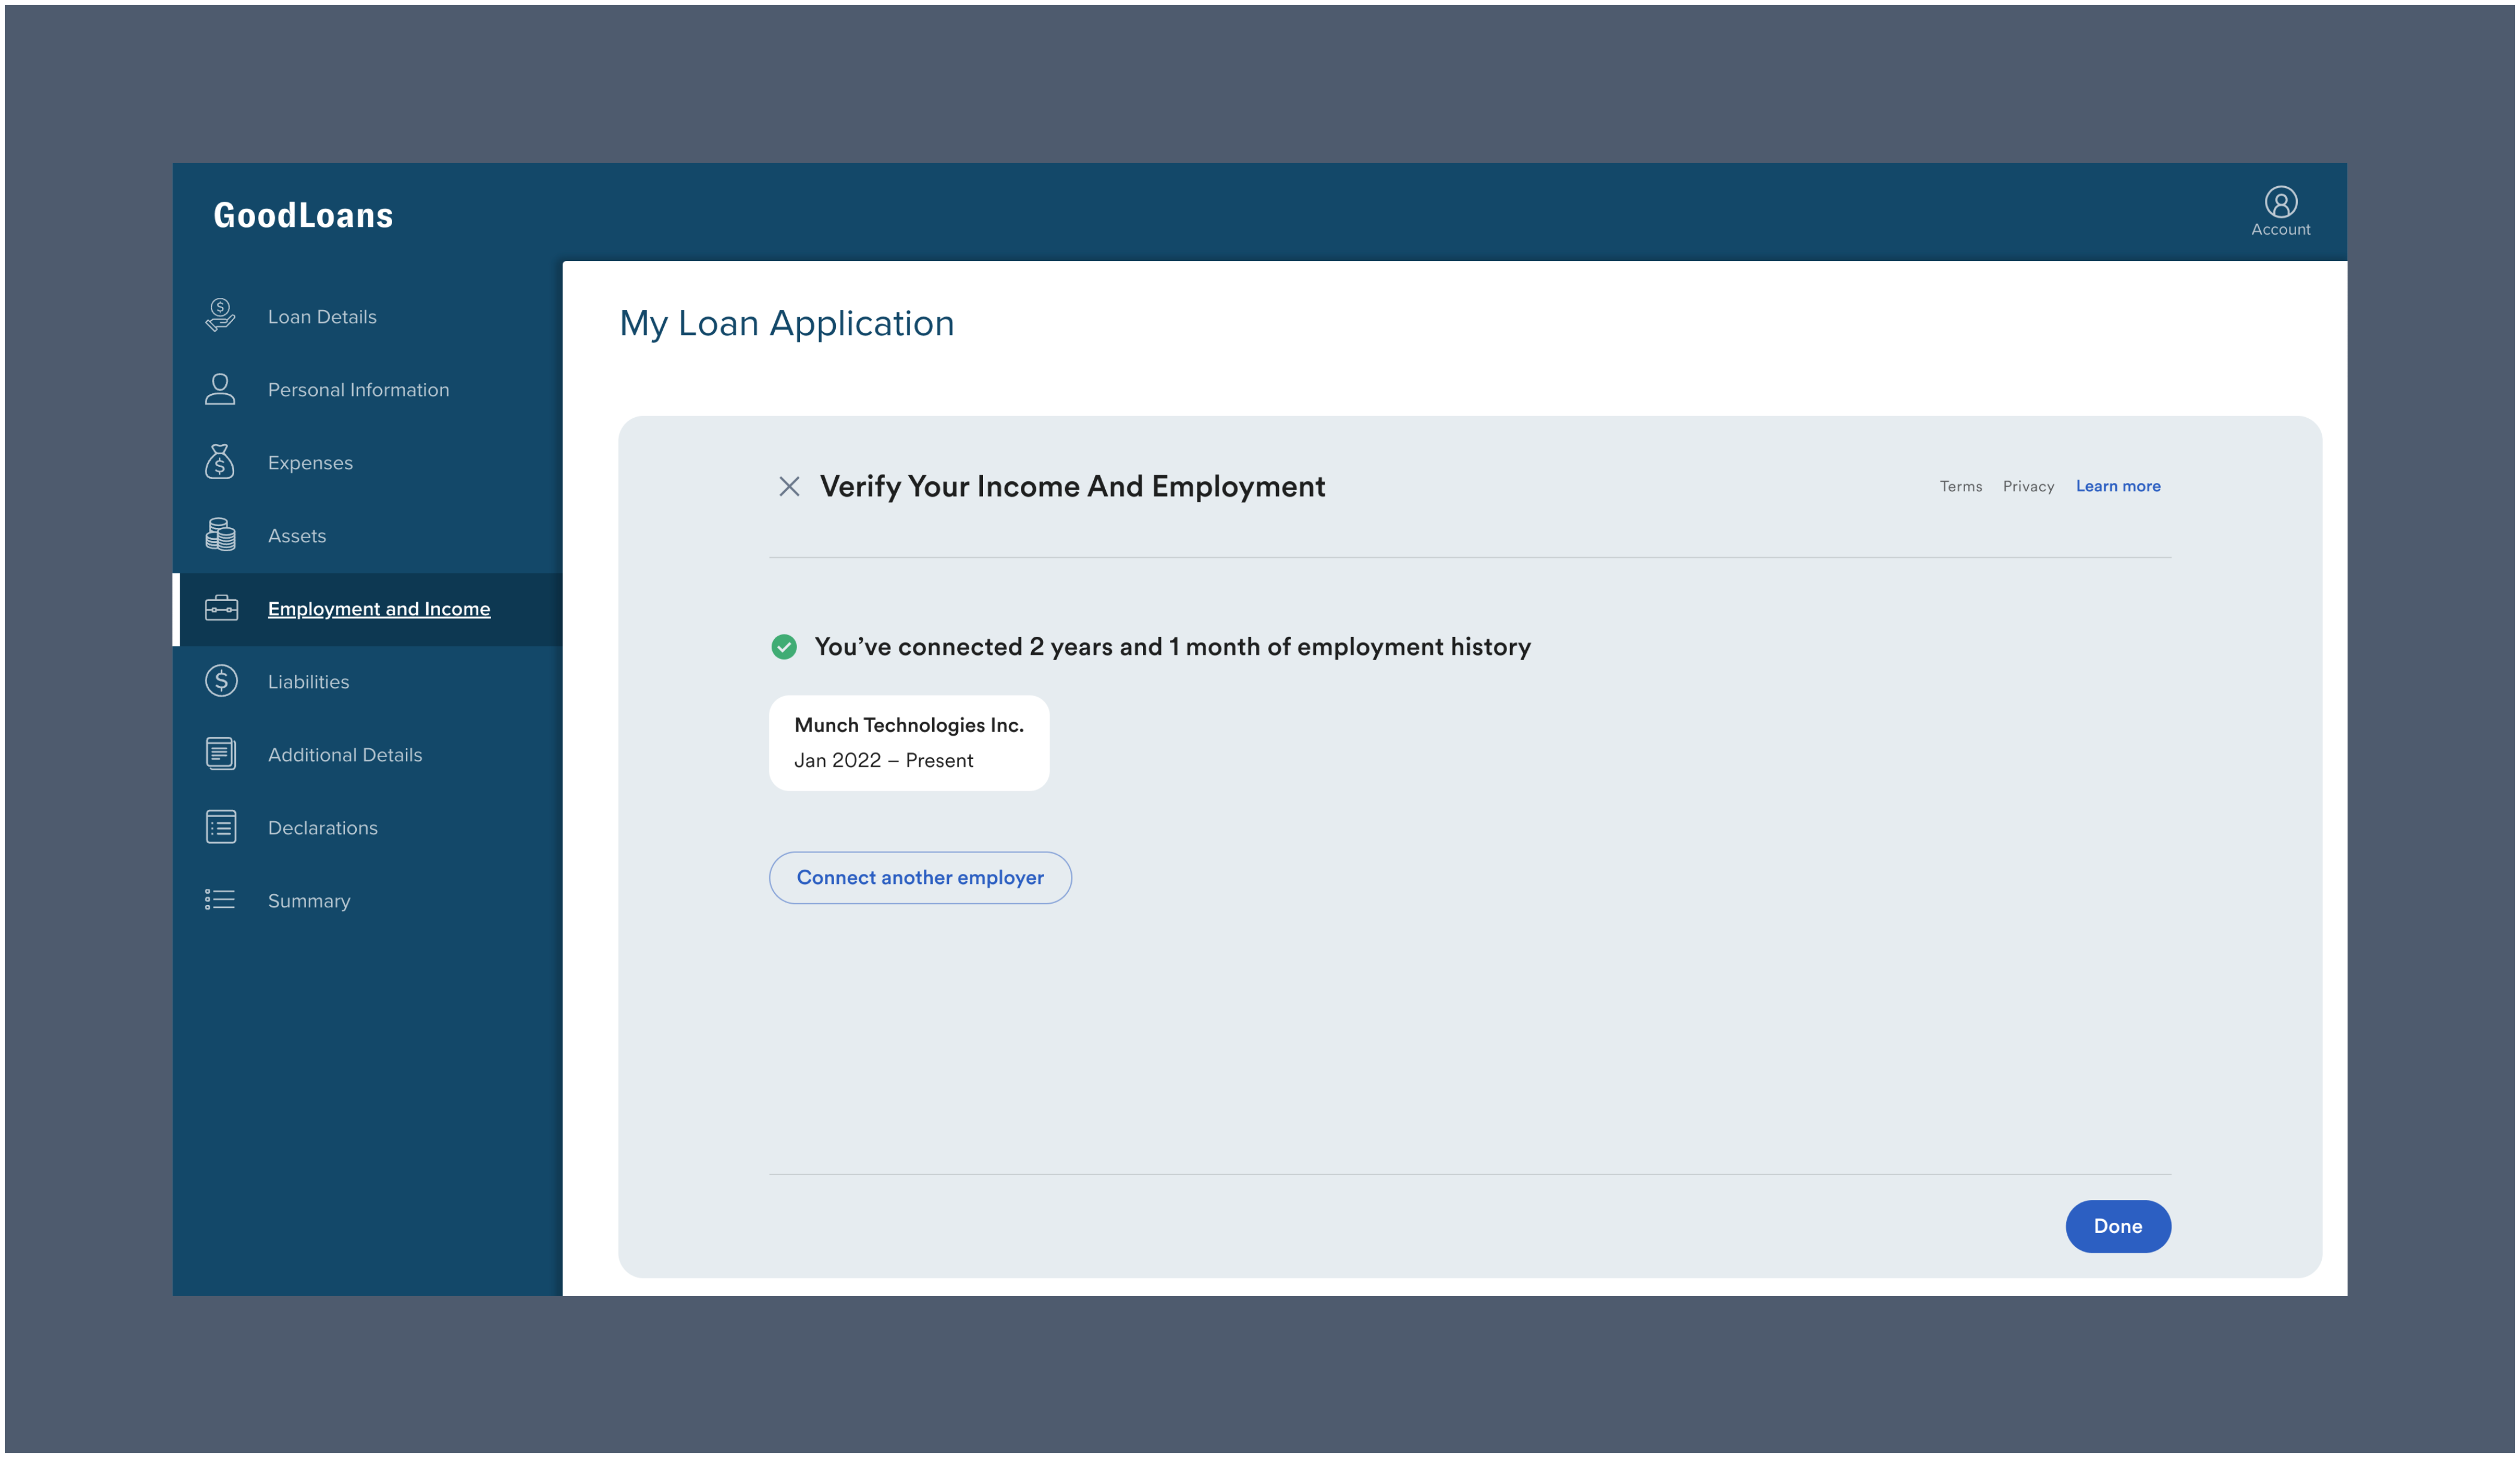
Payroll data populates the application
After the borrower completes the connection process, supported employment and income data populates the application and maps to the loan file, including:- Borrower Employer Information (including start date and length of employment)
- Borrower Gross Monthly Income
Payroll documents and verification reports available in Encompass
Imported payroll documents and verification reports are made available within the Encompass® integration for the borrower’s loan file.Admin setup
- Log in to the Consumer Connect Admin portal via Encompass®.
-
Go to Services Management and select
Argyleas the Provider next to Employment and Income Verification Settings.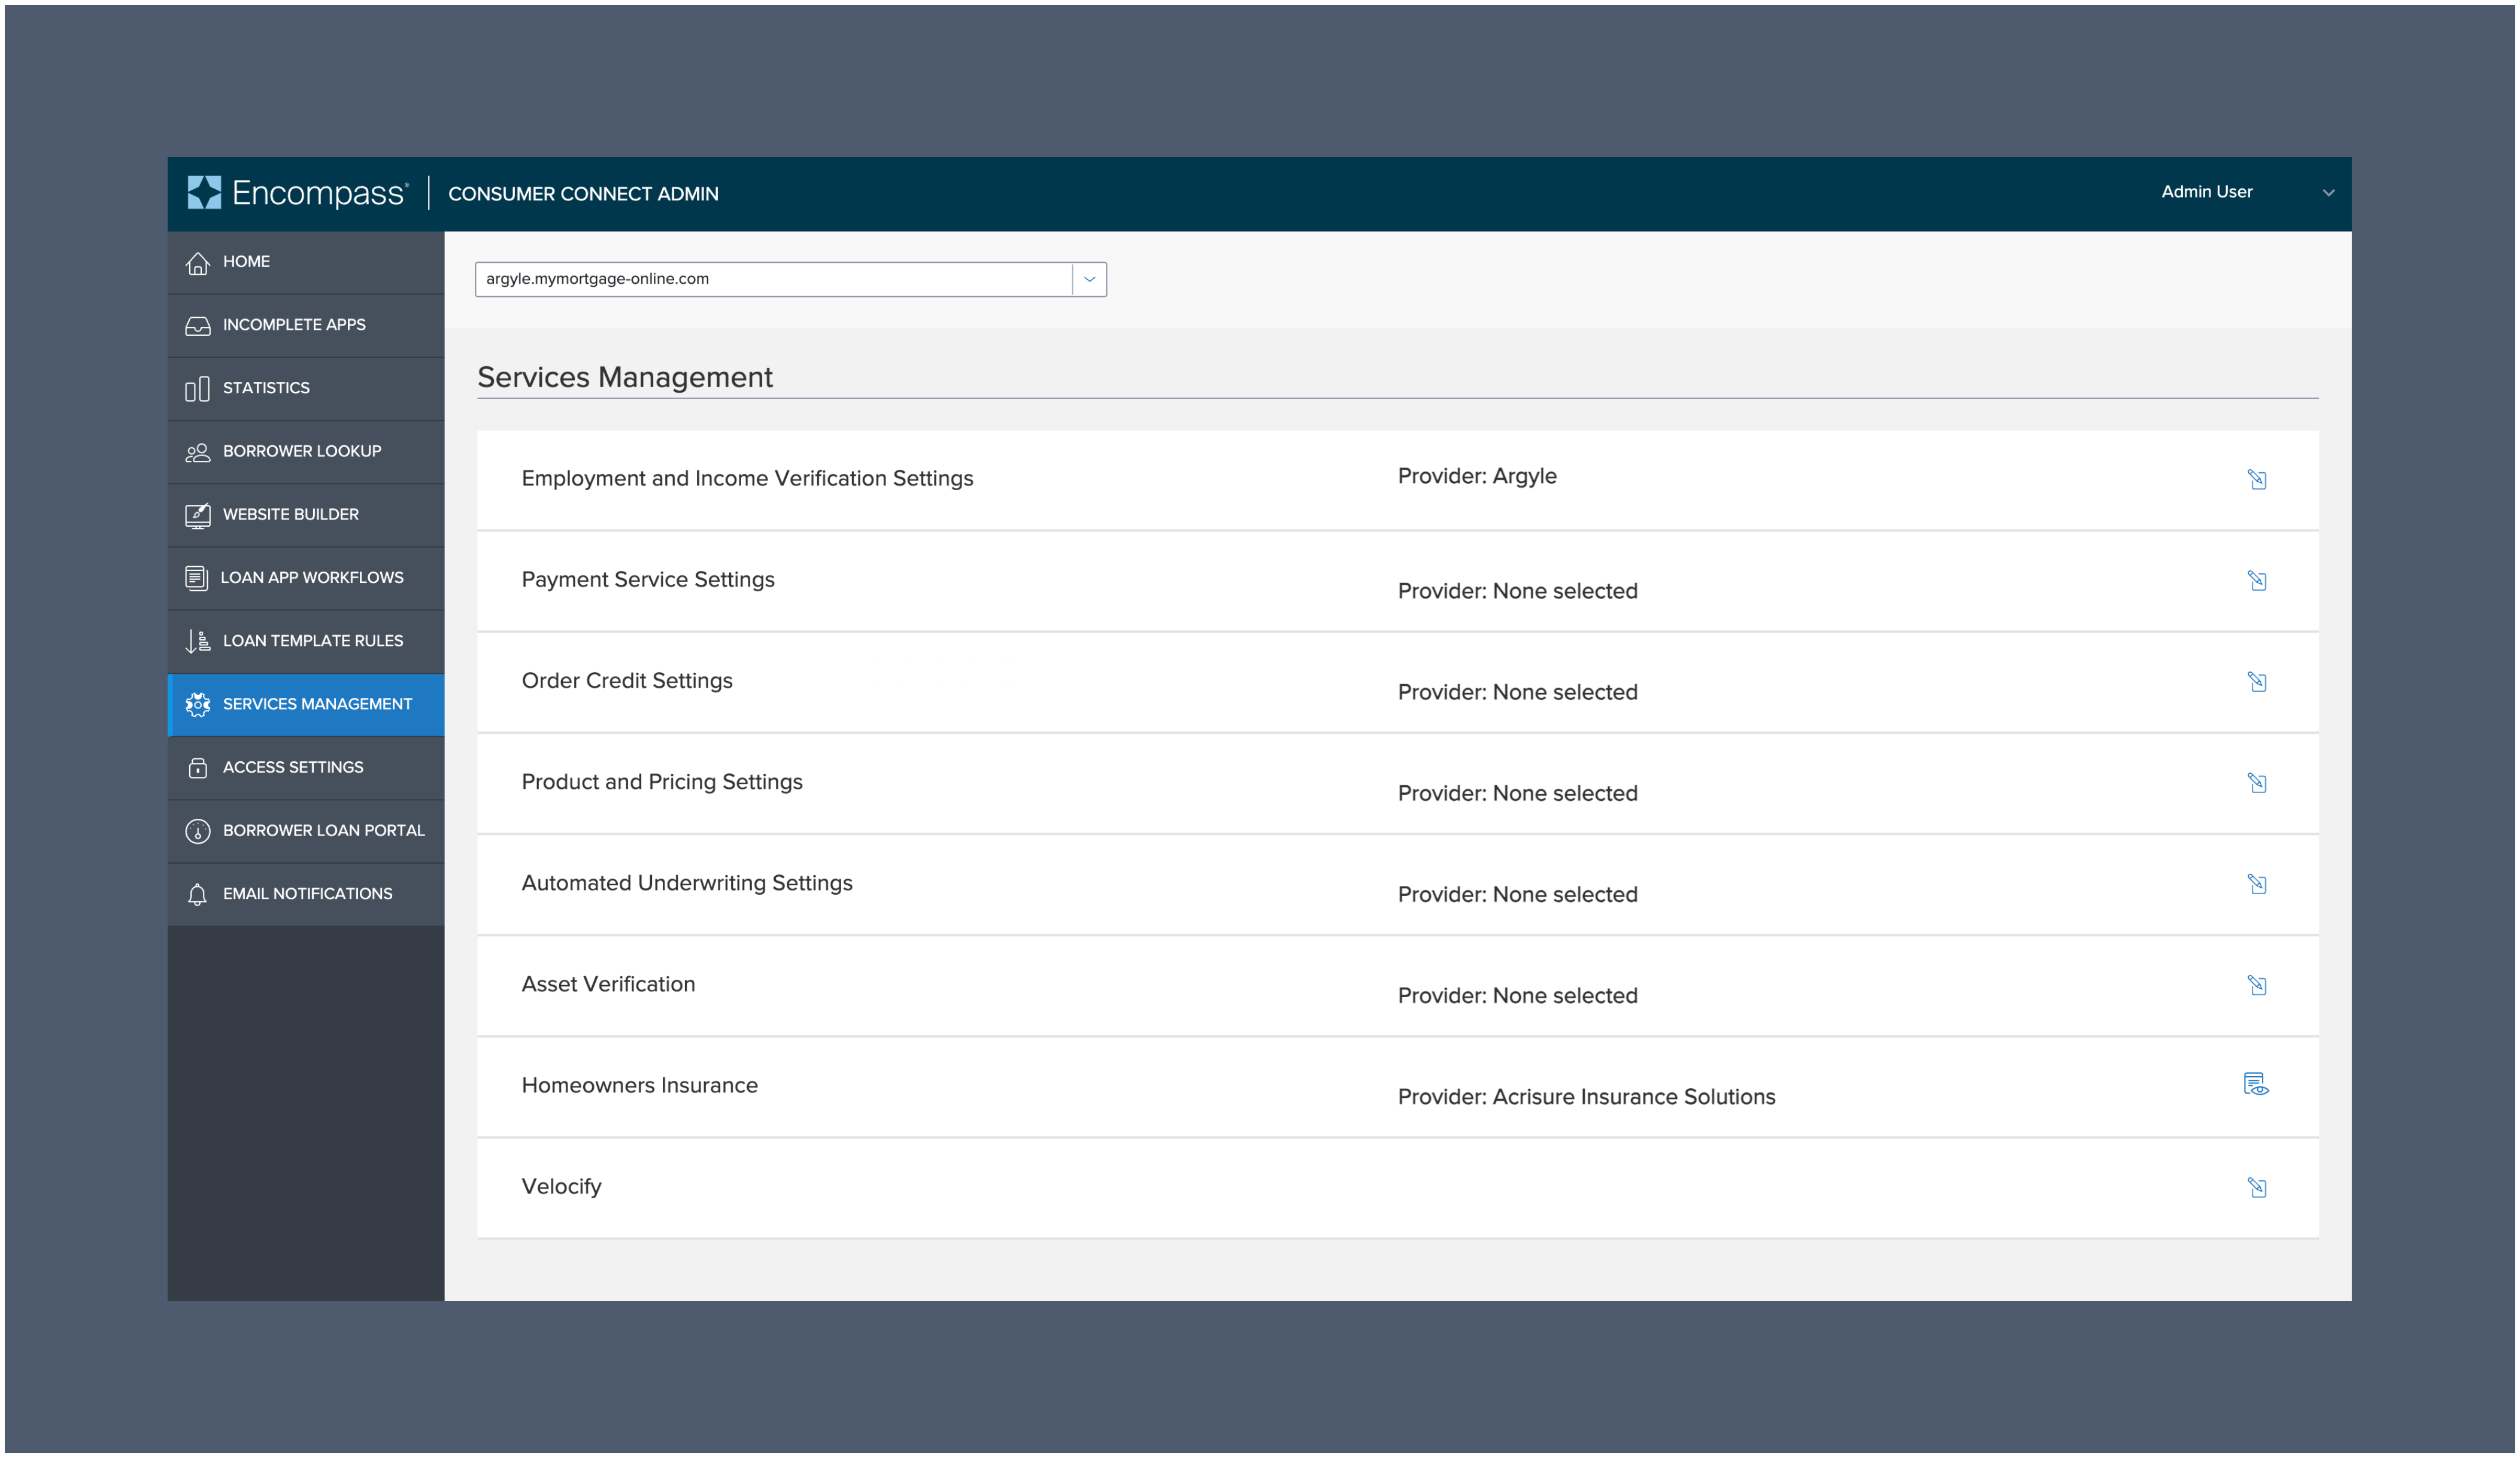
-
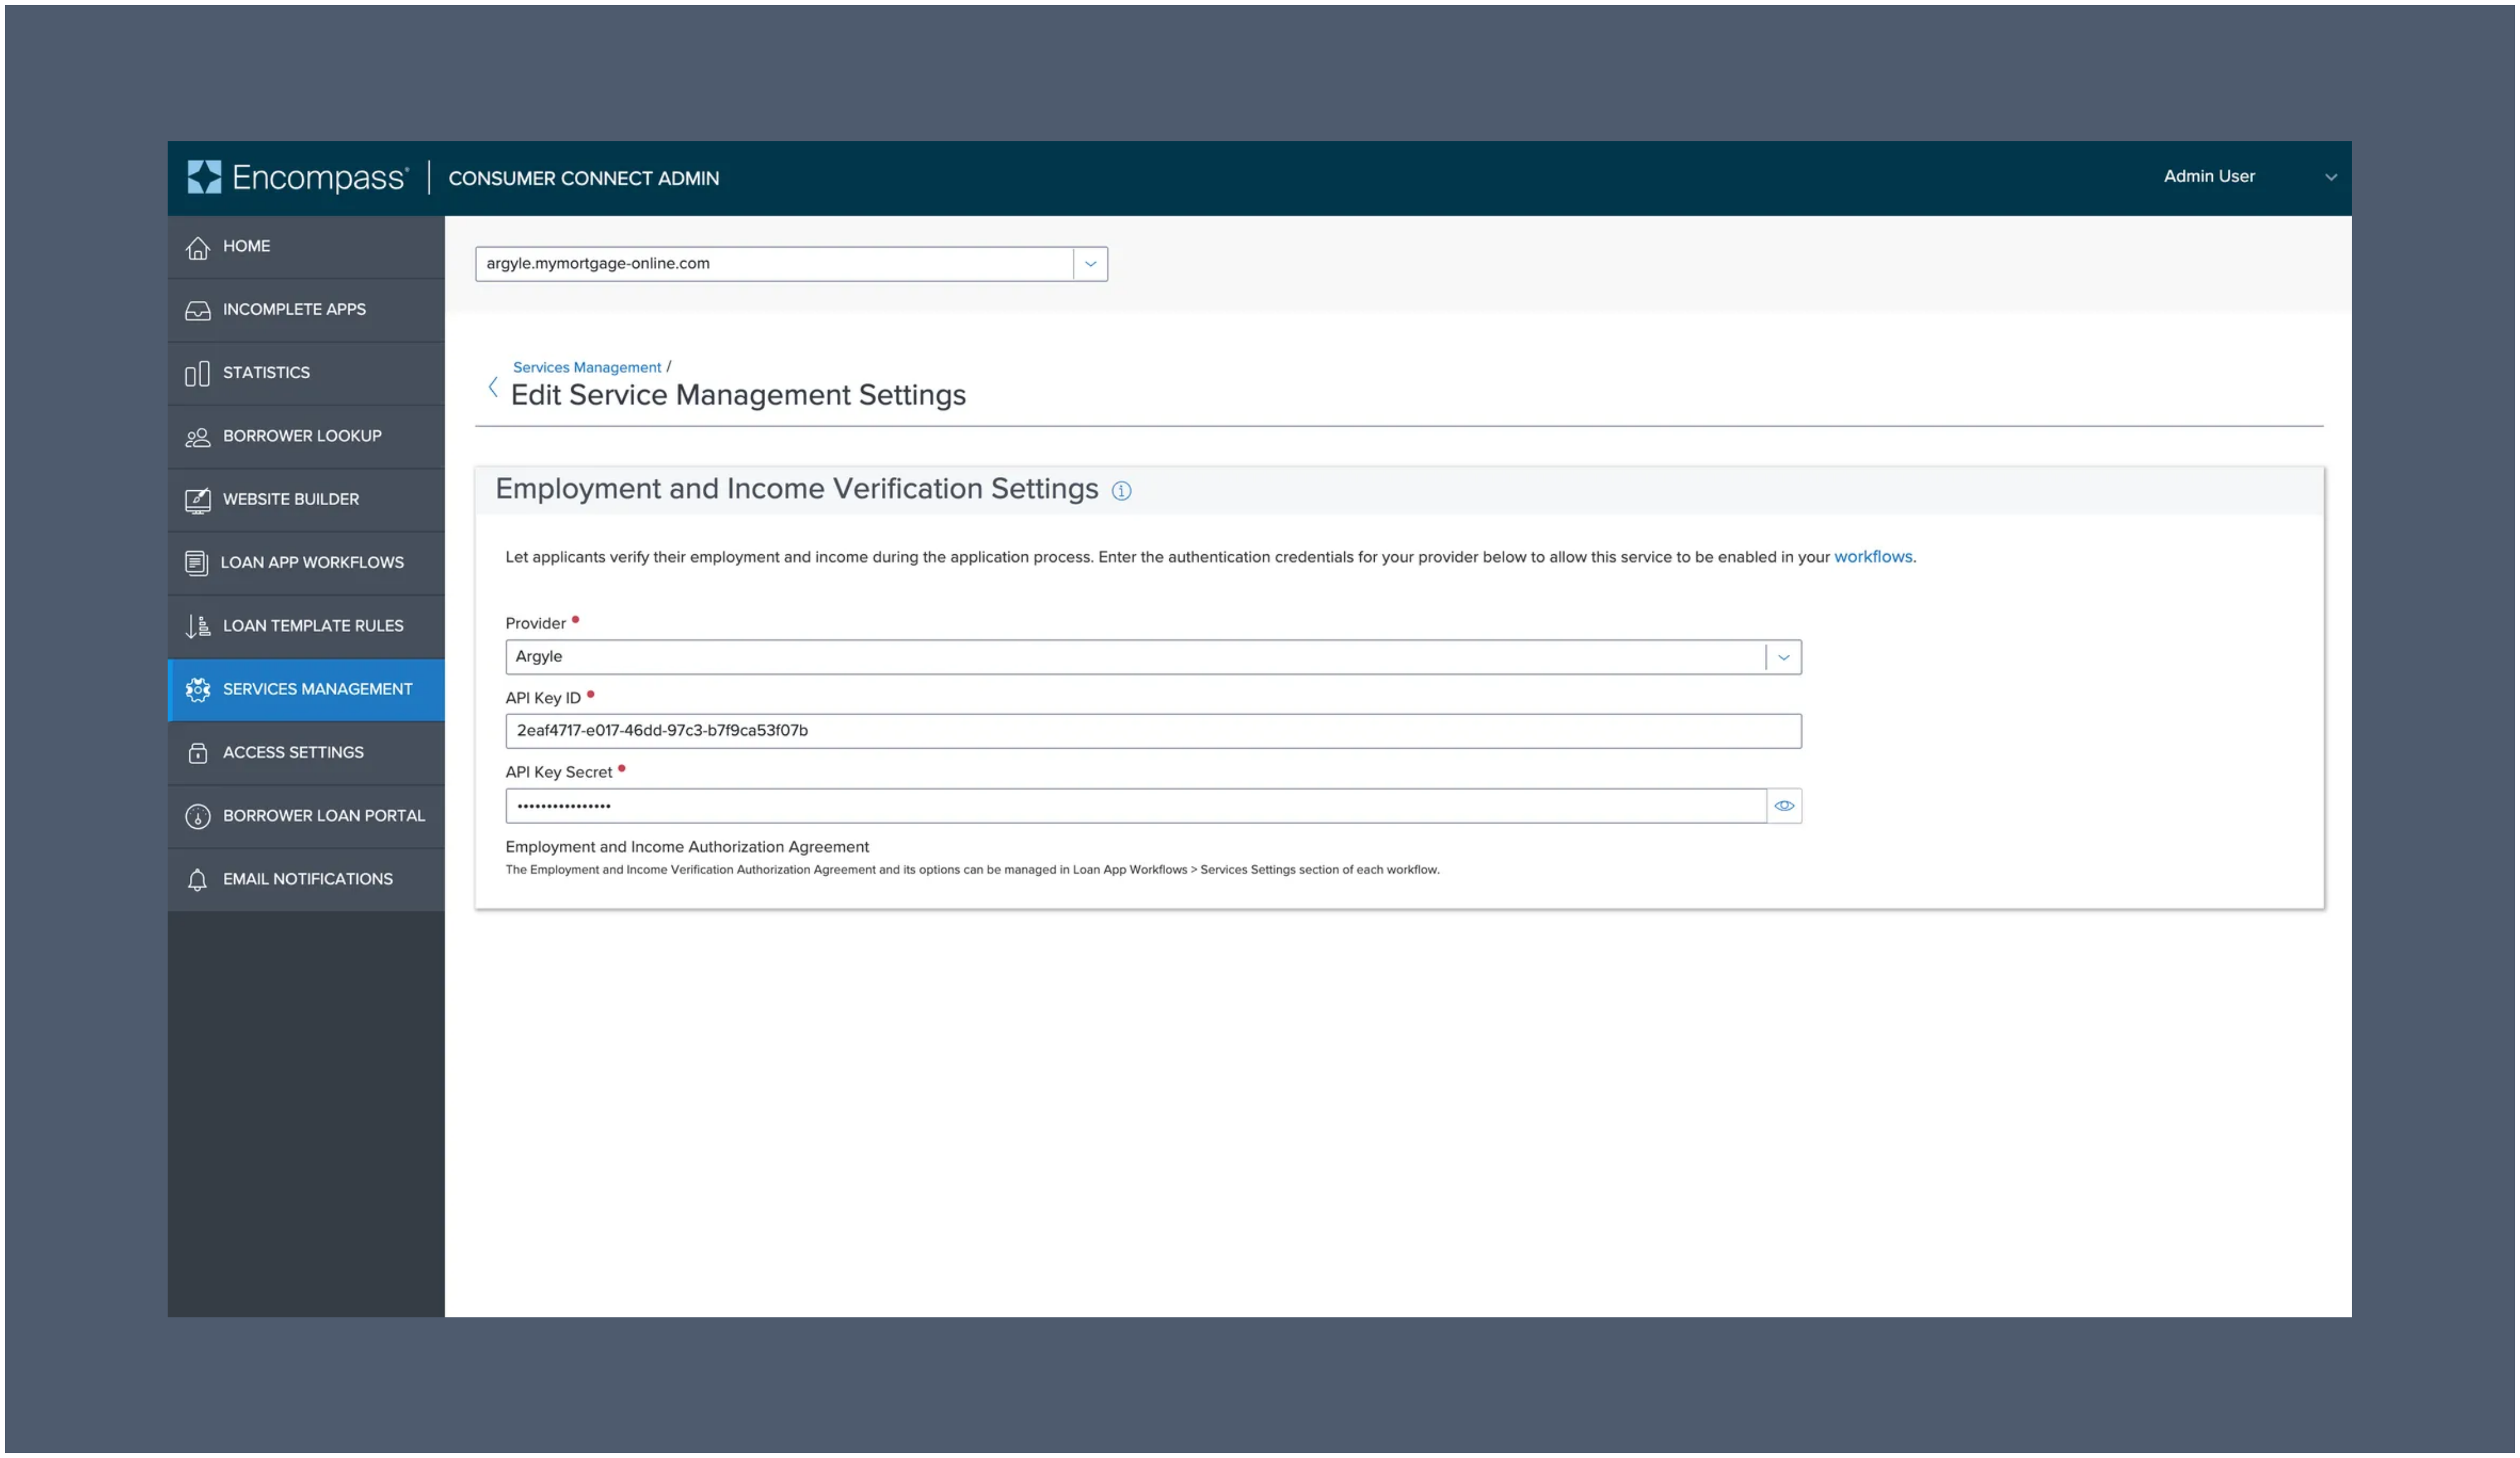
When prompted, enter your Argyle API key and secret, which can be found in the Developers section of Argyle Console.
-
Navigate to the LOAN APP WORKFLOWS section of the navigation menu, then select
Create Workflow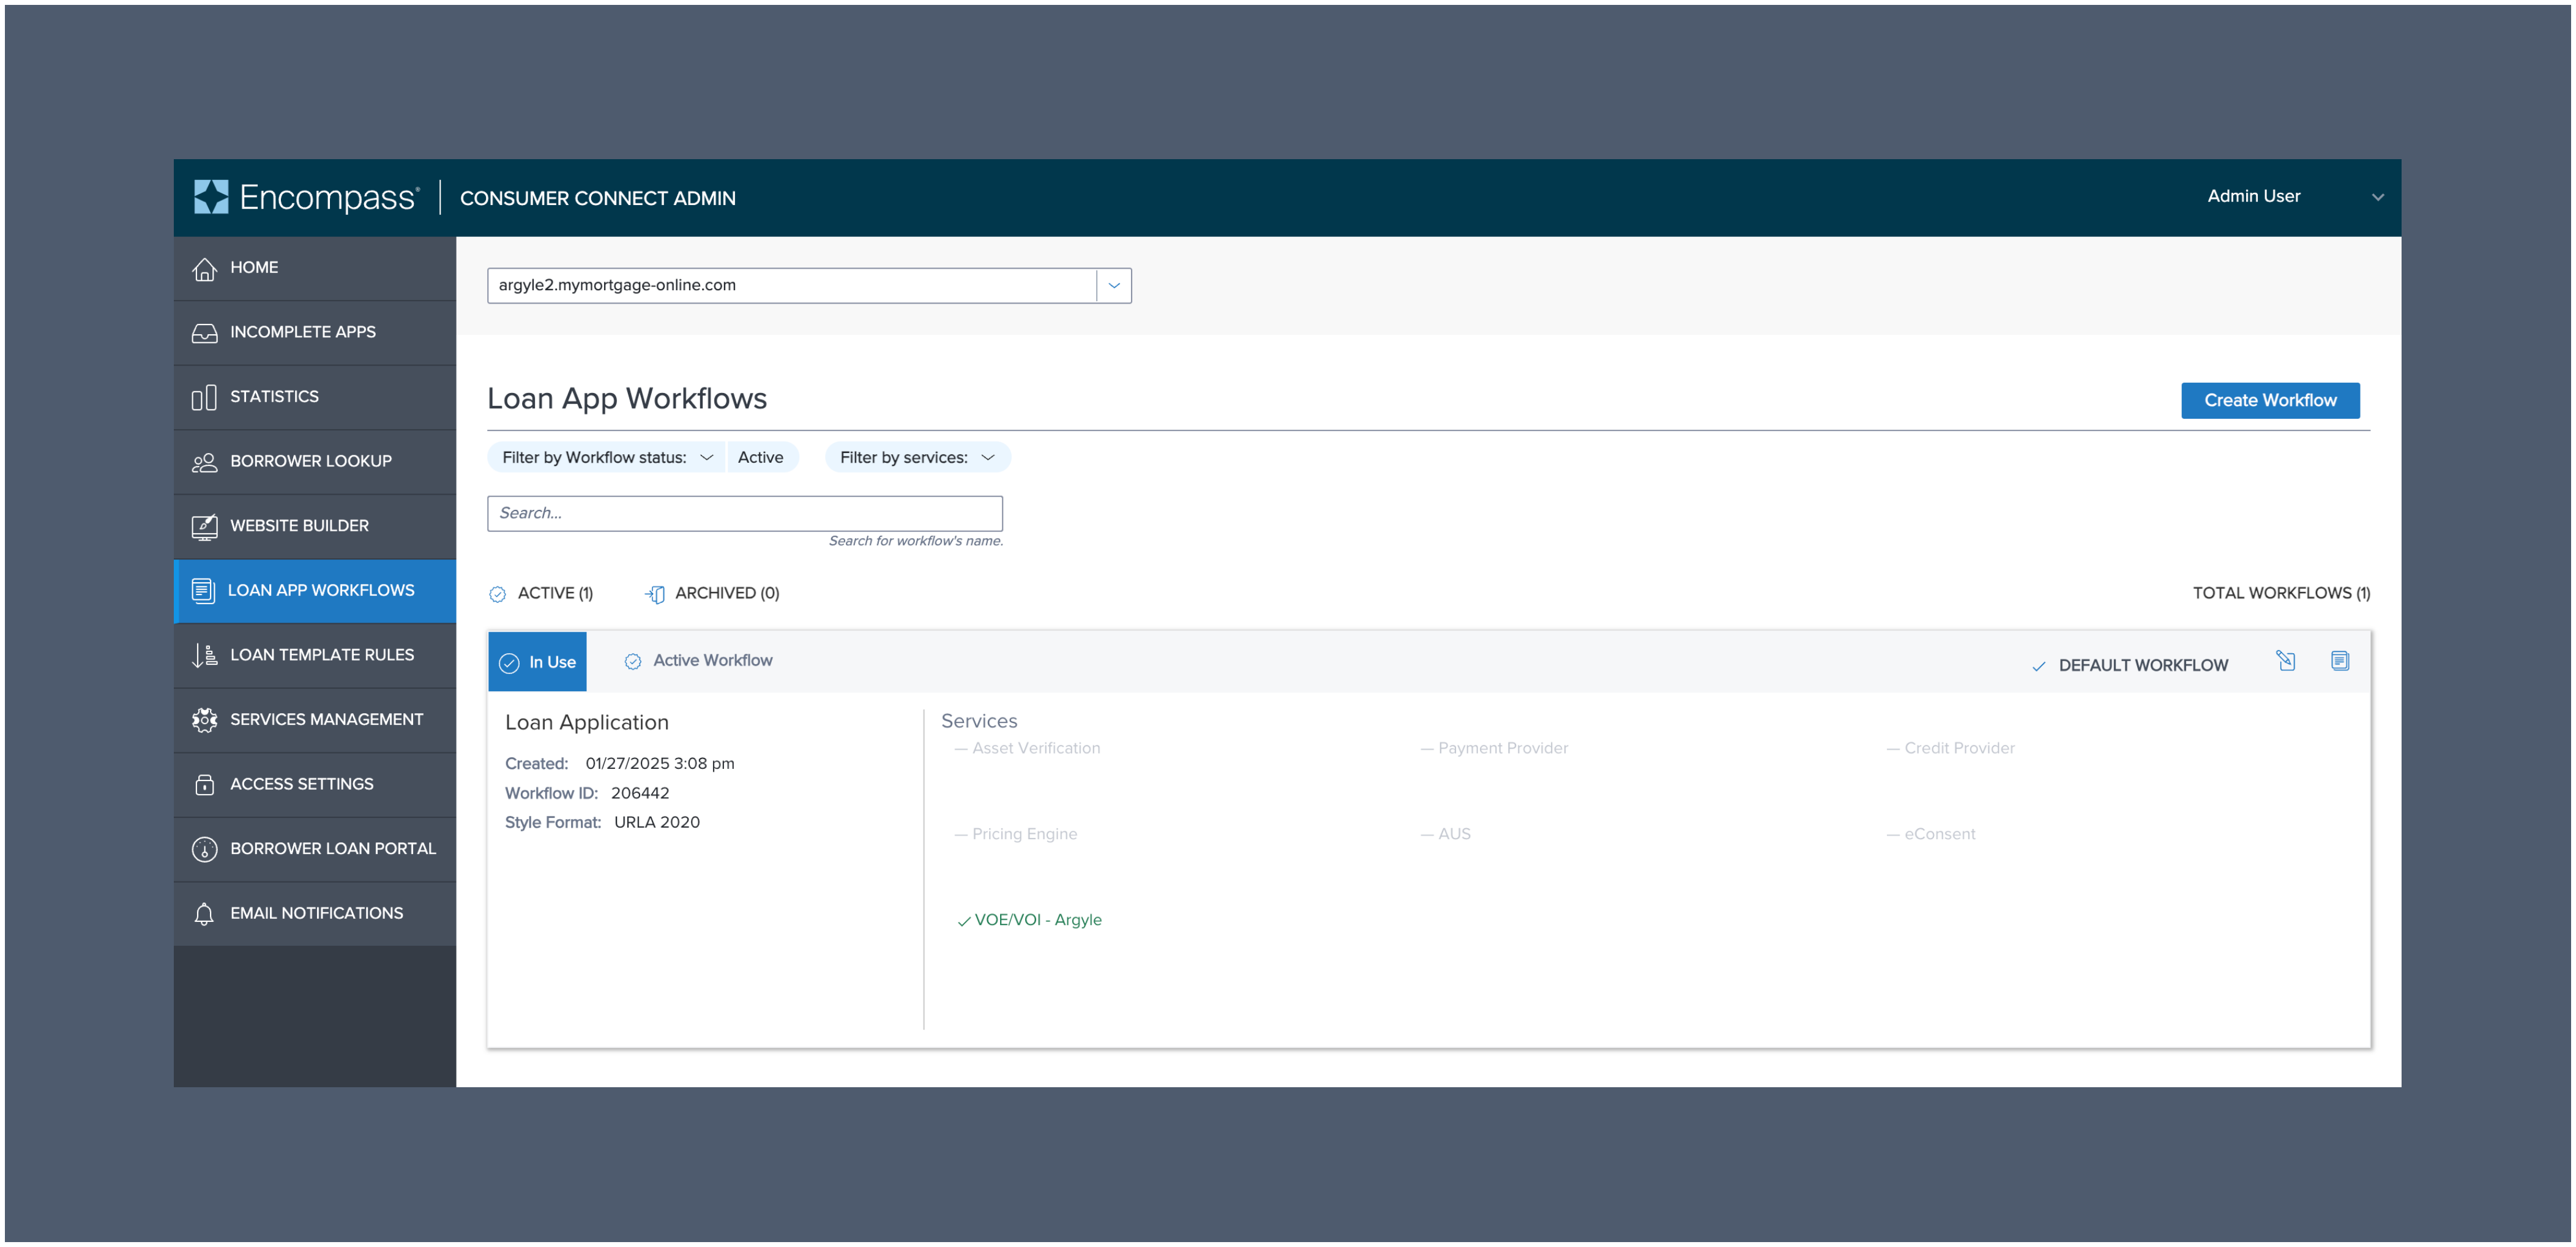
- Within Admin Configurations, open the Service Settings toggle.
-
Scroll down to VOE/VOI and
enable the togglethen clickSave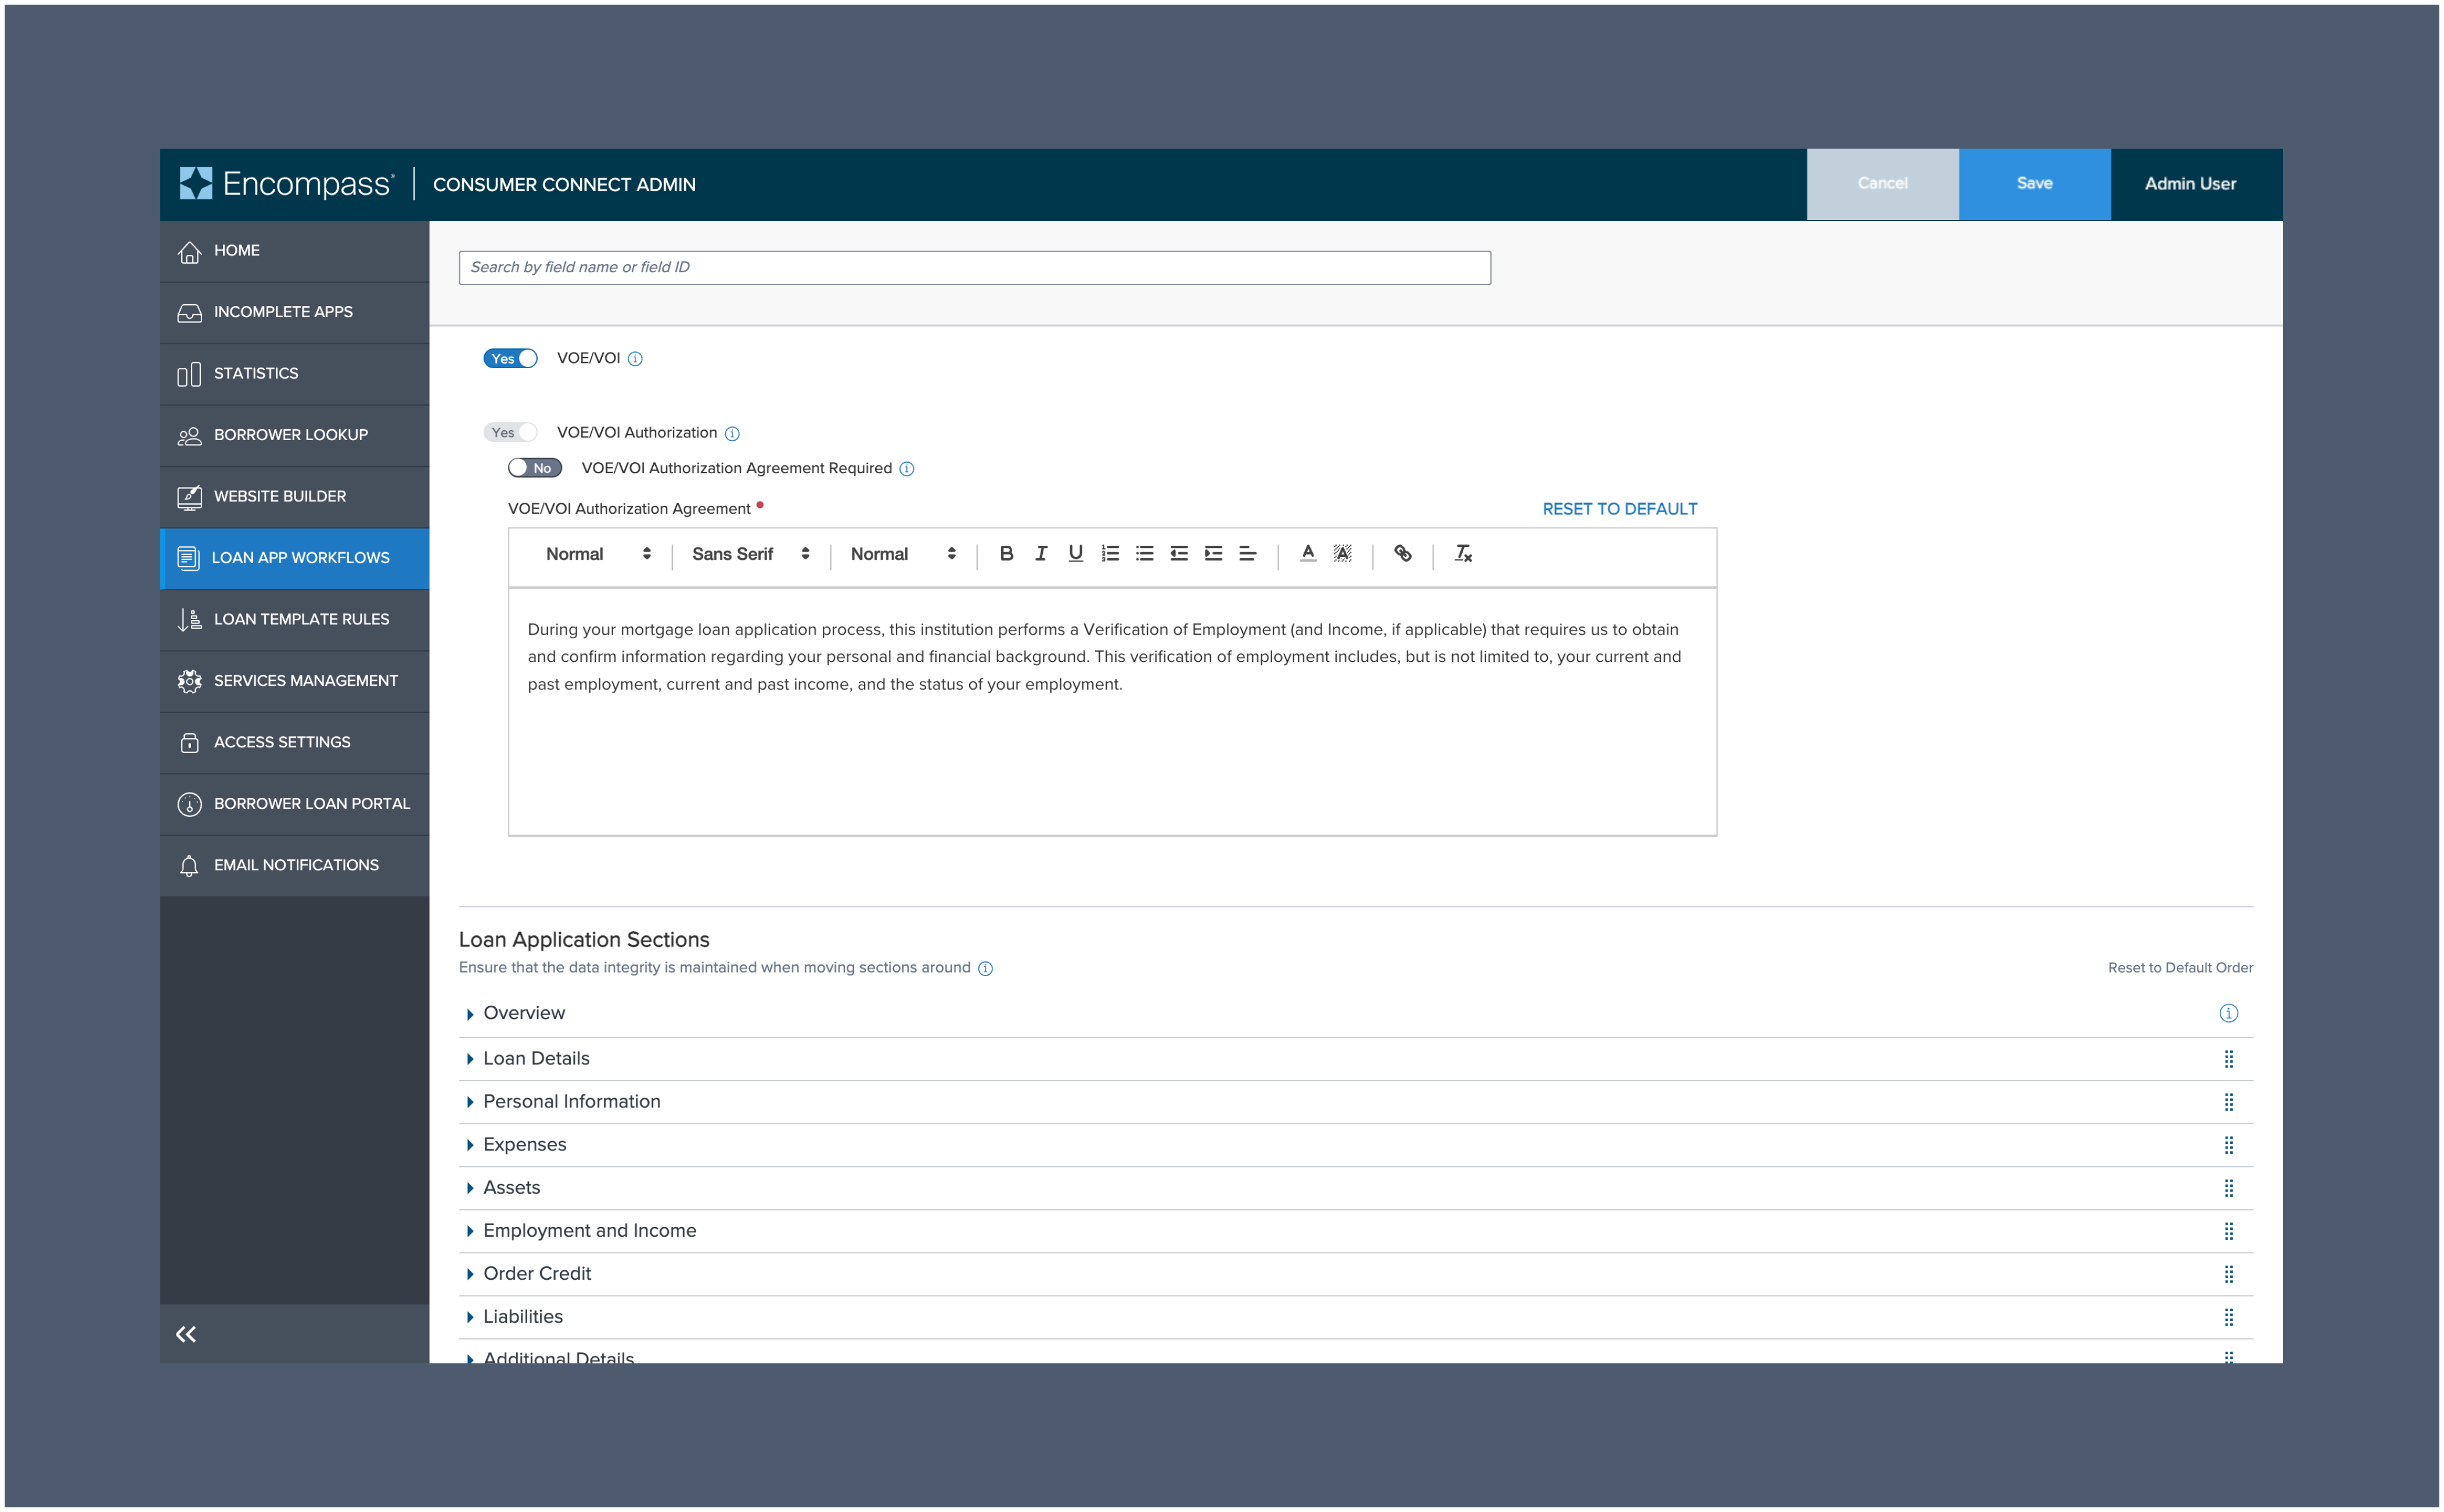
Testing profiles
-
Choose
Argyle Sandboxwhen selecting a Provider during step 2 of Admin setup.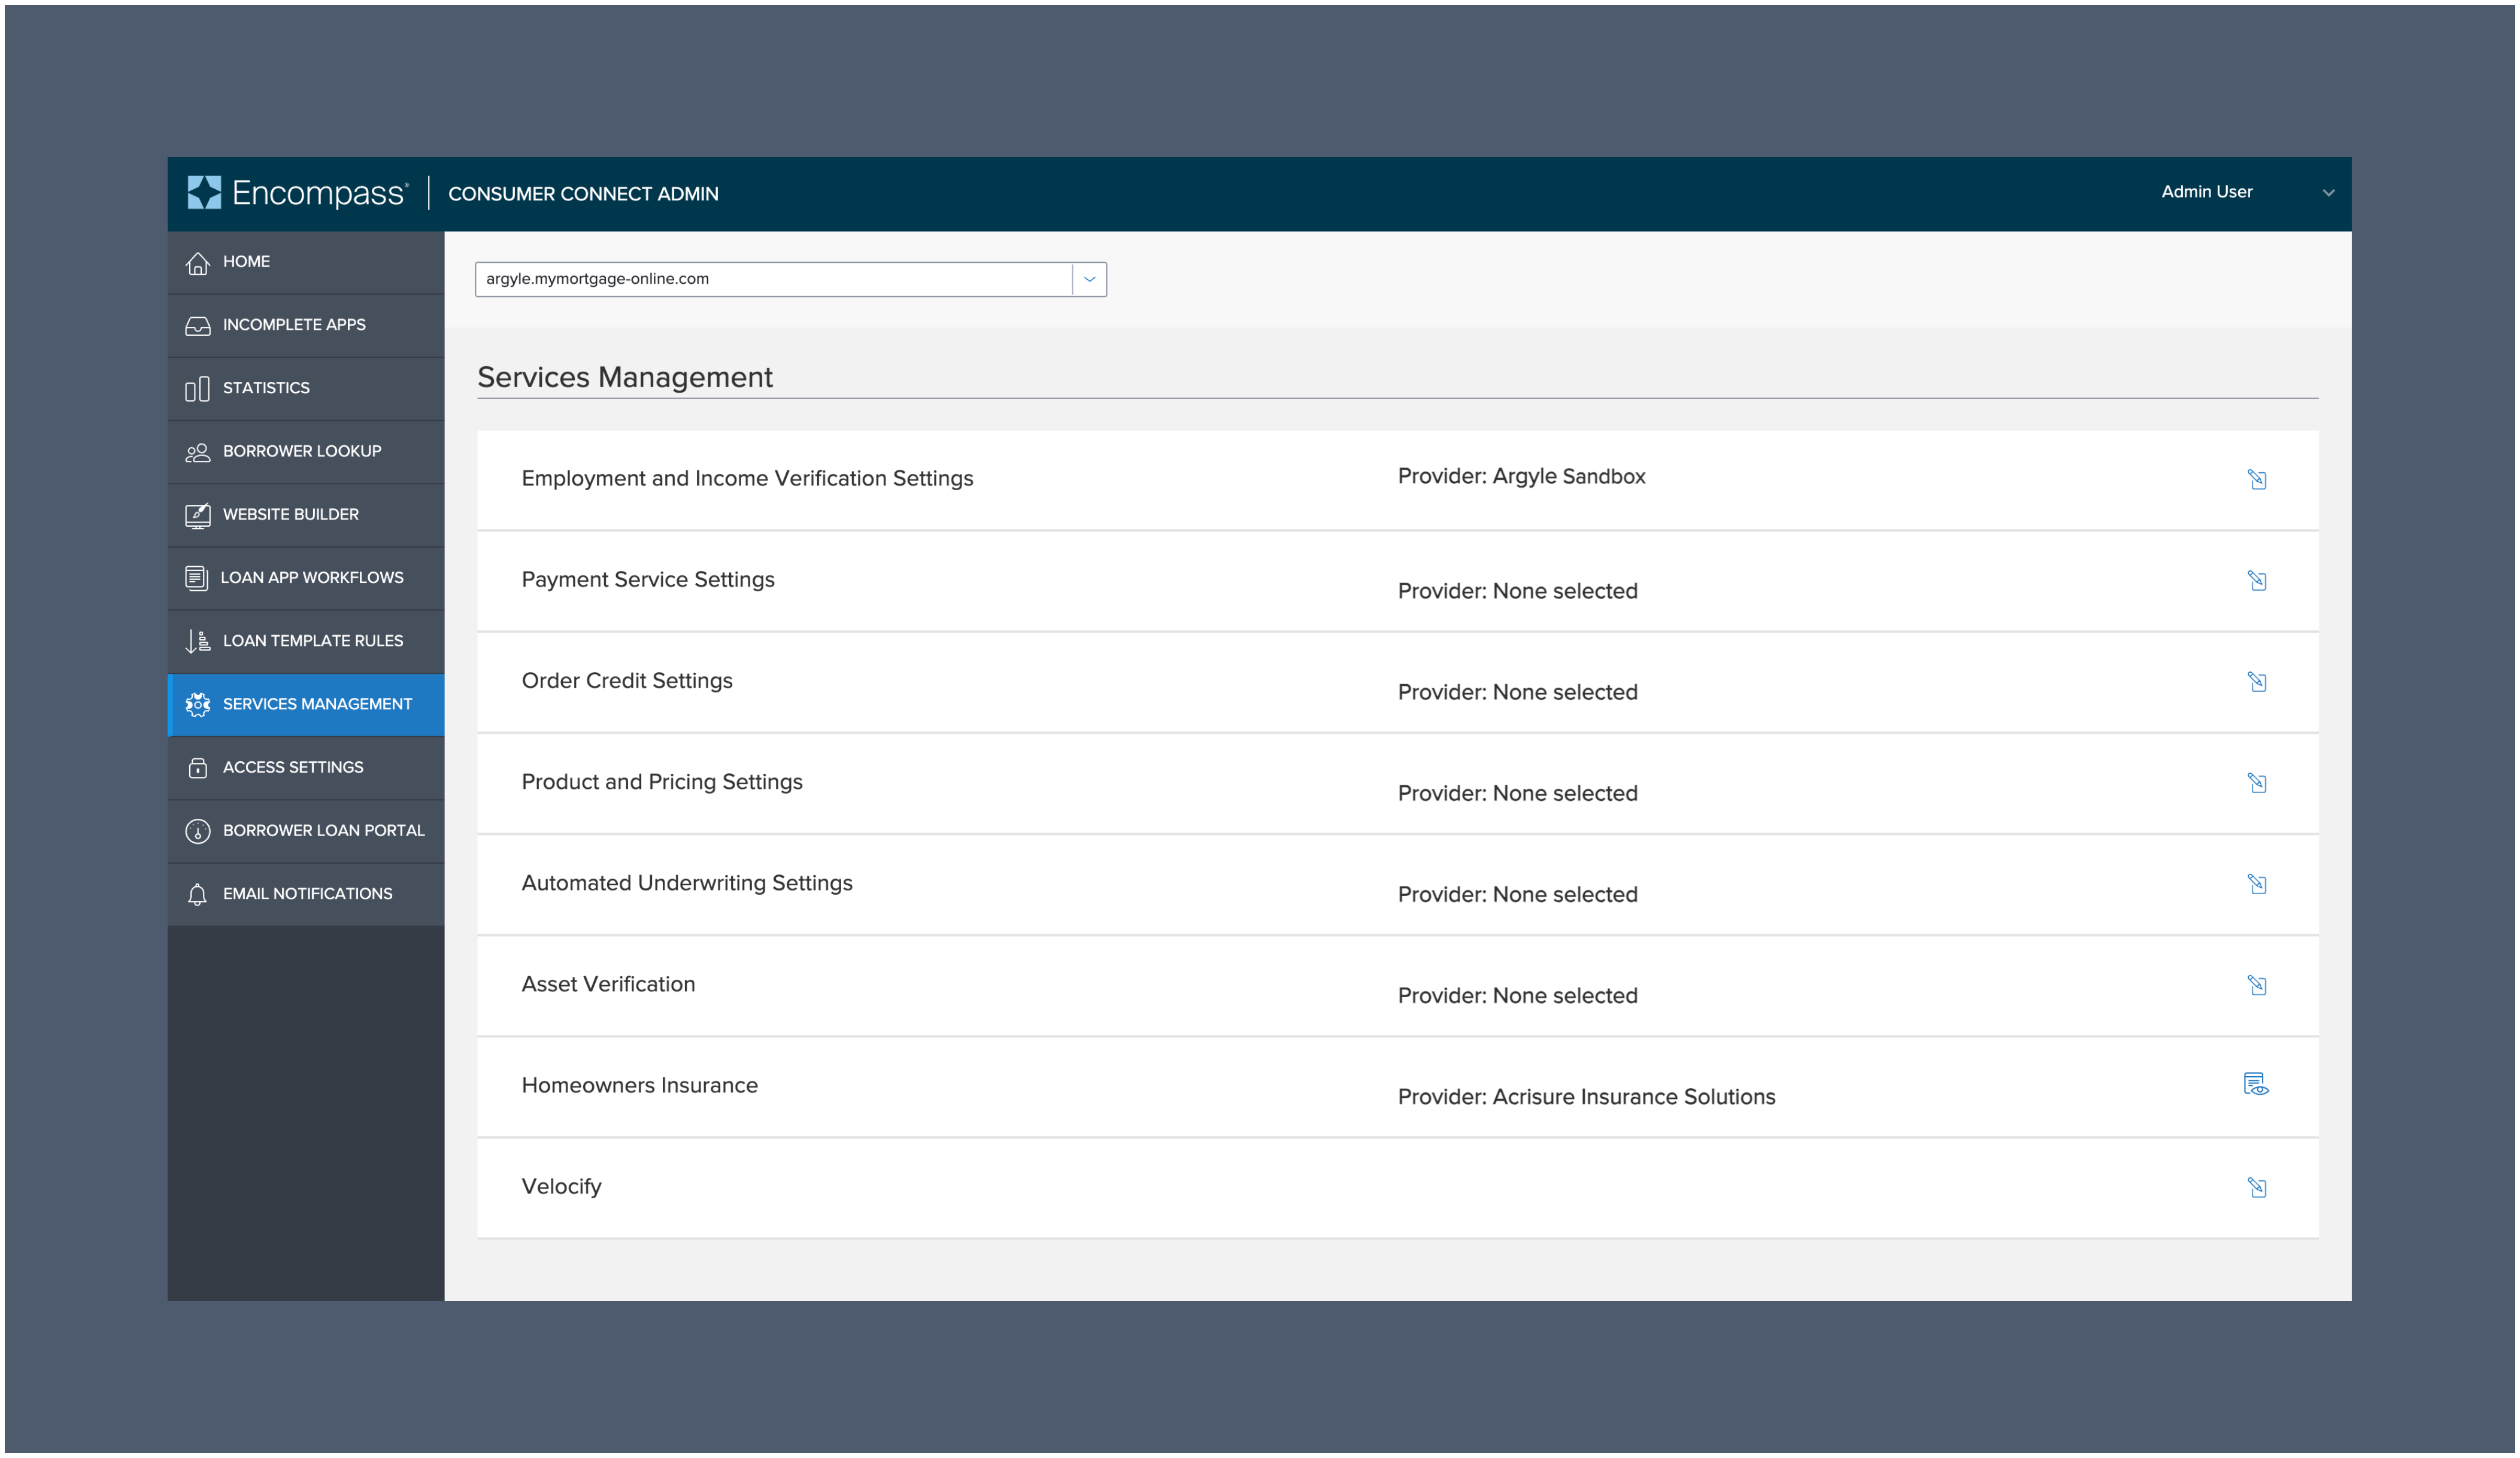
-
When testing connecting payroll via Argyle, use the following test credentials of Argyle’s sample users:
-
For specific scenario testing, the following sample users are also available:
Financial accounts
Overview
Argyle also provides a native bank connection experience within Consumer Connect:- Borrowers connect their financial accounts within the Argyle experience.
- Asset data will automatically populate the borrower’s Consumer Connect application.
- After importing to Encompass®:
- Argyle will automatically generate a verification of assets (VOA) or verification of assets and income (VOAI) report.
- Asset data will automatically be added to the 1003 URLA and report identifiers required by GSEs will be added to the Encompass® loan file.
- Closing verification of employment (VOE) reports can be ordered as needed within Encompass®.
Borrower experience
-
Borrower selects
Import Assetswithin the Assets section of their application.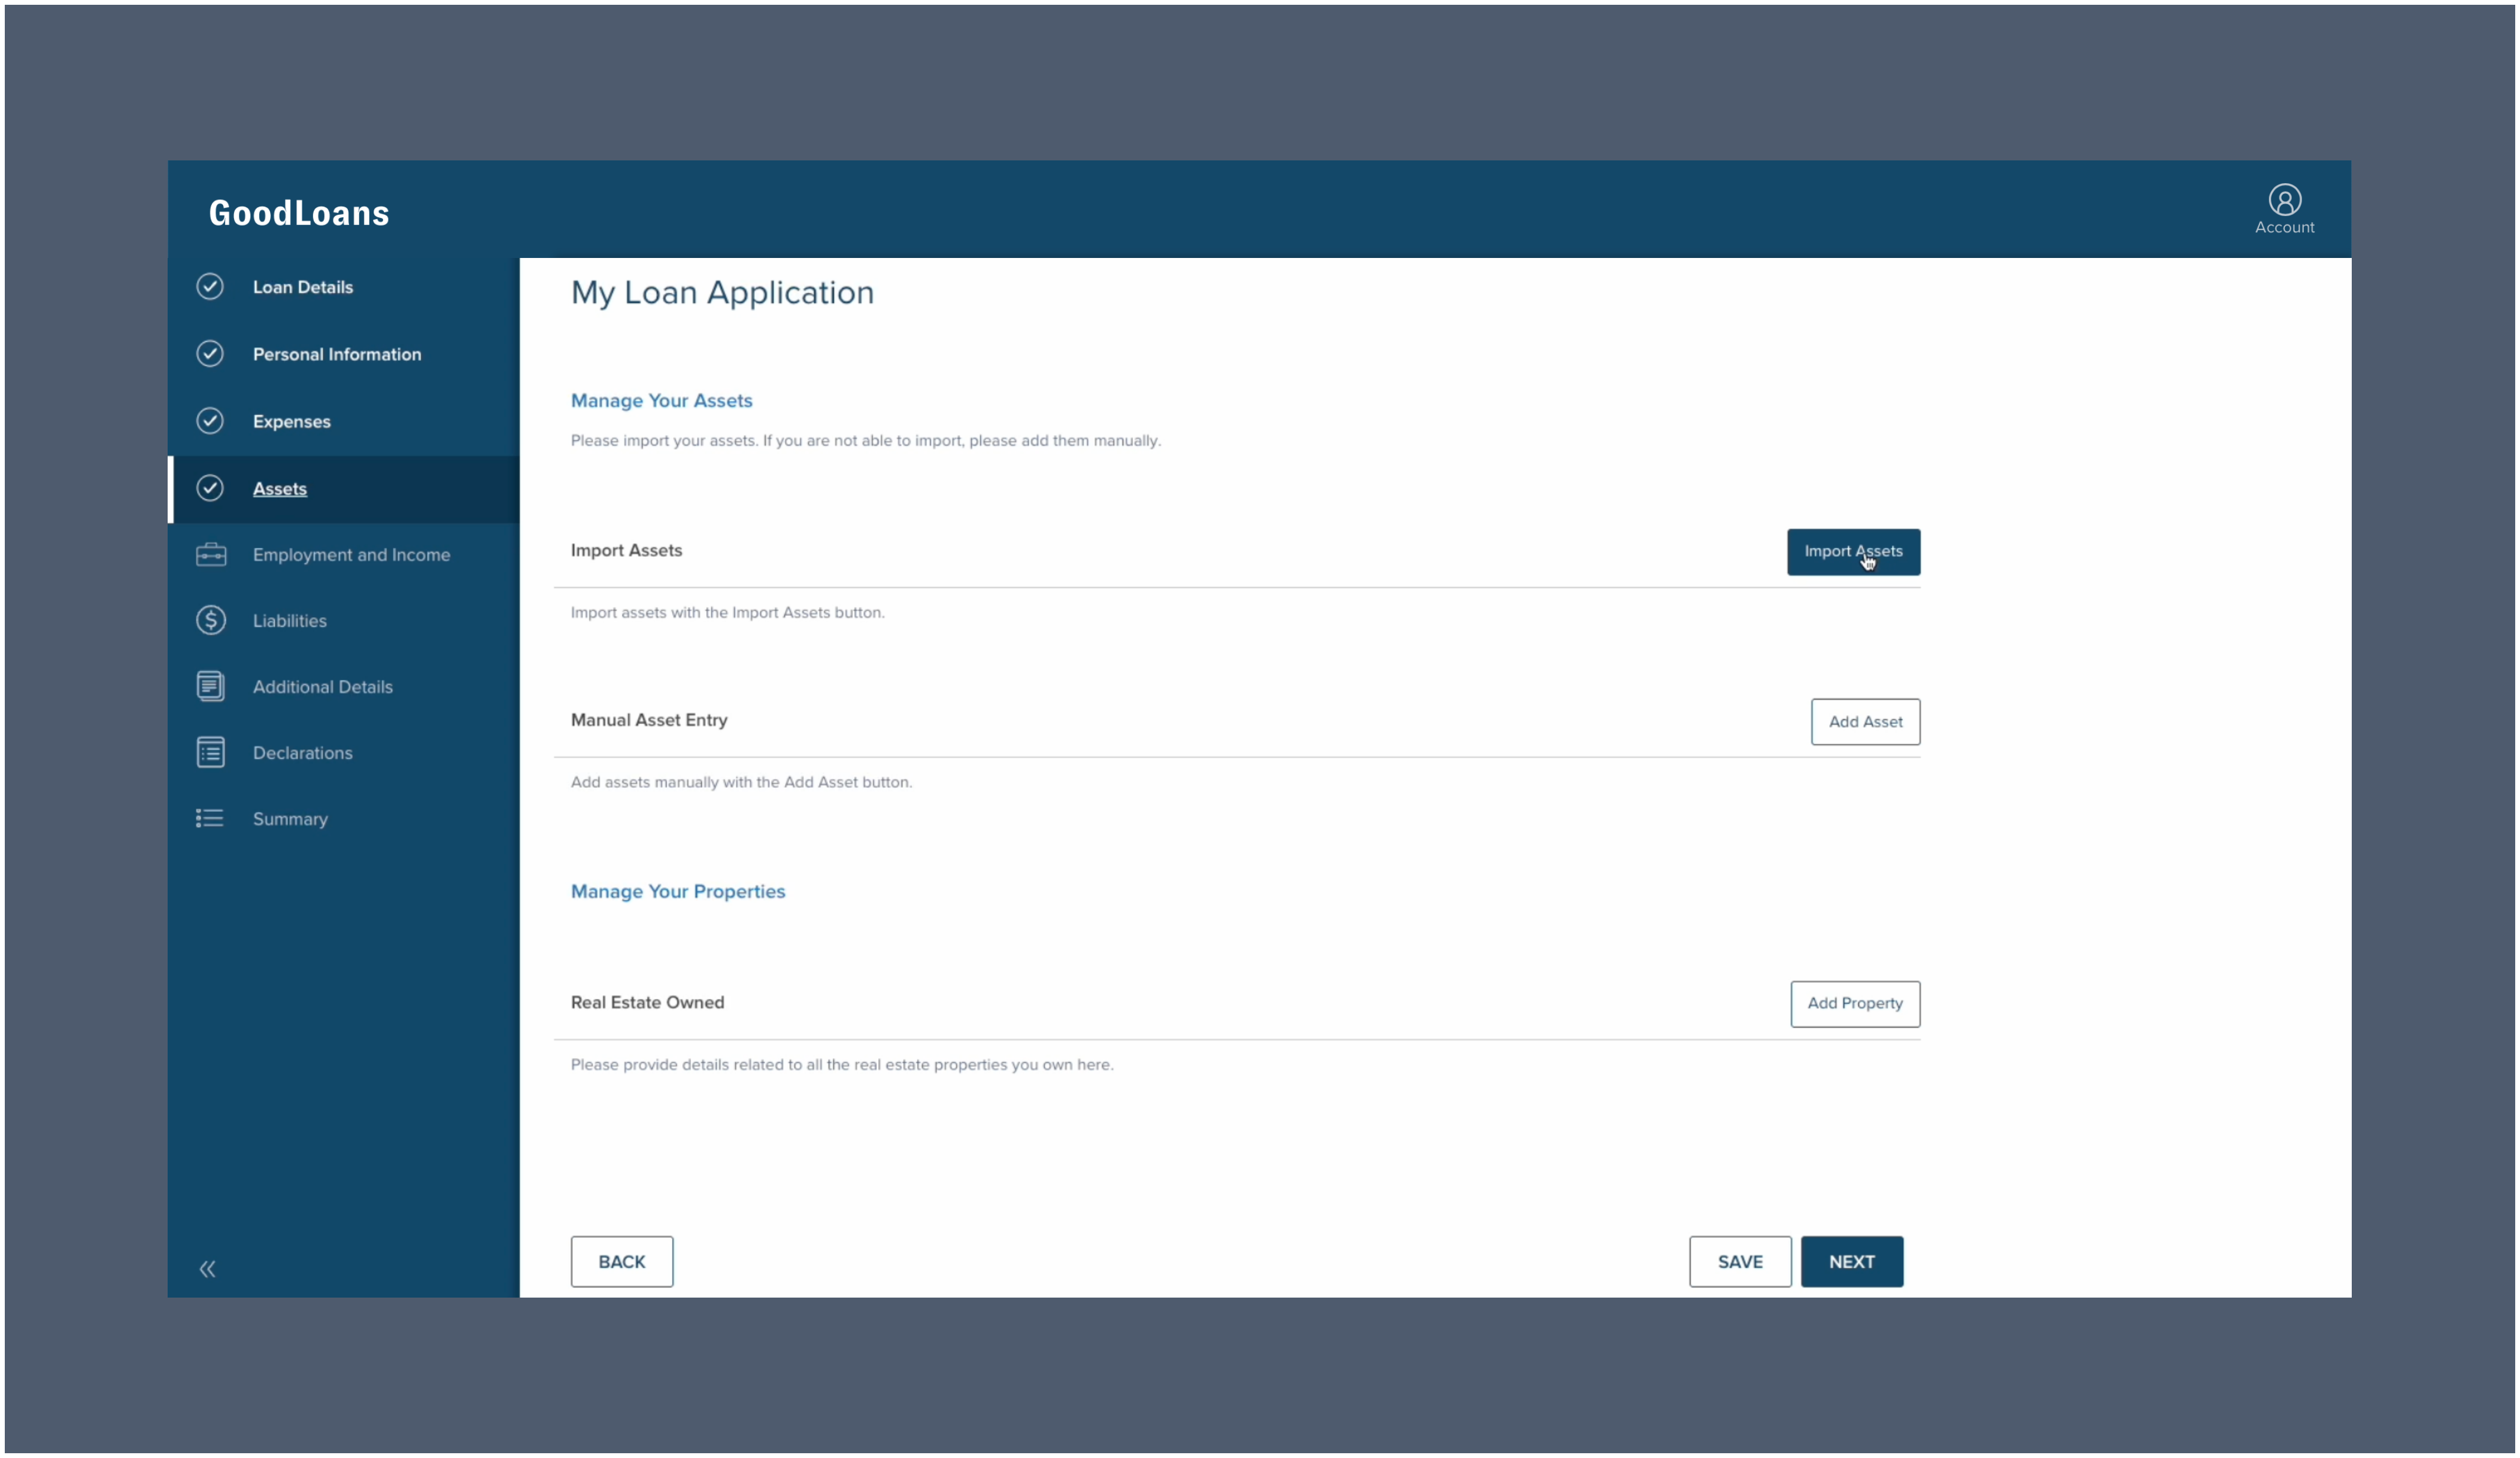
-
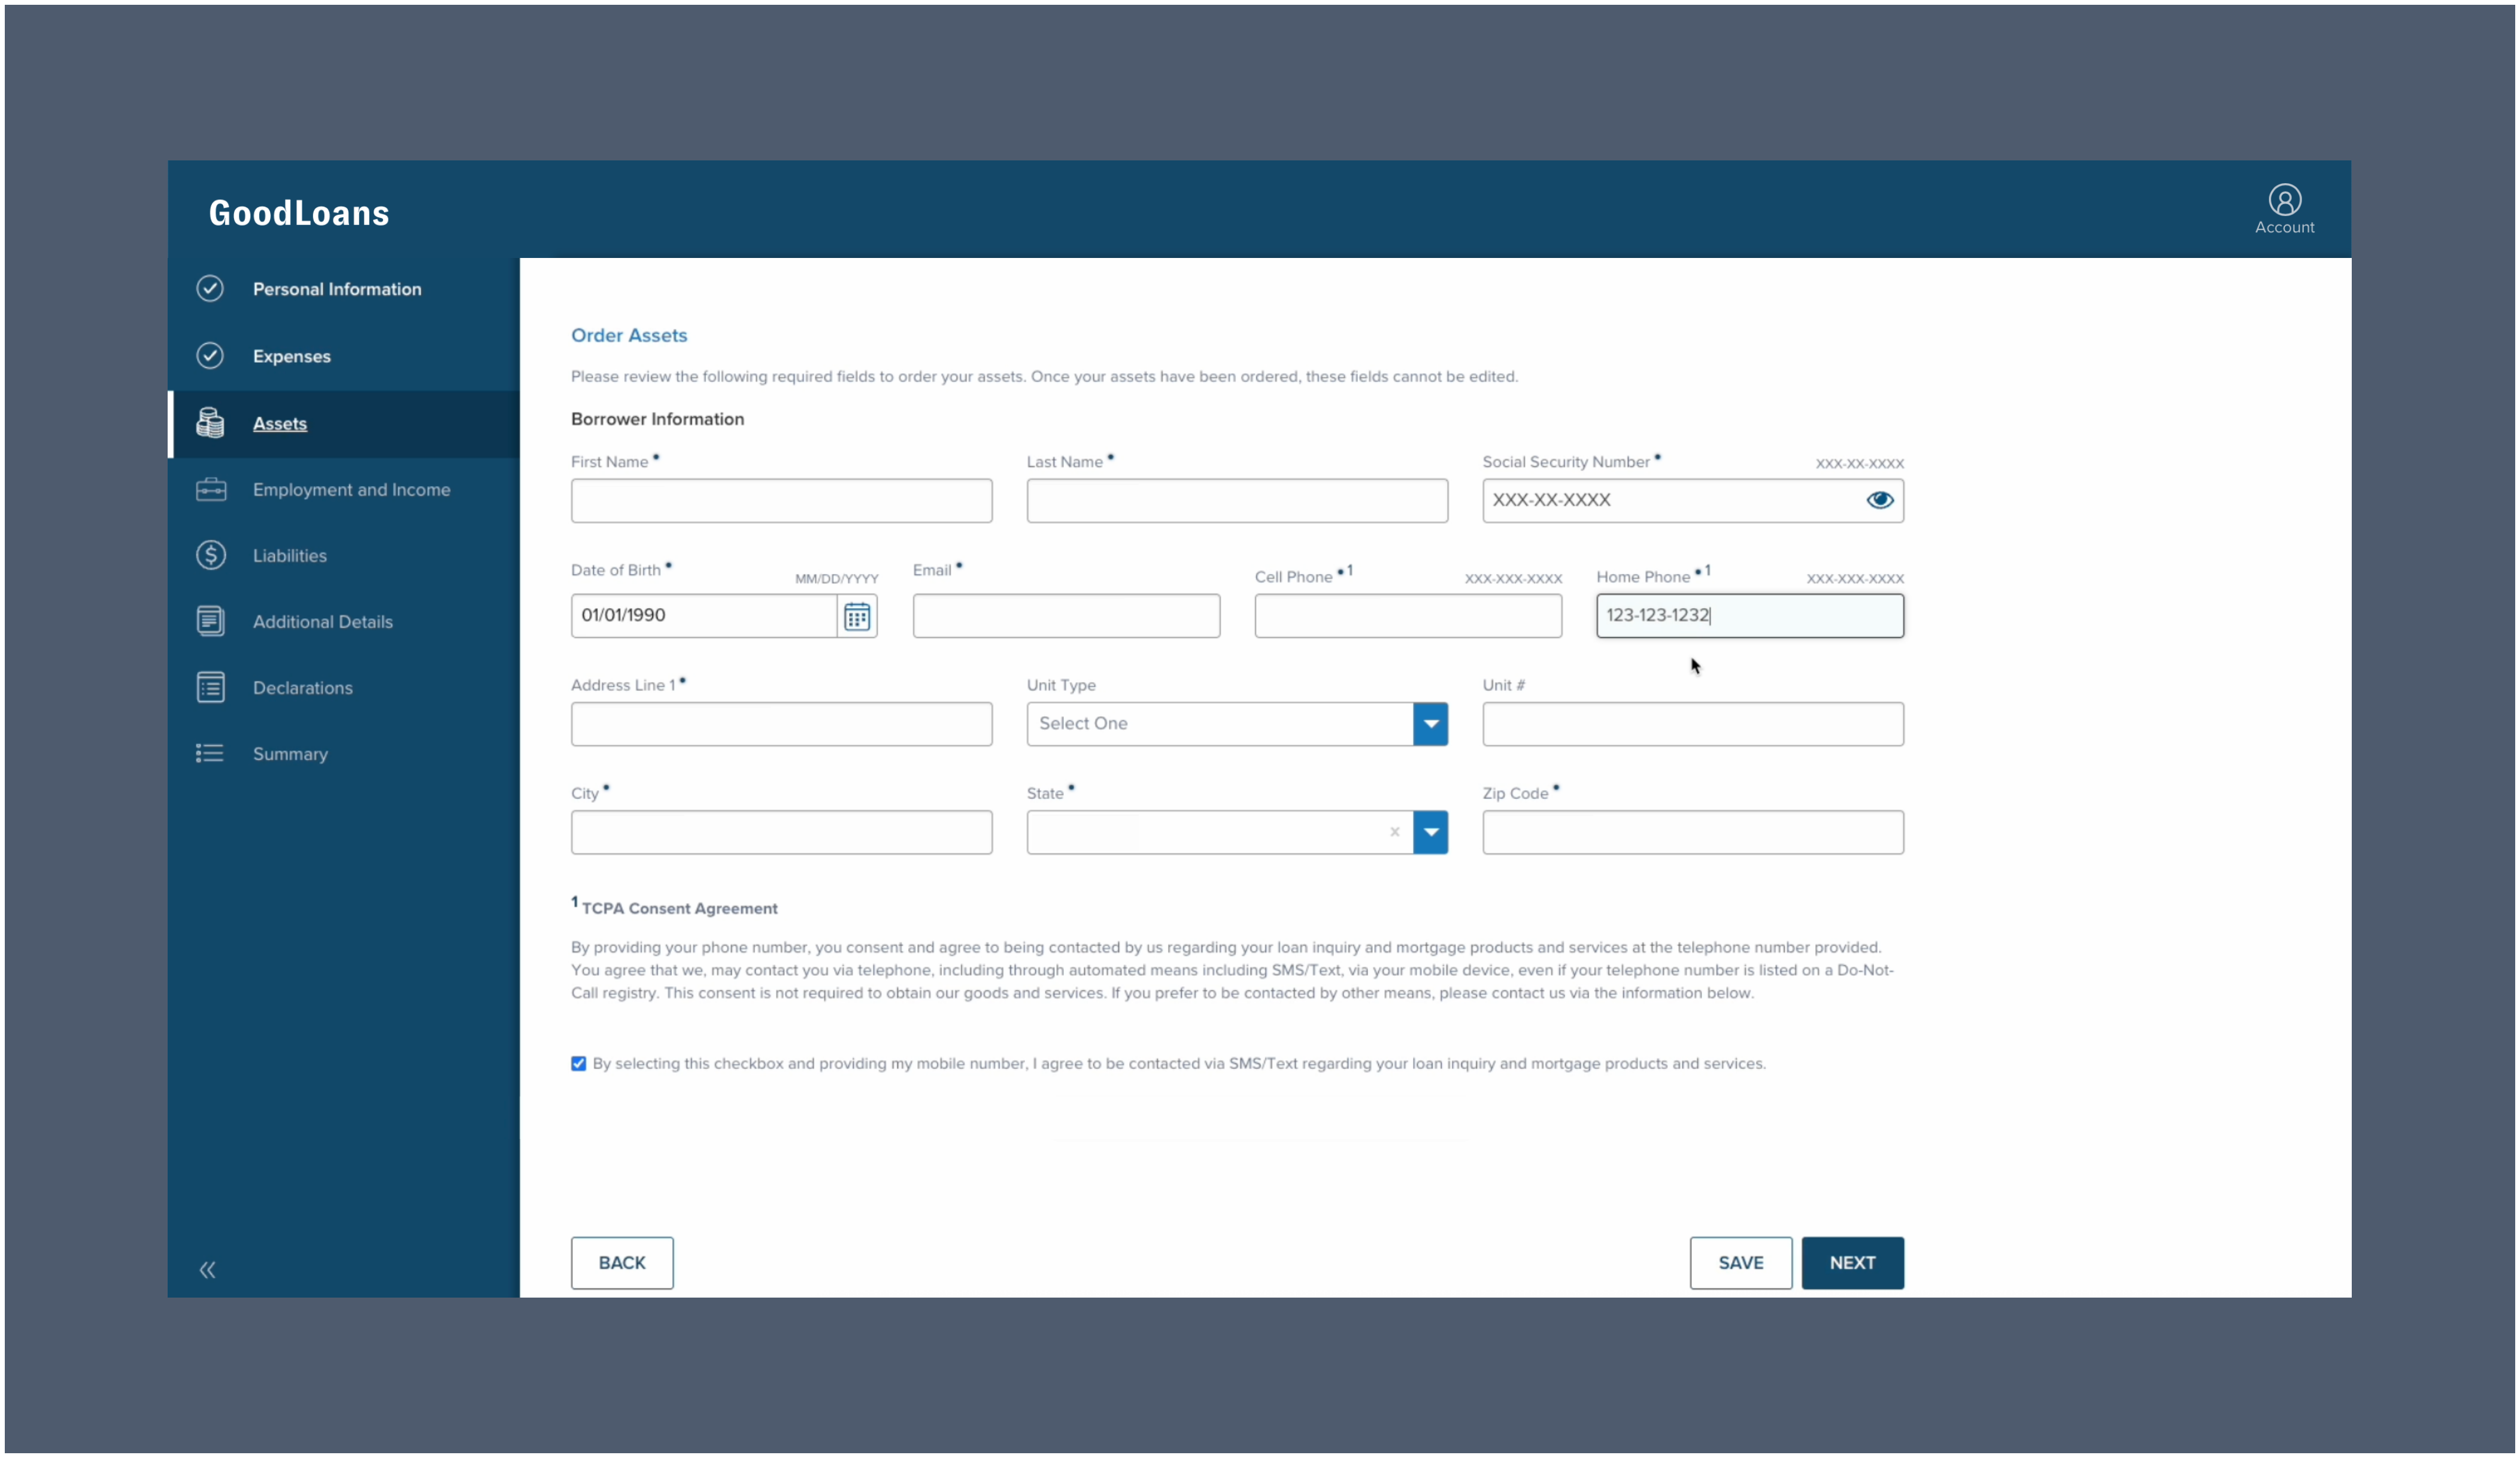
The borrower will then fill out preliminary information such as their name, social security number, and date of birth (this information is typically pre-filled).
-
Once completed, the borrower must click
Next. The borrower will then be guided through the process of logging in to their financial institutions to establish a data connection.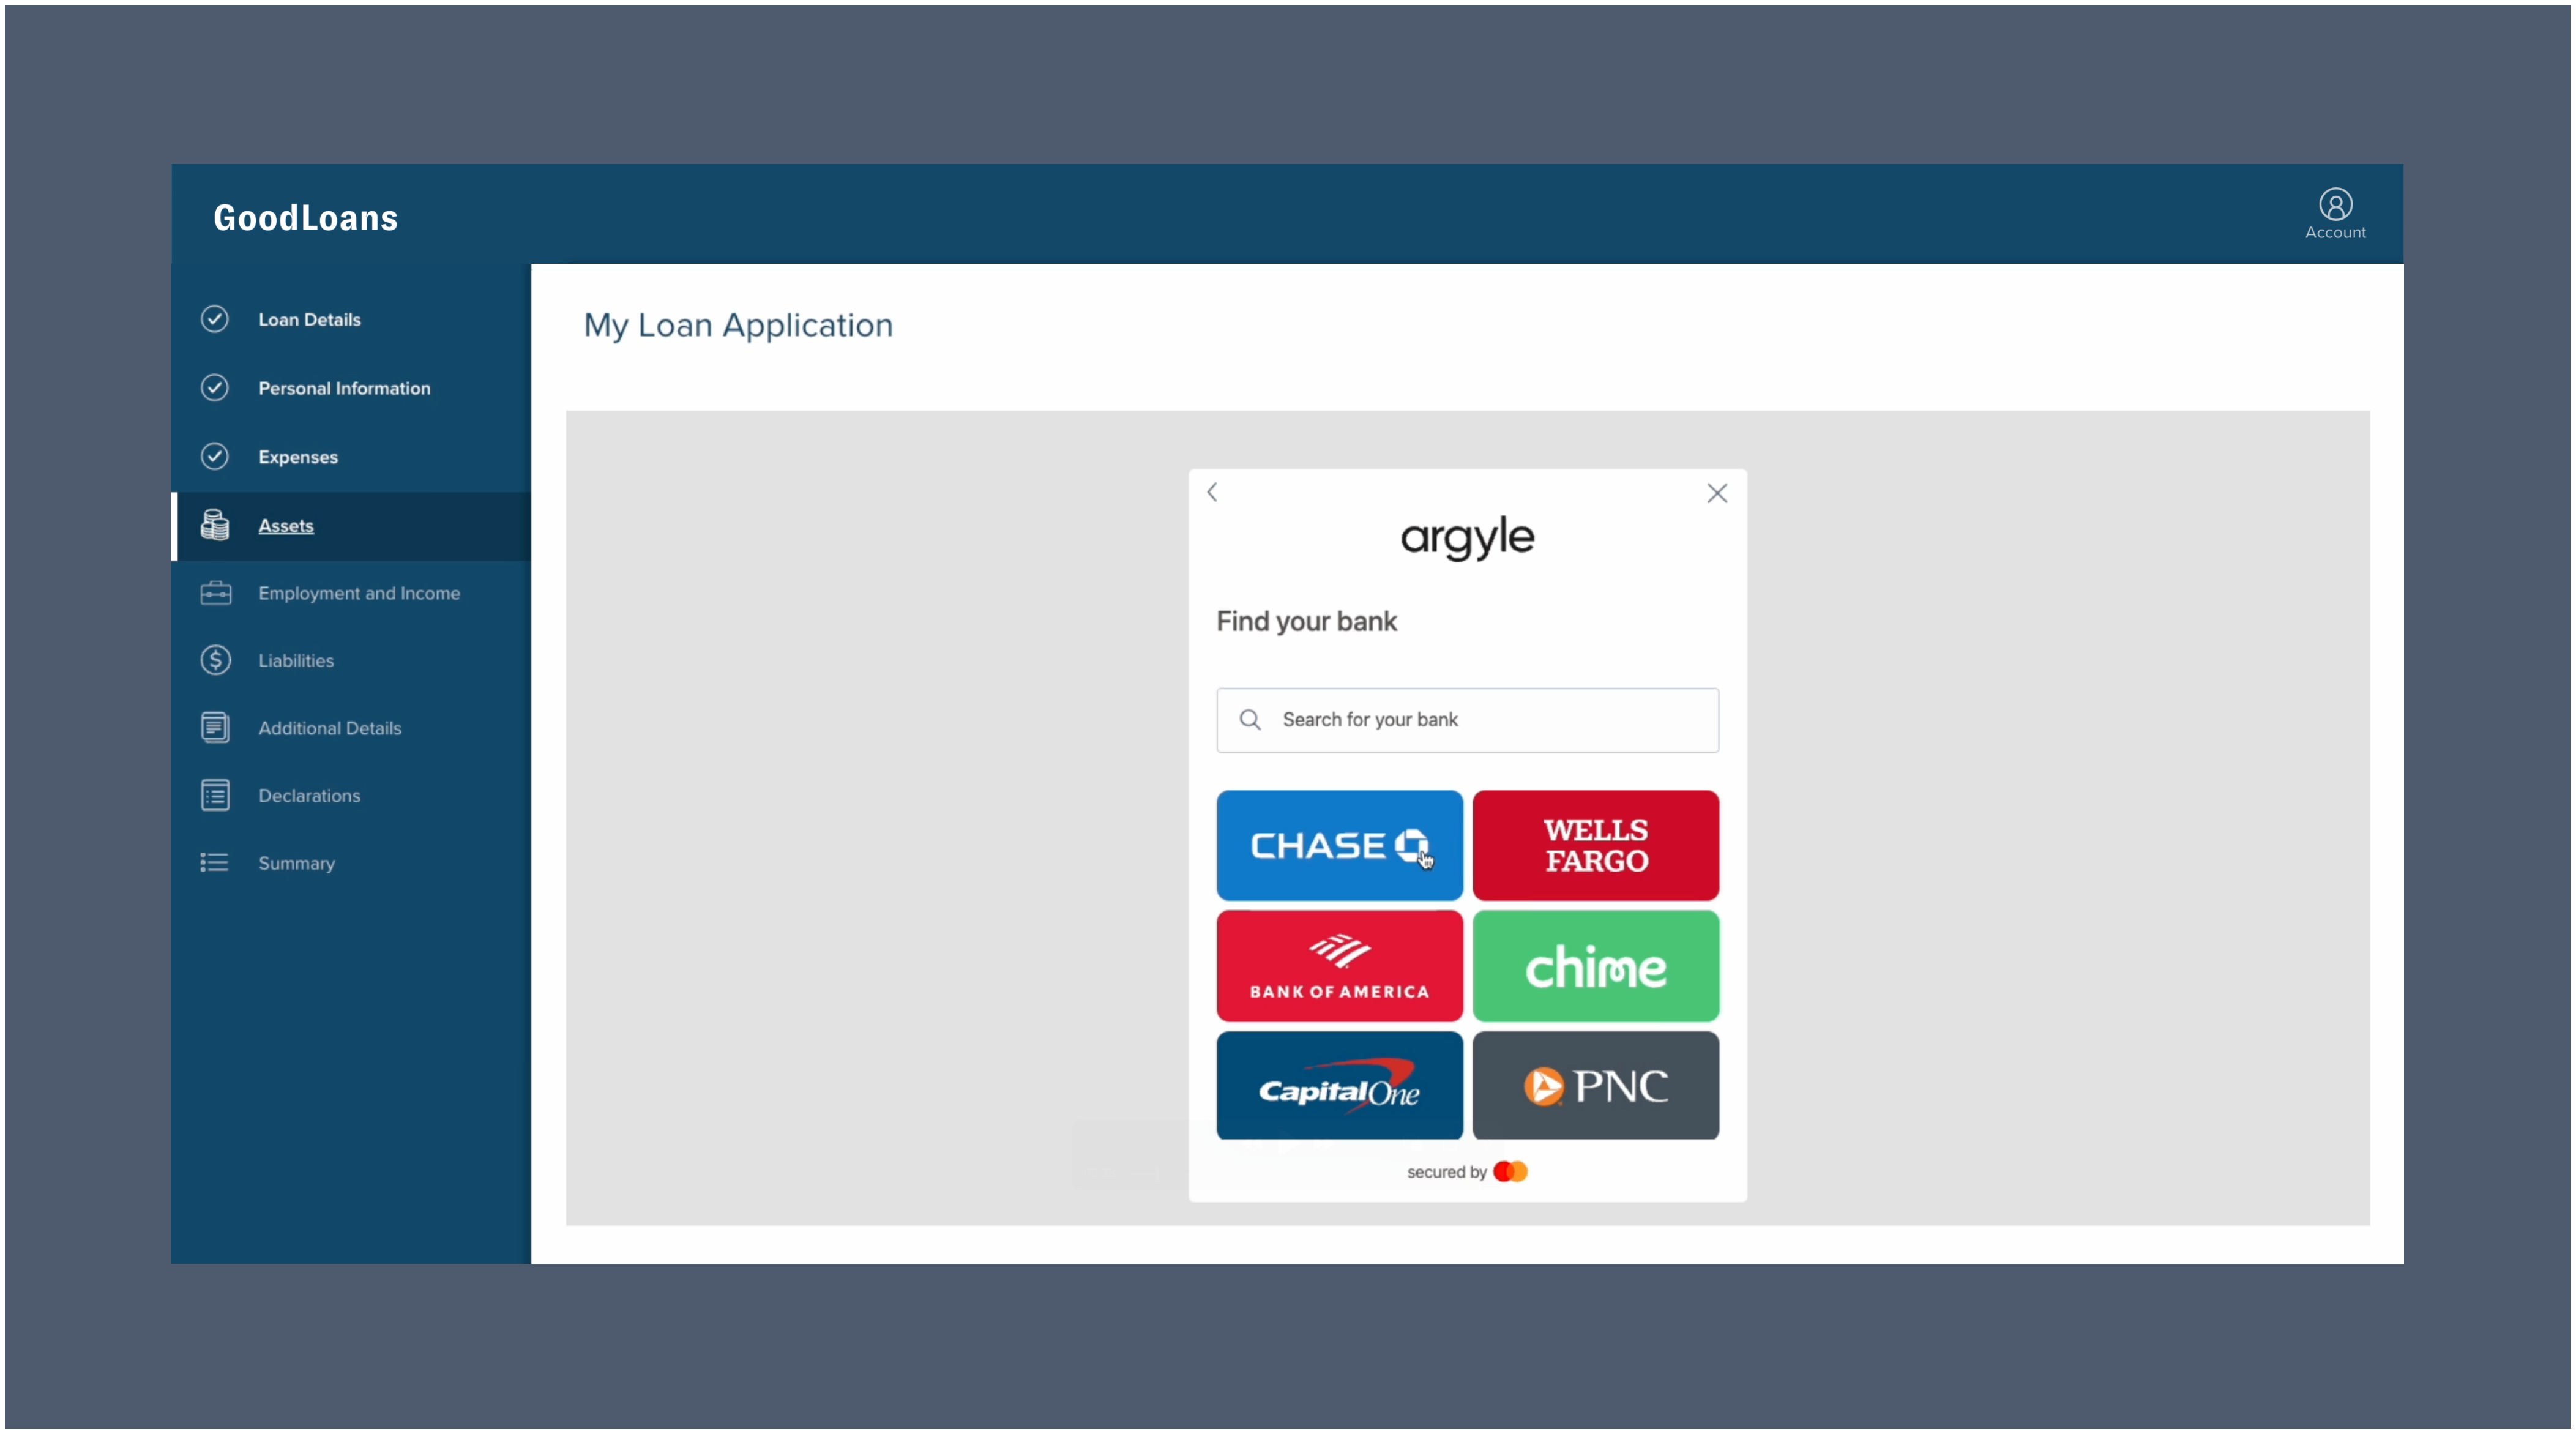
-
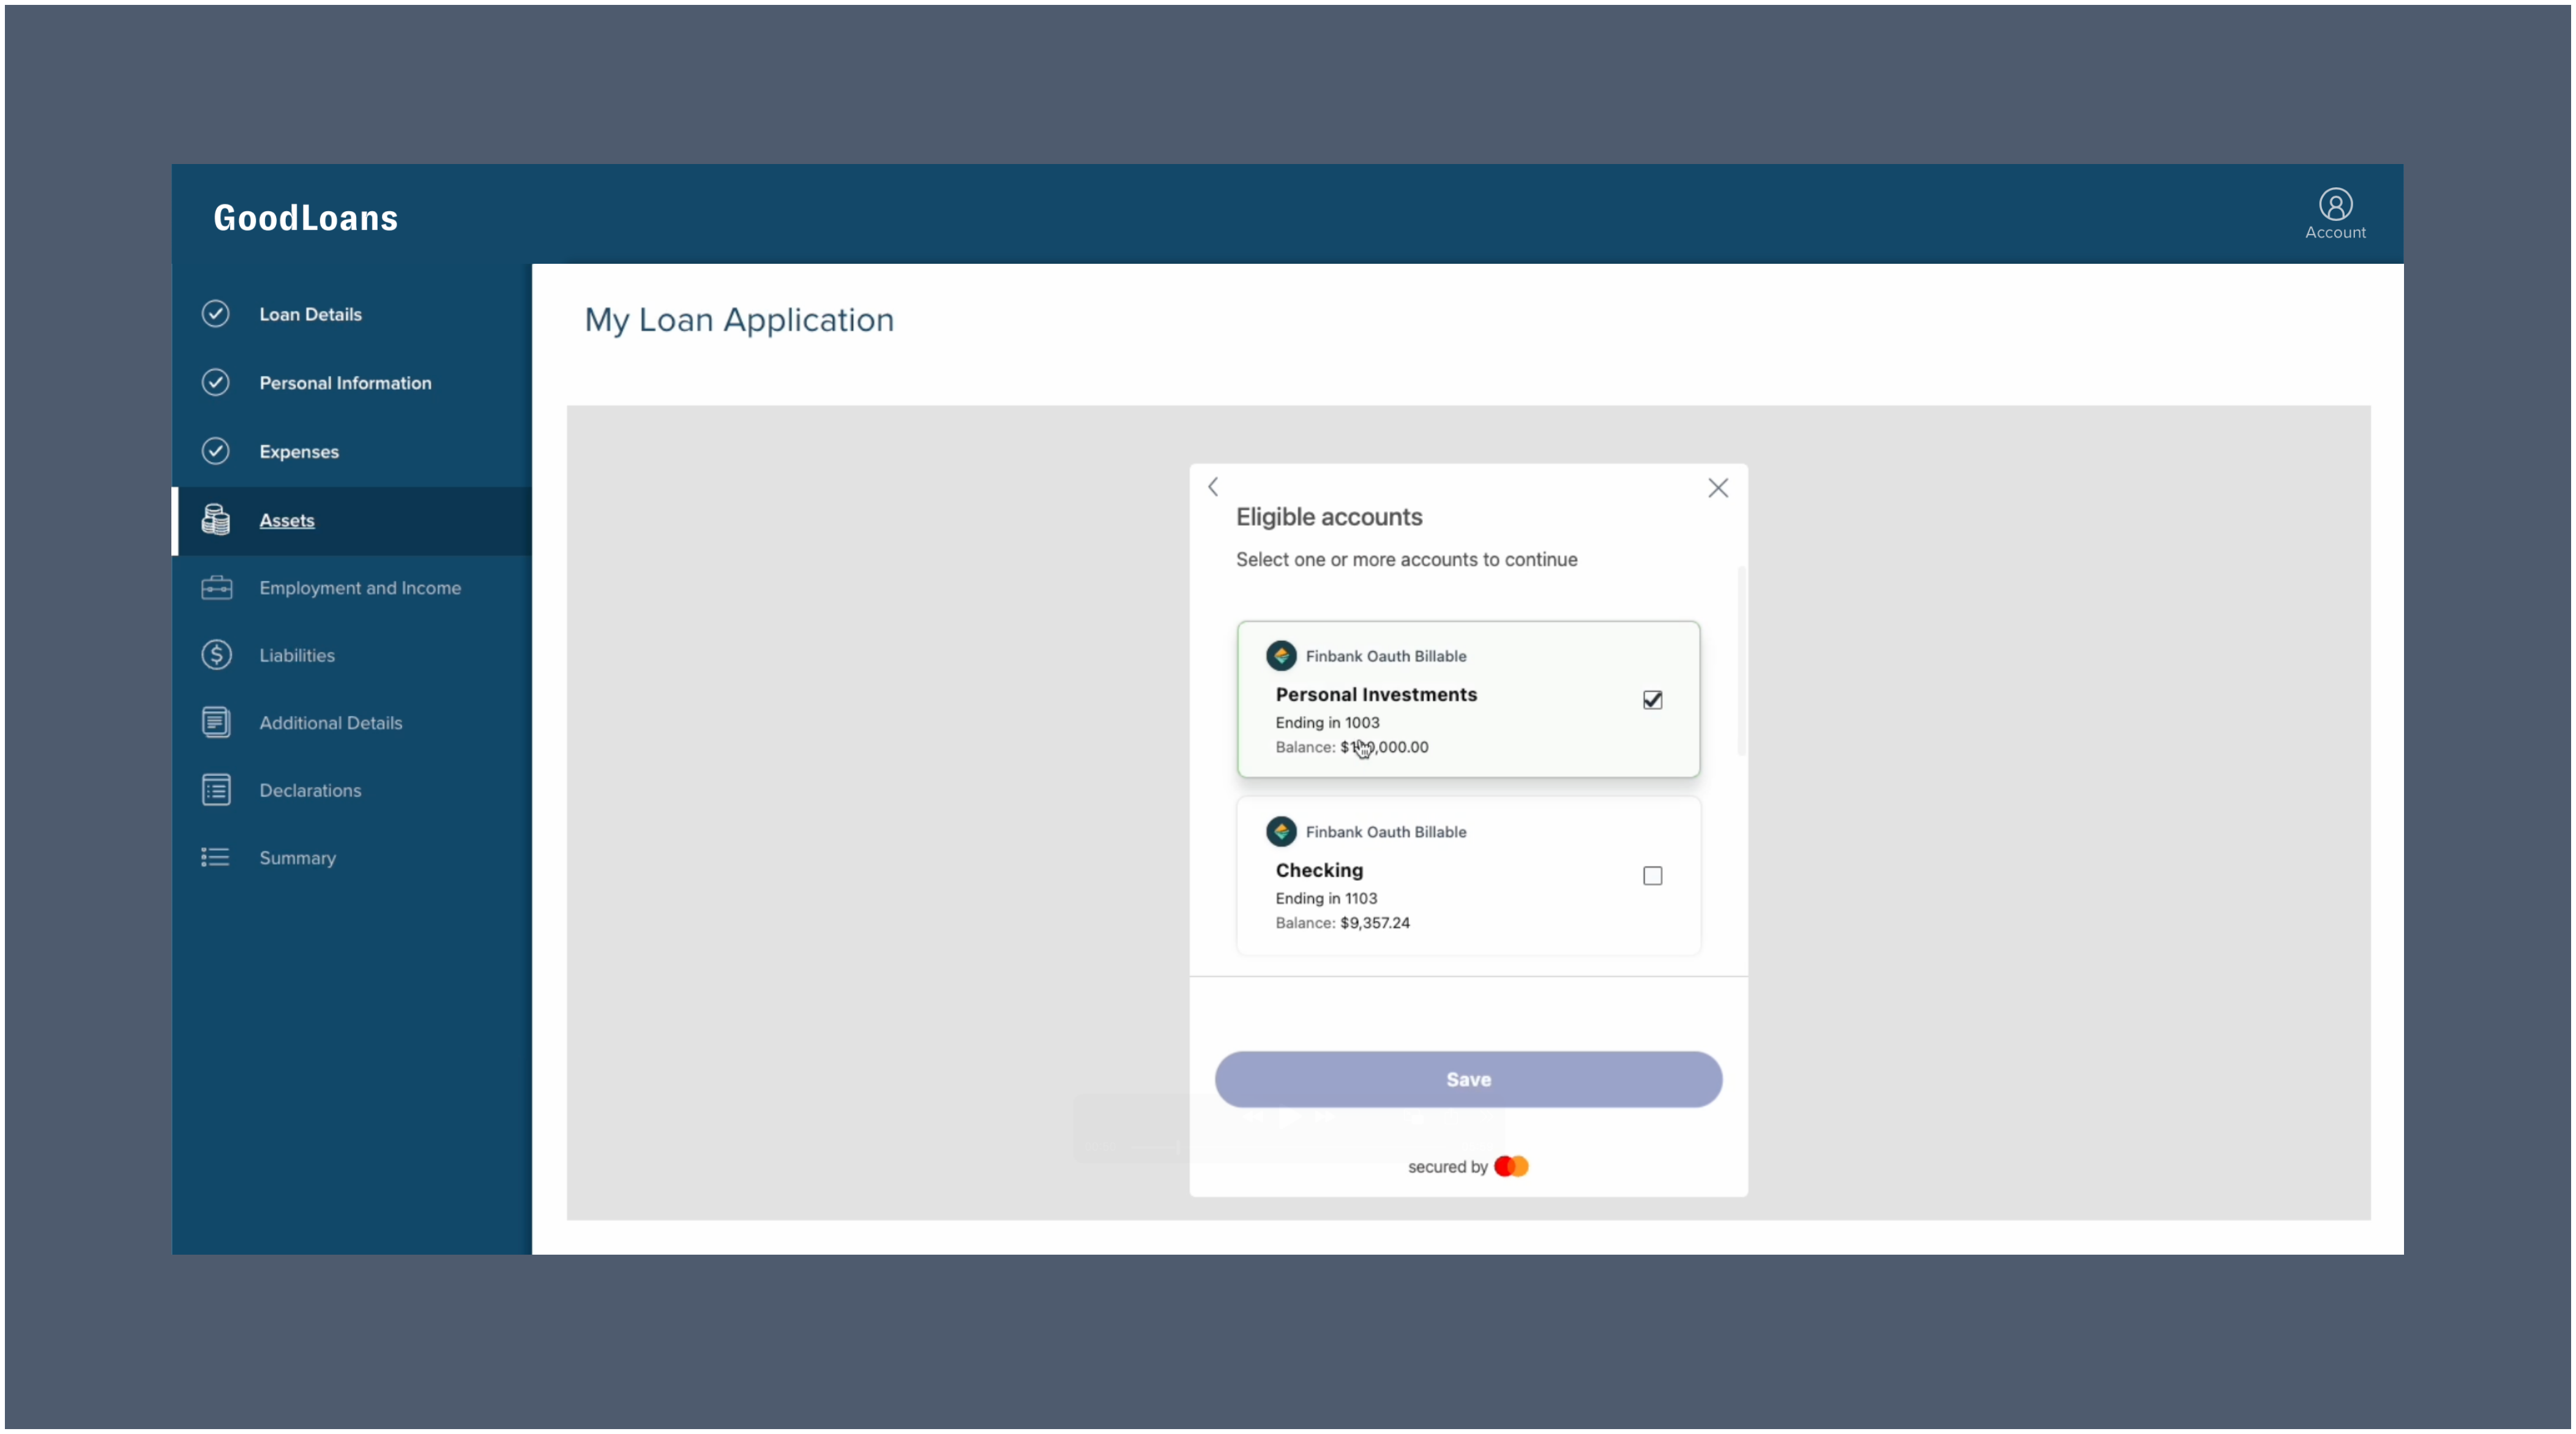
For each financial institution, the borrower will select which associated accounts to connect.
Asset data populates the application
After the borrower completes the connection process, supported asset data from the selected financial accounts begins importing into the Consumer Connect application. The borrower can add other assets manually or continue the application.Asset data and verification reports available in Encompass
The borrower’s asset data can be imported to Encompass®. Argyle will automatically generate a verification of assets (VOA) or verification of assets and income (VOAI) report and add it to the loan file, in addition to populating asset data in the 1003 URLA and report identifiers required by GSEs within the Encompass® loan file.Closing verification of employment (VOE) reports can also be ordered as needed within Encompass®, as long as a verification of assets and income (VOAI) report has previously been generated.
Admin setup
- Log in to the Consumer Connect Admin portal via Encompass®.
-
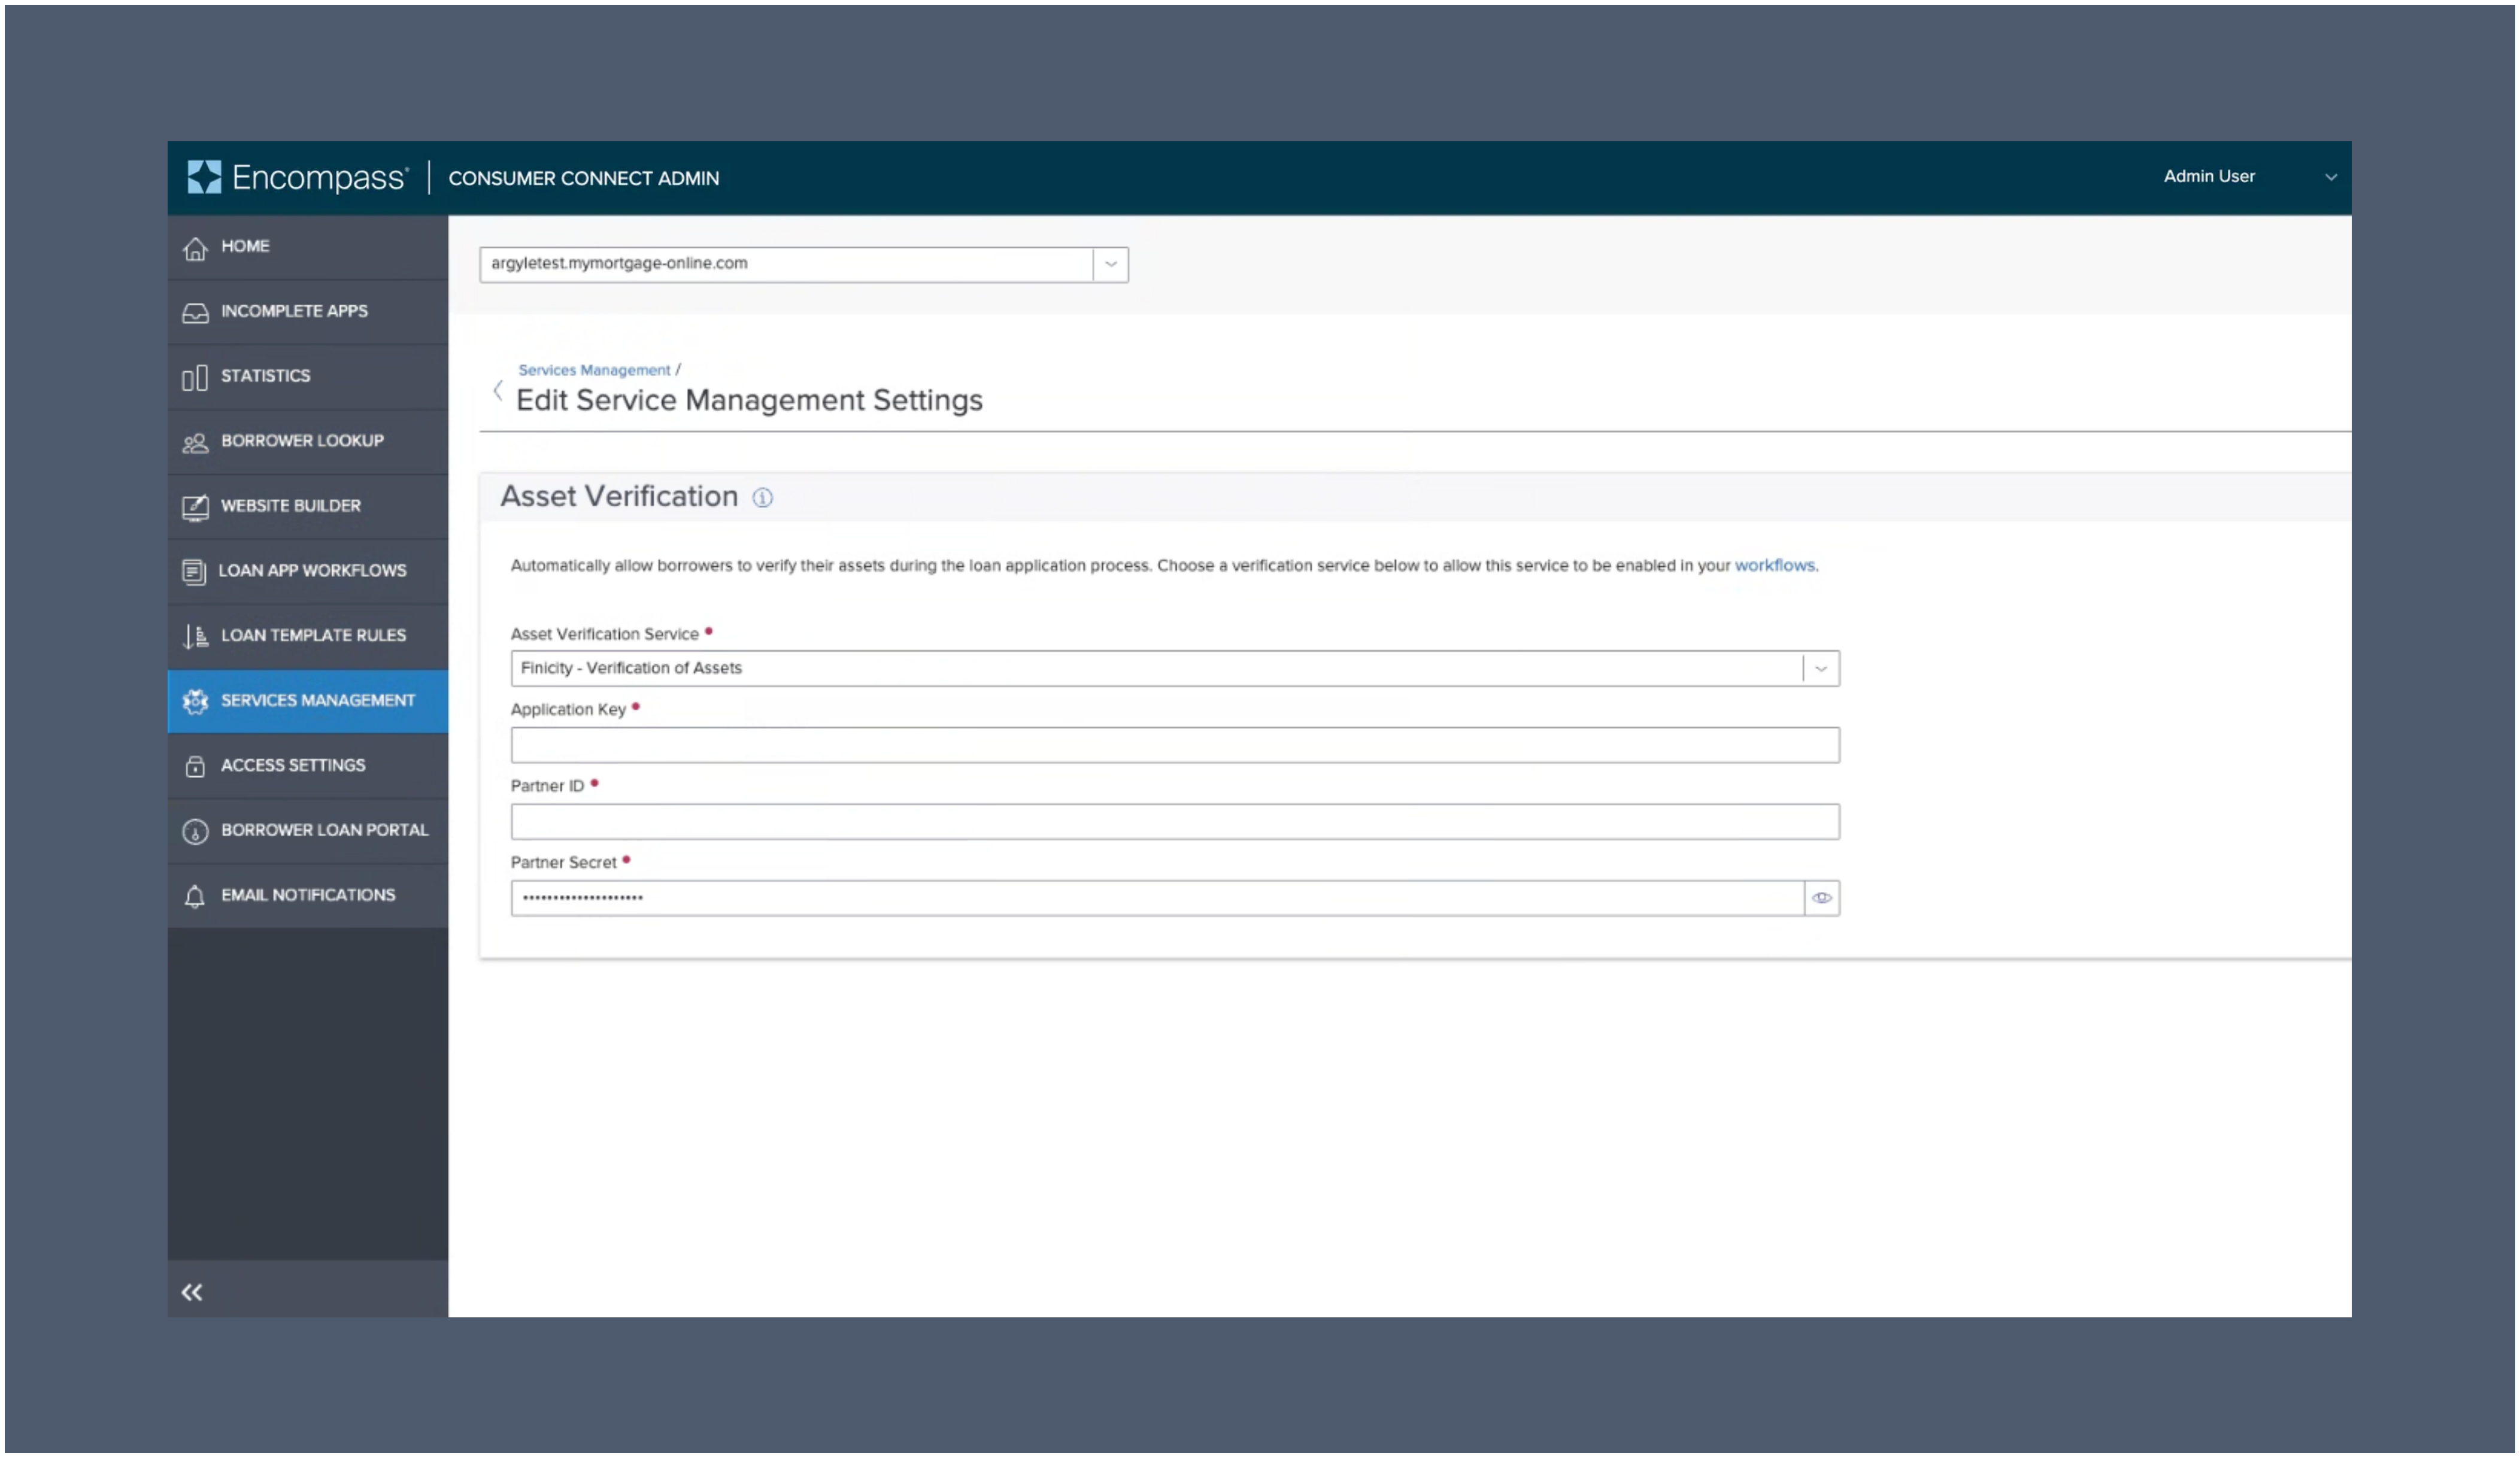
Go to Services Management and select
Finicityas the Provider next to Asset Verification. -
When prompted, enter your Application Key, Partner ID, and Partner Secret.
Reach out to your Argyle representative to obtain these integration credentials.
-
Navigate to the LOAN APP WORKFLOWS section of the navigation menu, then select
Create Workflow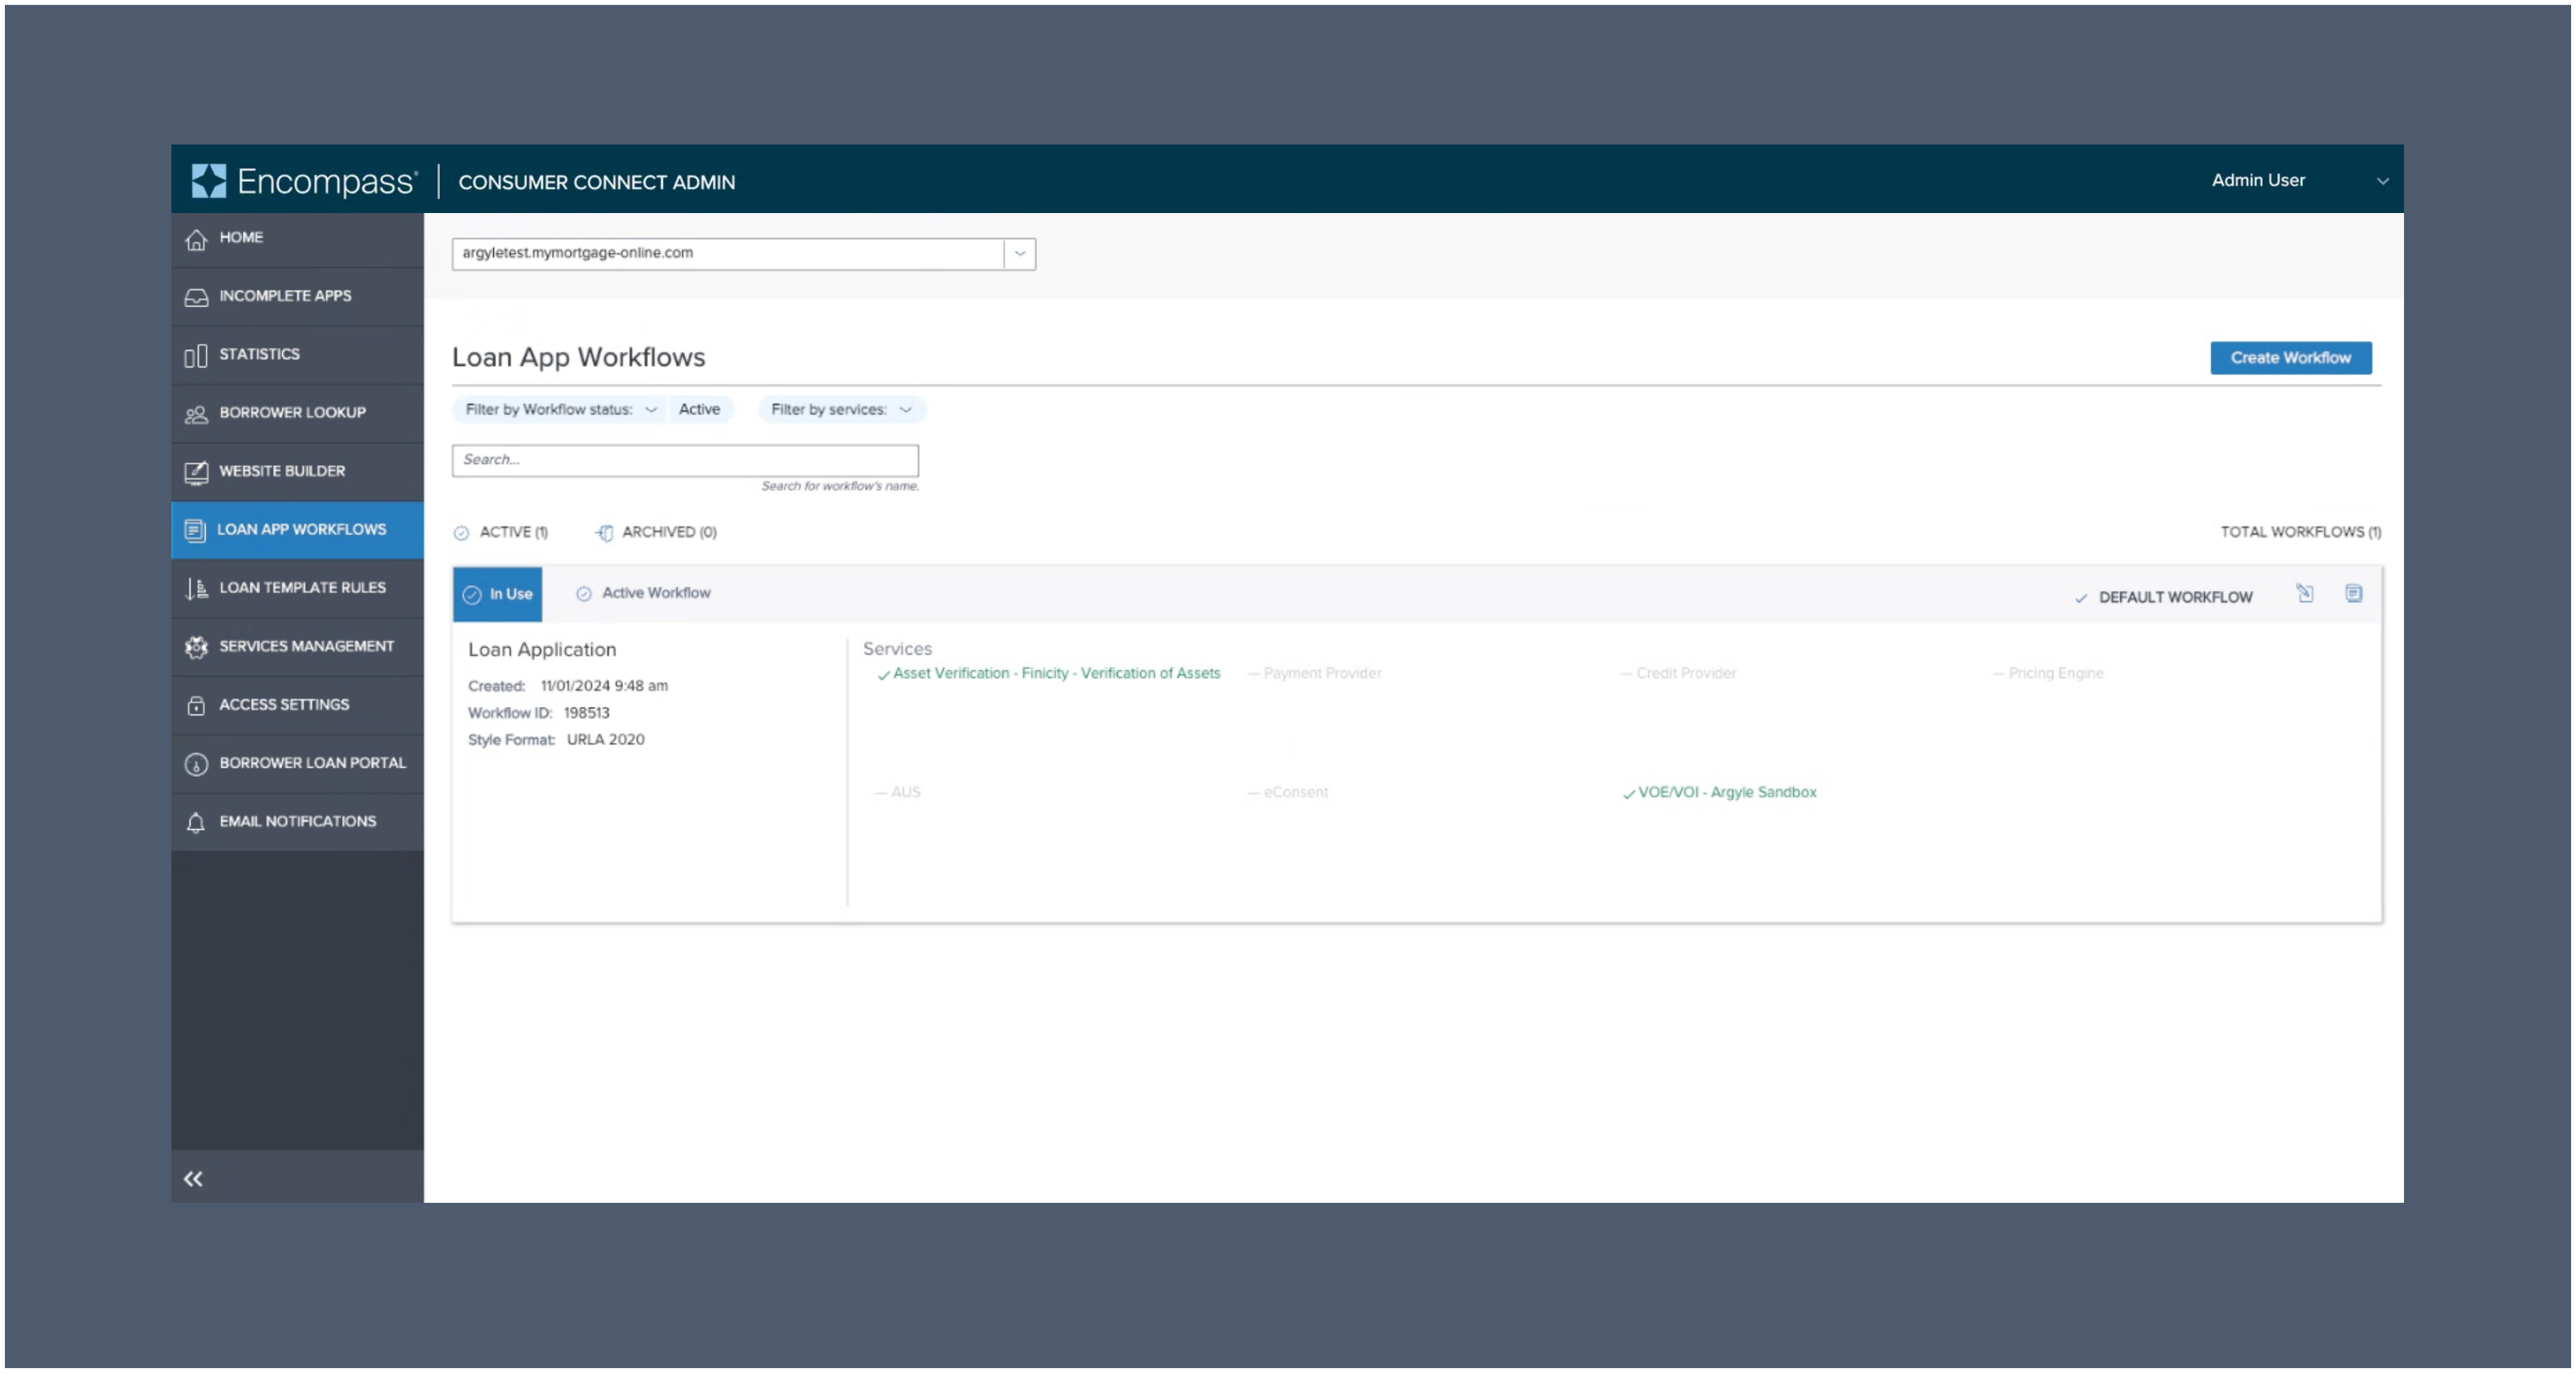
- Within Admin Configurations, open the Service Settings toggle.
-
Scroll down to Asset Verification and
enable the togglethen clickSave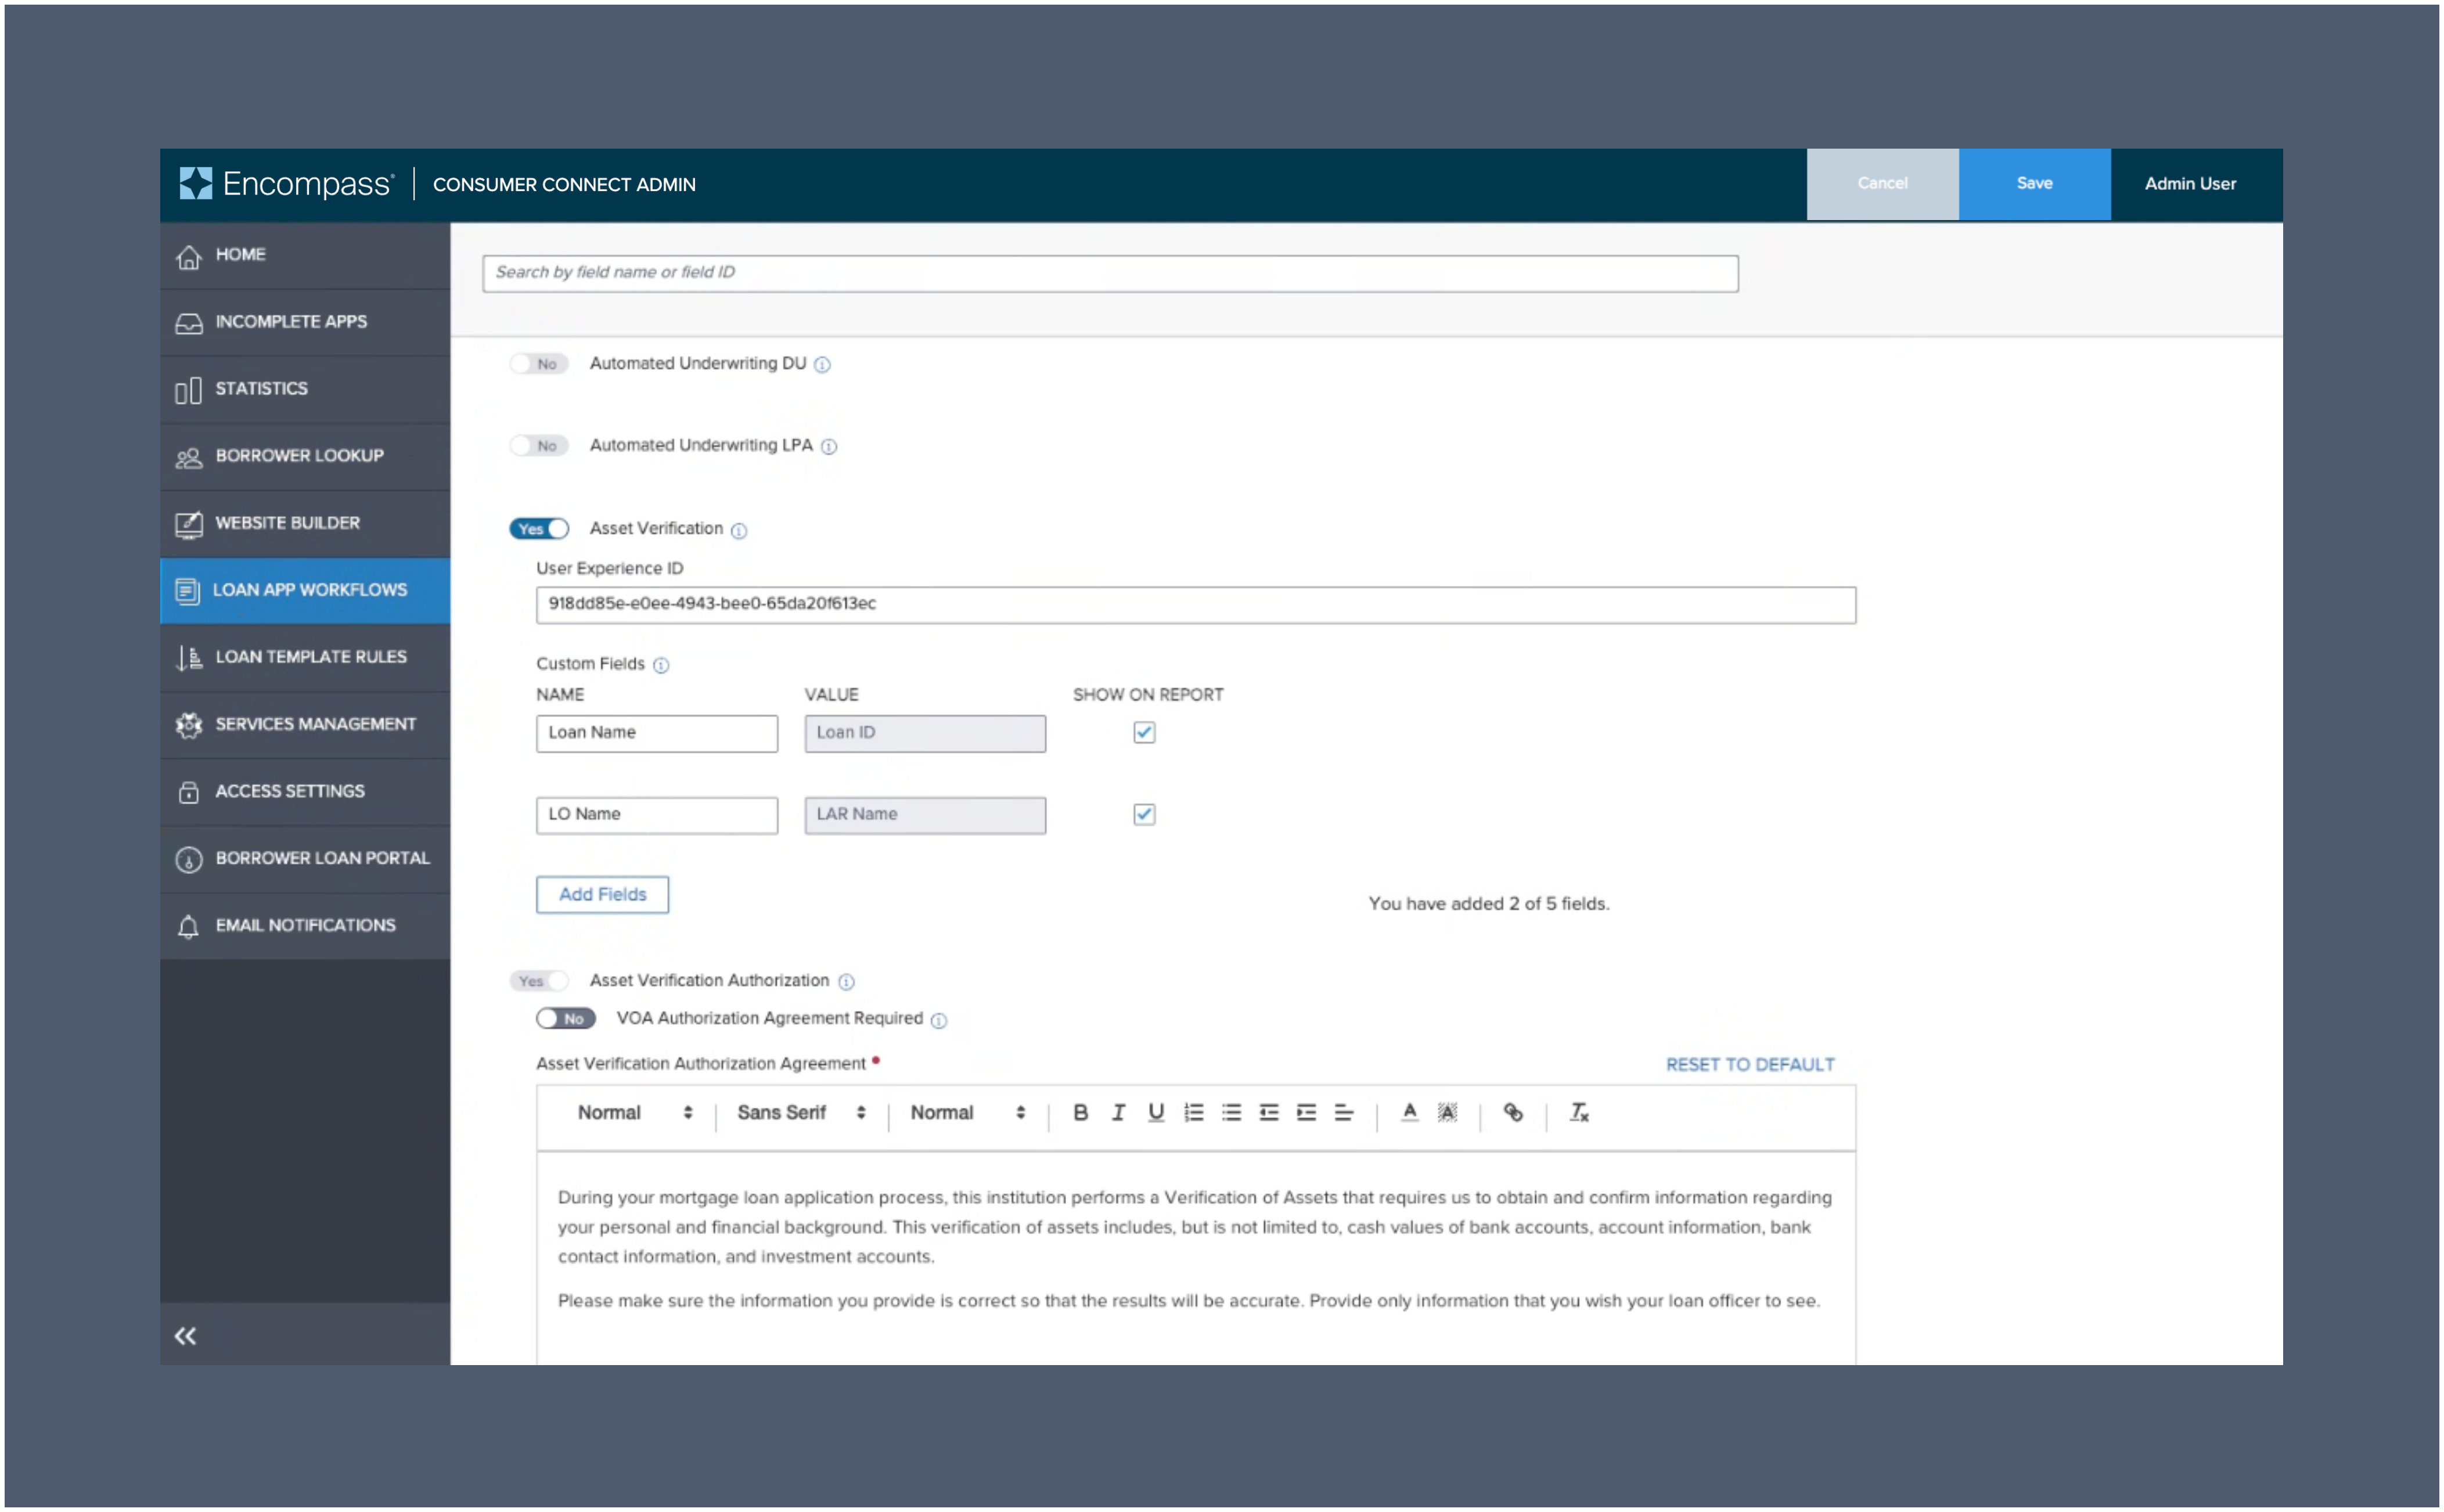
Testing profiles
- Use sample banking credentials to log into either the
FinBank BillableorFinBank Oauth Billablefinancial institutions for testing. - For specific scenario testing, the following sample users are also available: