Overview
Entirely within the Empower® Loan Origination Platform, you can verify income and employment using Argyle’s direct connections to U.S. employee payroll accounts.- Generate Verification of Income and Verification of Employment reports.
- Access and view W-2’s and paystubs from connected payroll accounts.
- Re-verify employment prior to final closing.
How it works
- Loan officers select Argyle as the Exchange Verification provider and choose a product:
- Initial Verification of Income (VOI) and Verification of Employment (VOE)
- Re-verification of Employment (VOE only)
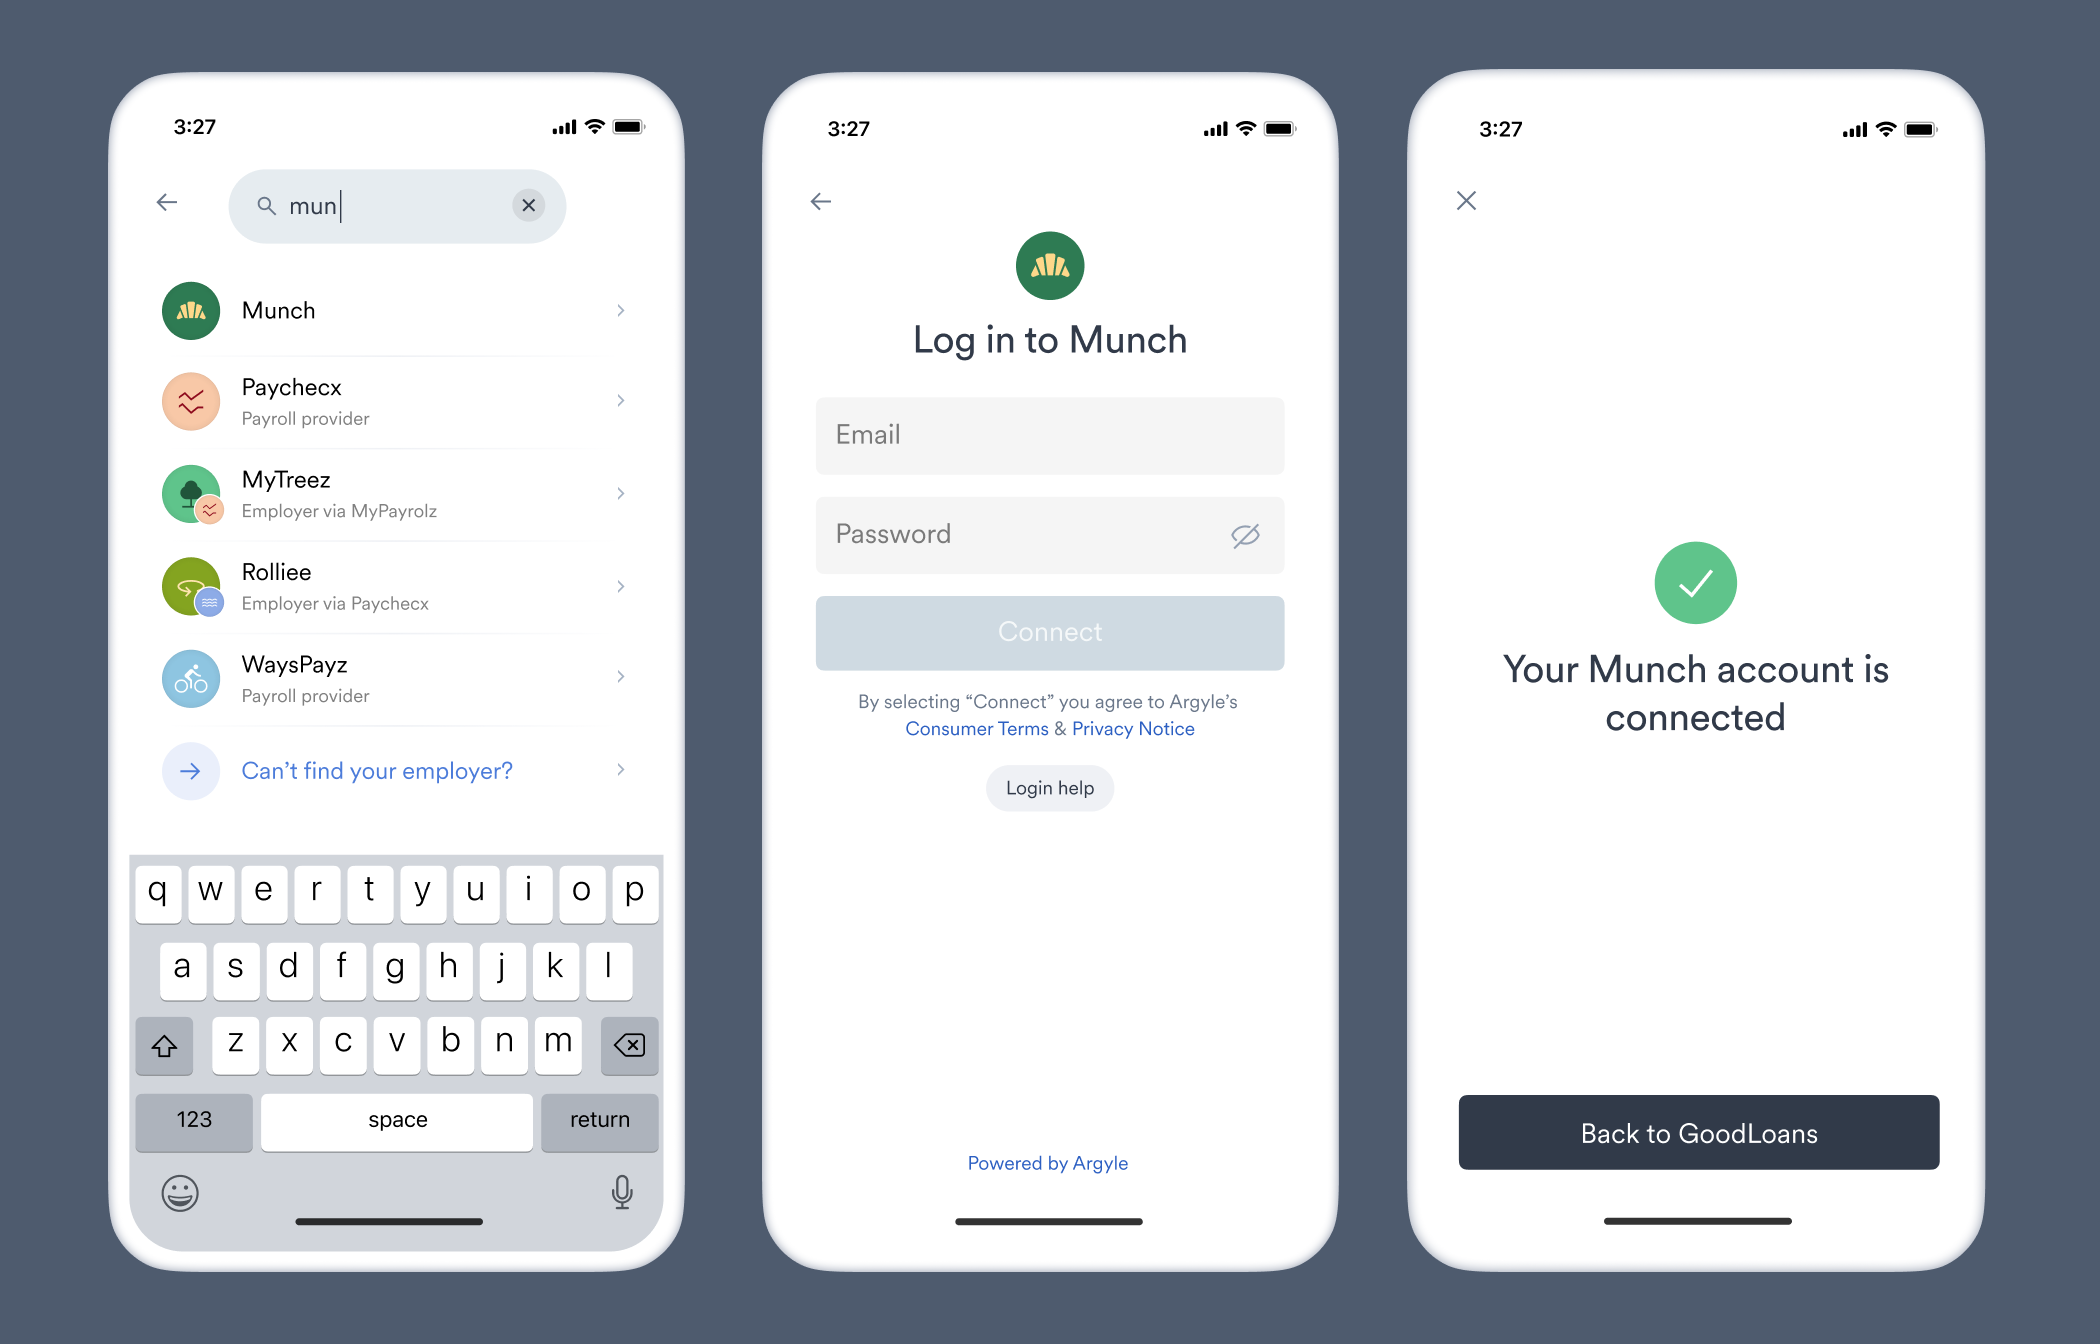
- After submitting a verification order, the borrower is invited to connect their payroll accounts through Argyle.
- The following documents are made available in the Empower® Document Repository:
- VOI and VOE report PDFs
- The borrower’s last two W-2s
- The borrower’s paystubs from the last 30 days
Enabling the integration
- Reach out to your Empower® account representative to enable Argyle’s verification of income and employment integration.
- Once you receive your Party IDs from Empower®, go to the Integrations section of Argyle Console.
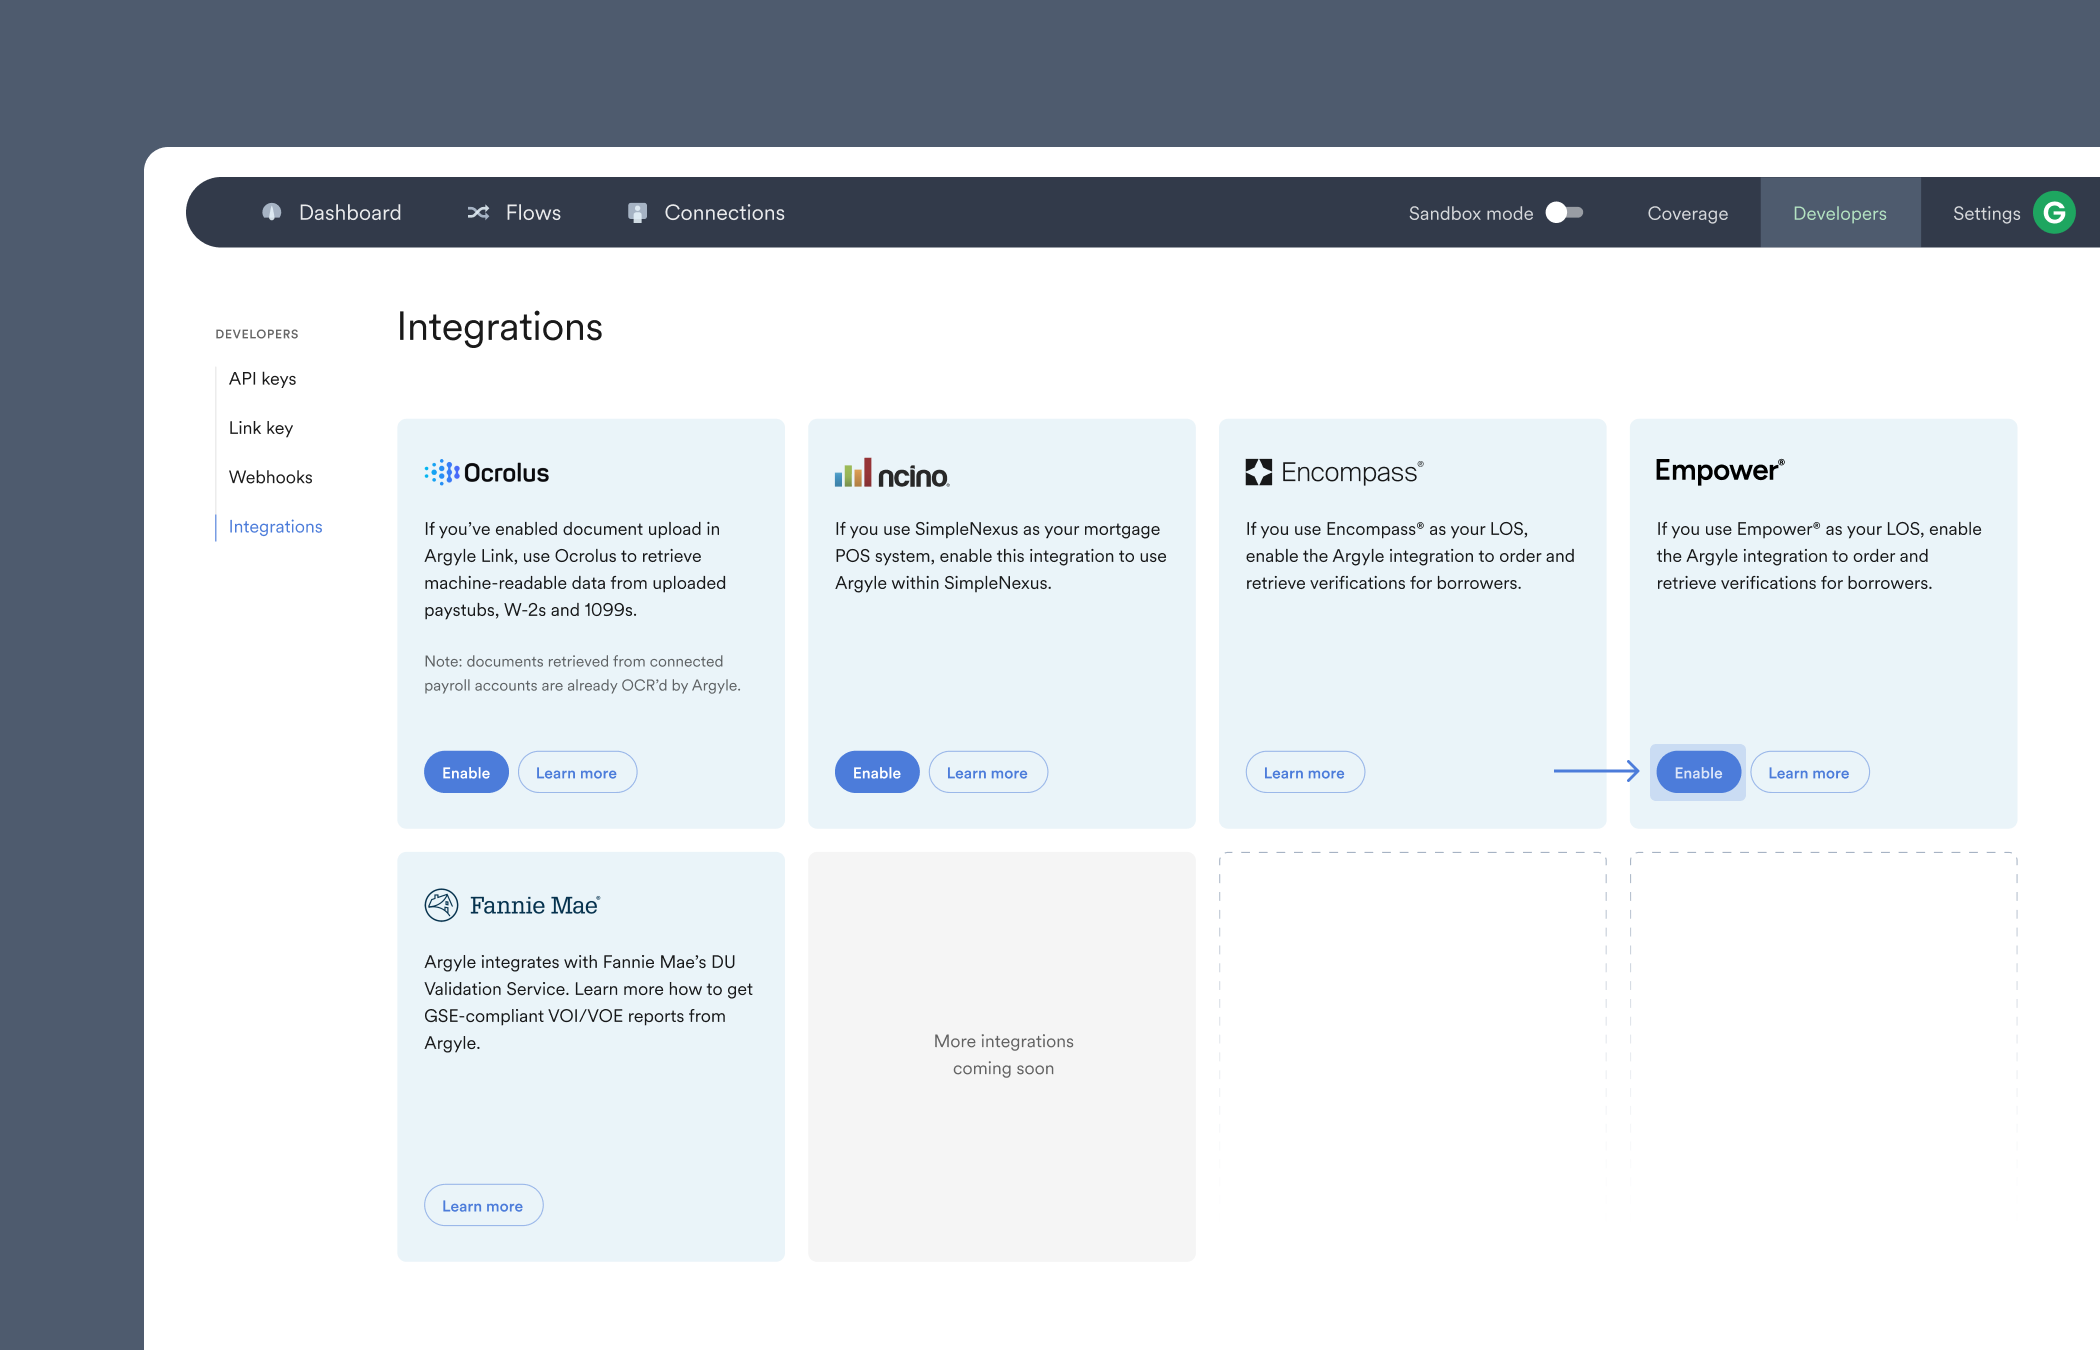
- Enter your
UAT(testing) andProductionParty IDs. - (Optional) Select Edit Configuration to adjust the Flow (borrower’s payroll connection experience) used in your Empower integration. Custom Flows can be created by selecting + New Flow in the Flows section of Argyle Console.
Ordering a verification
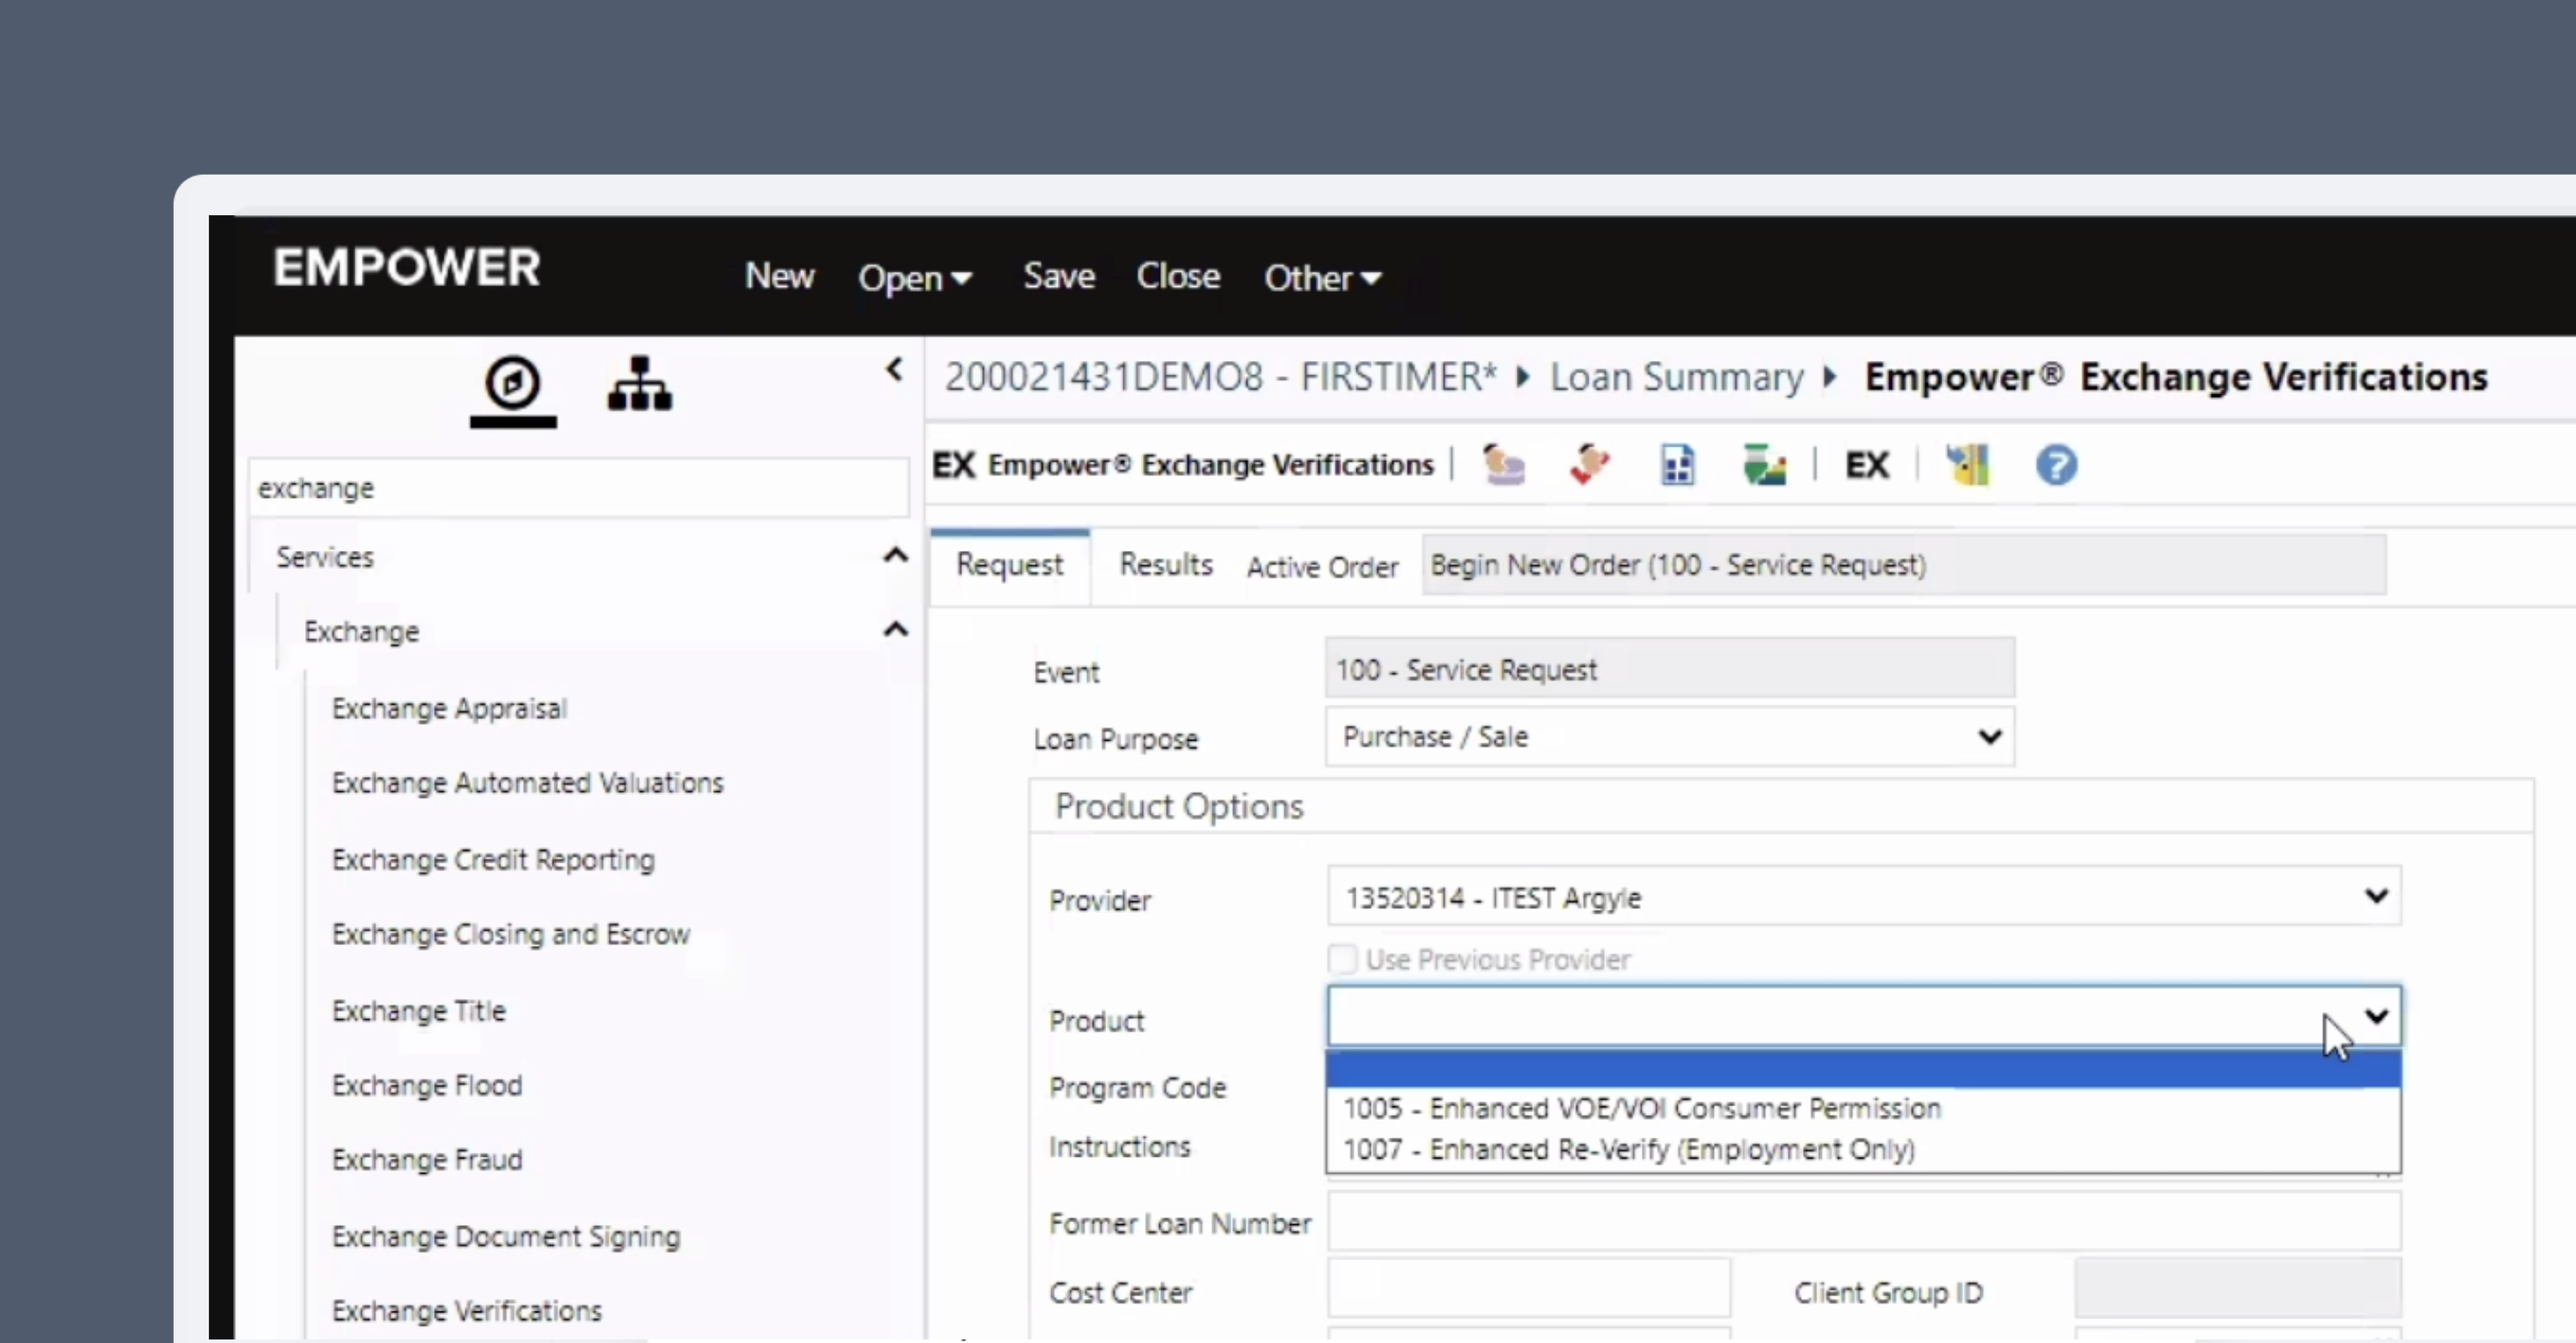
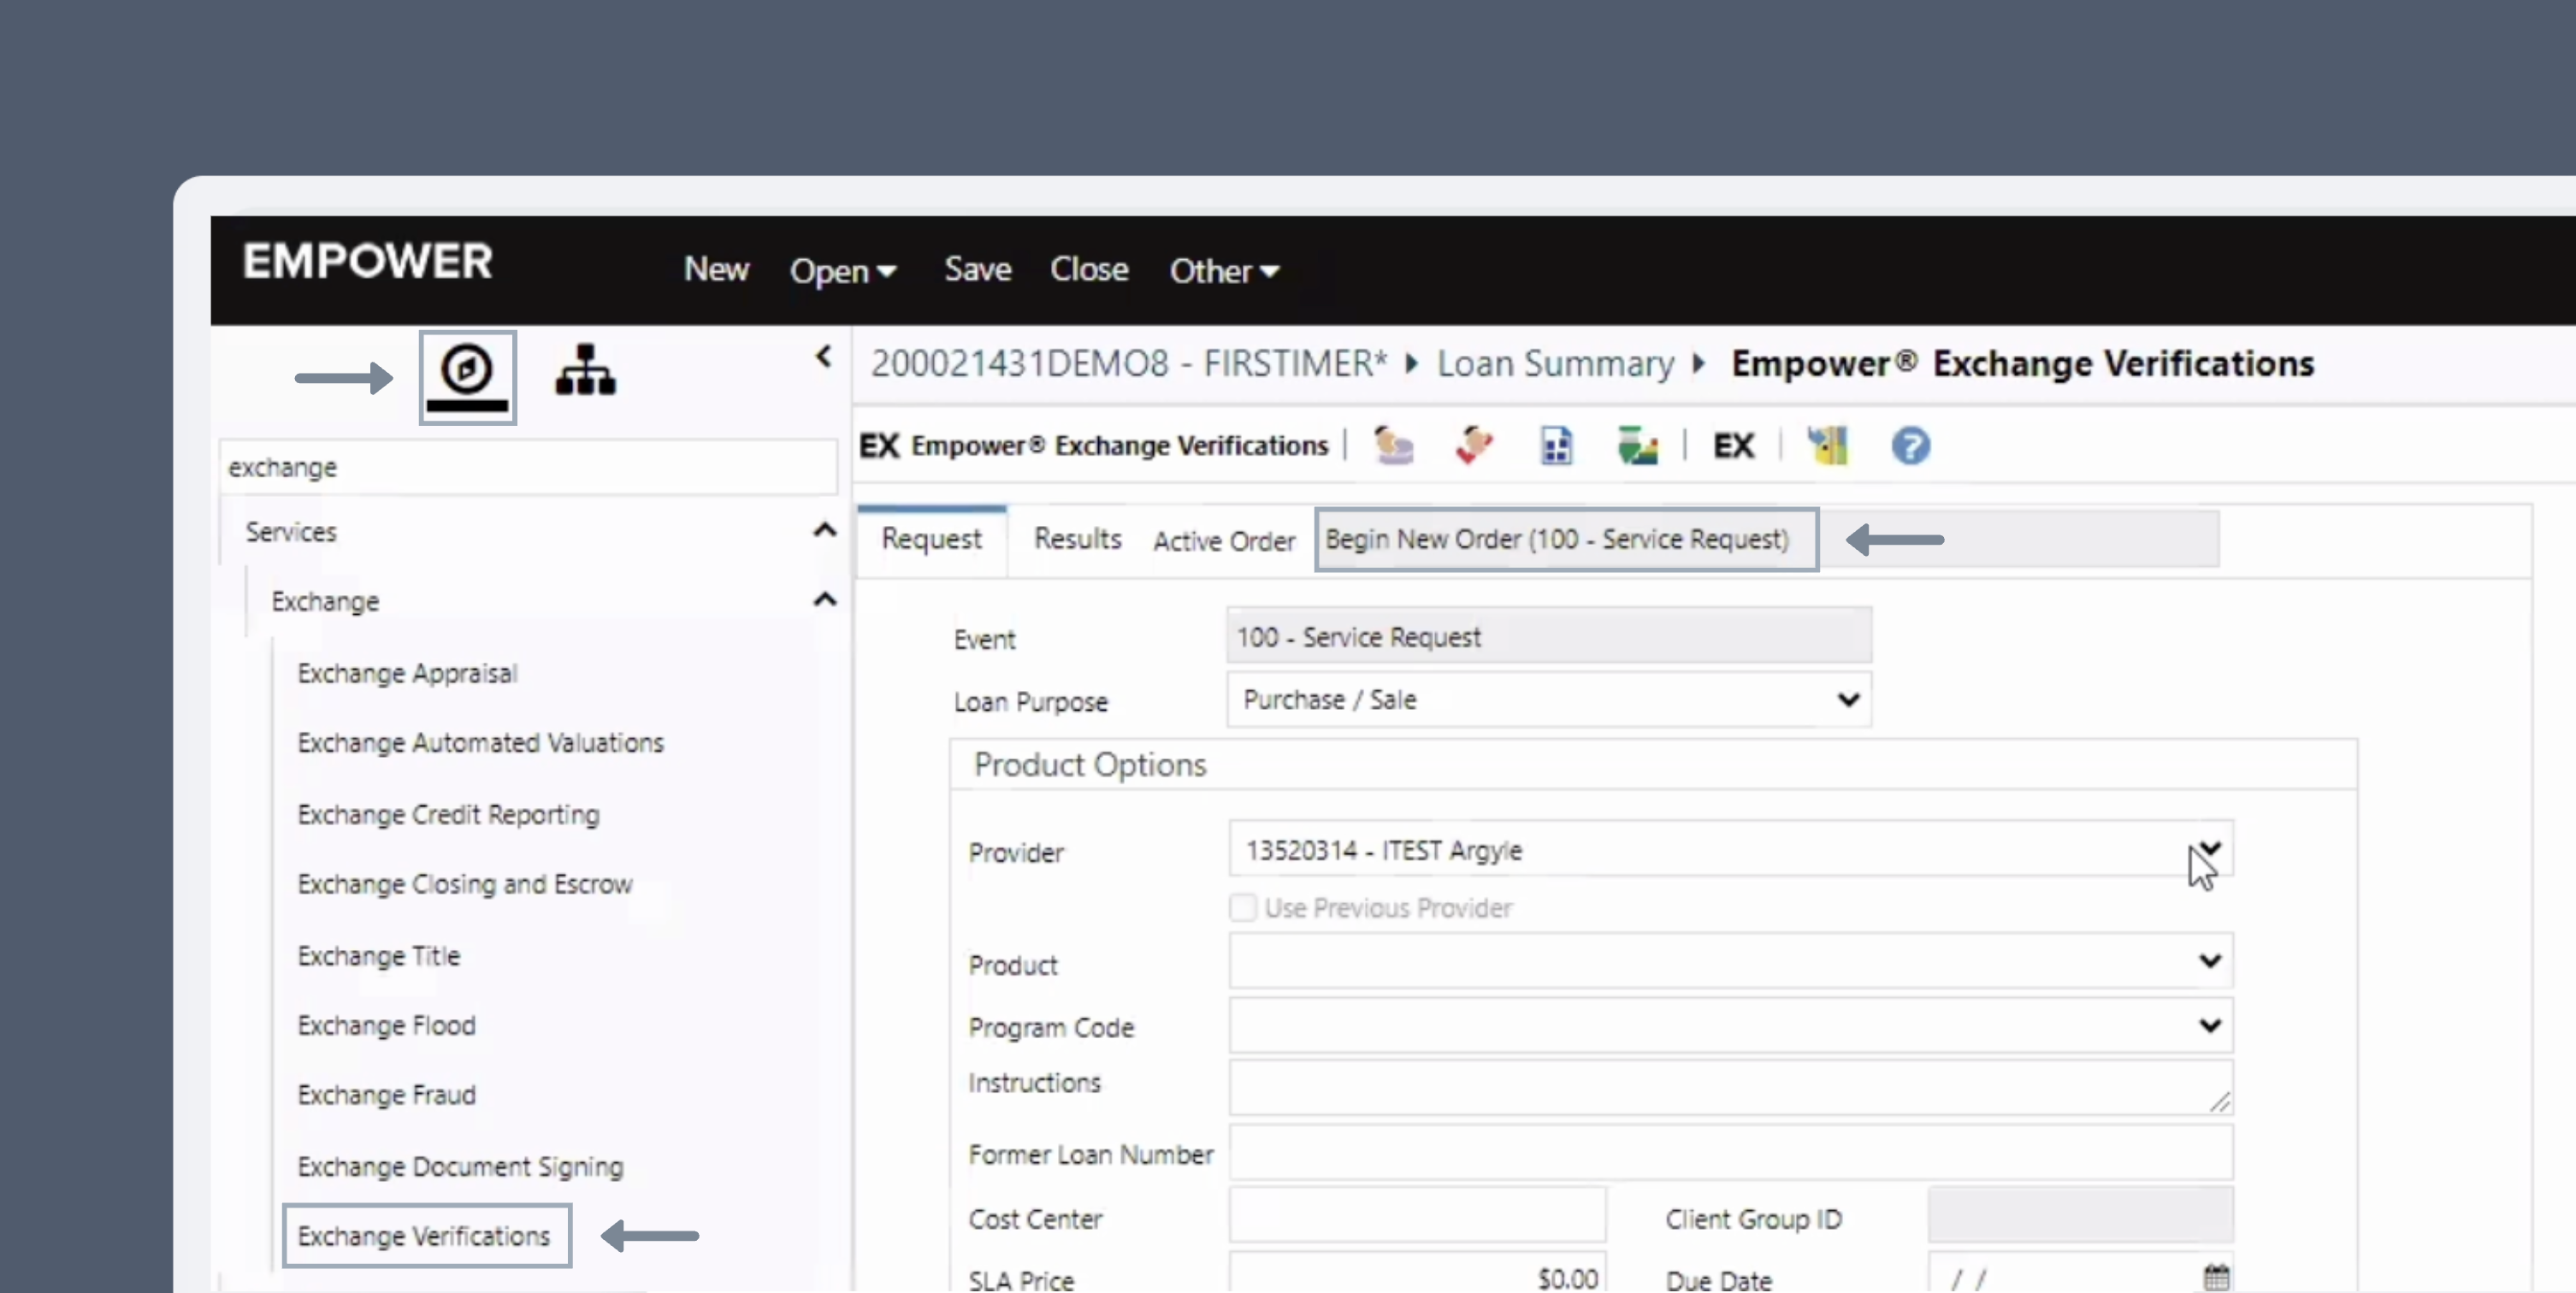
- Select Exchange Verifications from within a loan file and Begin a New Order (Service Request).
- Choose
Argyleas the verification Provider. - Select a verification Product —
VOE/VOIorEmployment Re-verification. - Choose
Conventionalas the Program Code.
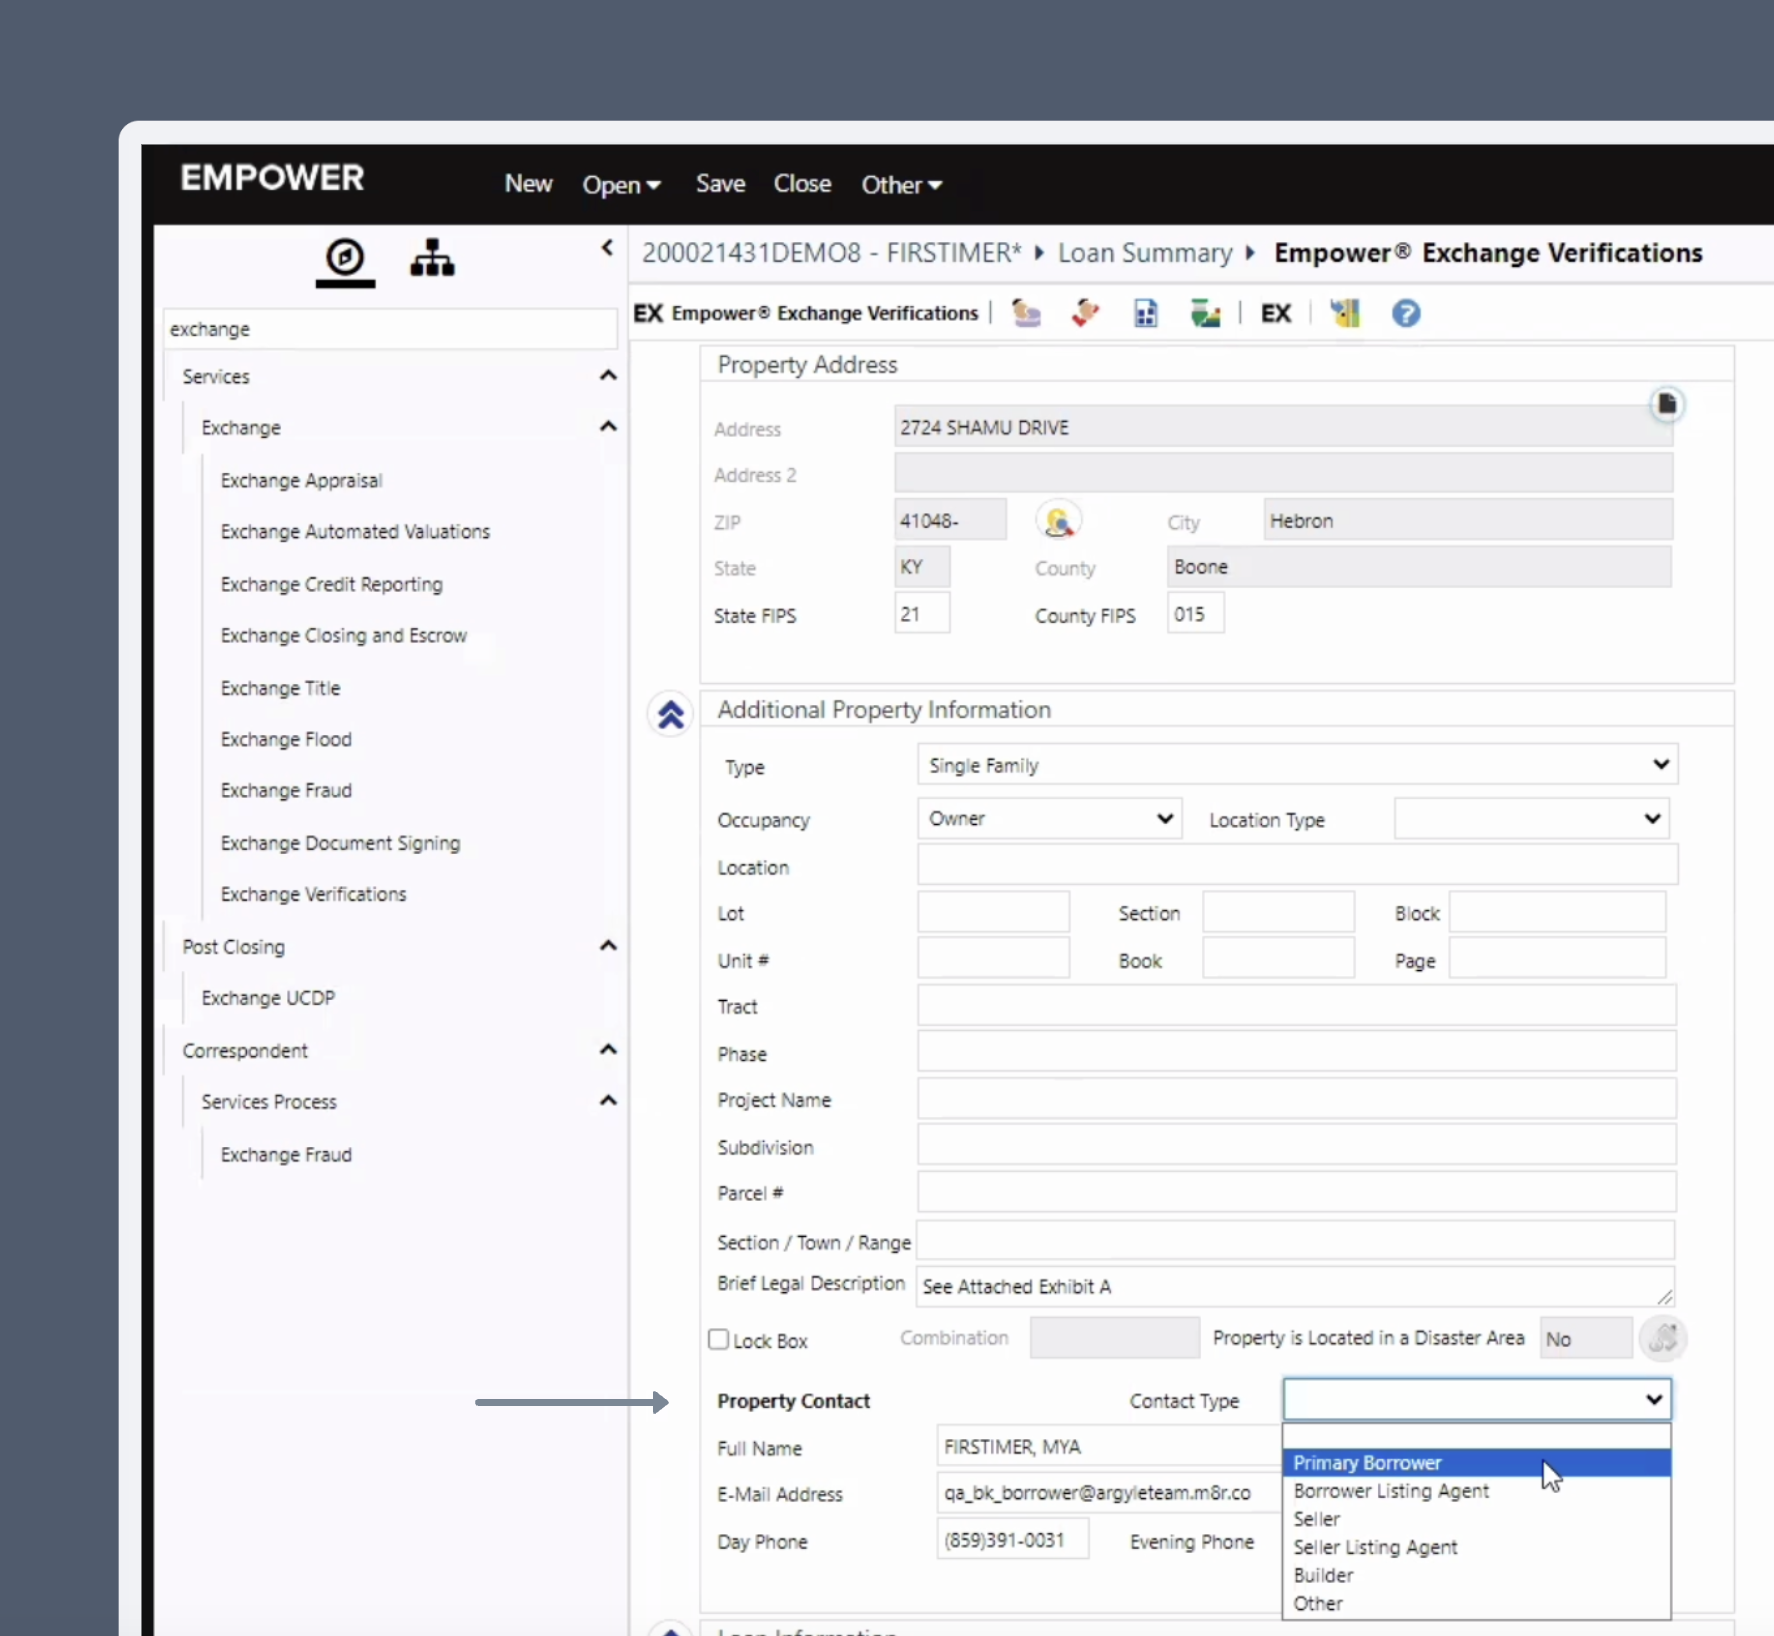
- In the Additional Property Information section, within the Contact Type dropdown select
Primary Borrower.
Argyle does not currently support multi-borrower orders — we recommend restricting verification orders to one borrower at a time through your Empower settings.
- Input the Full Name, E-Mail Address, and Day Phone of the borrower (if not already auto-populated).
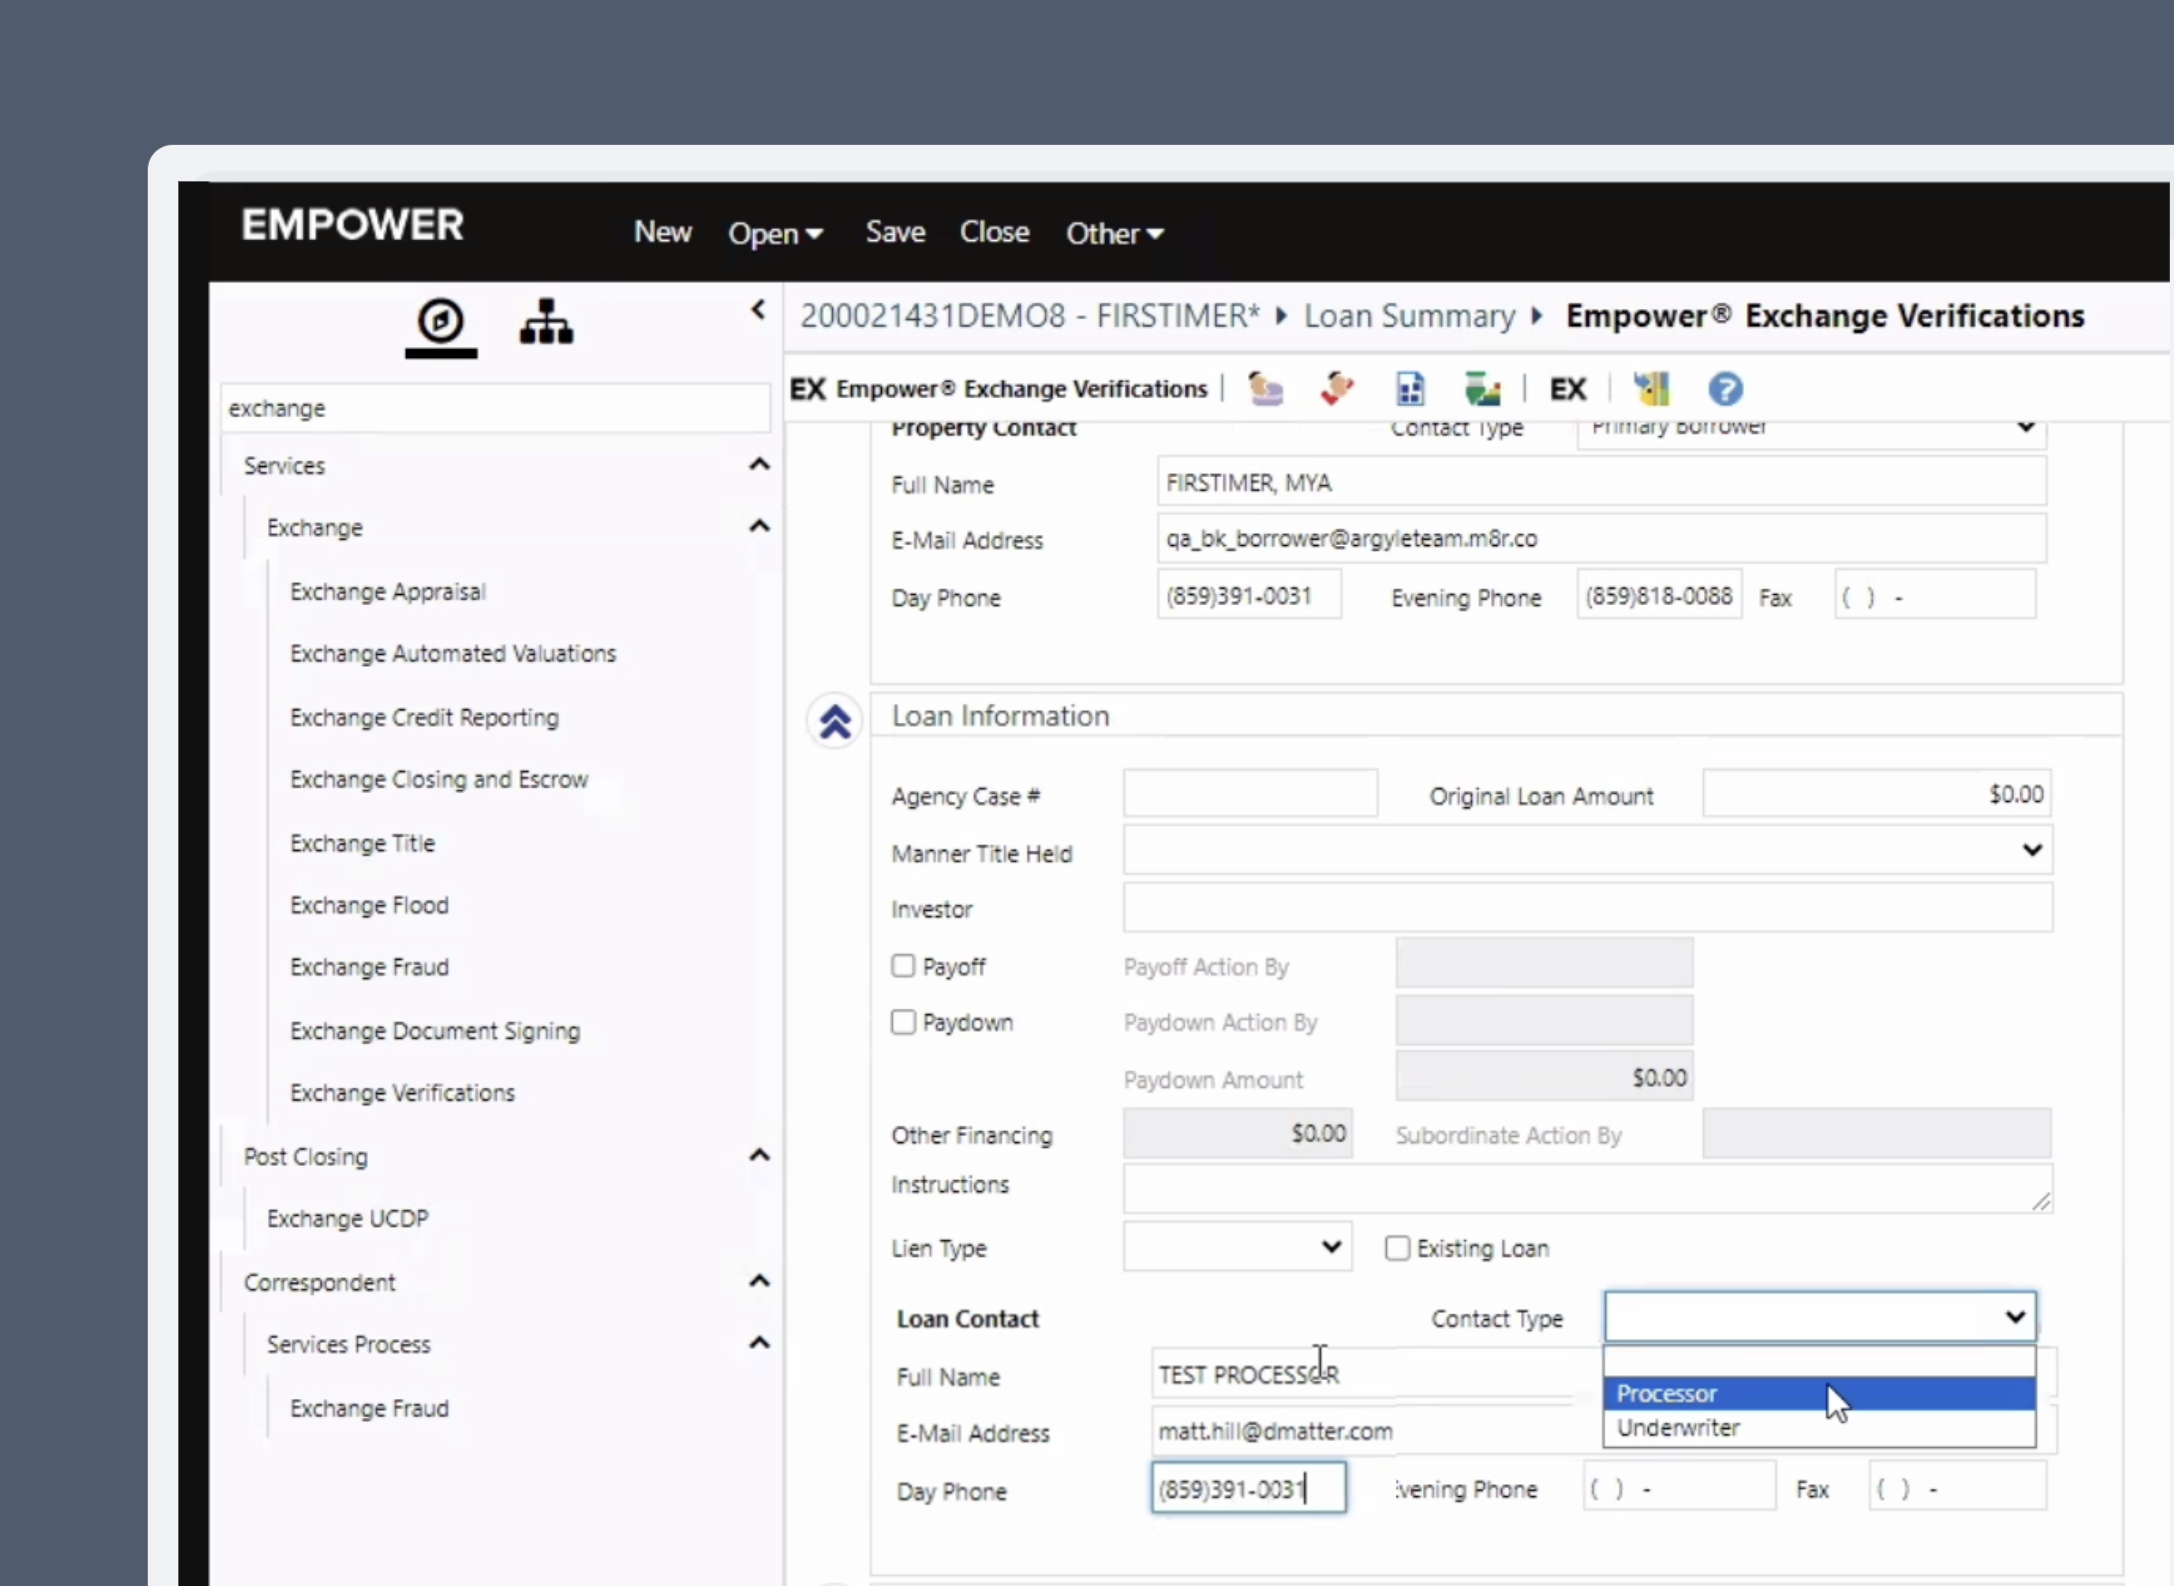
- In the Loan Information section, within the Contact Type dropdown select either
ProcessororUnderwriterdepending on the loan officer’s role. - Input the Full Name, E-Mail Address, and Day Phone of the loan officer (if not already auto-populated).
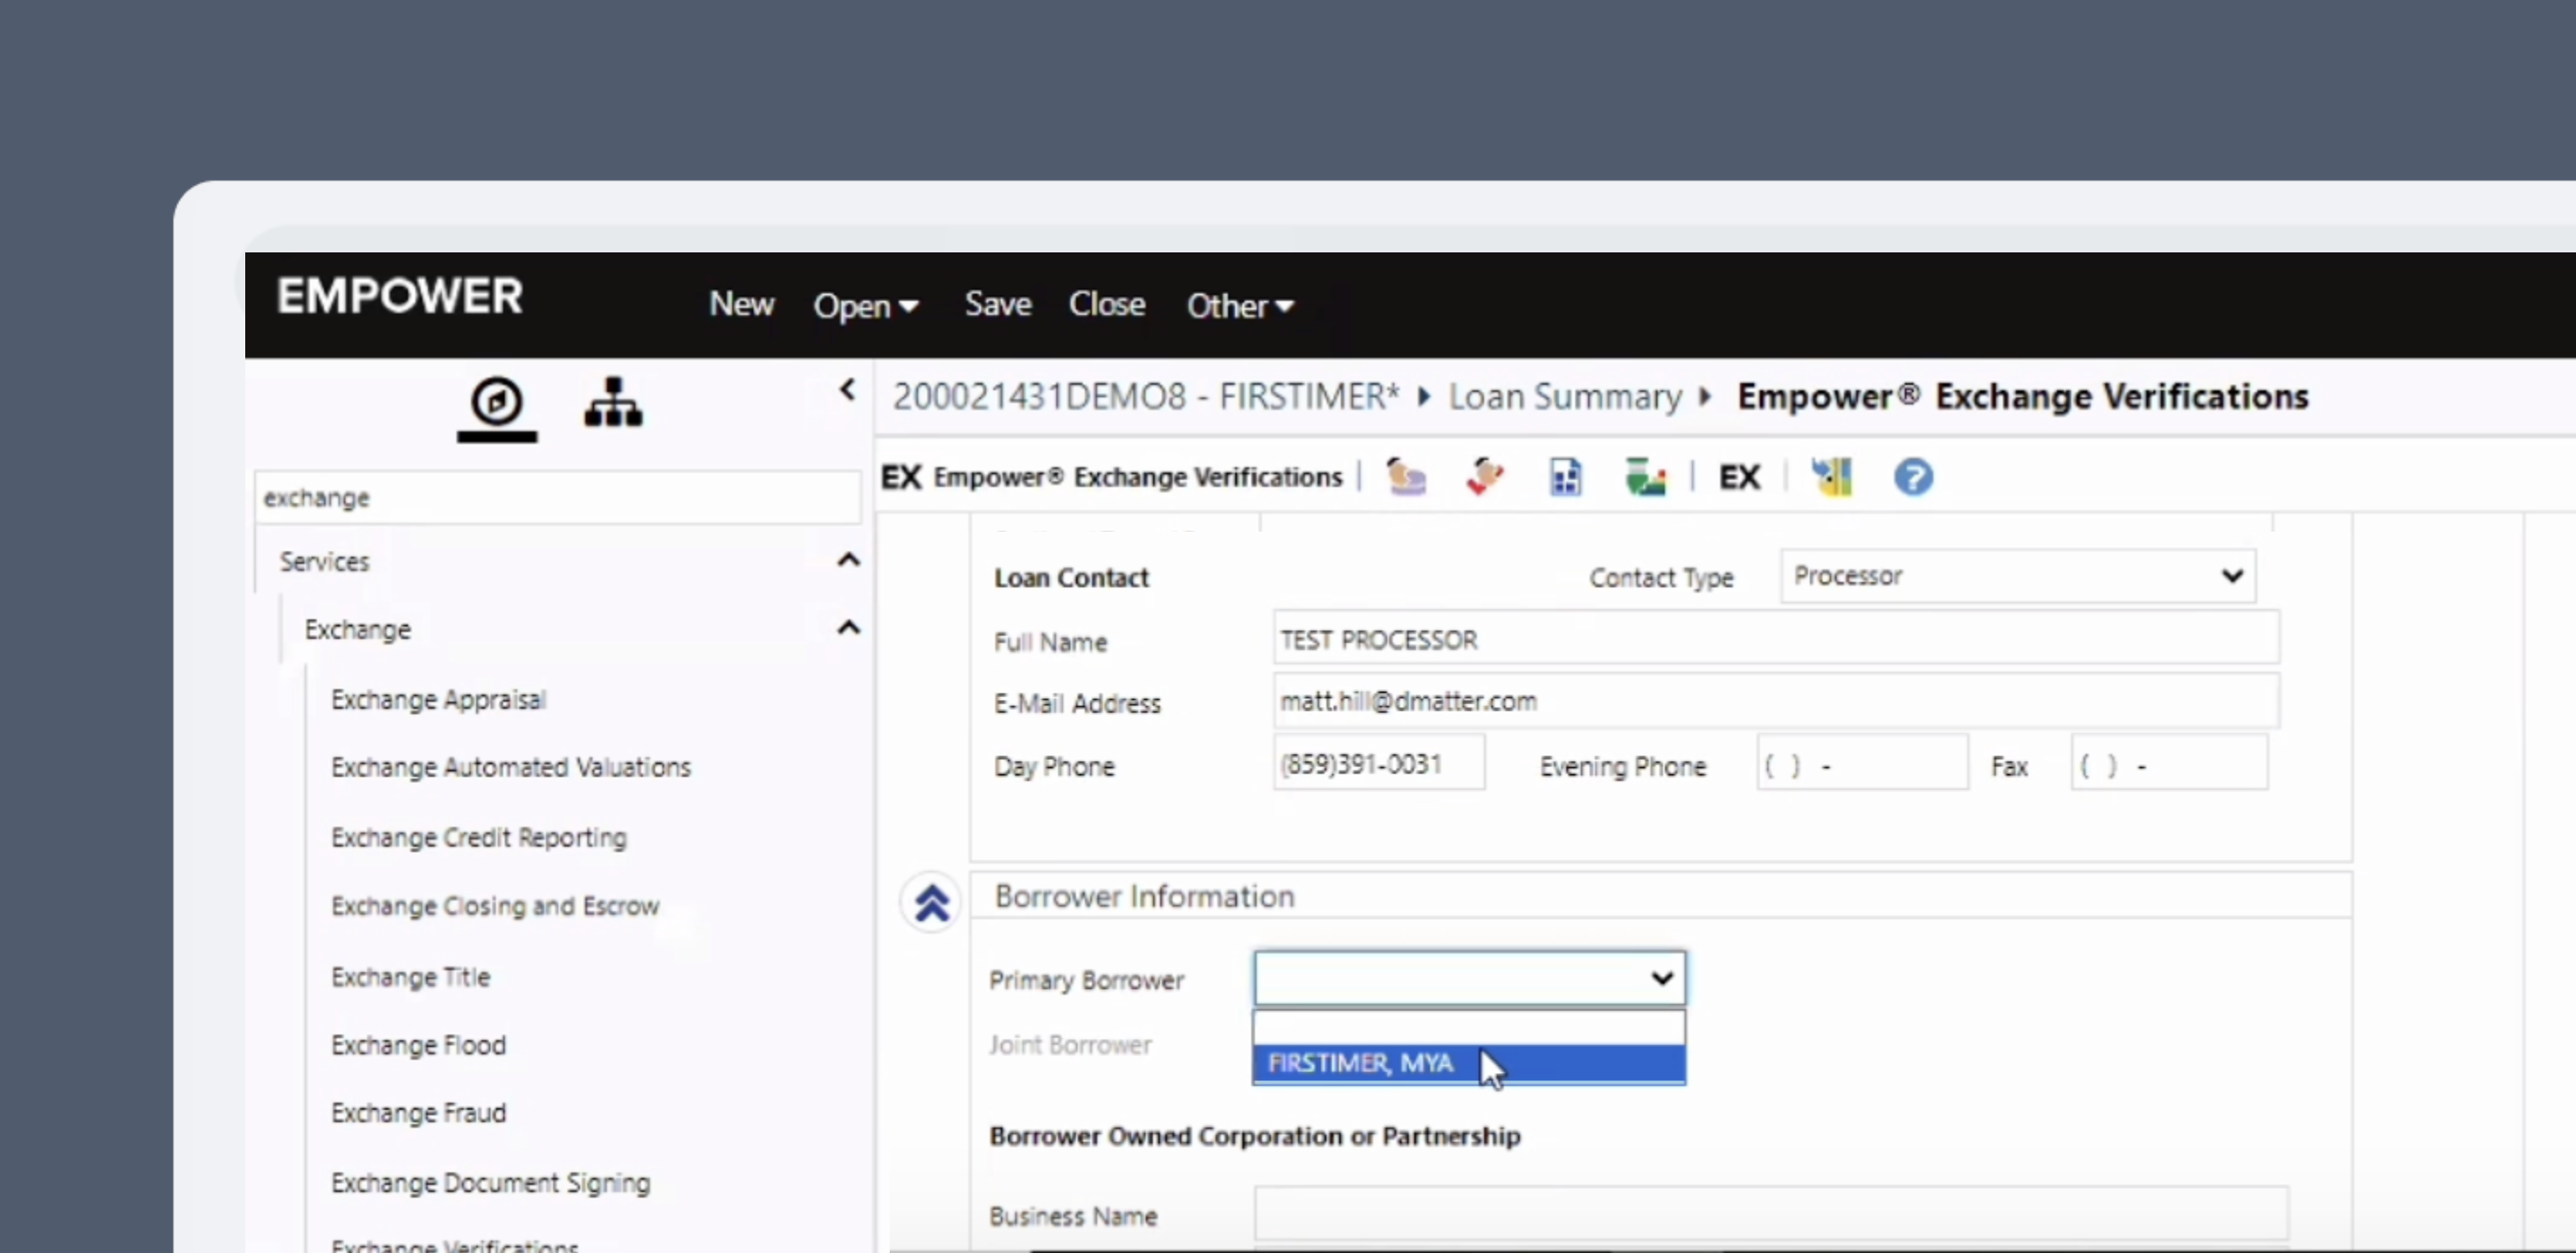
- In the Borrower Information section, within the Primary Borrower dropdown select the
[Name]of the primary borrower.
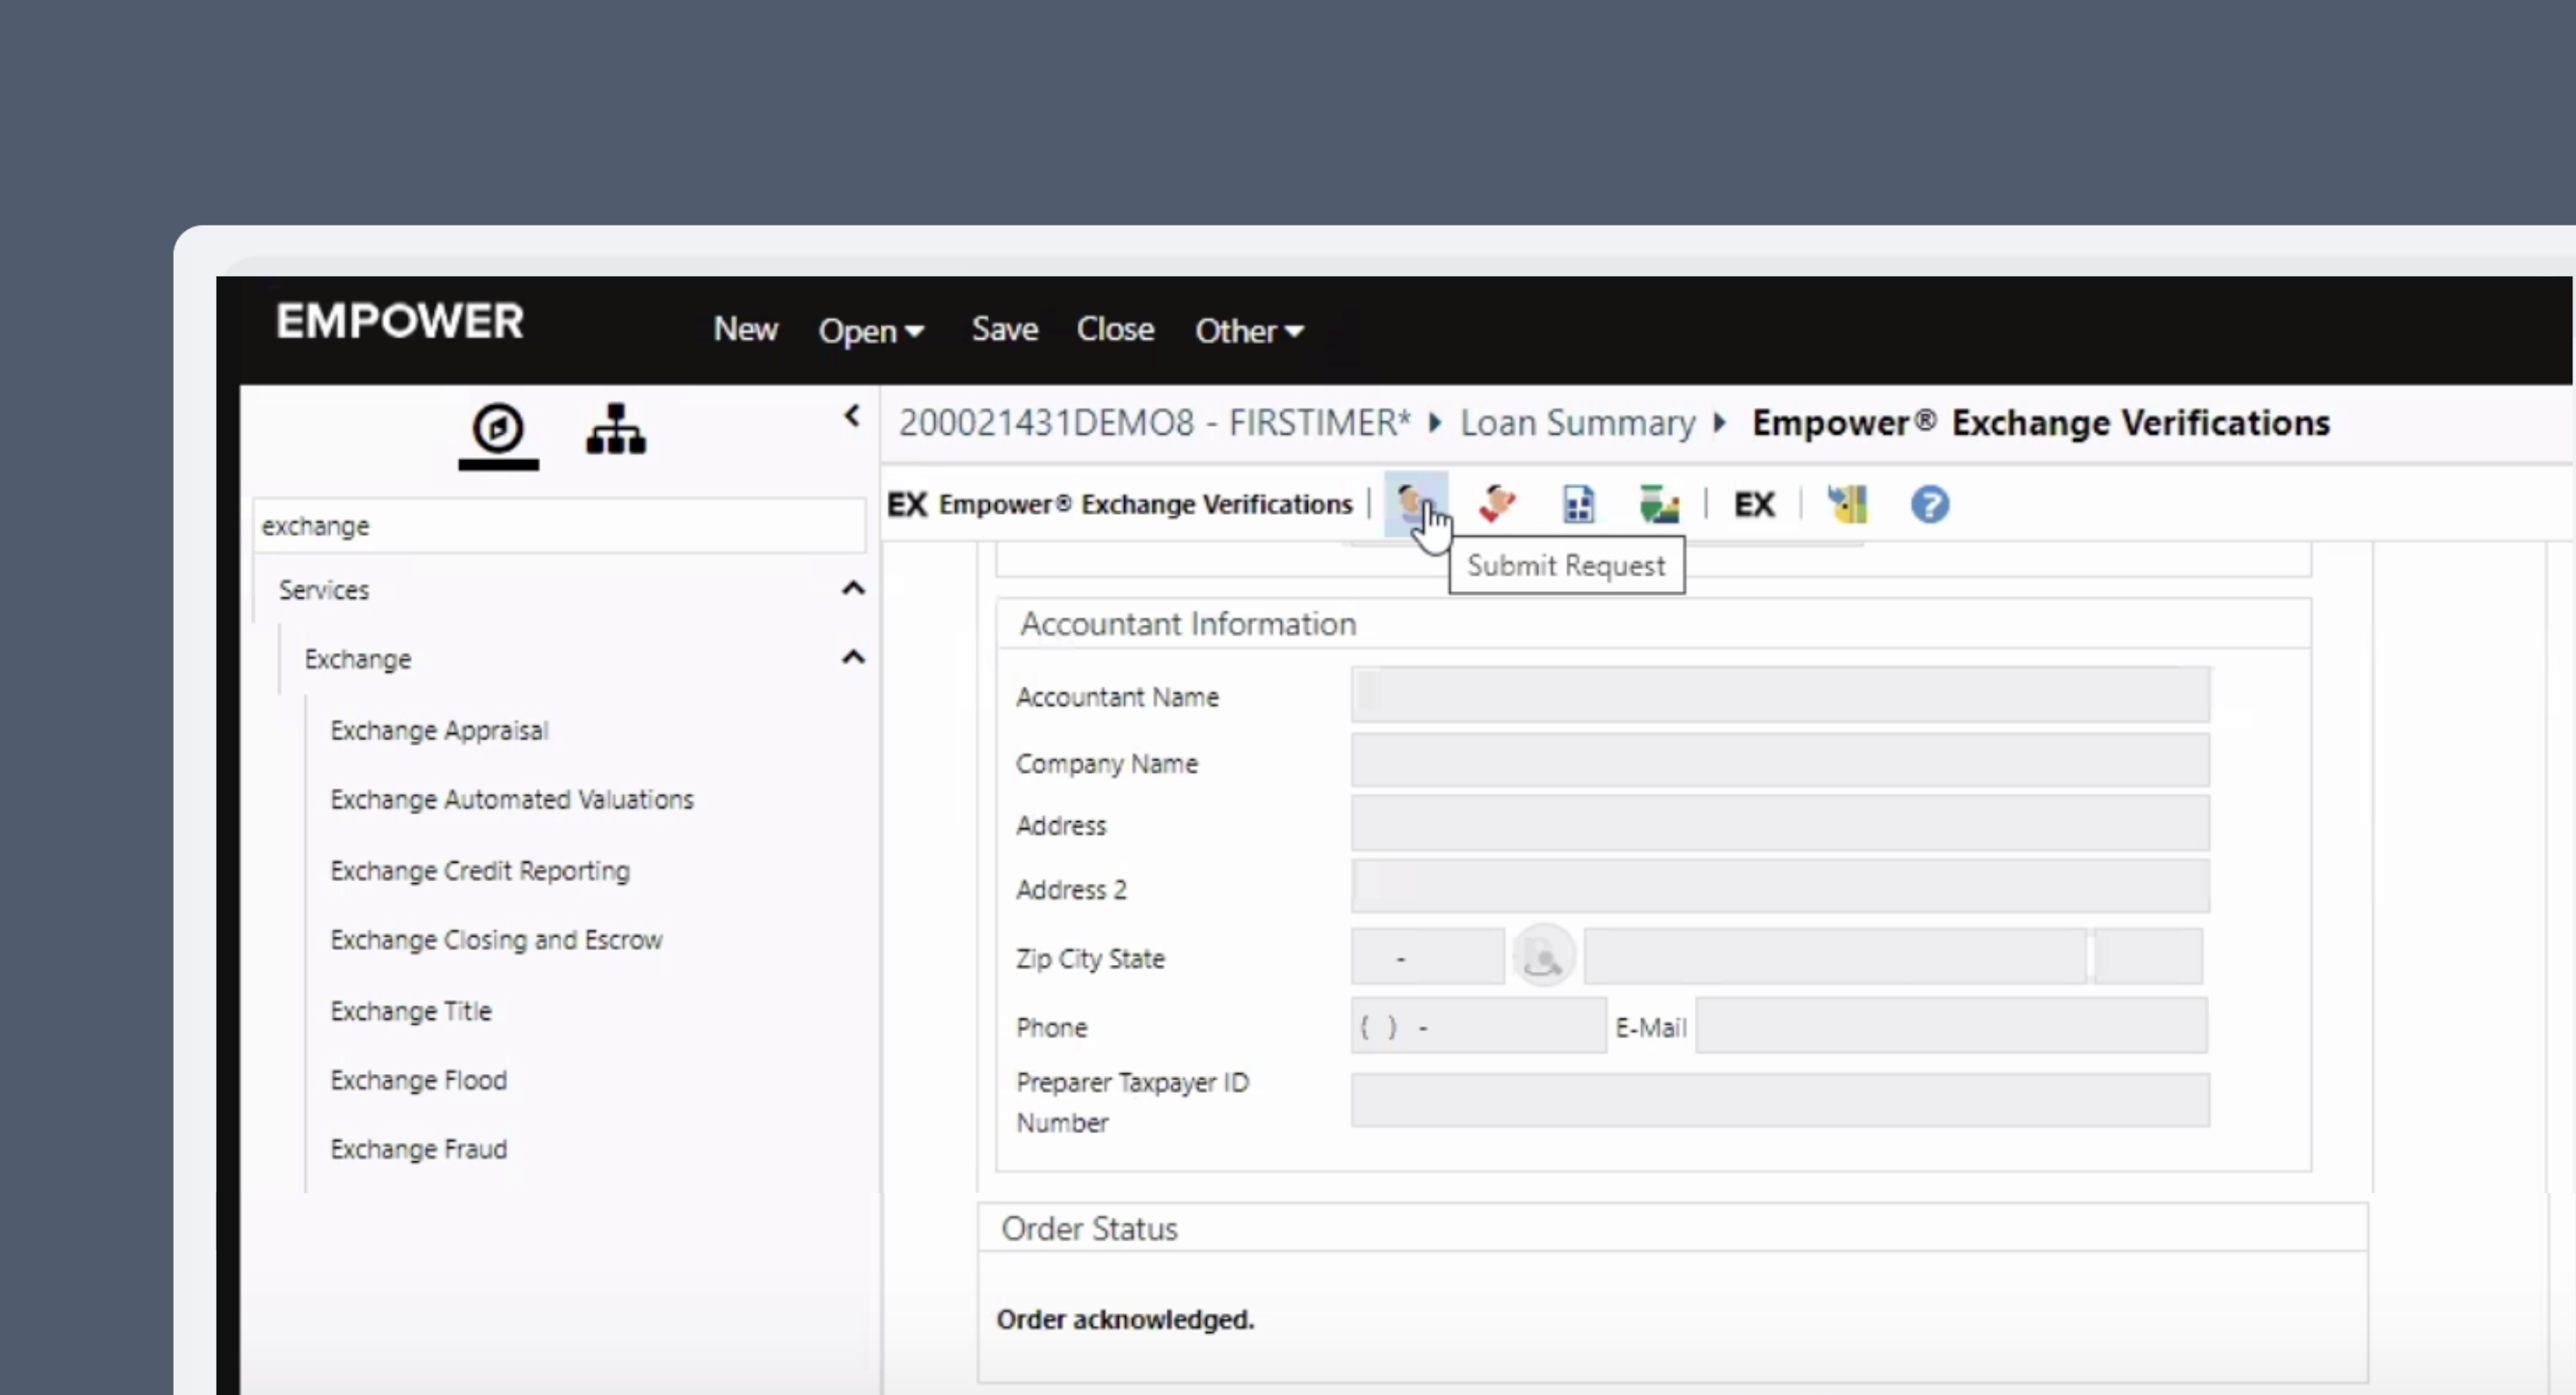
- Click Validate Submission Data in the toolbar to ensure all required fields have been filled.
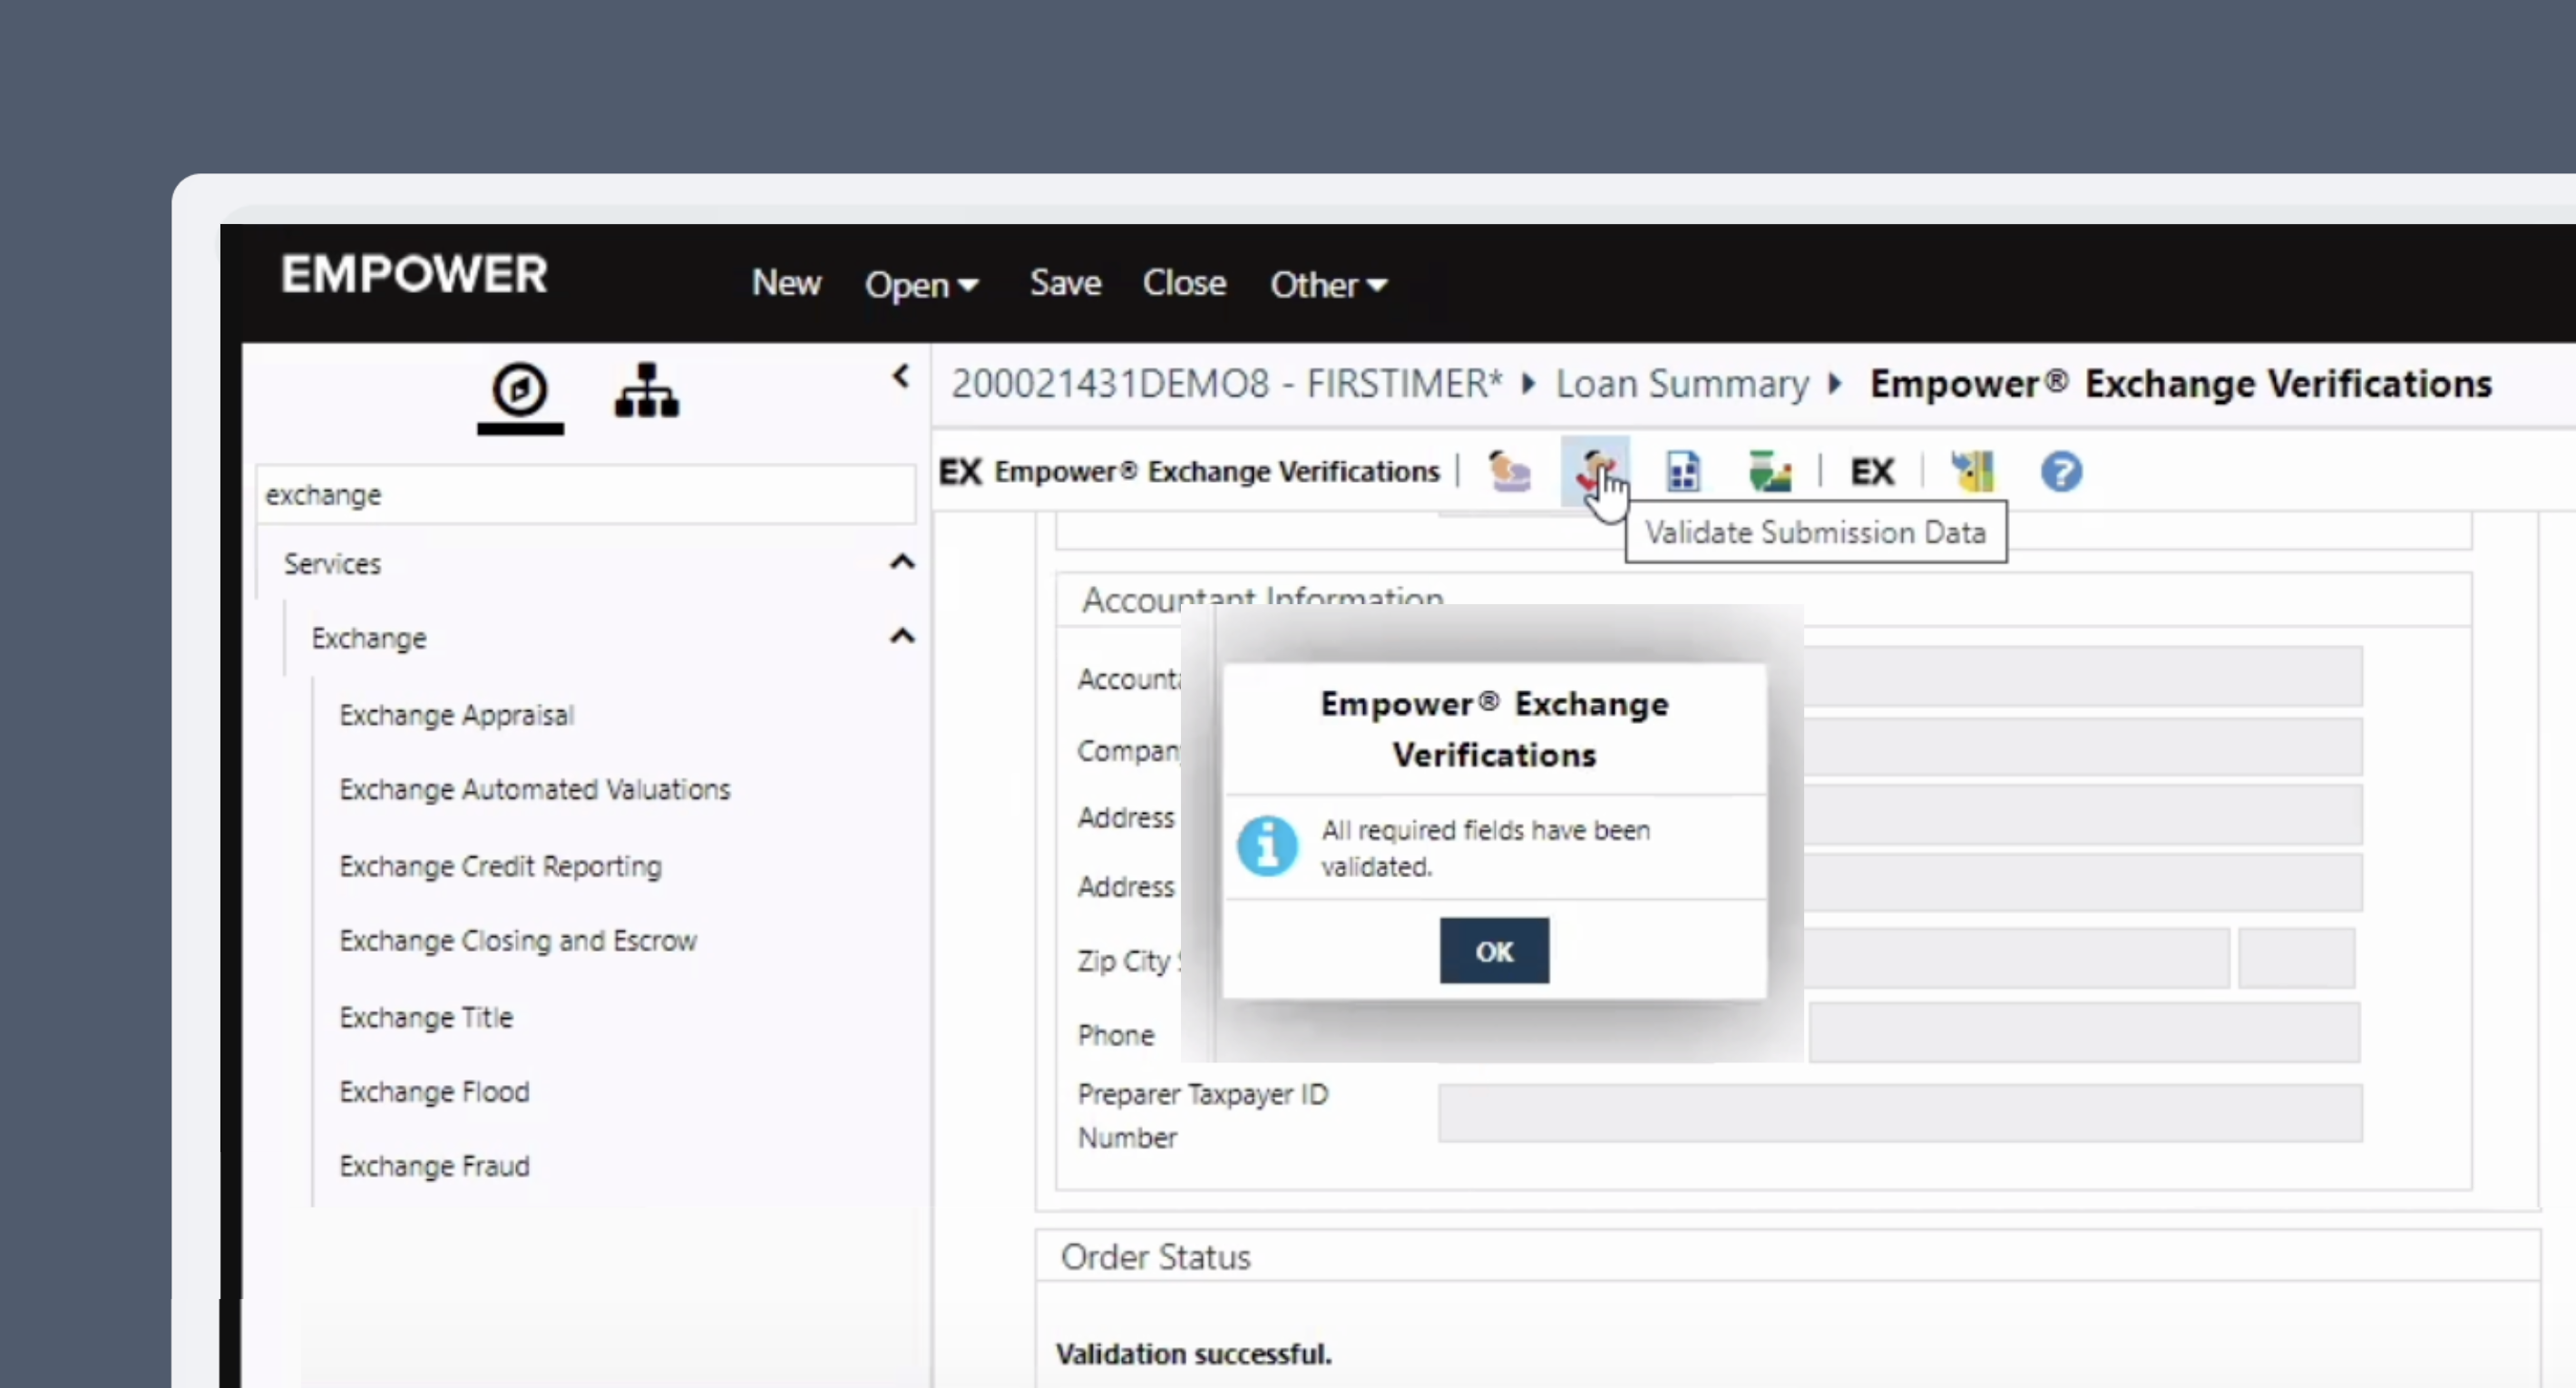
- Click Submit Request in the toolbar. An Order Status of
Ordered submittedfollowed byOrder acknowledgedwill appear at the bottom of the page.
- After an order is submitted, the borrower will be invited via text (SMS) and email to connect their payroll account(s) through Argyle.
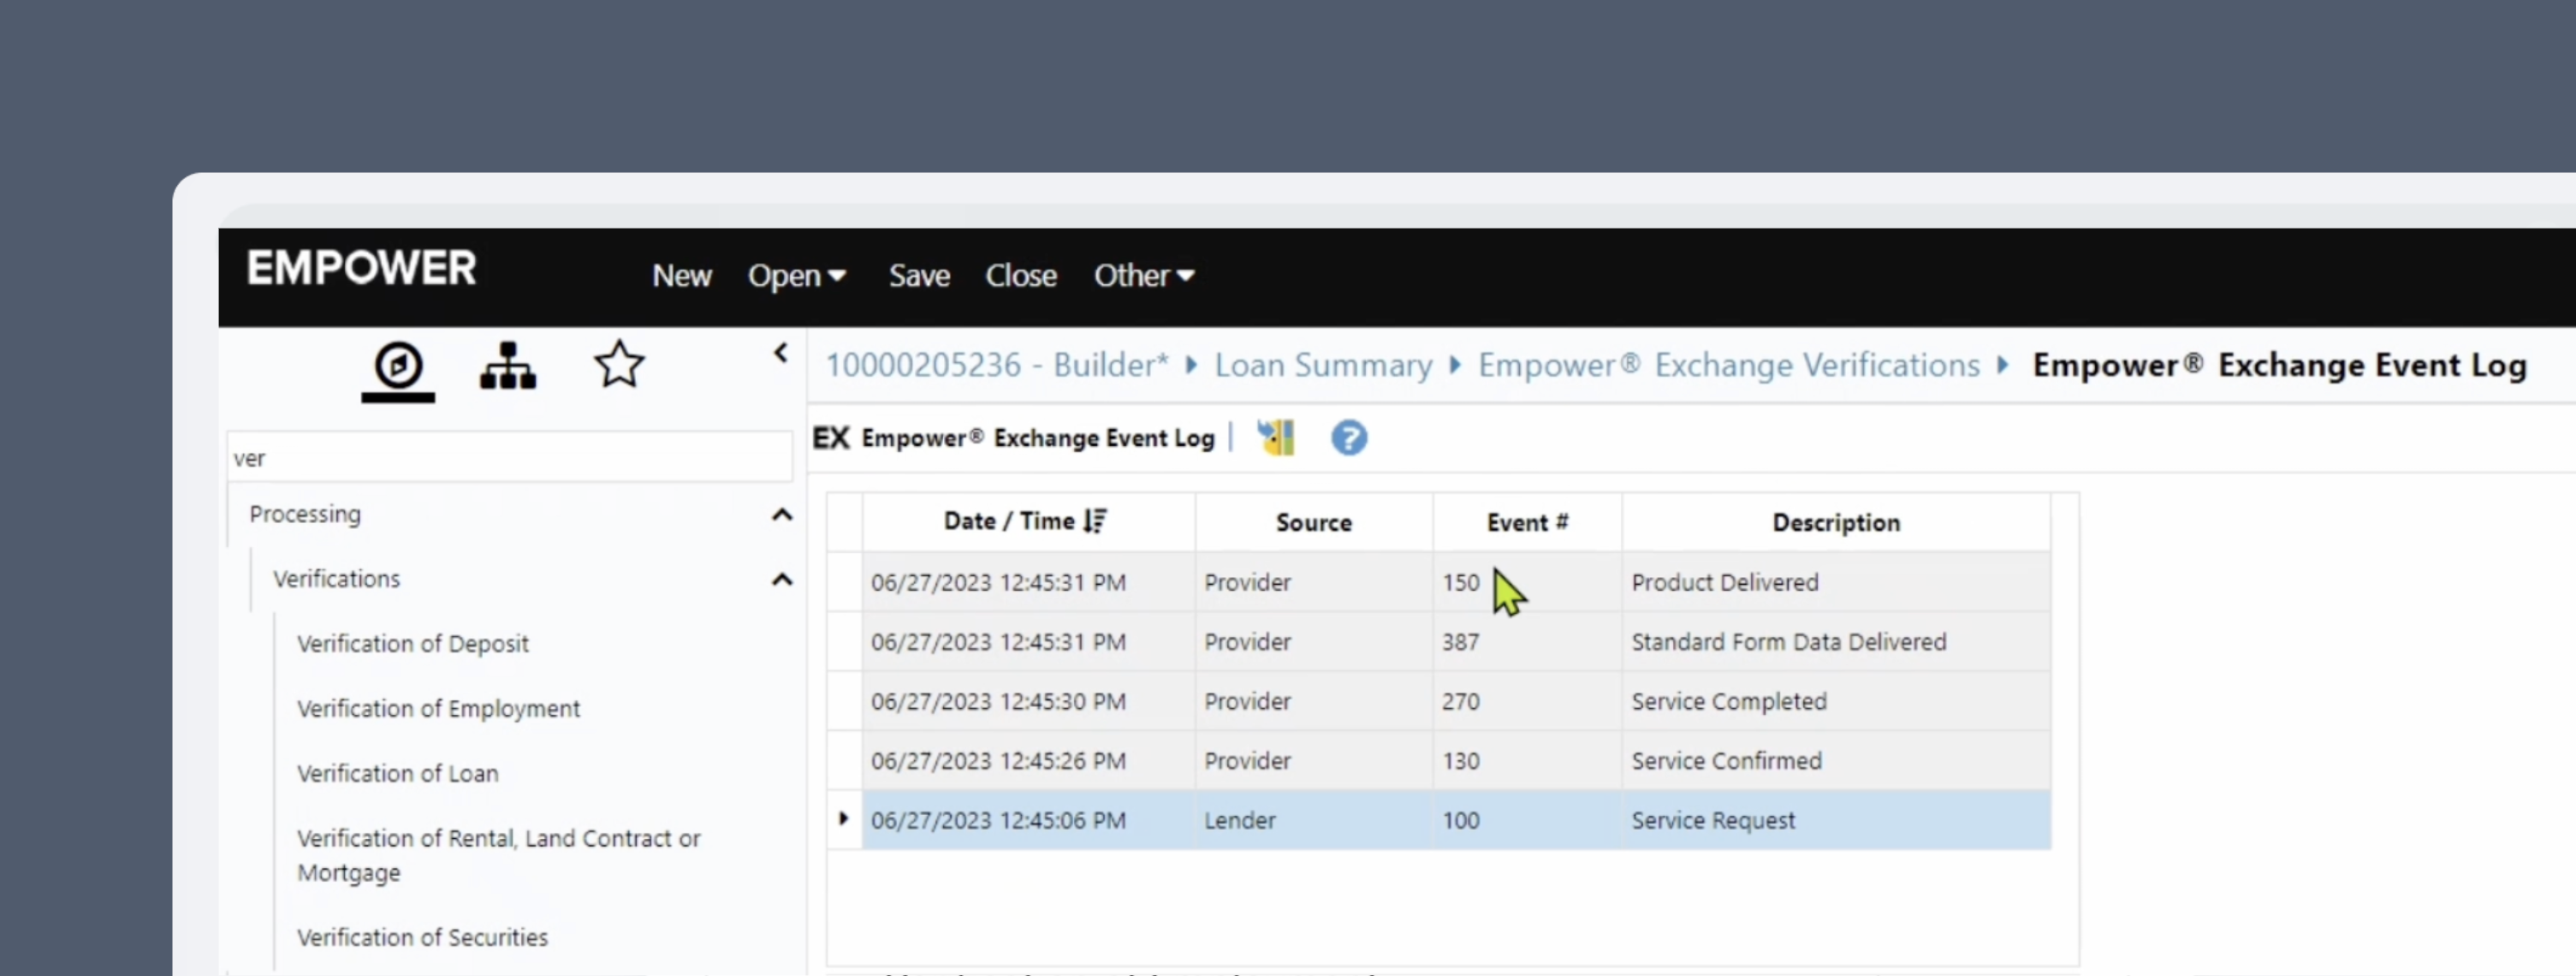
(Optional) Event notifications
Ask your Empower® admin to set up event notifications, so when different events are received (such as a150 — Product Delivered event) loan officers are notified that Argyle verifications reports and the borrower’s payroll documents are now available in the Empower® Document Repository.
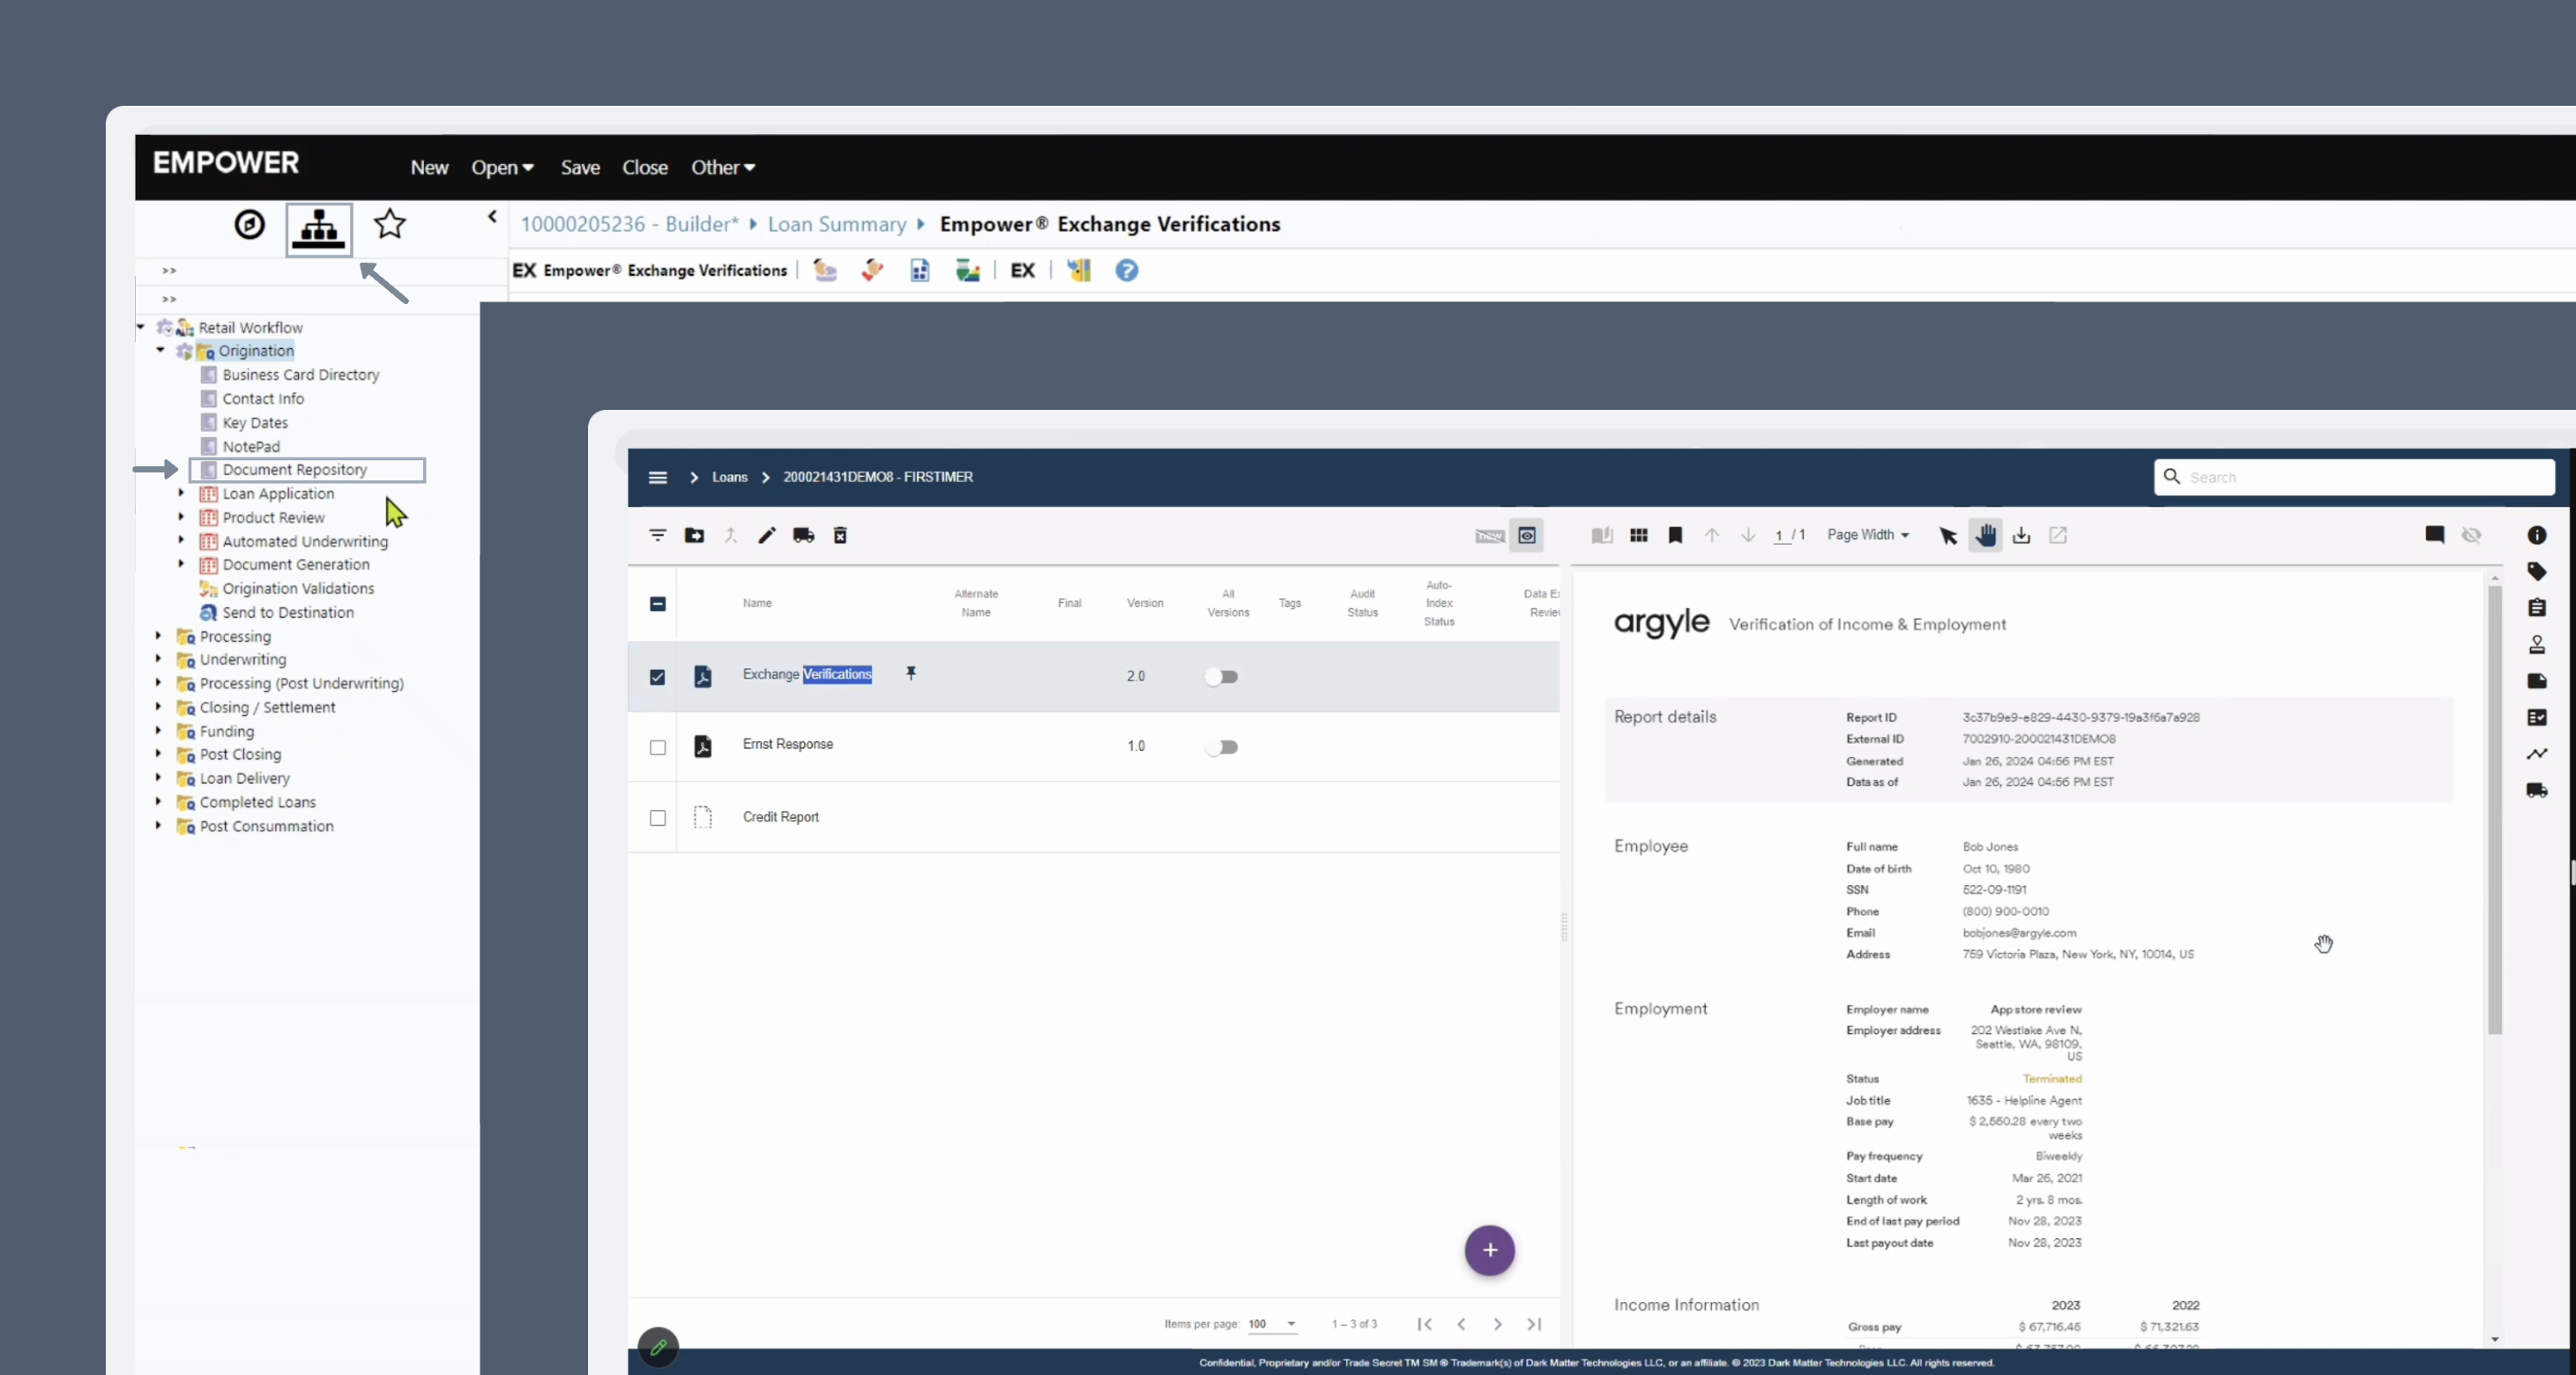
Retrieving reports and documents
SelectDocument Repository in the sidebar to view VOI and VOE reports, W-2s, and paystubs retrieved from the borrower’s payroll account(s) once an order has completed.
Day 1 Certainty® and AIM
Argyle’s income and employment verification reports provide lenders an automated way to achieve Day 1 Certainty® through Fannie Mae’s Desktop Underwriter® (DU®) validation service and assessment of borrower income and employment through Freddie Mac’s asset and income modeler (AIM).Please reach out to your Argyle Customer Success Manager to enable Day 1 Certainty® and AIM for verification reports.
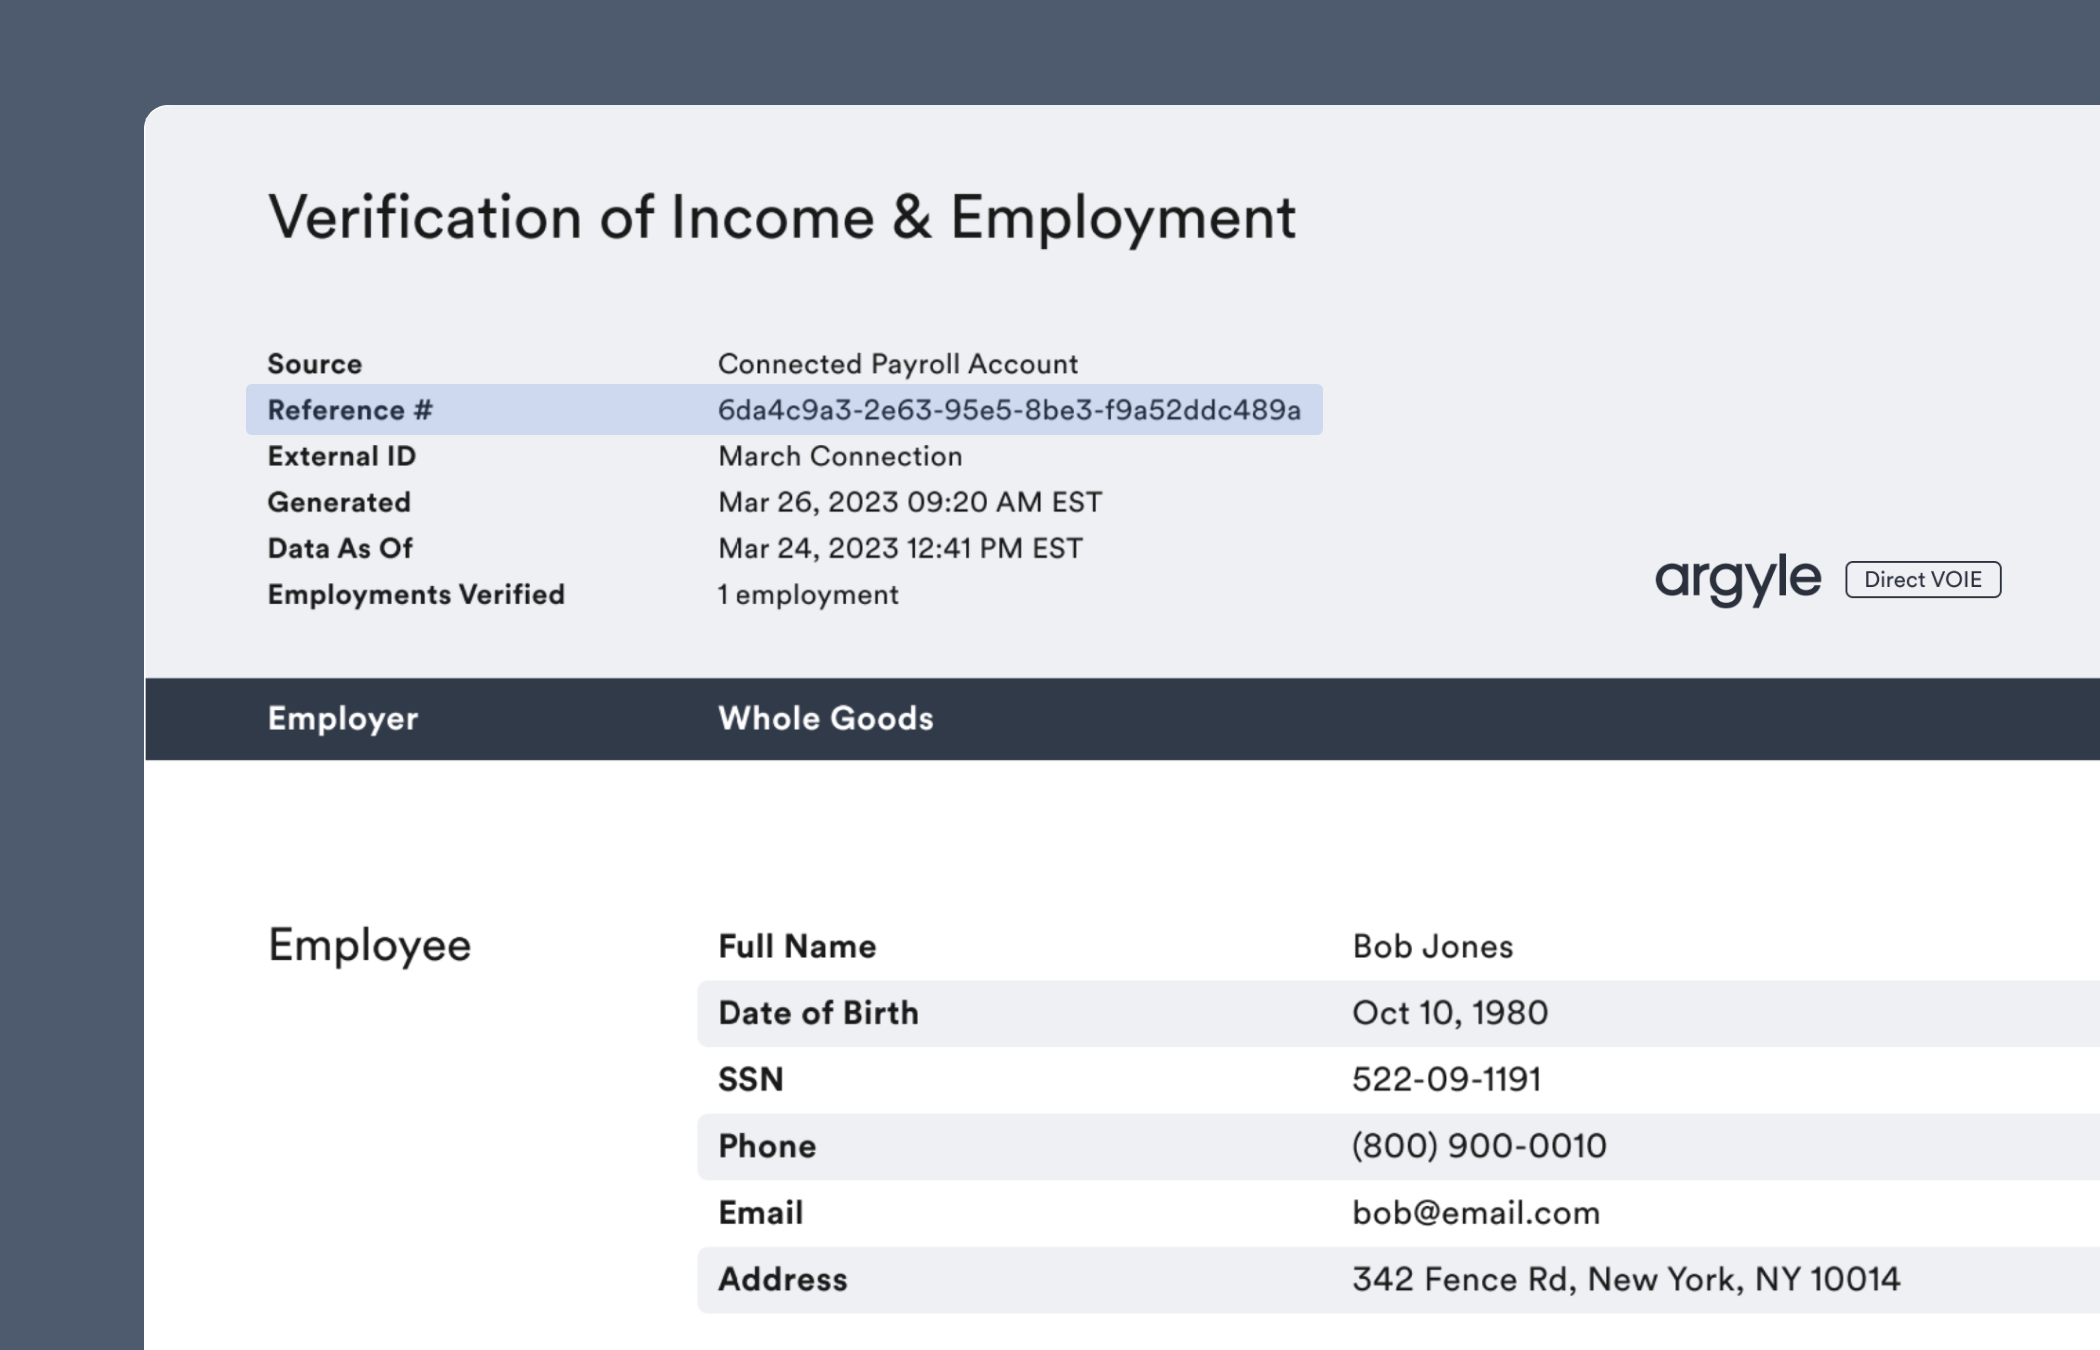
- If the loan is eligible for Day 1 Certainty® based on the borrower’s income and employment data, a
DU reference numberwill be listed at the top of the verification report:
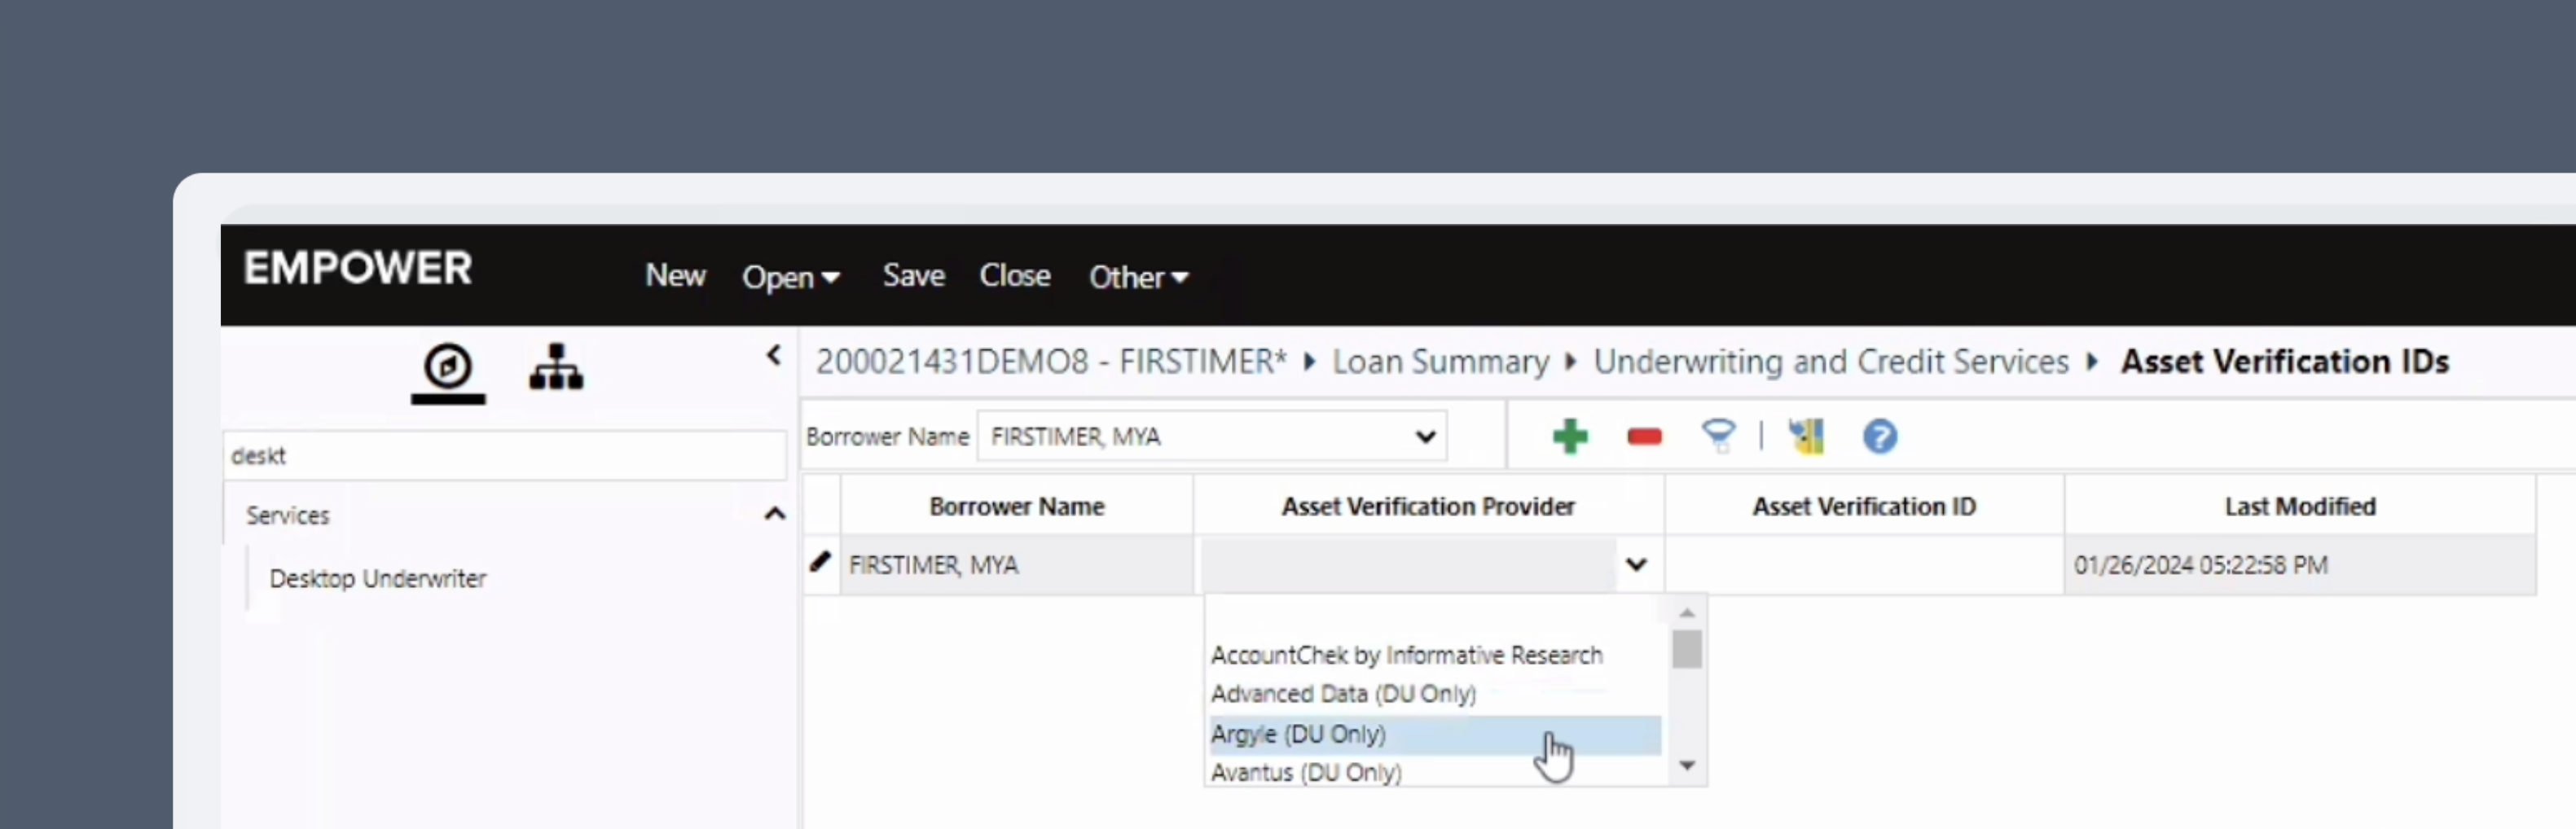
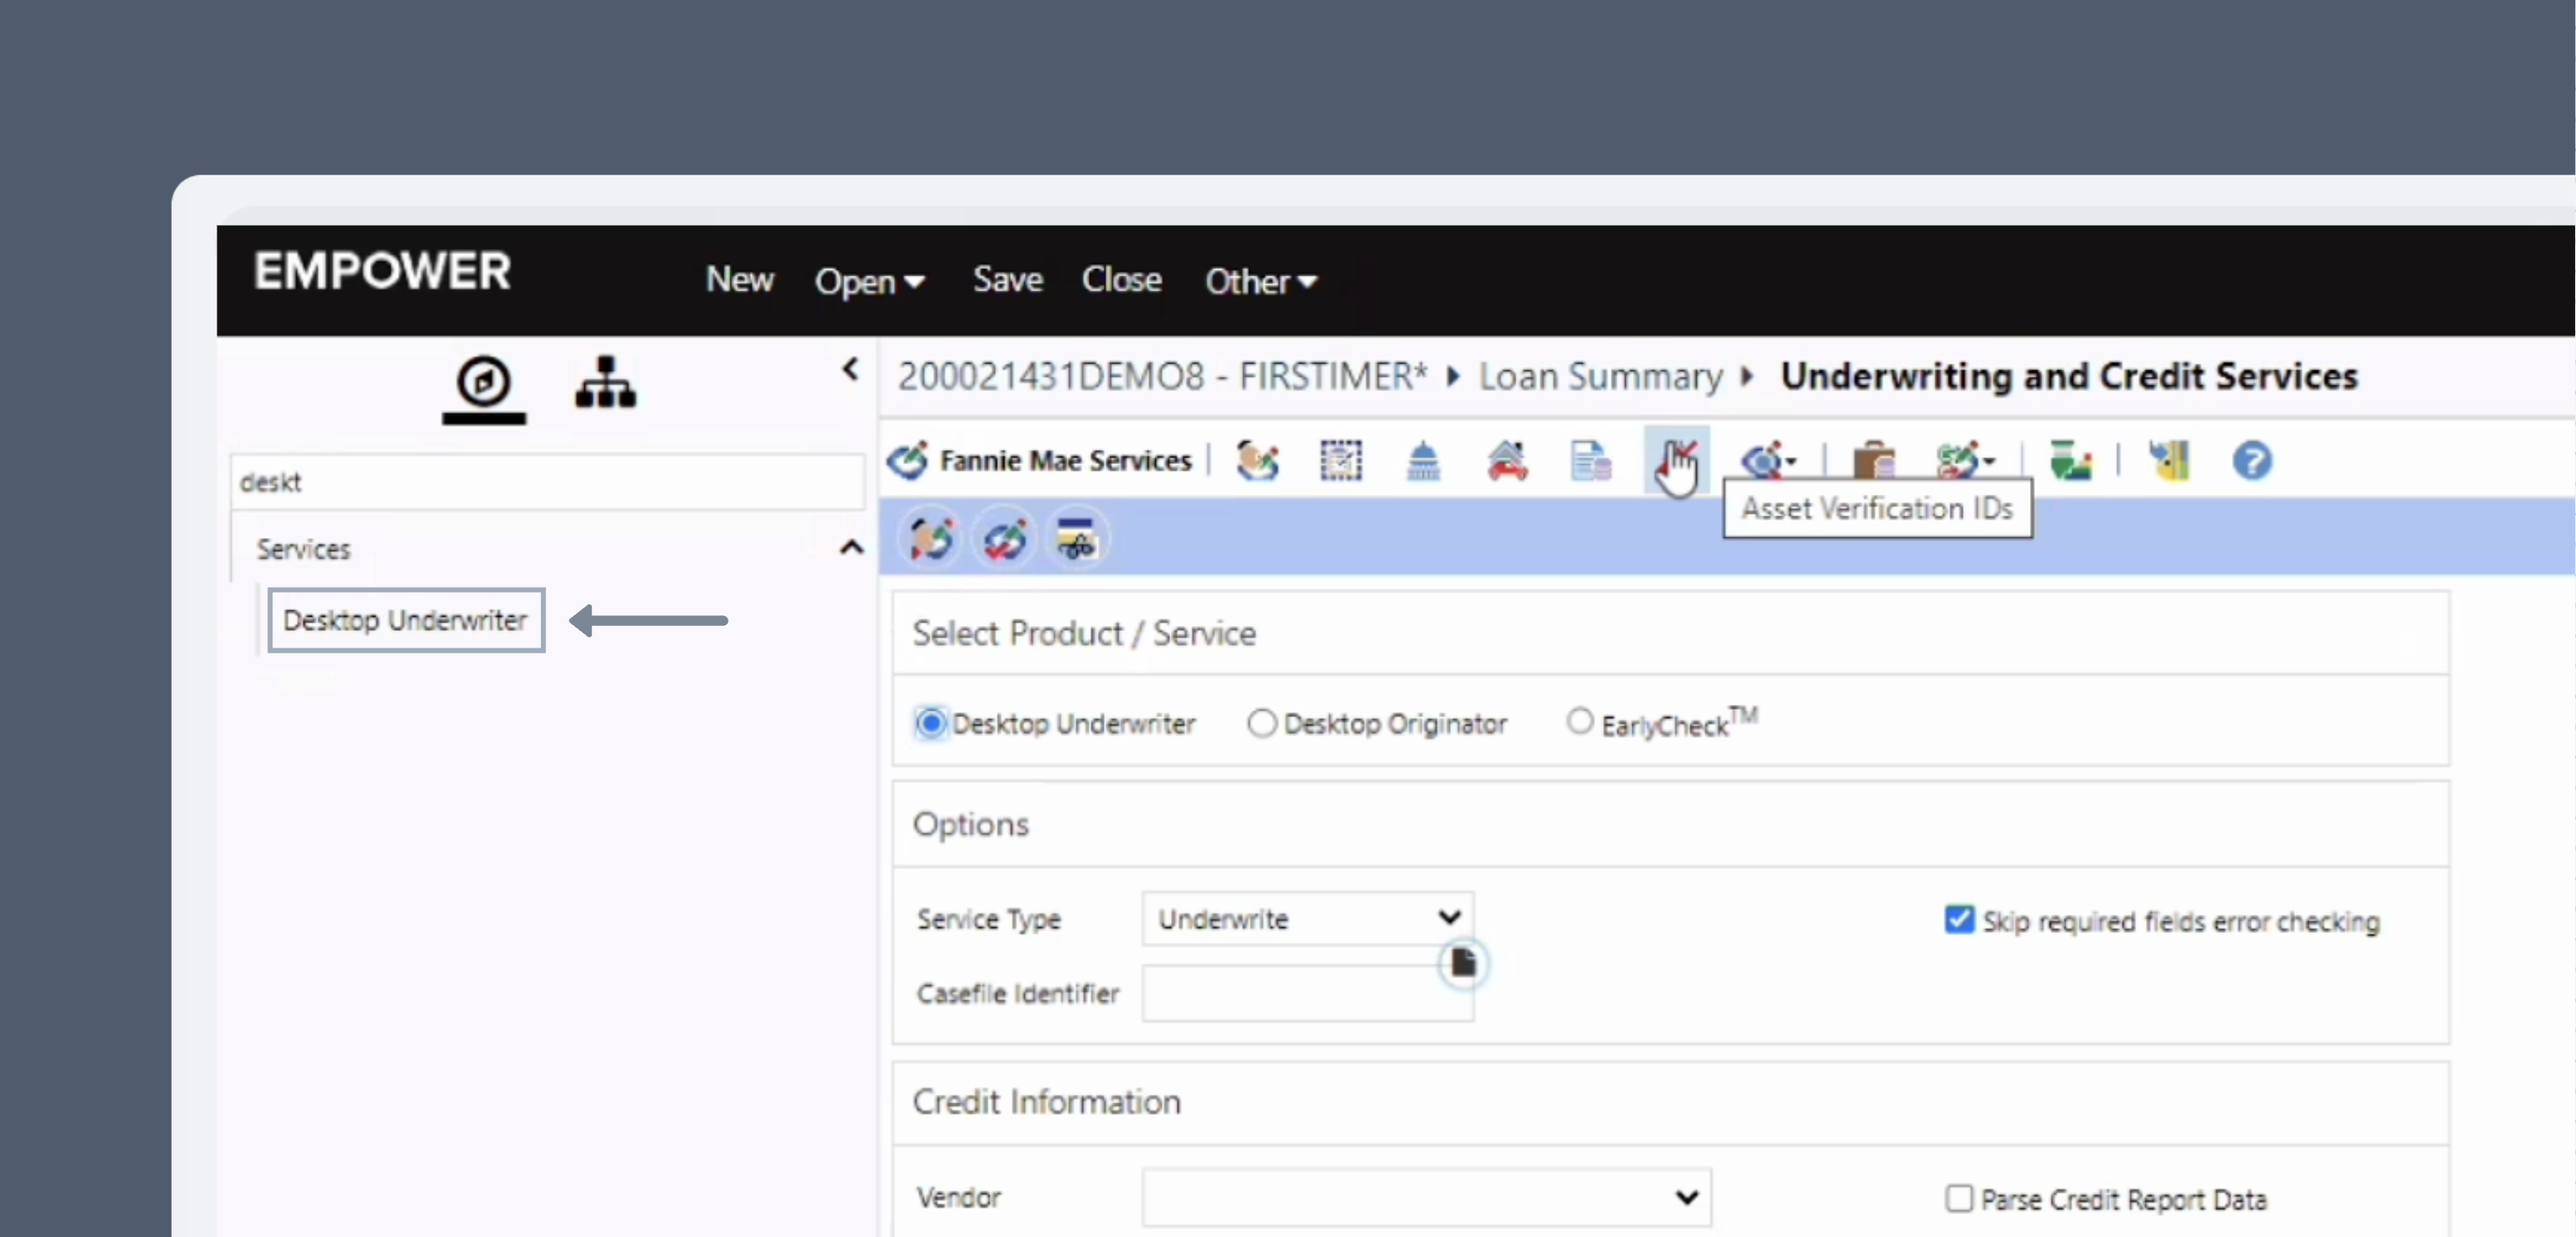
- Open Desktop Underwriter from the sidebar, then click Asset Verification IDs in the toolbar.
- Select a borrower from the Borrower Name dropdown, then click Add.
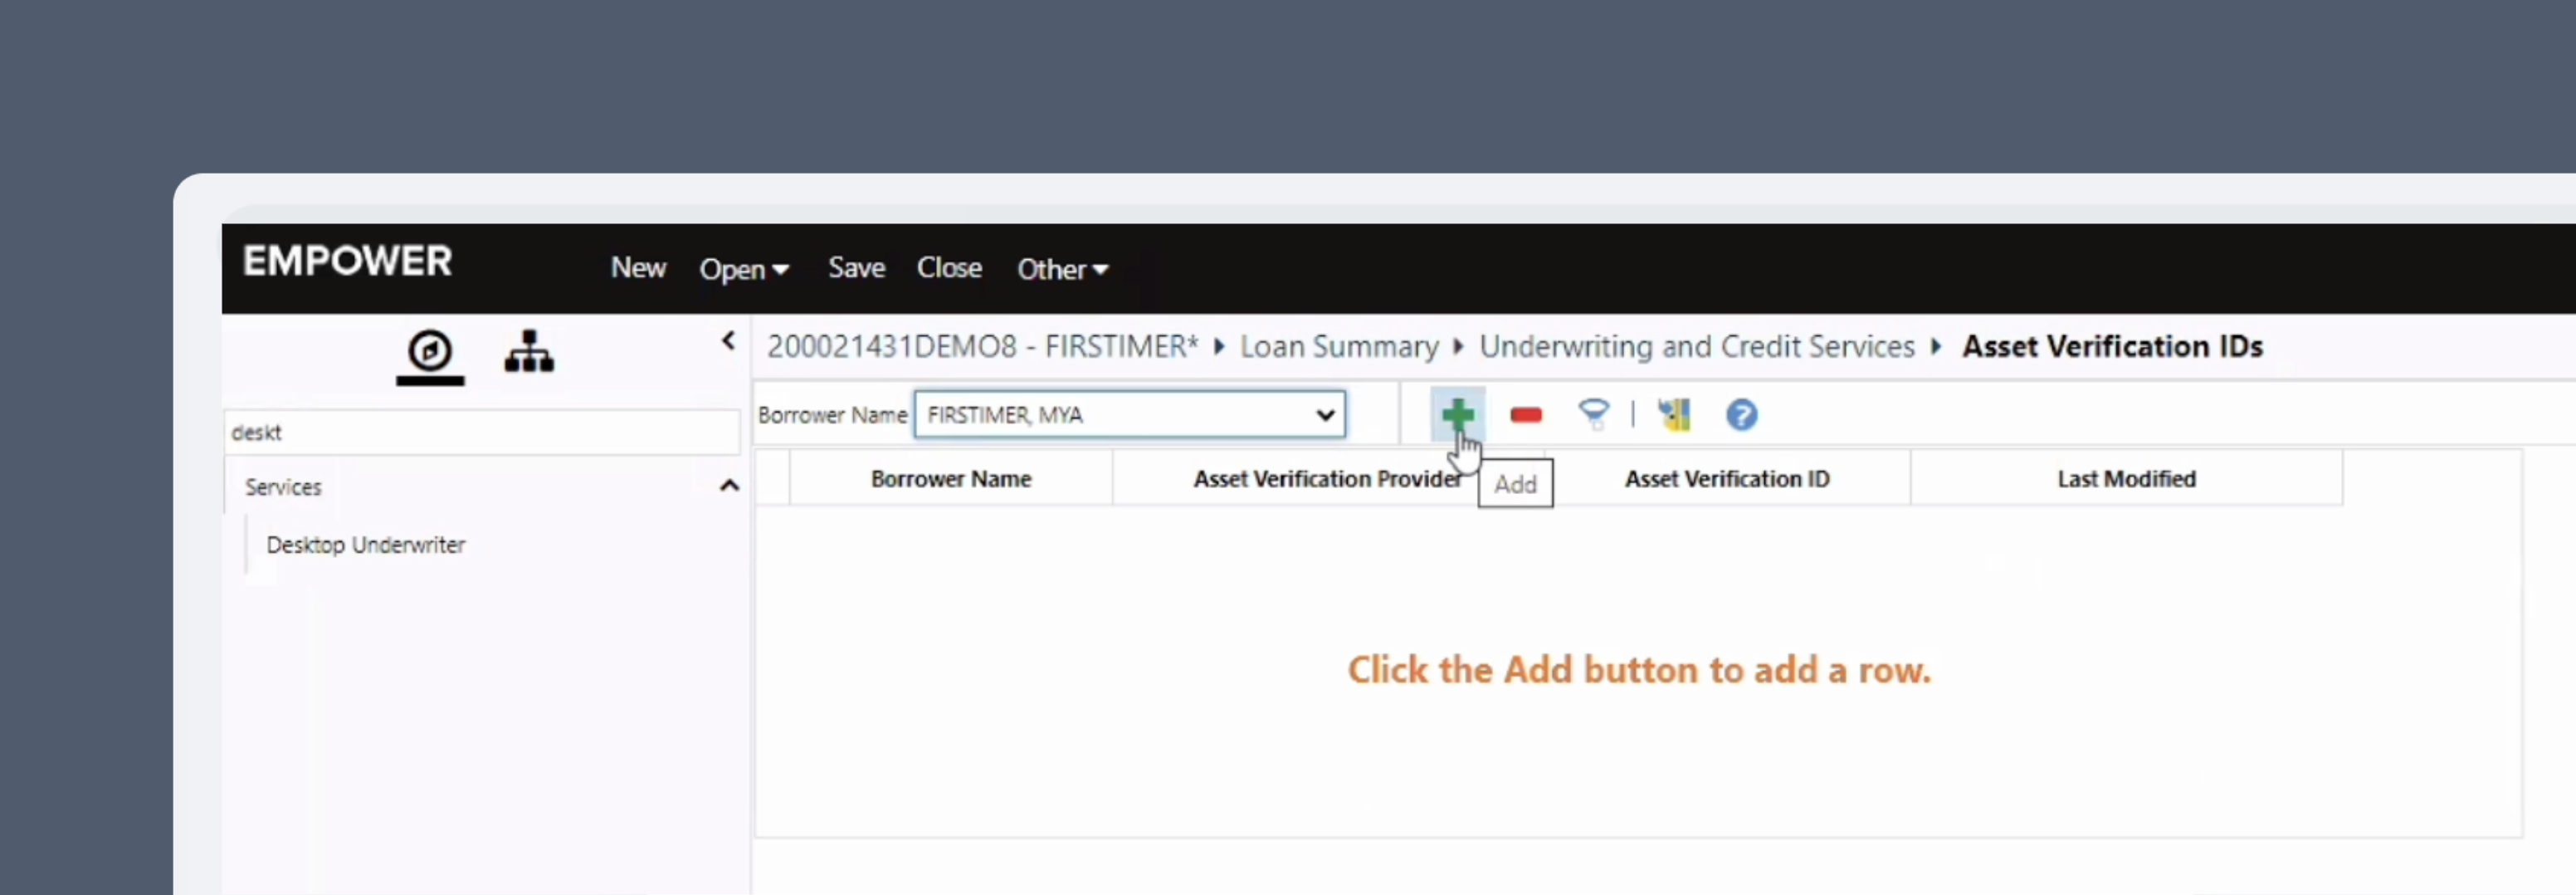
- Select
Argyle (DU Only)from the Asset Verification Provider dropdown. Then enter theDU reference numberin the Asset Verification ID field.