How to add your team members
- Sign in to Argyle Console with an Admin account.
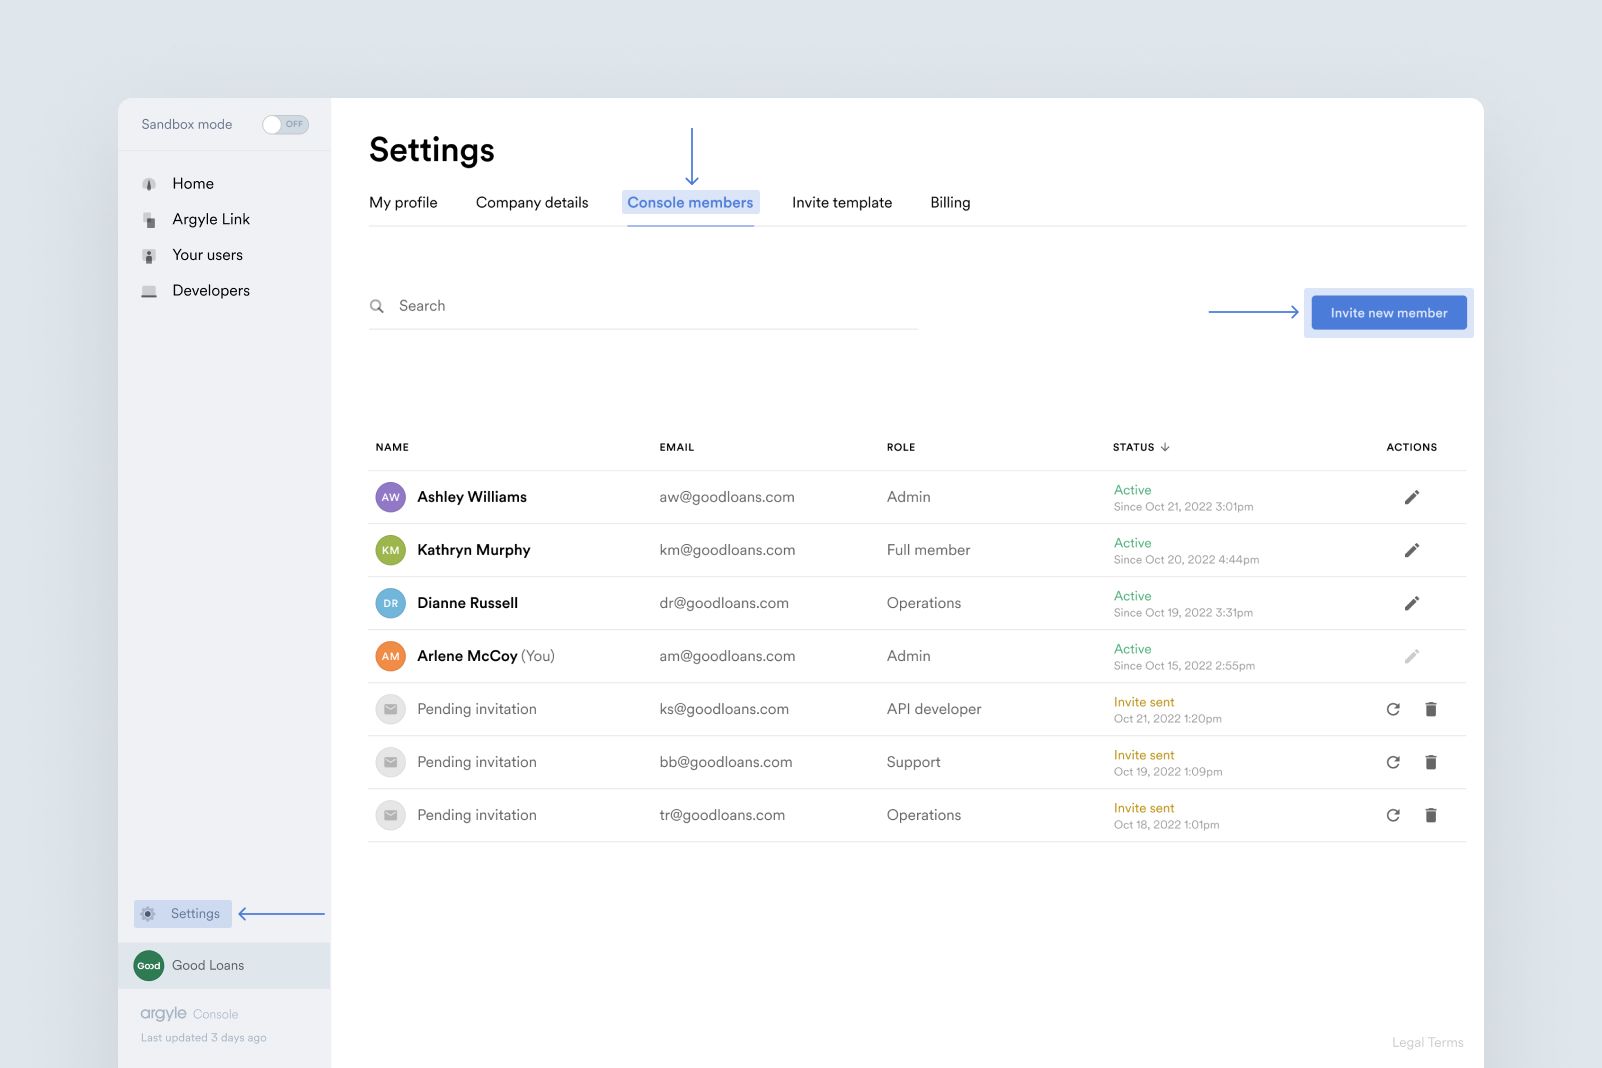
- Navigate to the Settings menu.
- View the Console members tab, which lists all the members currently added to Console.
- Select Invite member.
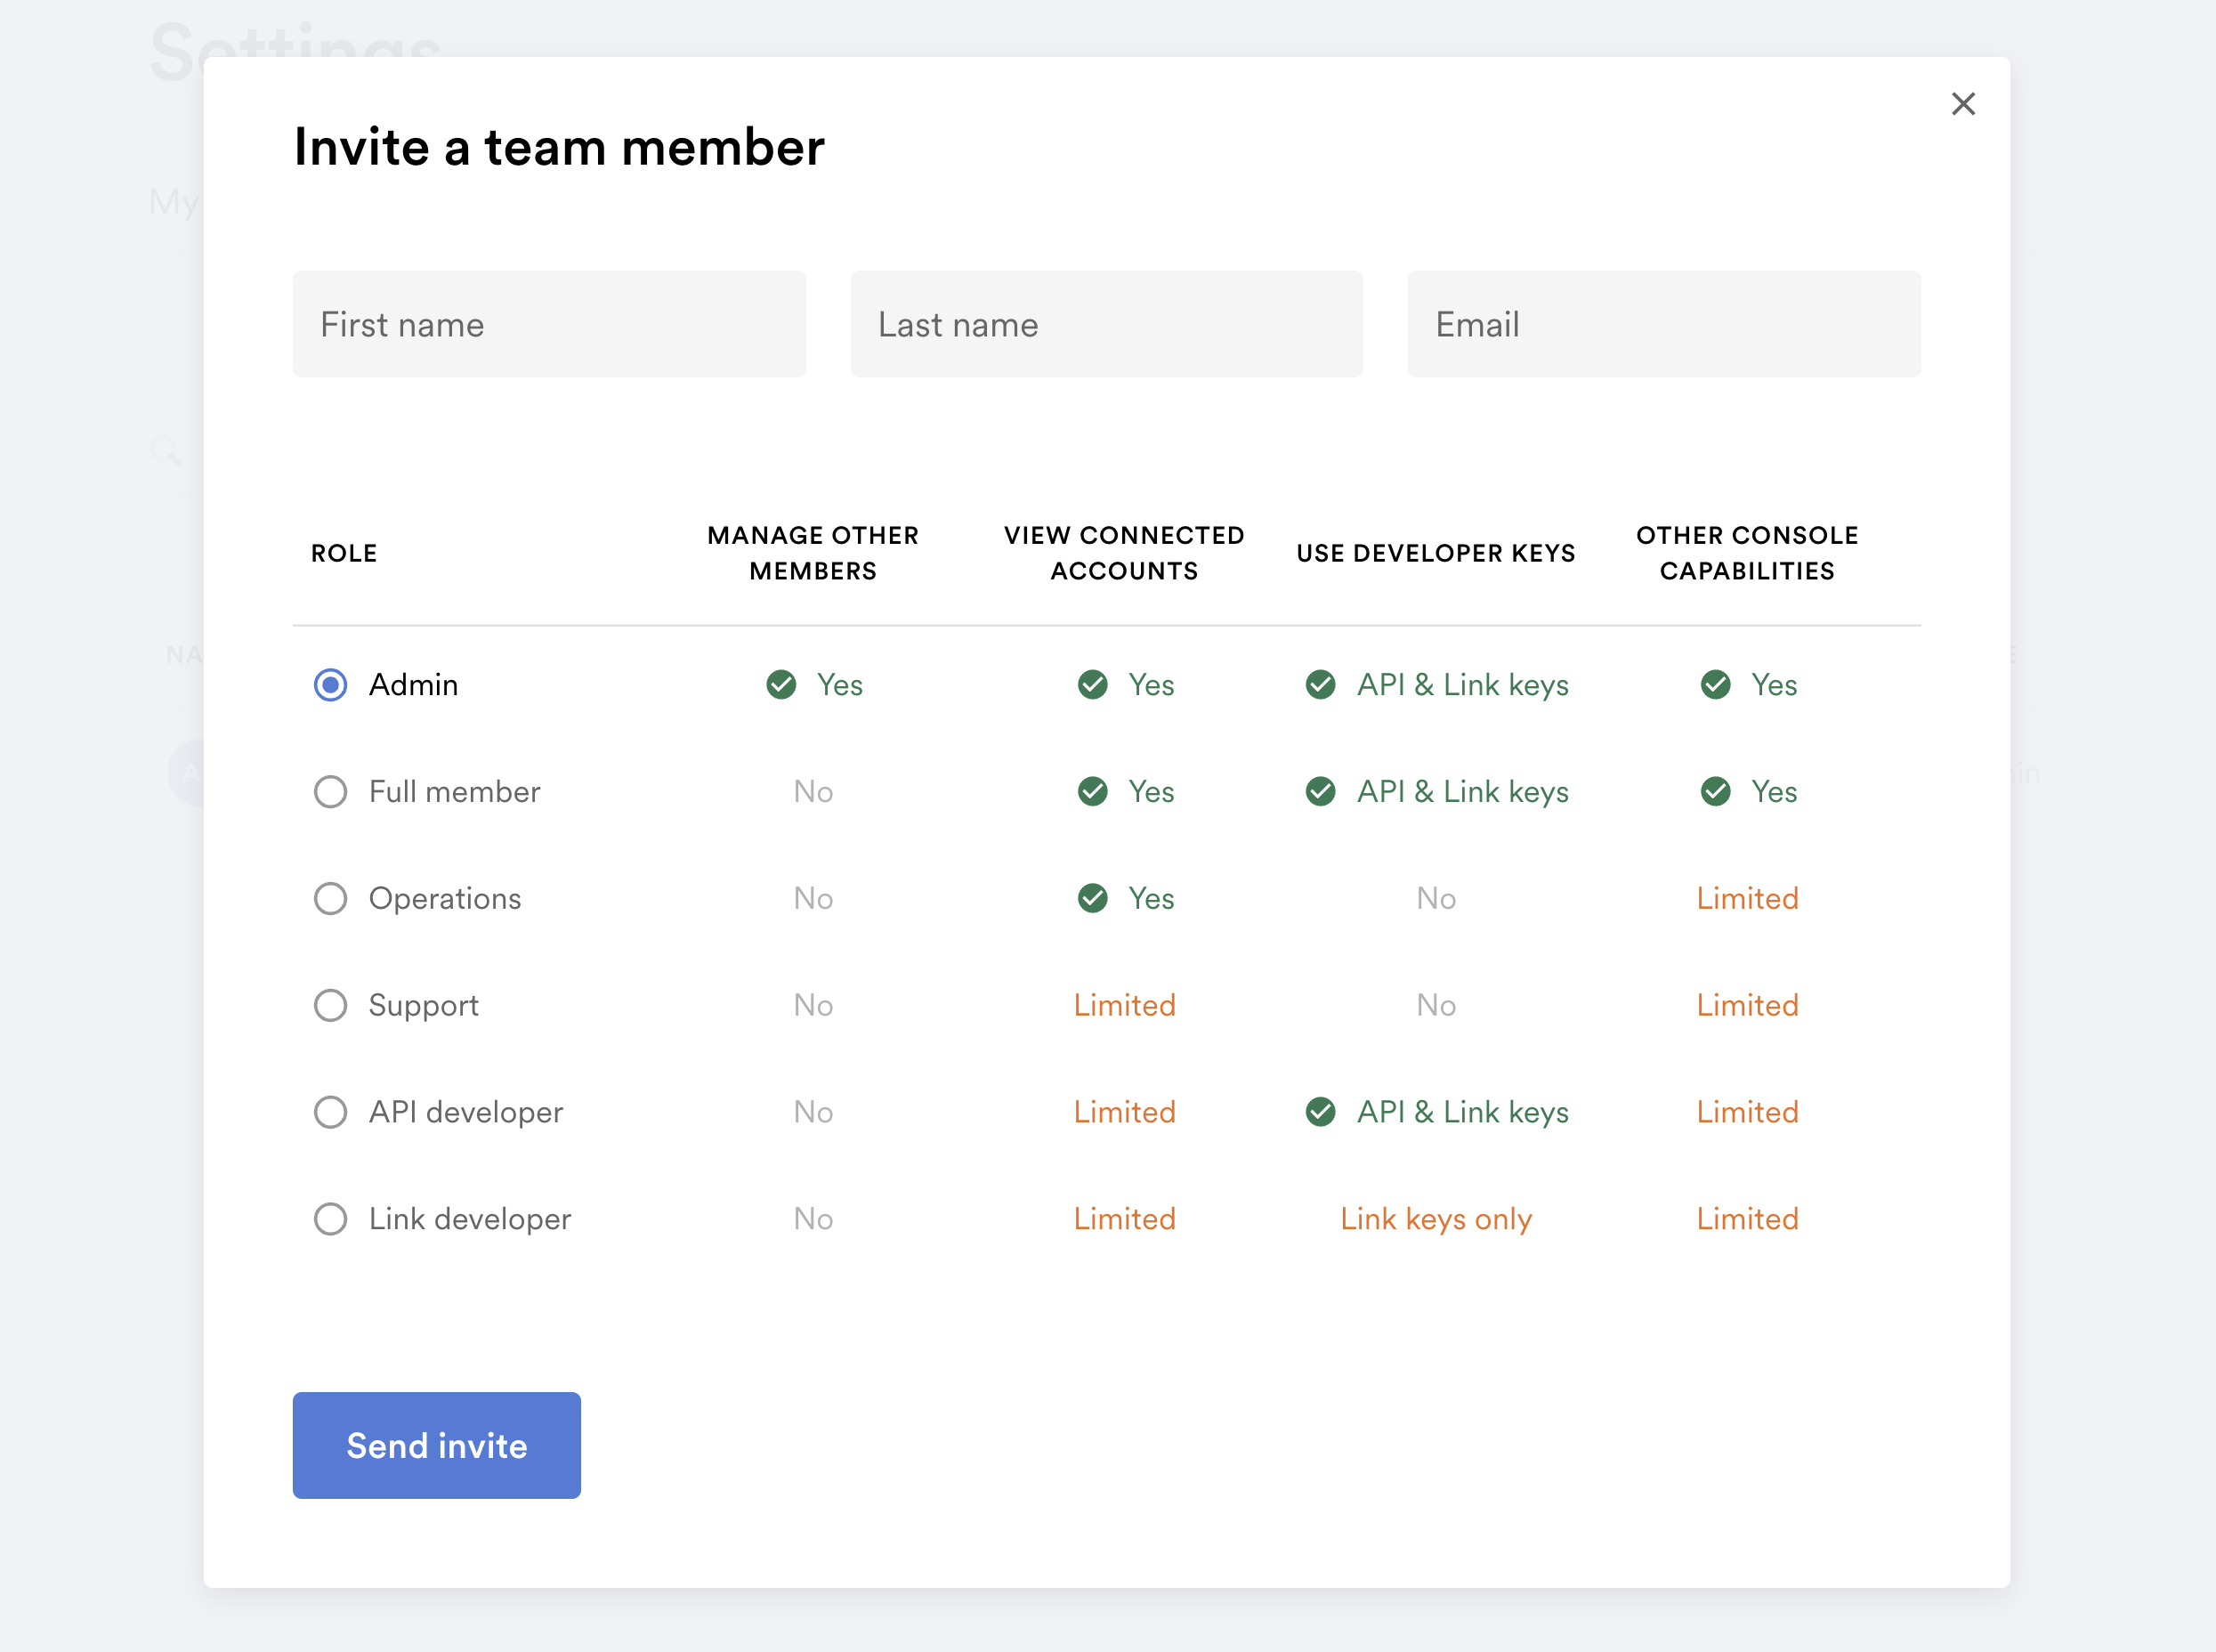
- Select a role for the new member, depending on the permissions you would like them to have in Console. Fill out the name and email fields and select Send invite.
- Your new team member will receive an email with further details on how to connect to Console.
How to invite new users
- Sign in to Argyle Console with an Admin, Full member, or Operations account.
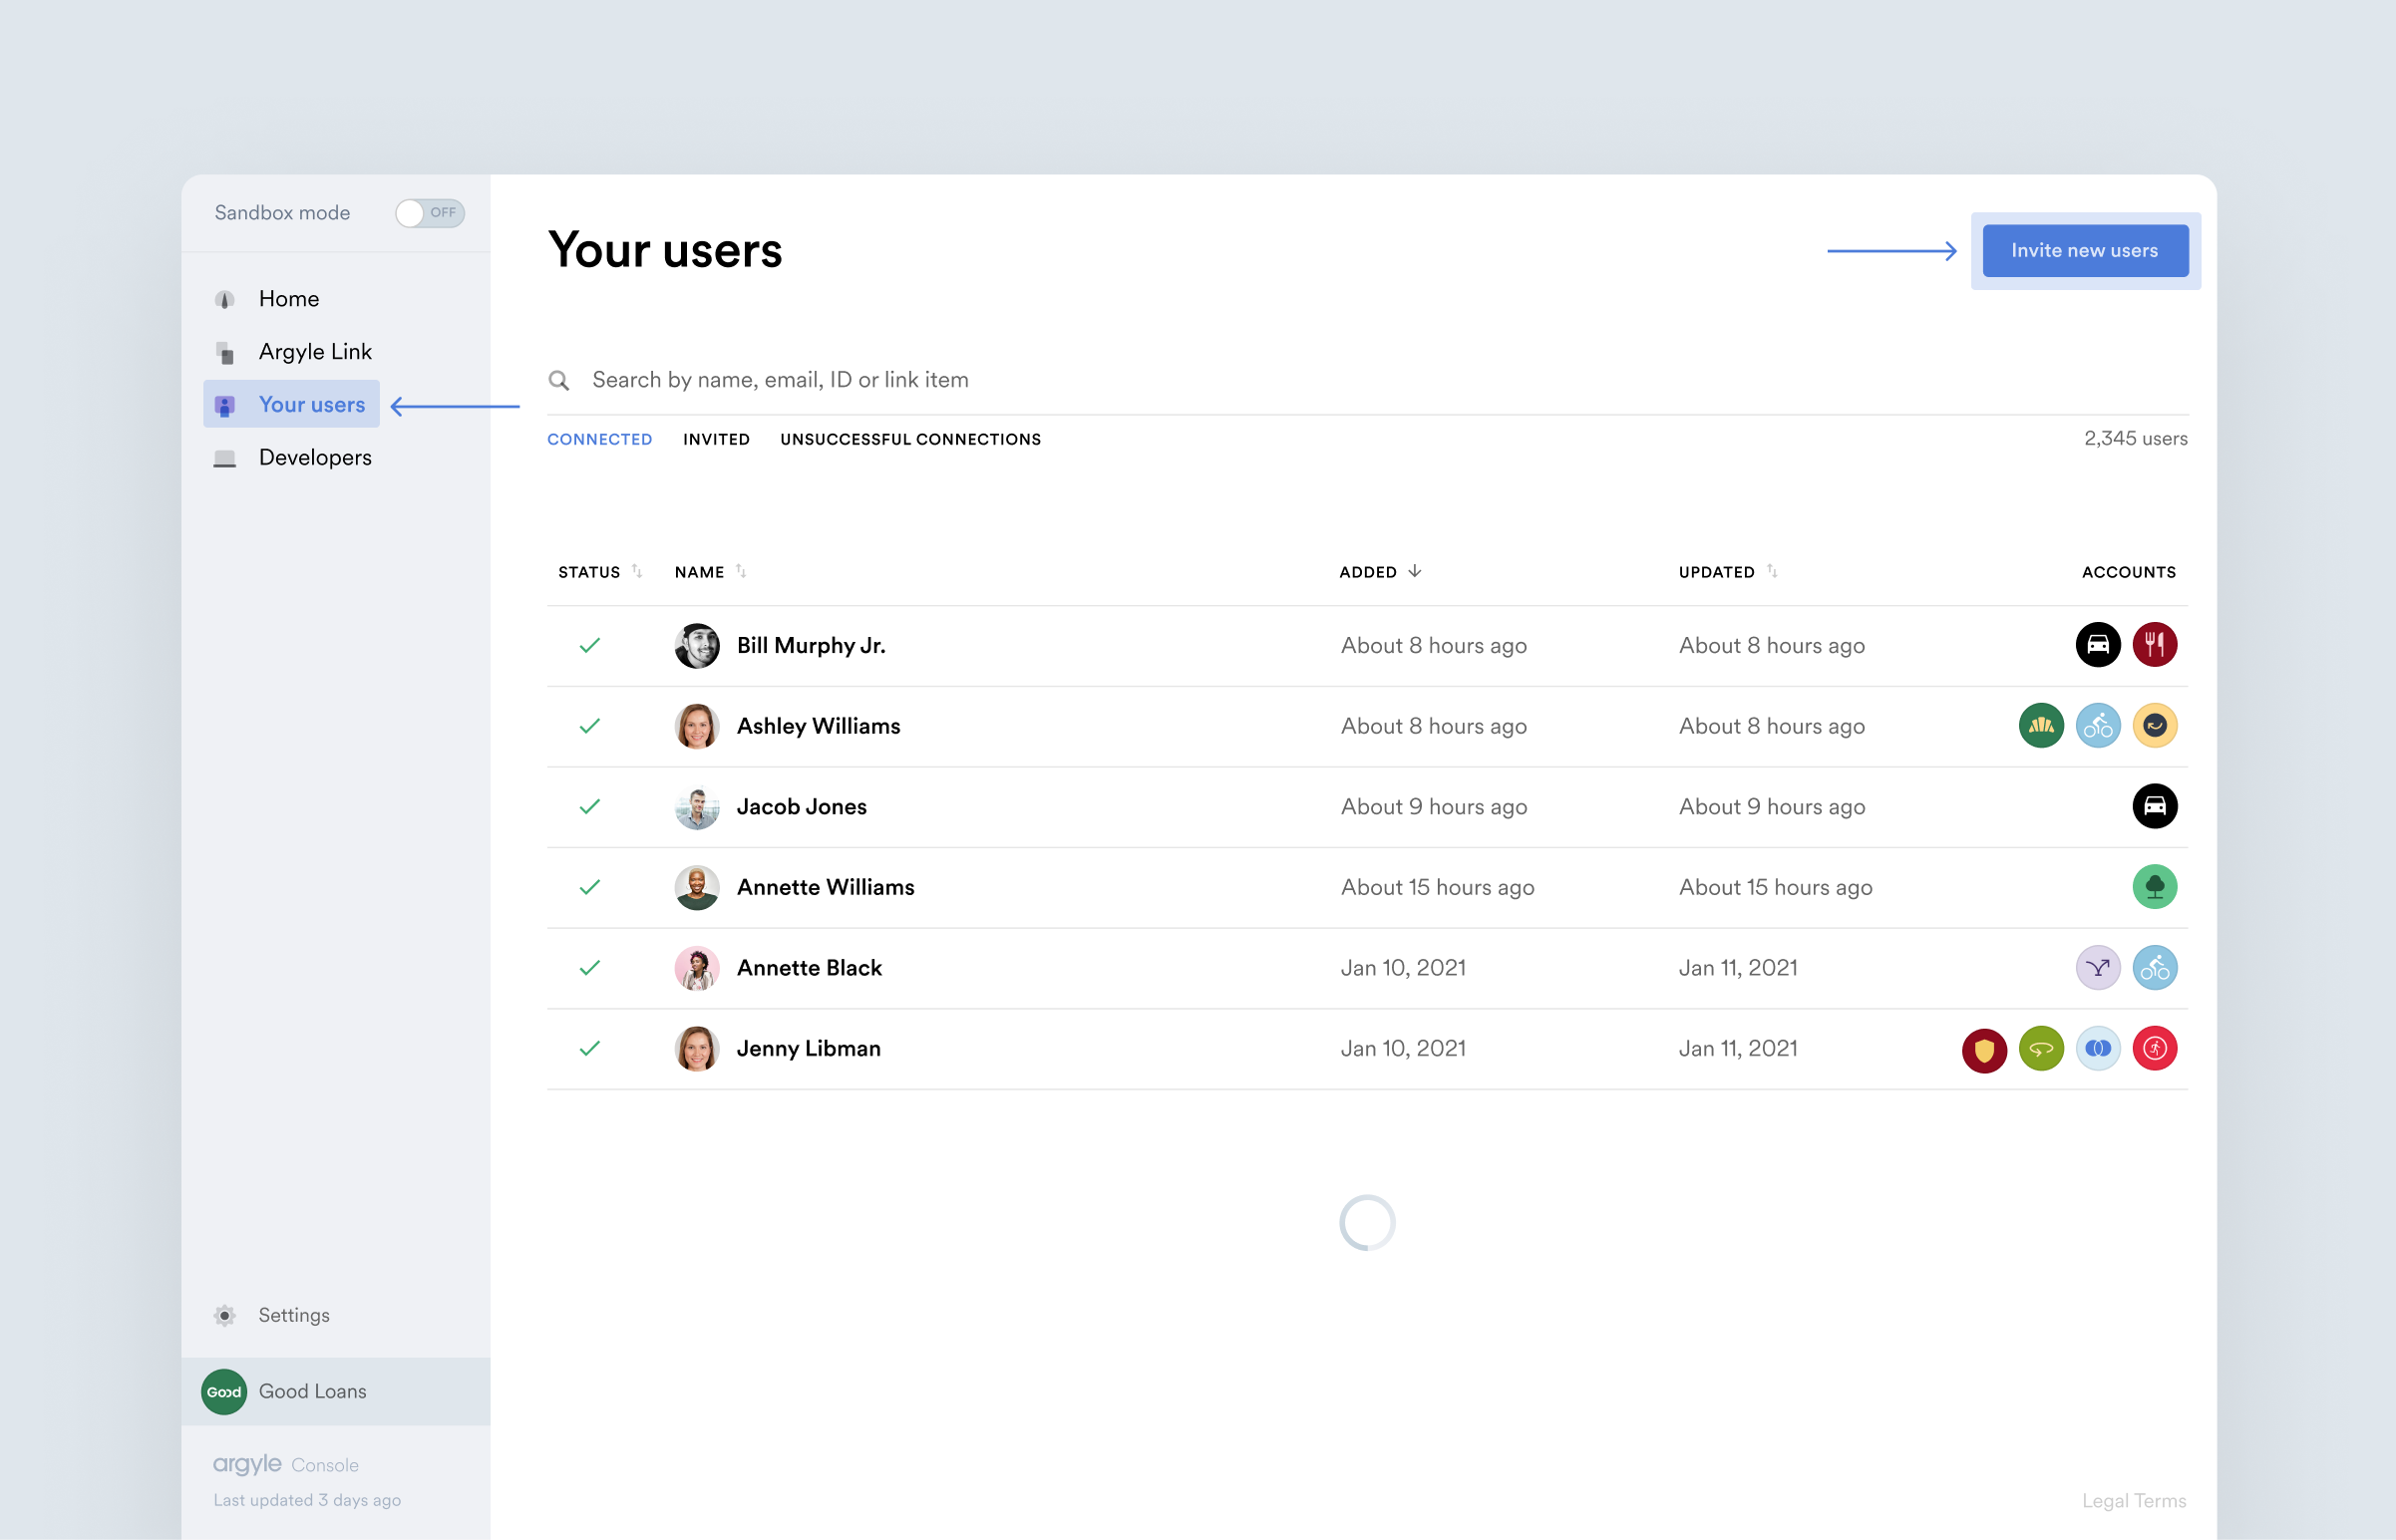
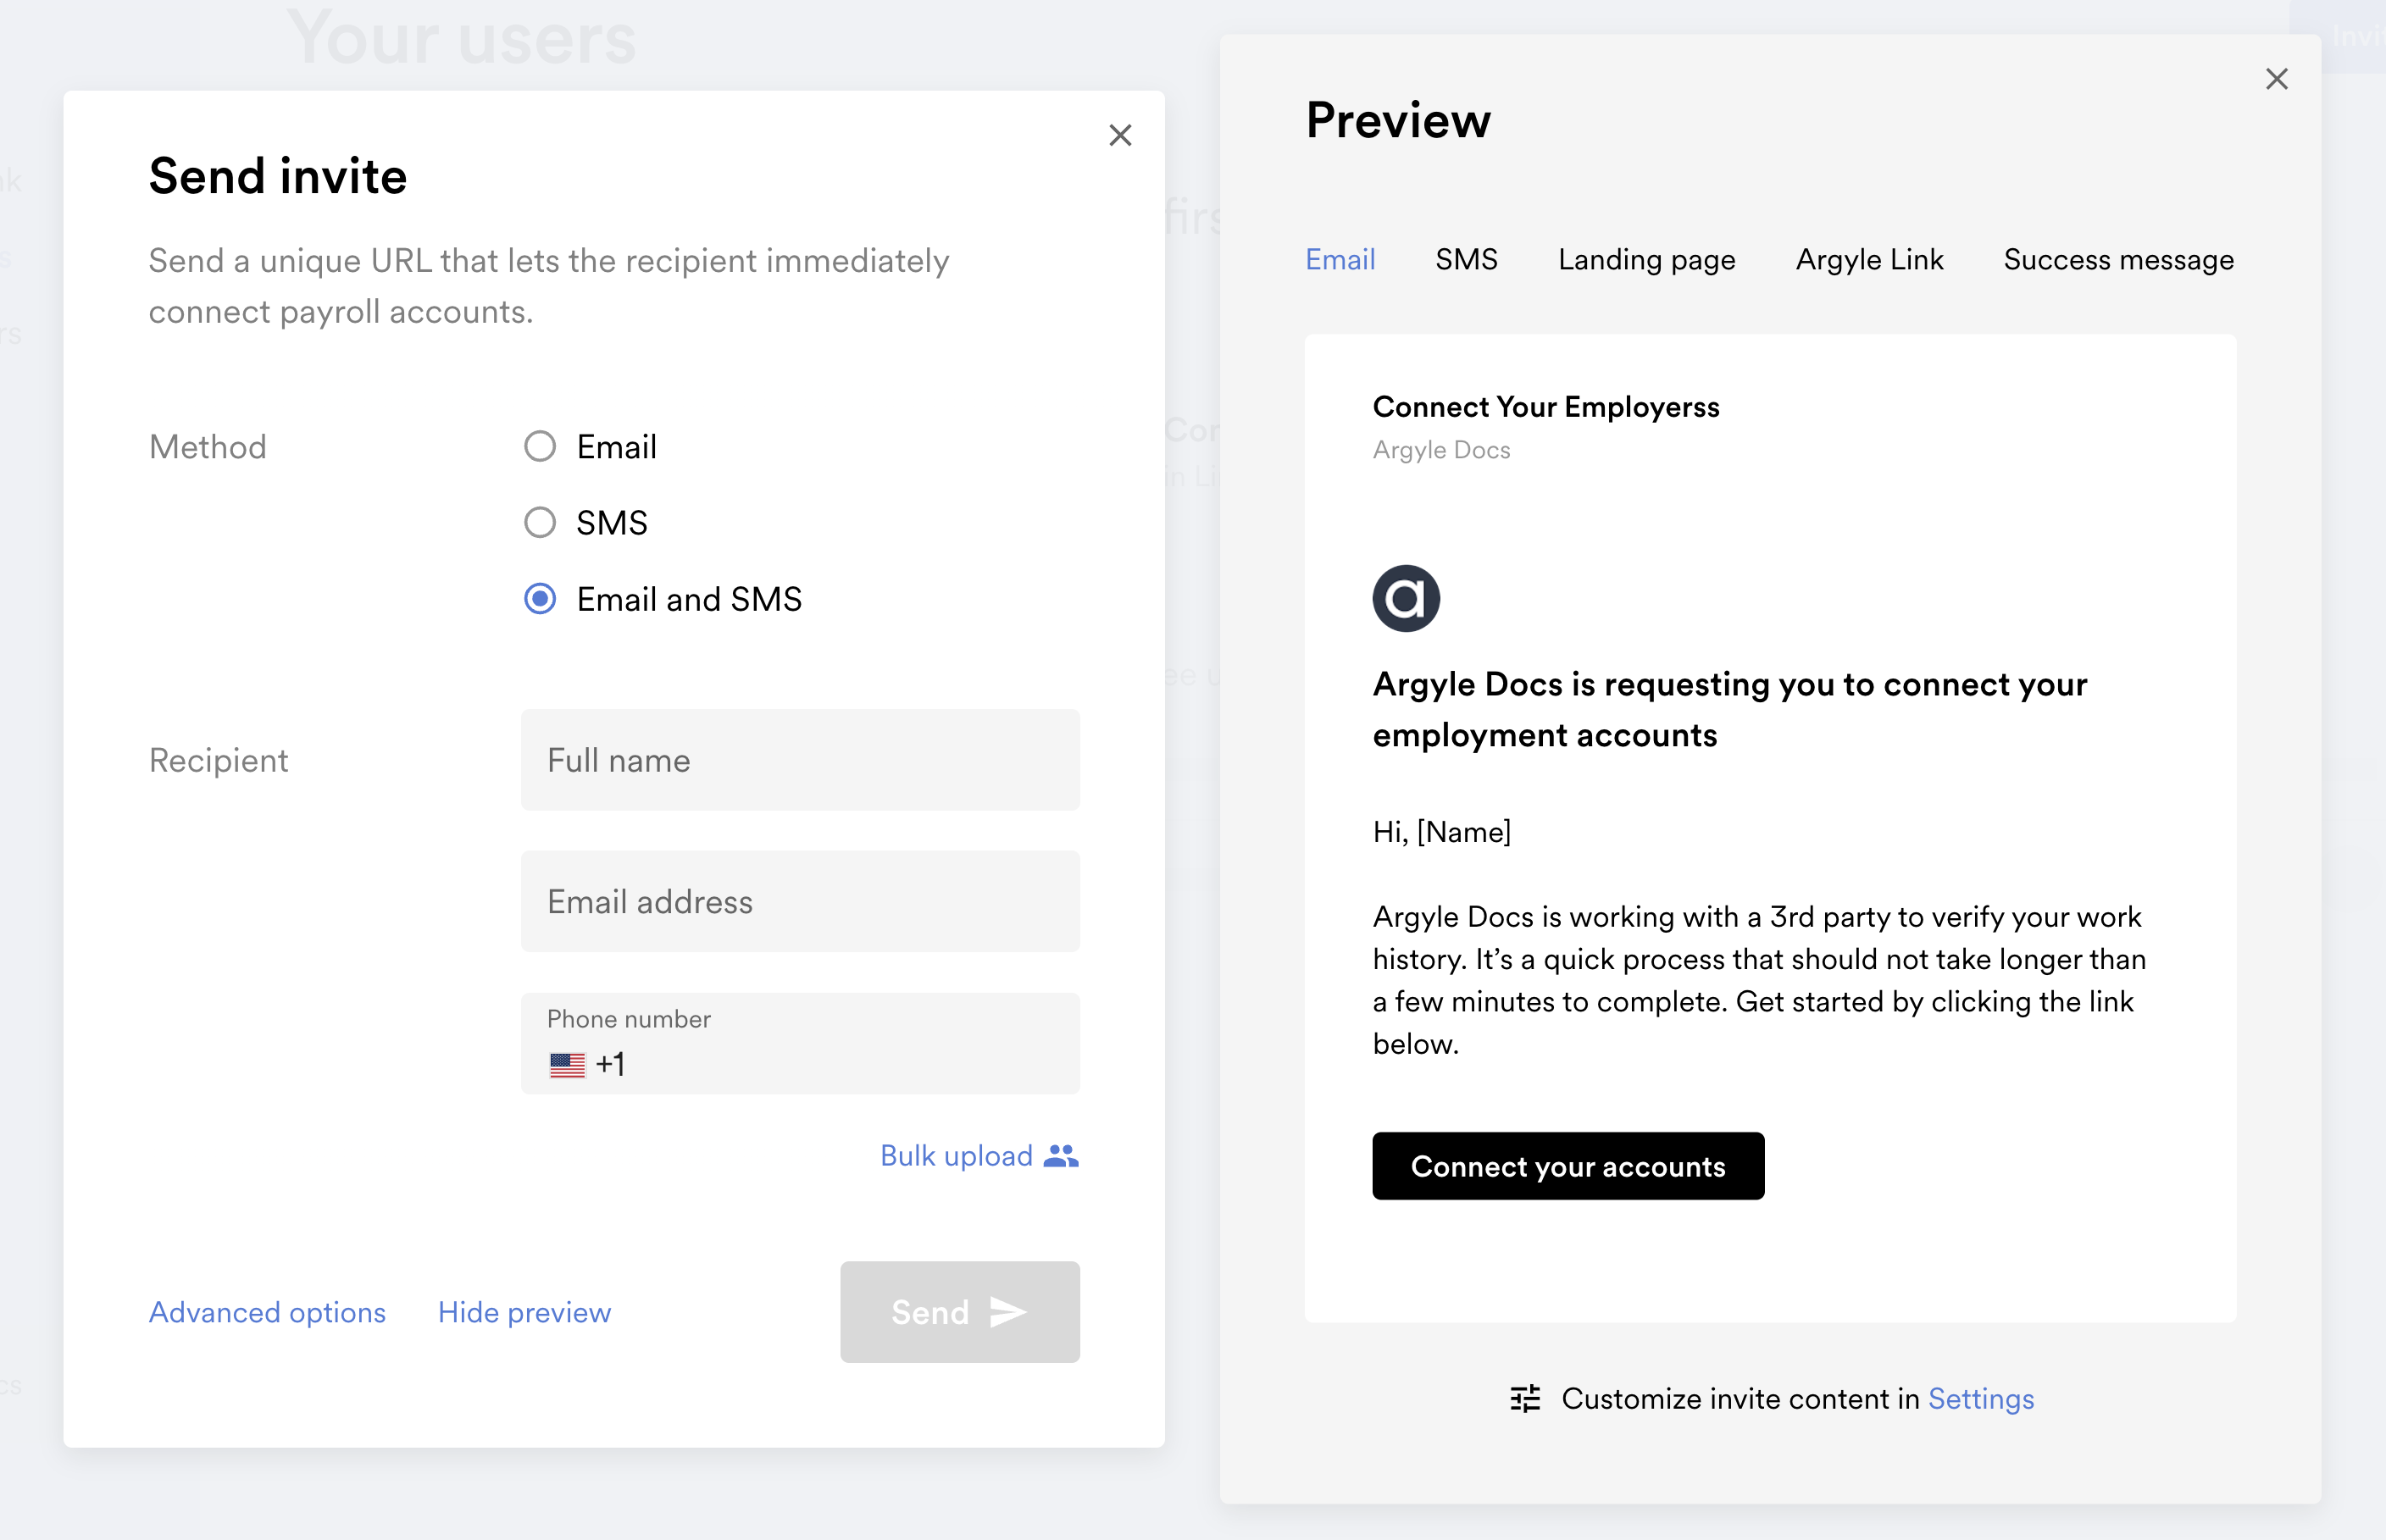
- From the Your users tab, select Invite new users.
- Choose your invite Method and fill out the Recipient details.
- If you would like to invite multiple users, select Bulk upload and upload a CSV file (example CSV) with the contact information of the users to invite.
- Select Advanced options to add a direct deposit switching flow for the user following the payroll connection process.
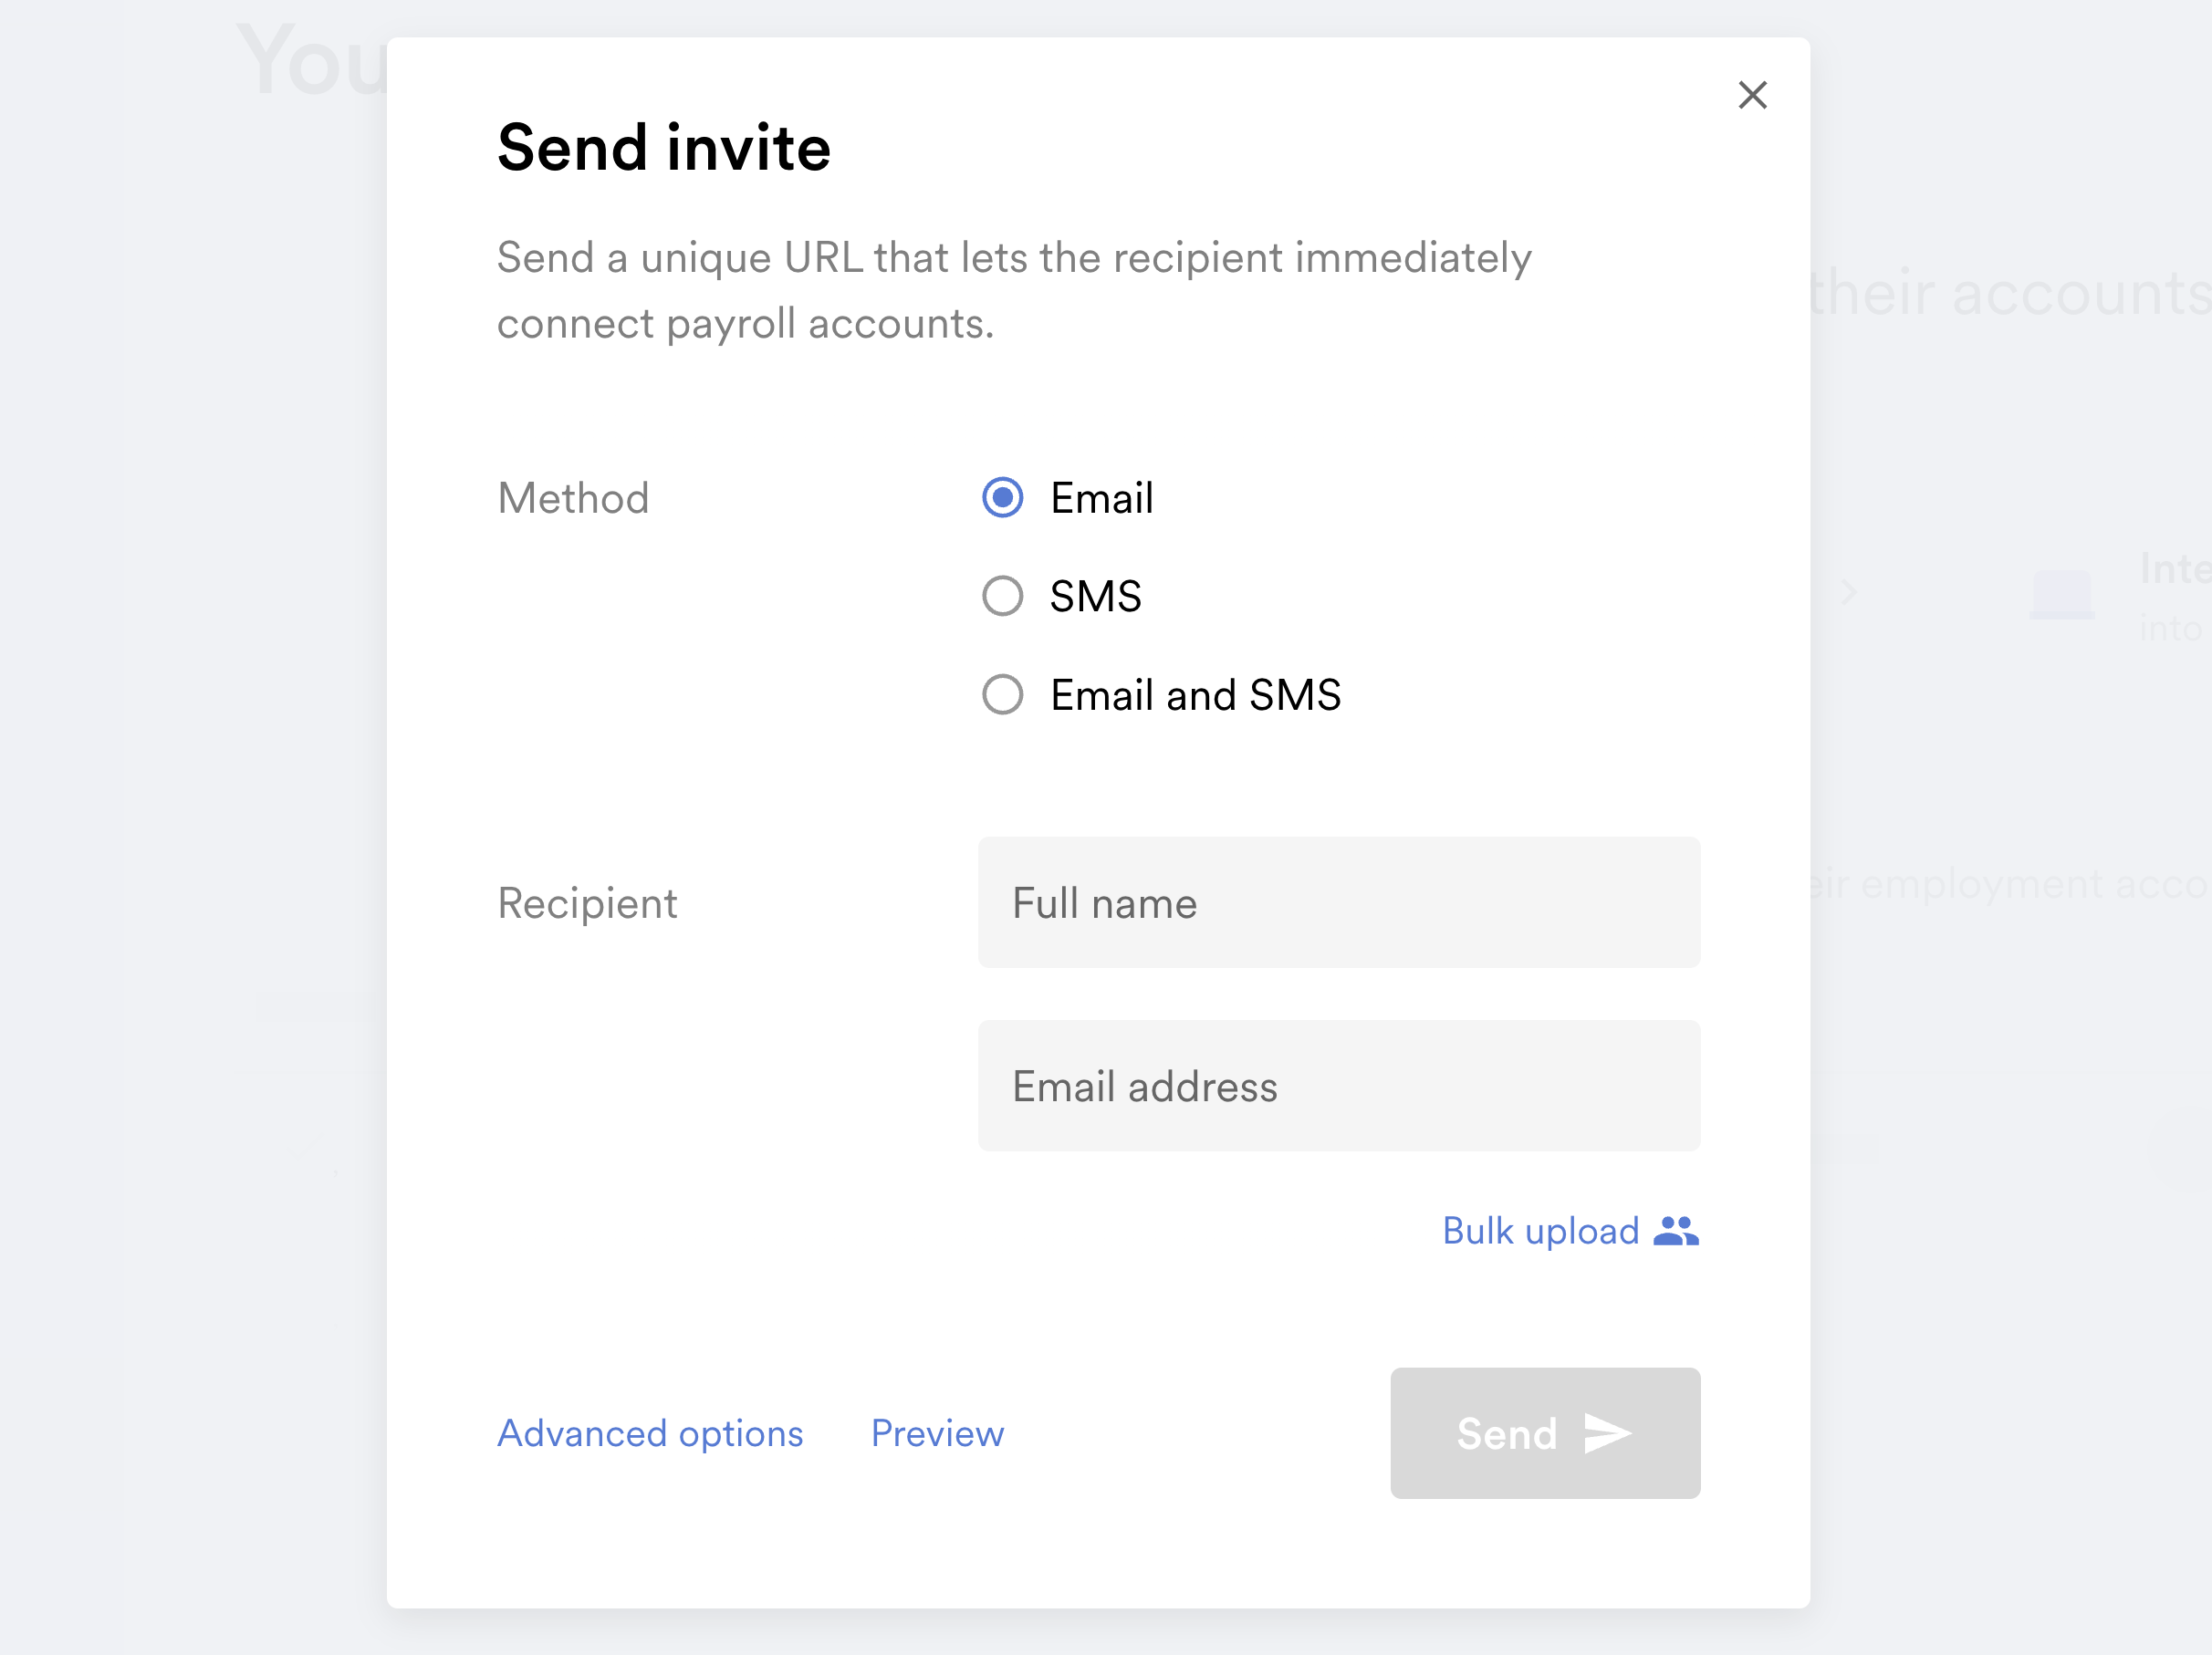
- Select Preview at any time to review the content of the invitation as it will appear to users. The Argyle Link tab will also simulate the user’s account connection experience.
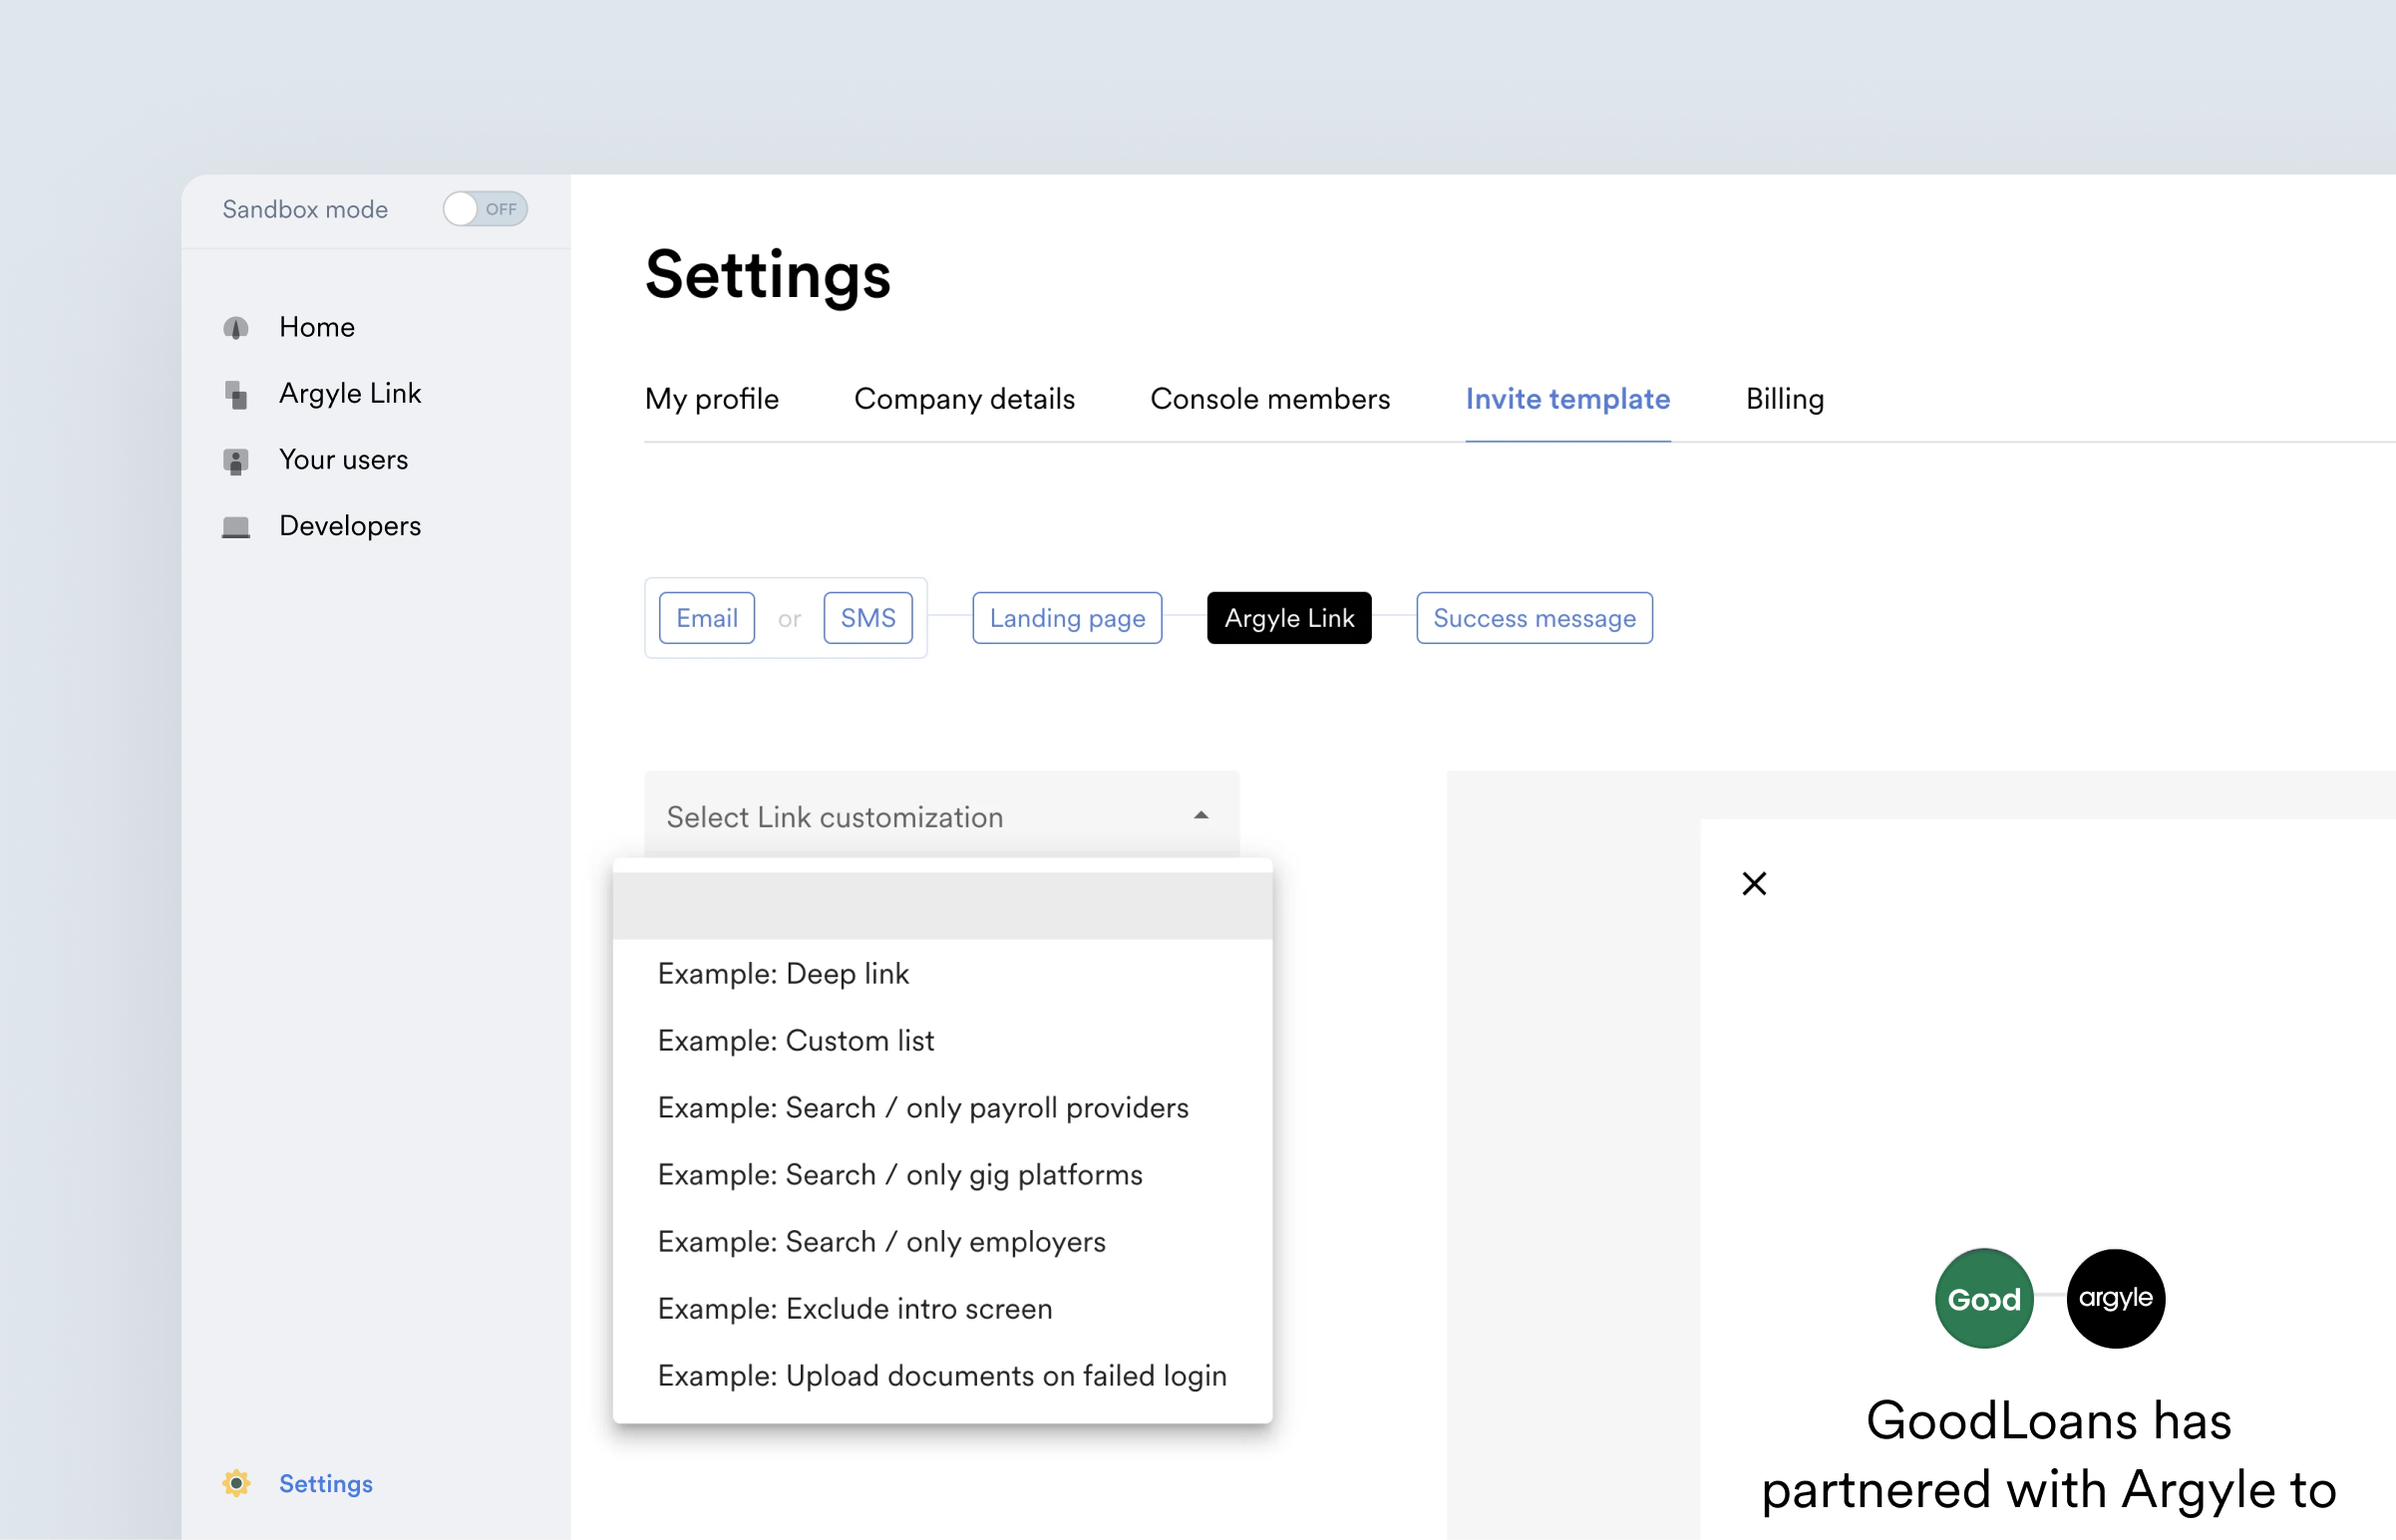
- If you would like to adjust or add new customizations before sending the invite to a new user, select Settings in the lower-right. This will open Console’s Invite settings page in a new tab.
- After adjusting the invite text, or selecting a Link Flow customization from the dropdown menu on the Argyle Link tab, save your changes and they will be reflected when you return to your new invite.
- Select Send after returning to the new user invite.
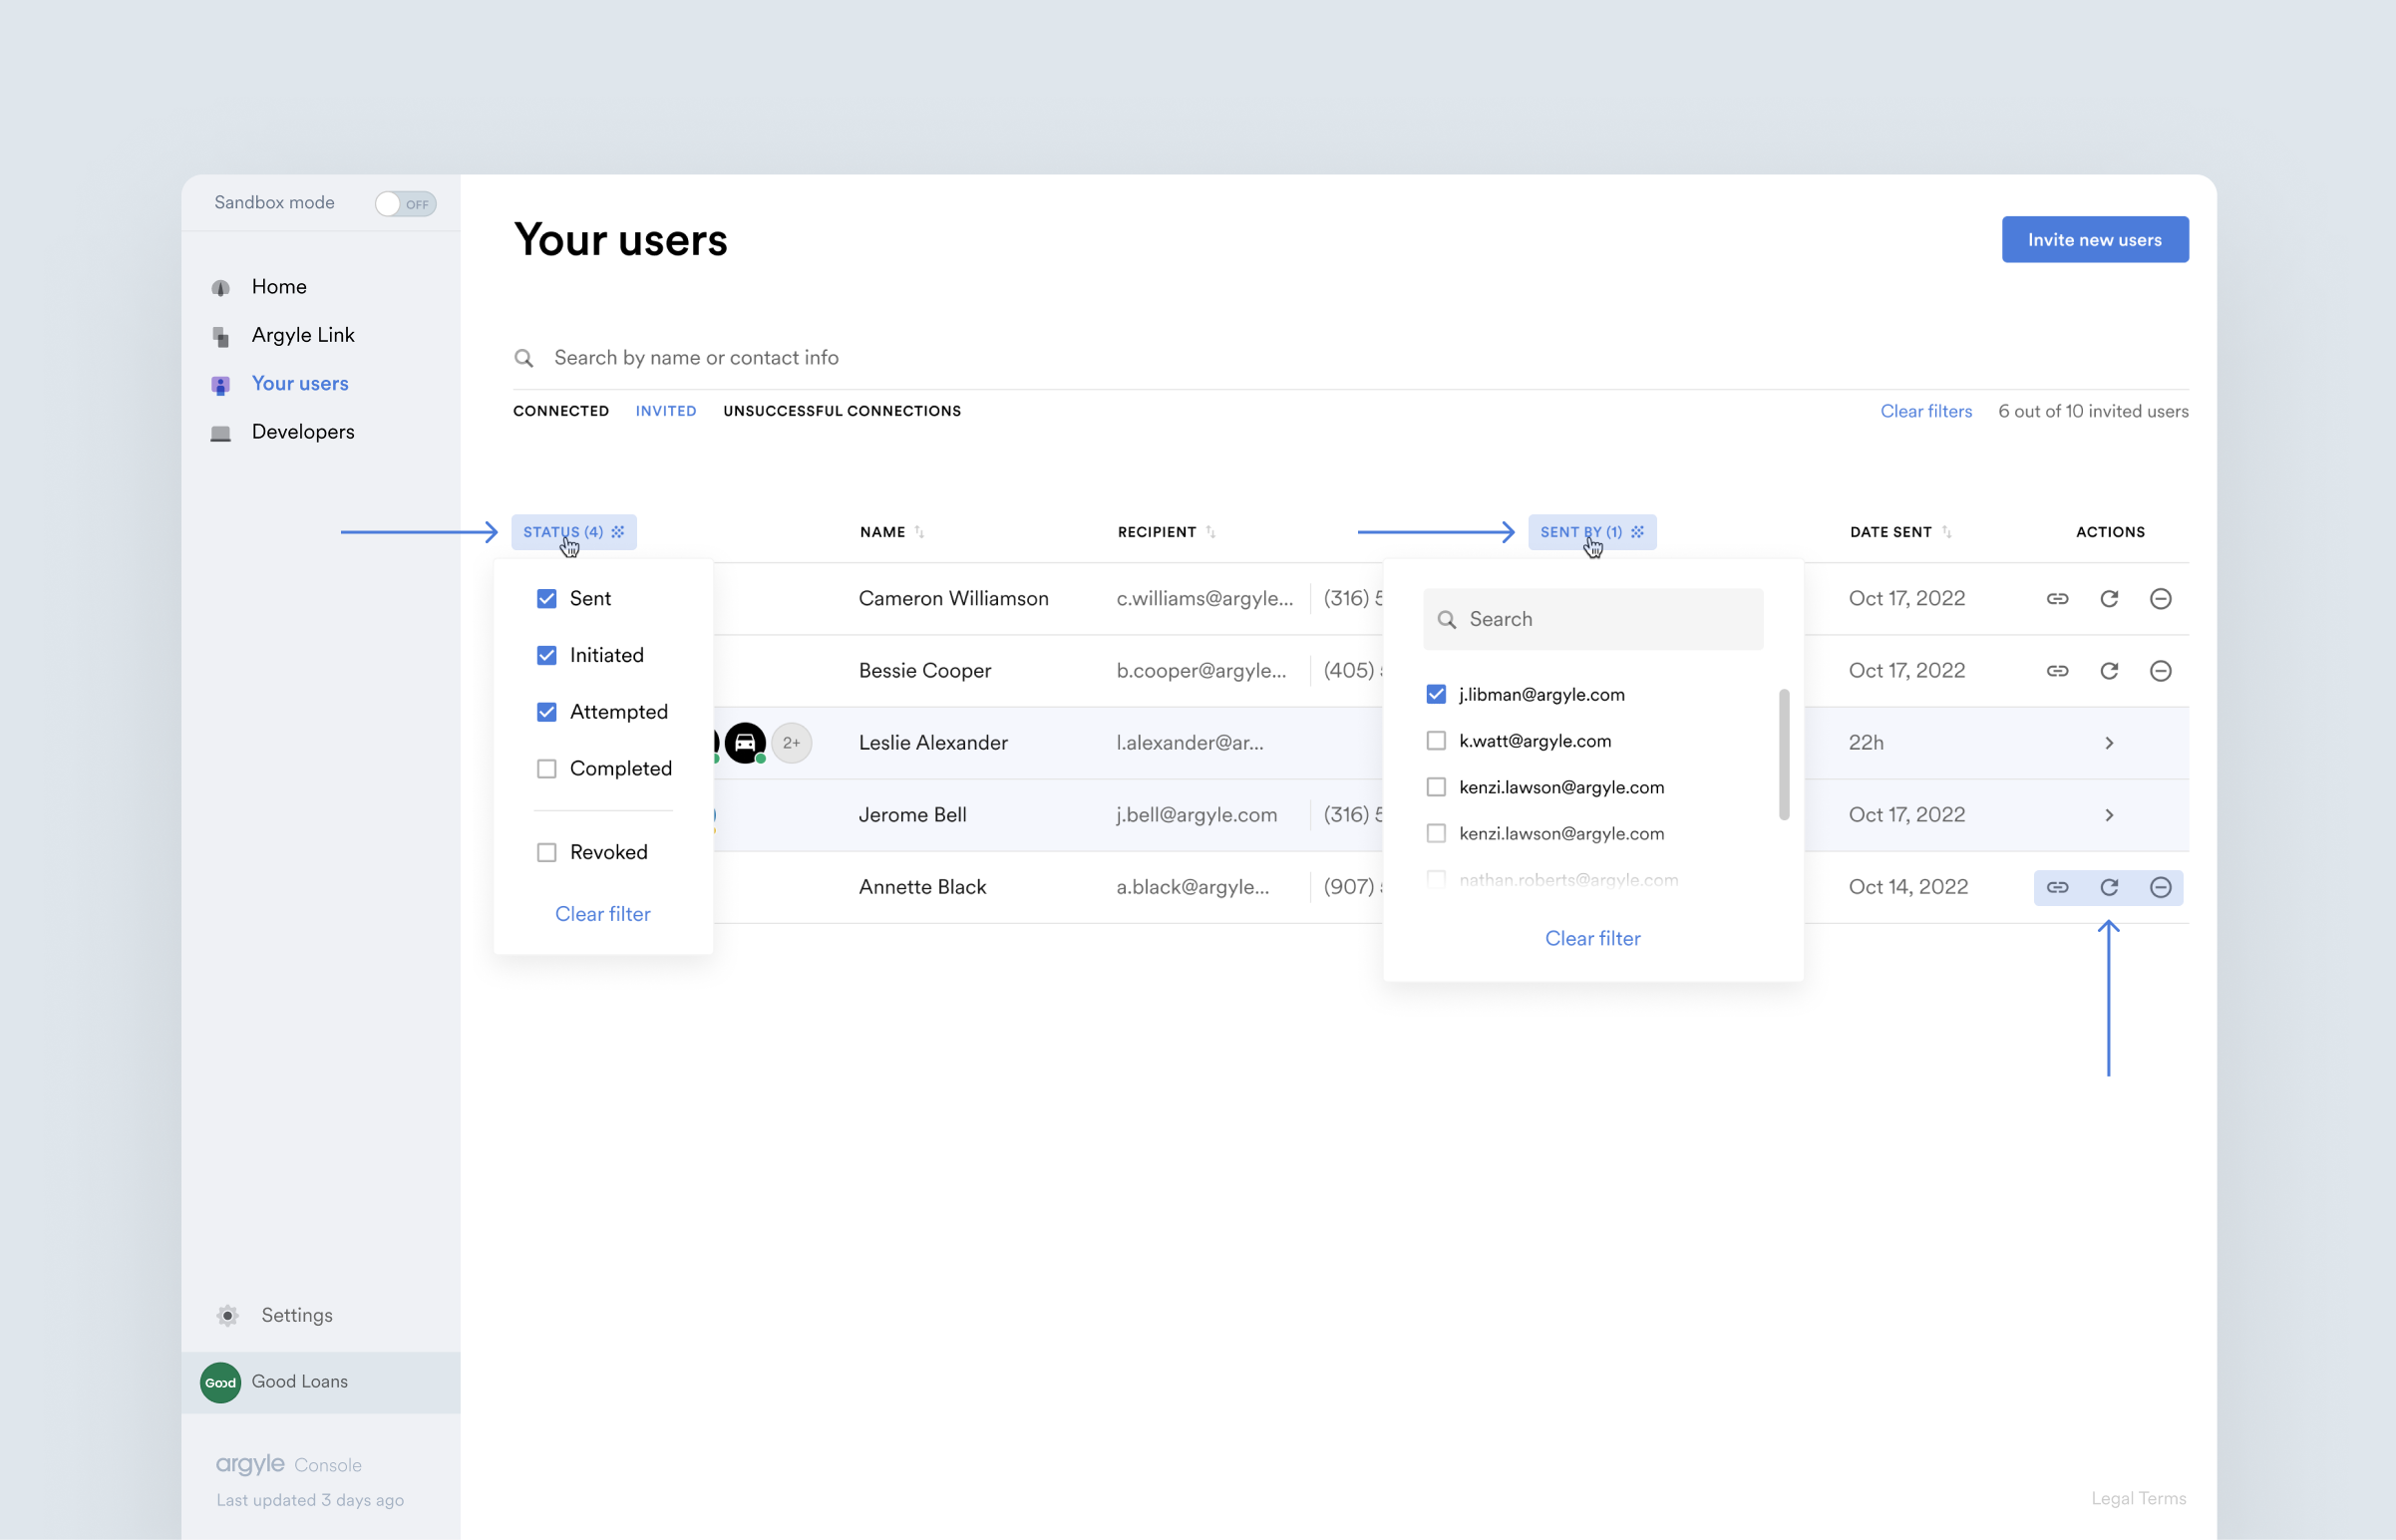
- You will be notified by email when the user has connected, or you can check the invitation’s status from the Connections page of Console. The possible invite status values are:
- Sent - Invite successfully sent.
- Initiated - User has clicked the invite URL, but has not submitted credentials, uploaded documents, or completed a “Can’t find your income source?” form.
- Attempted - User submitted login credentials in Argyle Link, but no accounts have been successfully connected.
- Completed - User submitted login credentials in Argyle Link, and at least one account has been successfully connected (uploading documents and form submissions are considered a successful connection).
- Revoked - Invite has been revoked (invite URL is disabled).
How to invite returning users
The URL sent in an invite to a new user does not expire. This allows the user to return to Argyle Link through the original invite URL in order to:- Complete multi-factor authentication (MFA)
- Re-verify disconnected accounts
This is a one-click process for the returning user. They will not need to re-enter their login credentials.
- Connect additional accounts
- Revoke access to previously connected accounts
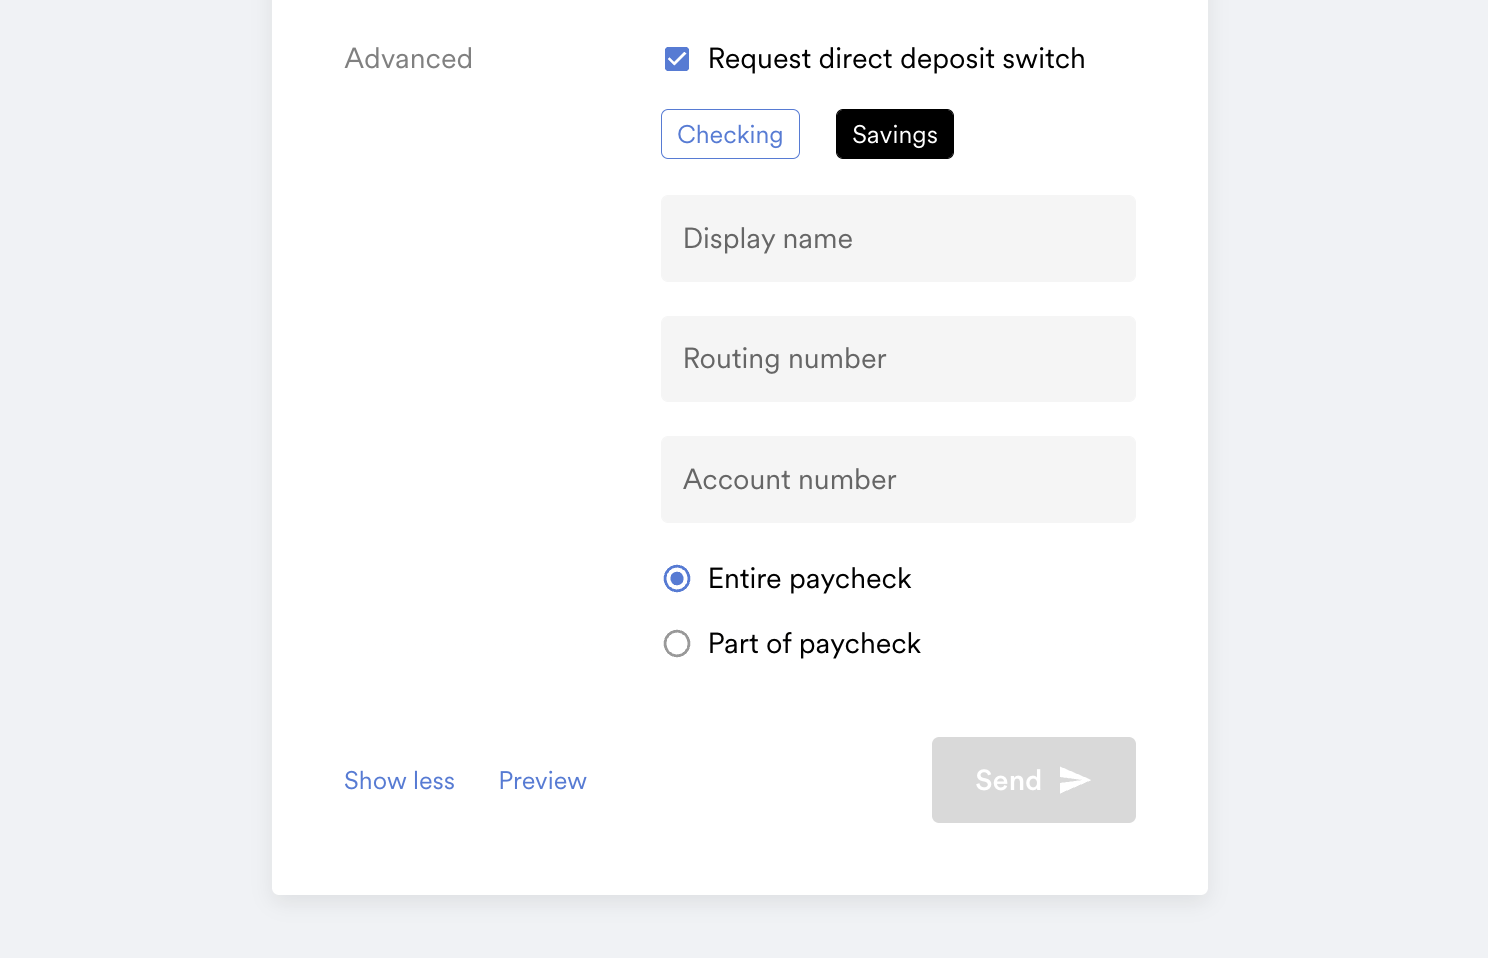
How to set up deposit switching
- In Step 5 of the user invite process described above, make sure the Request direct deposit switch checkbox has been selected.
- Enter the Display name (bank or account name), Routing number, and Account number for the new account where you would like the user to send future paychecks.
- Choose if you want the account to begin receiving the entire or a partial amount of the user’s paycheck. For partial paychecks, you can select a $ or % amount.
How to view employment data
- Navigate to the Your users section of Argyle Console.
- Click on an individual user.
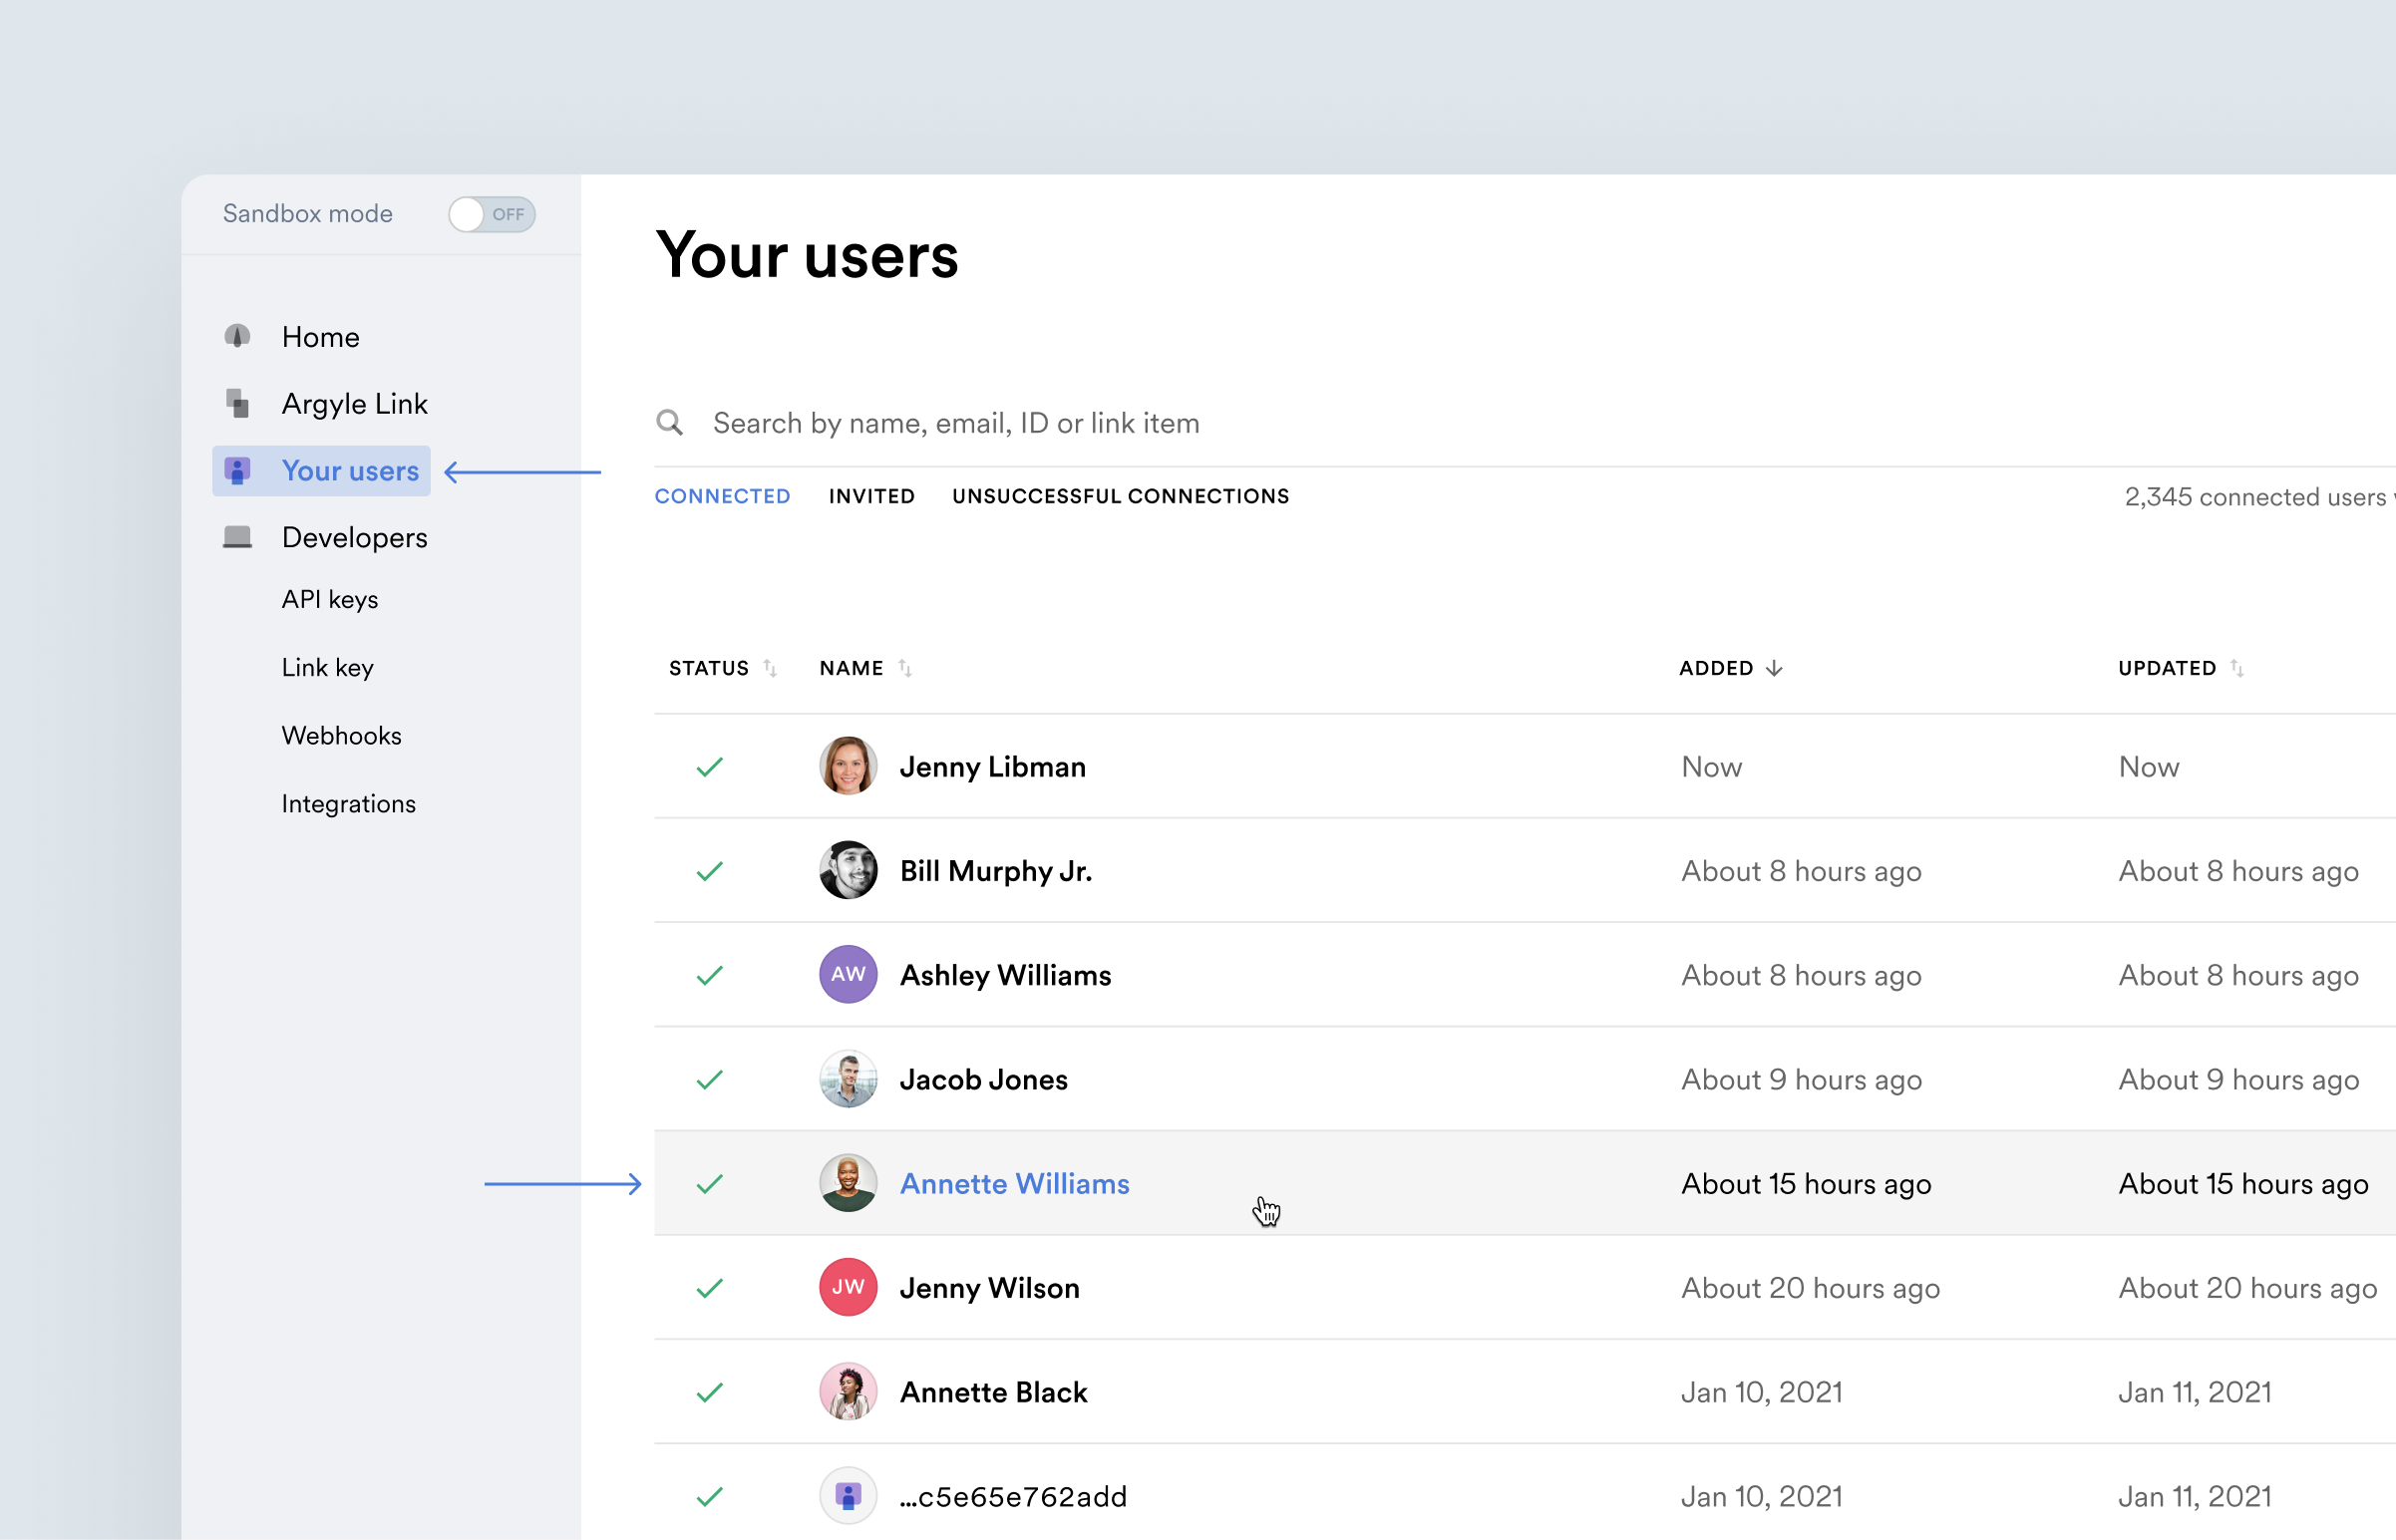
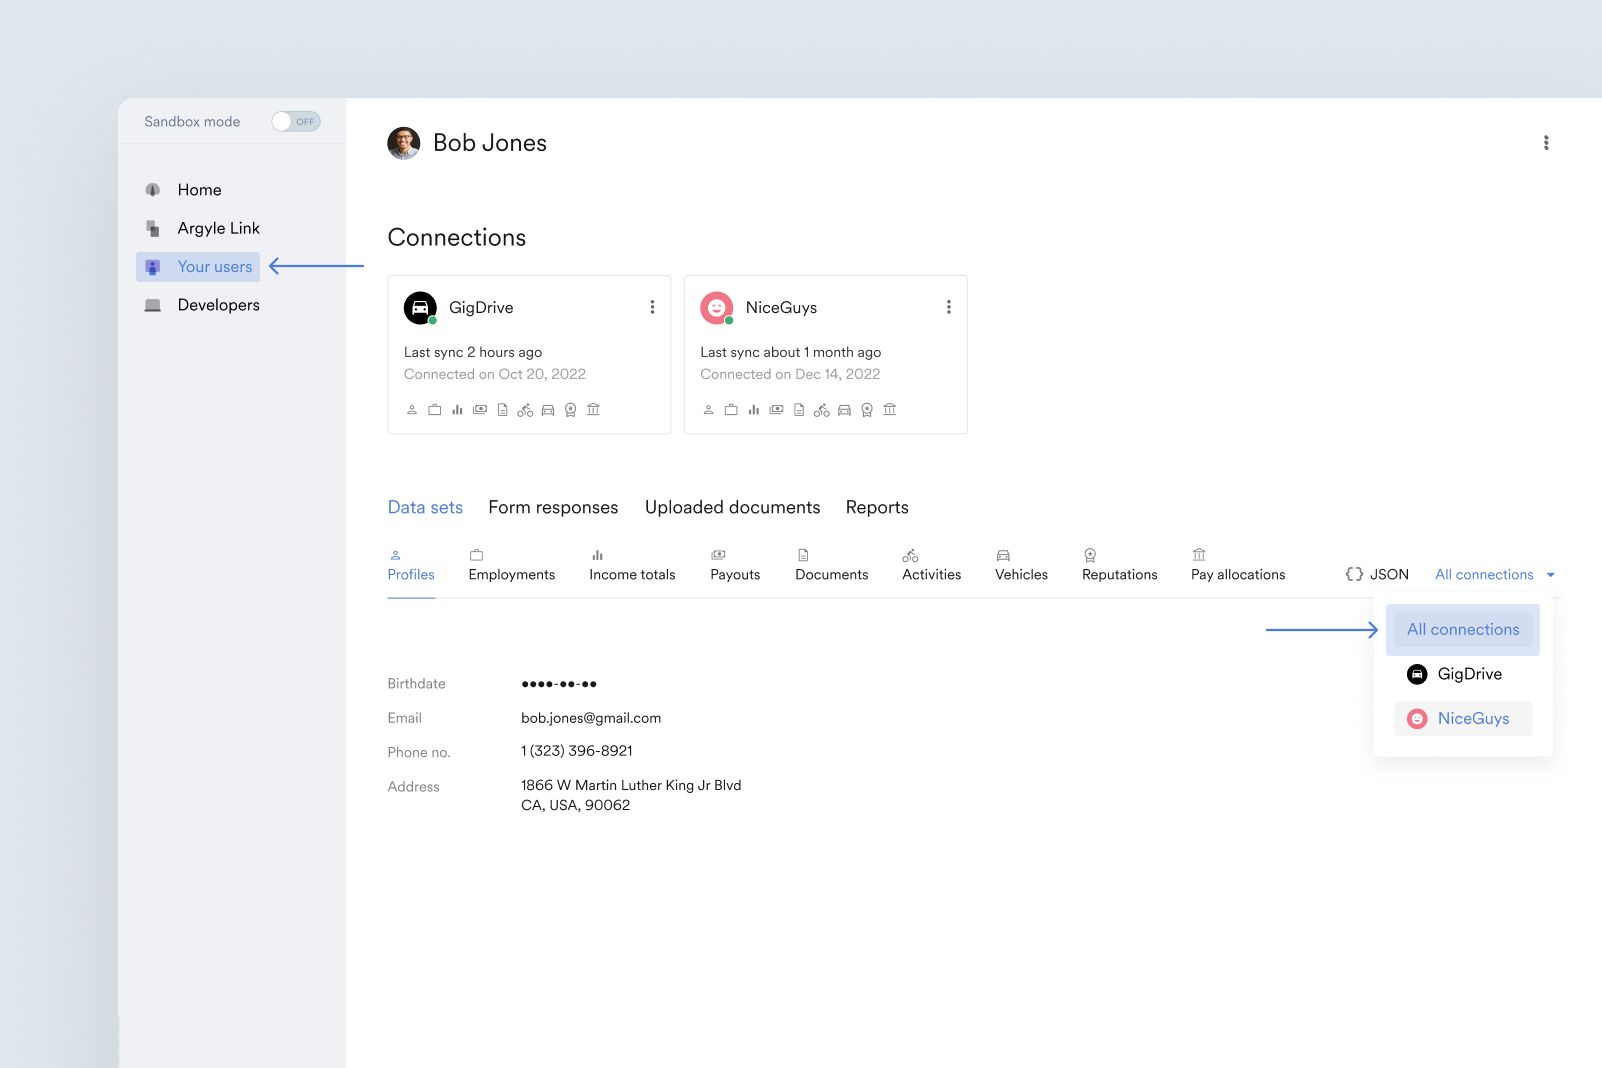
- Navigate to the Data sets tab, where you can view data by individual category:
- Profiles — overview of the user’s account, including name, email, phone, and address
- Employments — view employment status, hire date, and title
- Income totals — view total income earned by year
- Payouts — view hours worked, total pay accumulated and total paid out after taxes and deductions
- Documents — view W-2s, pay-slips, driver’s licenses and more
- Activities — view details around shifts worked, what dates they were worked and how much was paid
- Vehicles — view information related to a driver’s vehicles
- Reputations — view driver ratings and achievements
- Pay allocations — view the account and routing numbers for a user’s bank
{ } JSON toggle lets you view data in the format returned by the API.
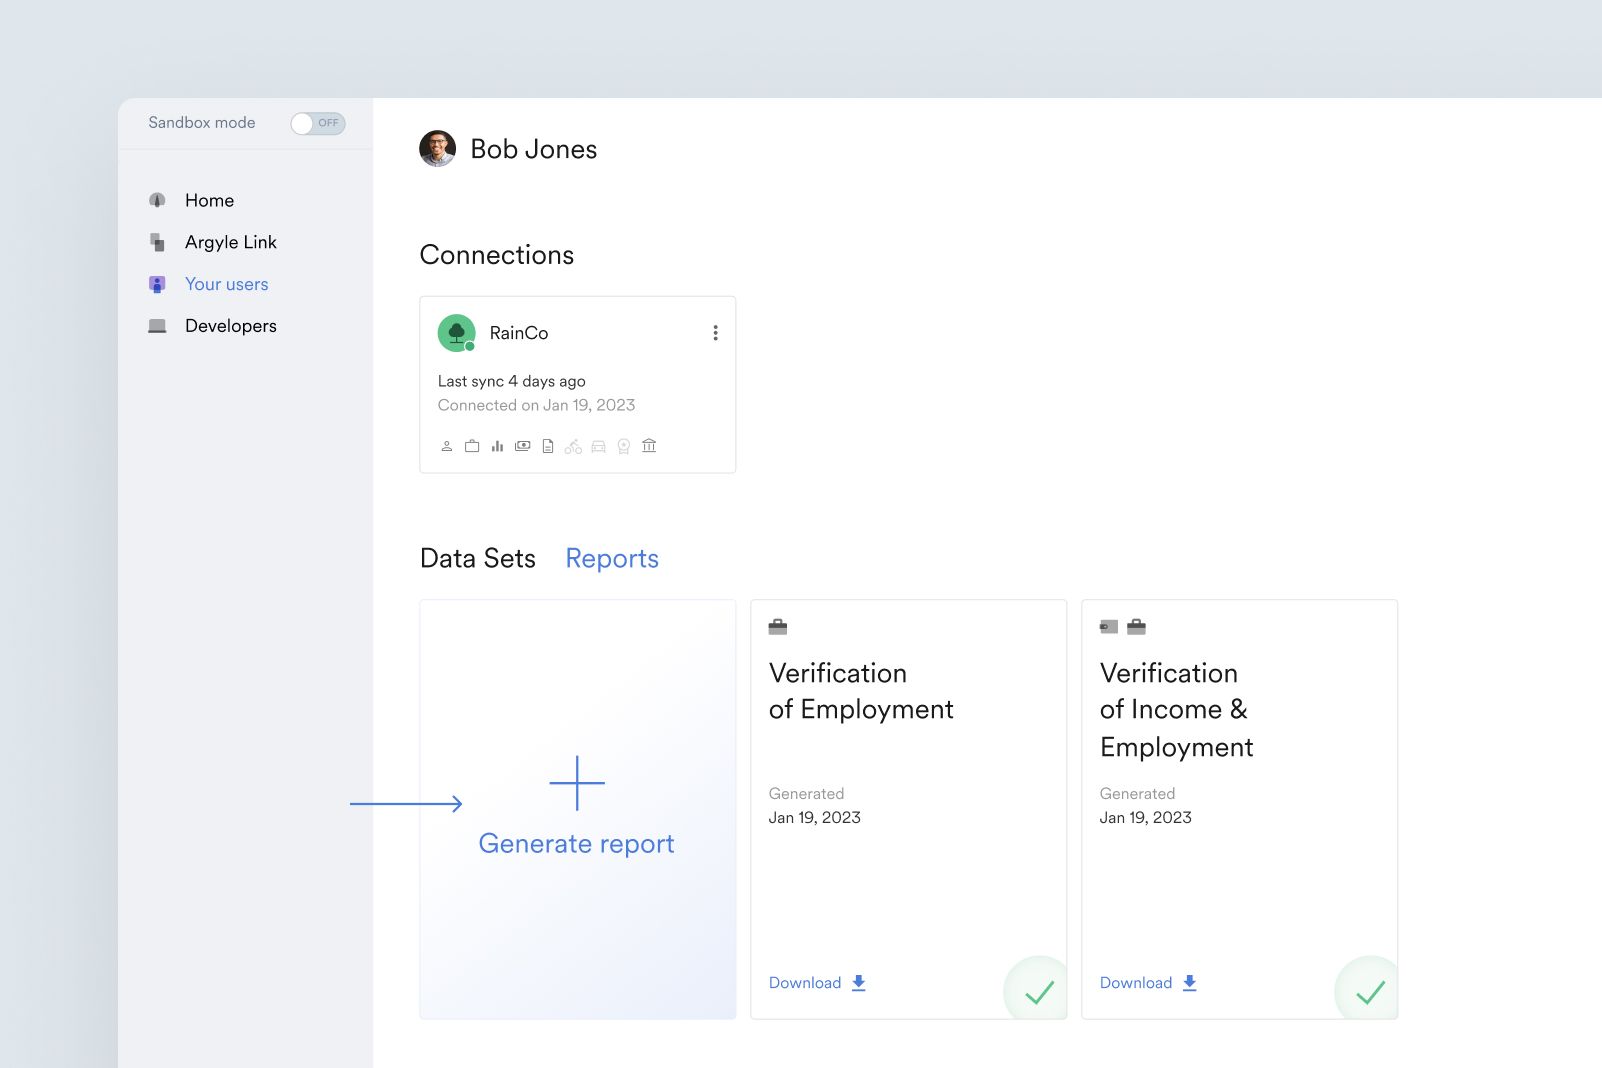
How to generate reports
- Navigate to the Your users section of Argyle Console and click on the user for whom you would like to generate a report.
- Select Generate report within the Reports tab of the user’s page.
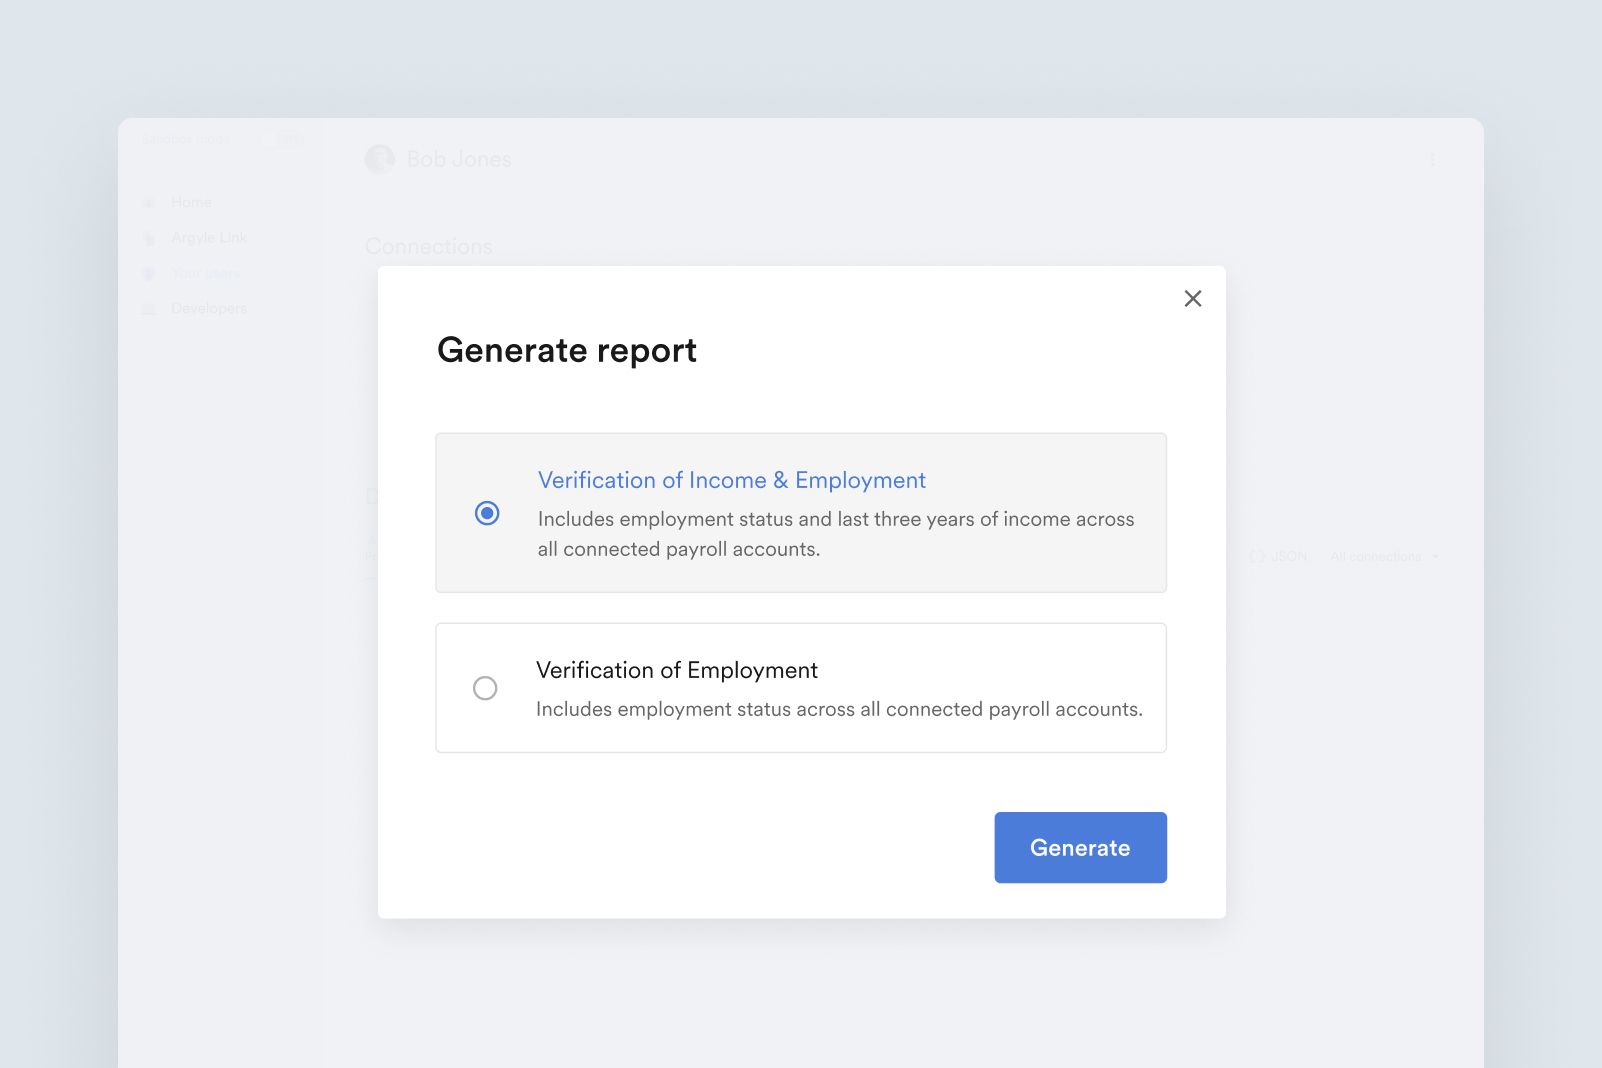
- Select the type of report you want to generate when the pop-up window appears.
- Verification of Income & Employment (sample report)
- Verification of Employment (sample report)
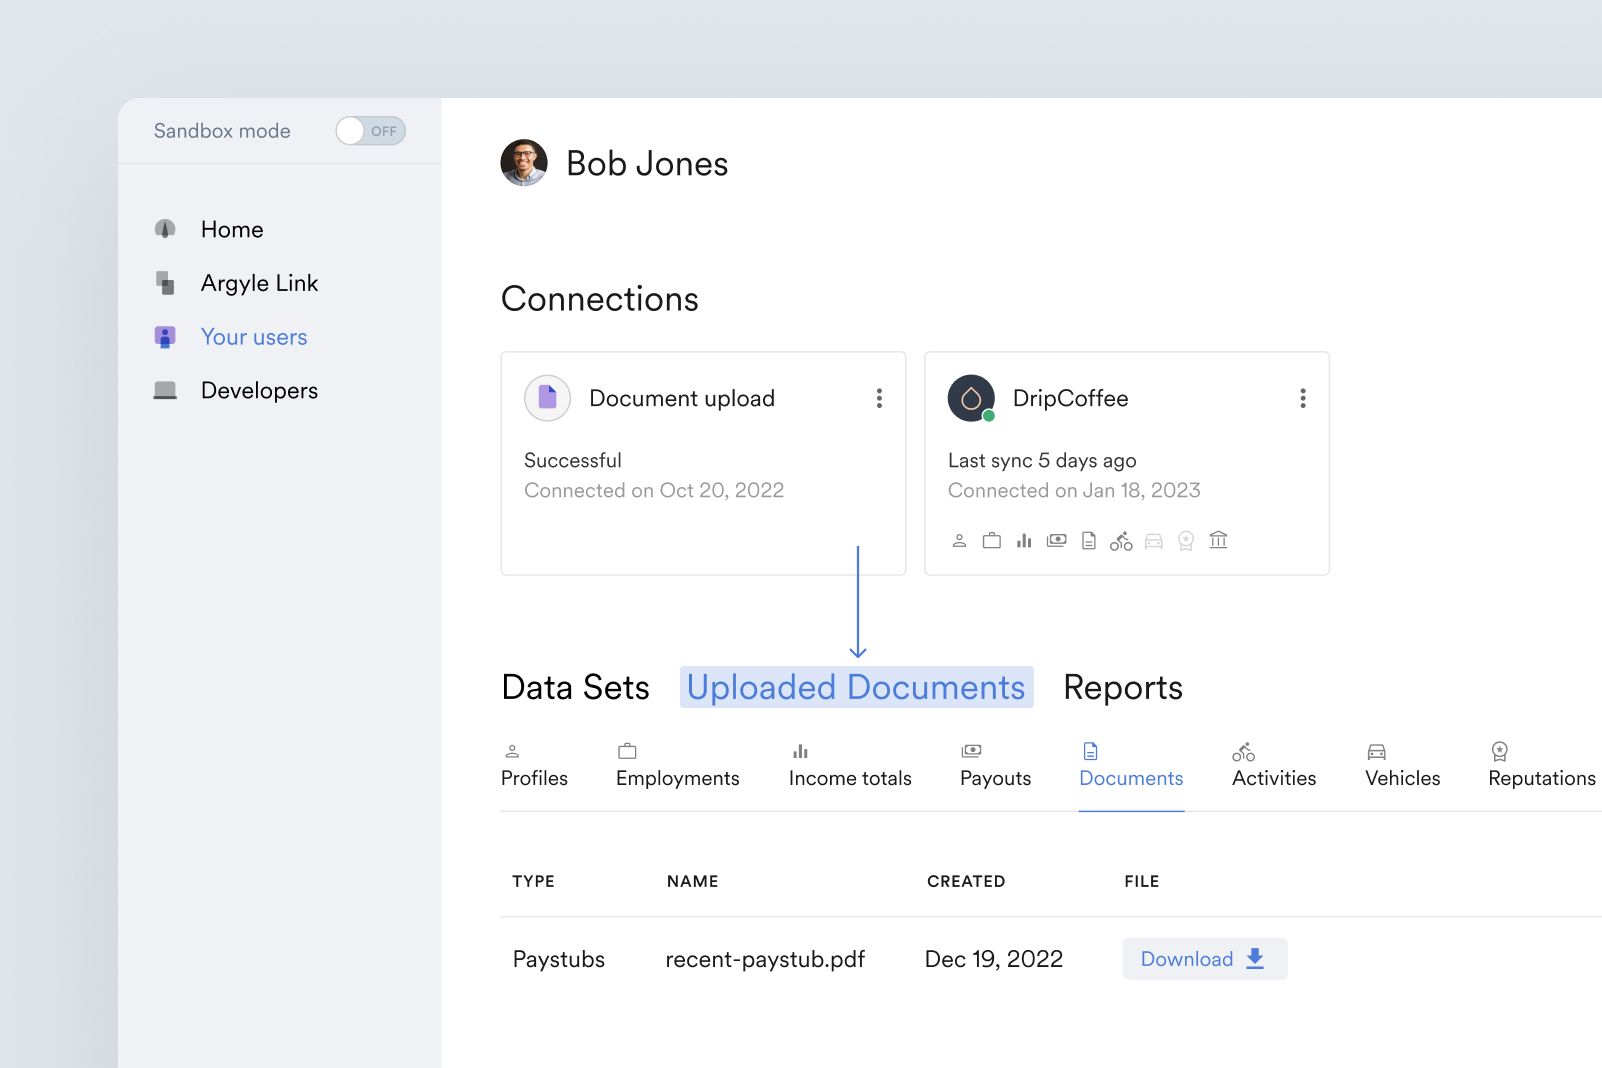
Viewing uploaded documents
- Navigate to the Connections page of Console and click on a user.
- If the user has uploaded employment documents through Argyle Link, an Uploaded Documents tab will appear on the user’s page.
Sandbox and Production modes
Toggle the Sandbox mode switch in the upper-left of Console. A yellow banner will appear at the top of the page when Sandbox mode is ON, and disappear for Production mode when the toggle is set to OFF.
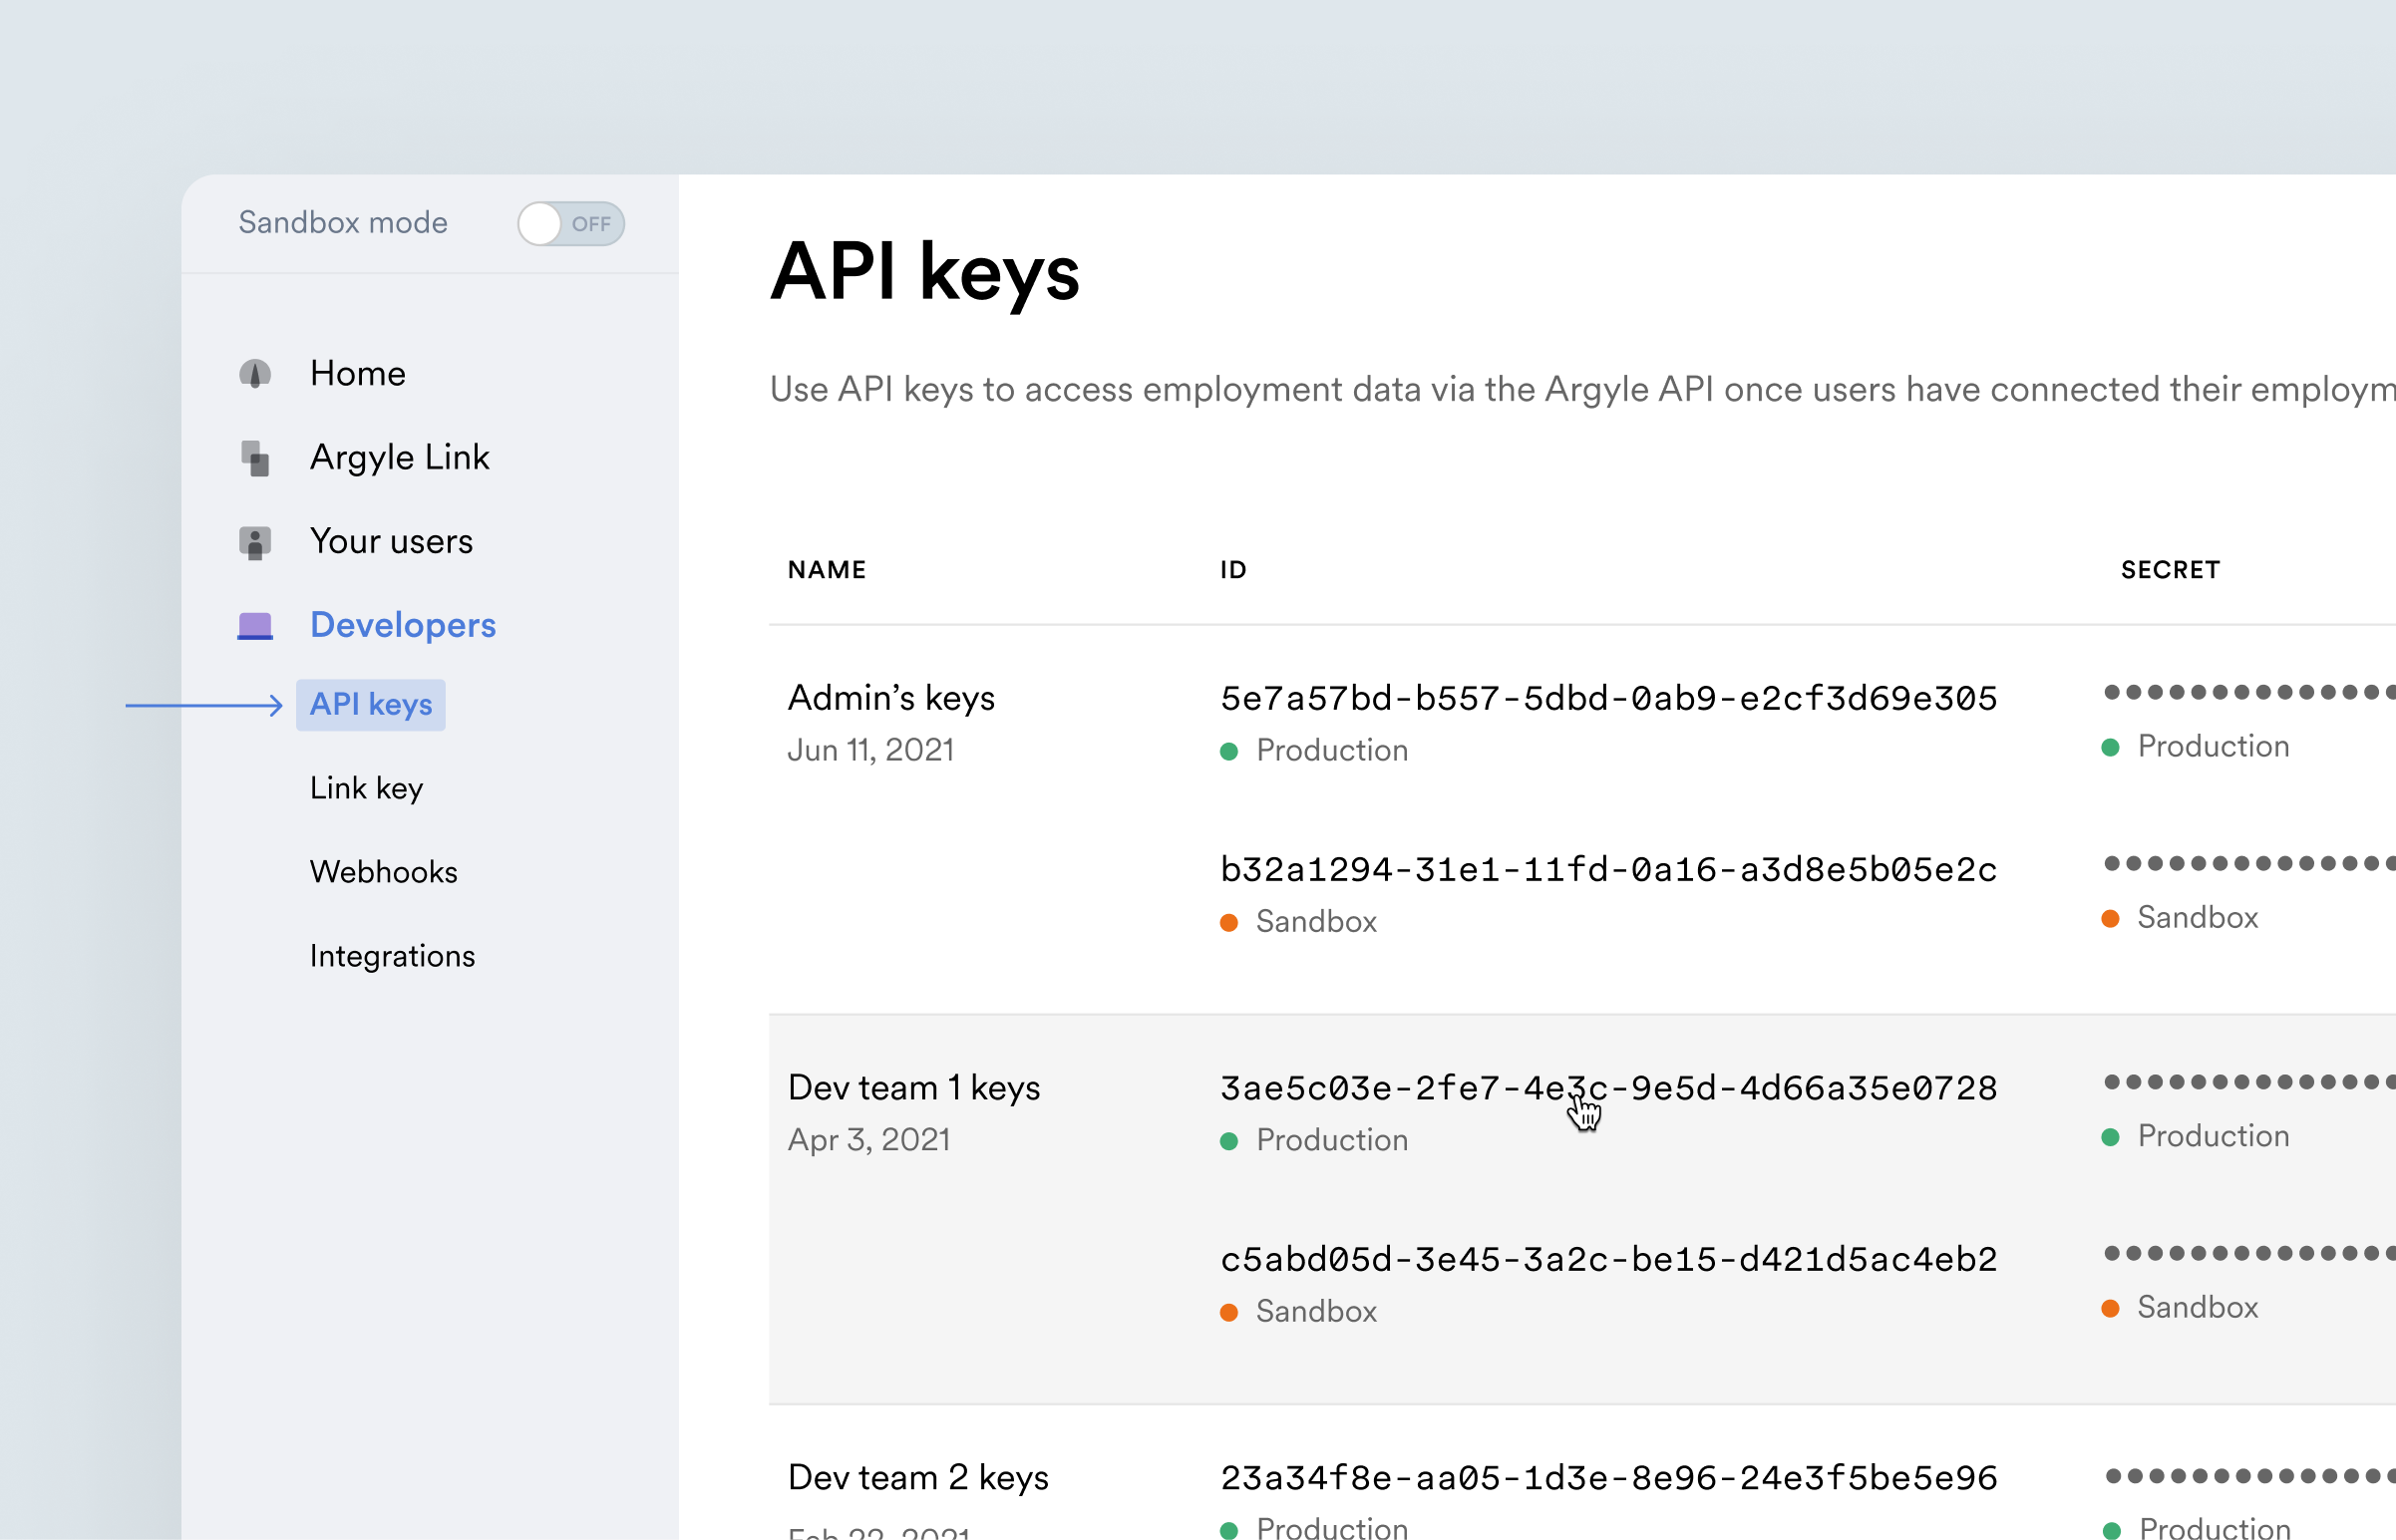
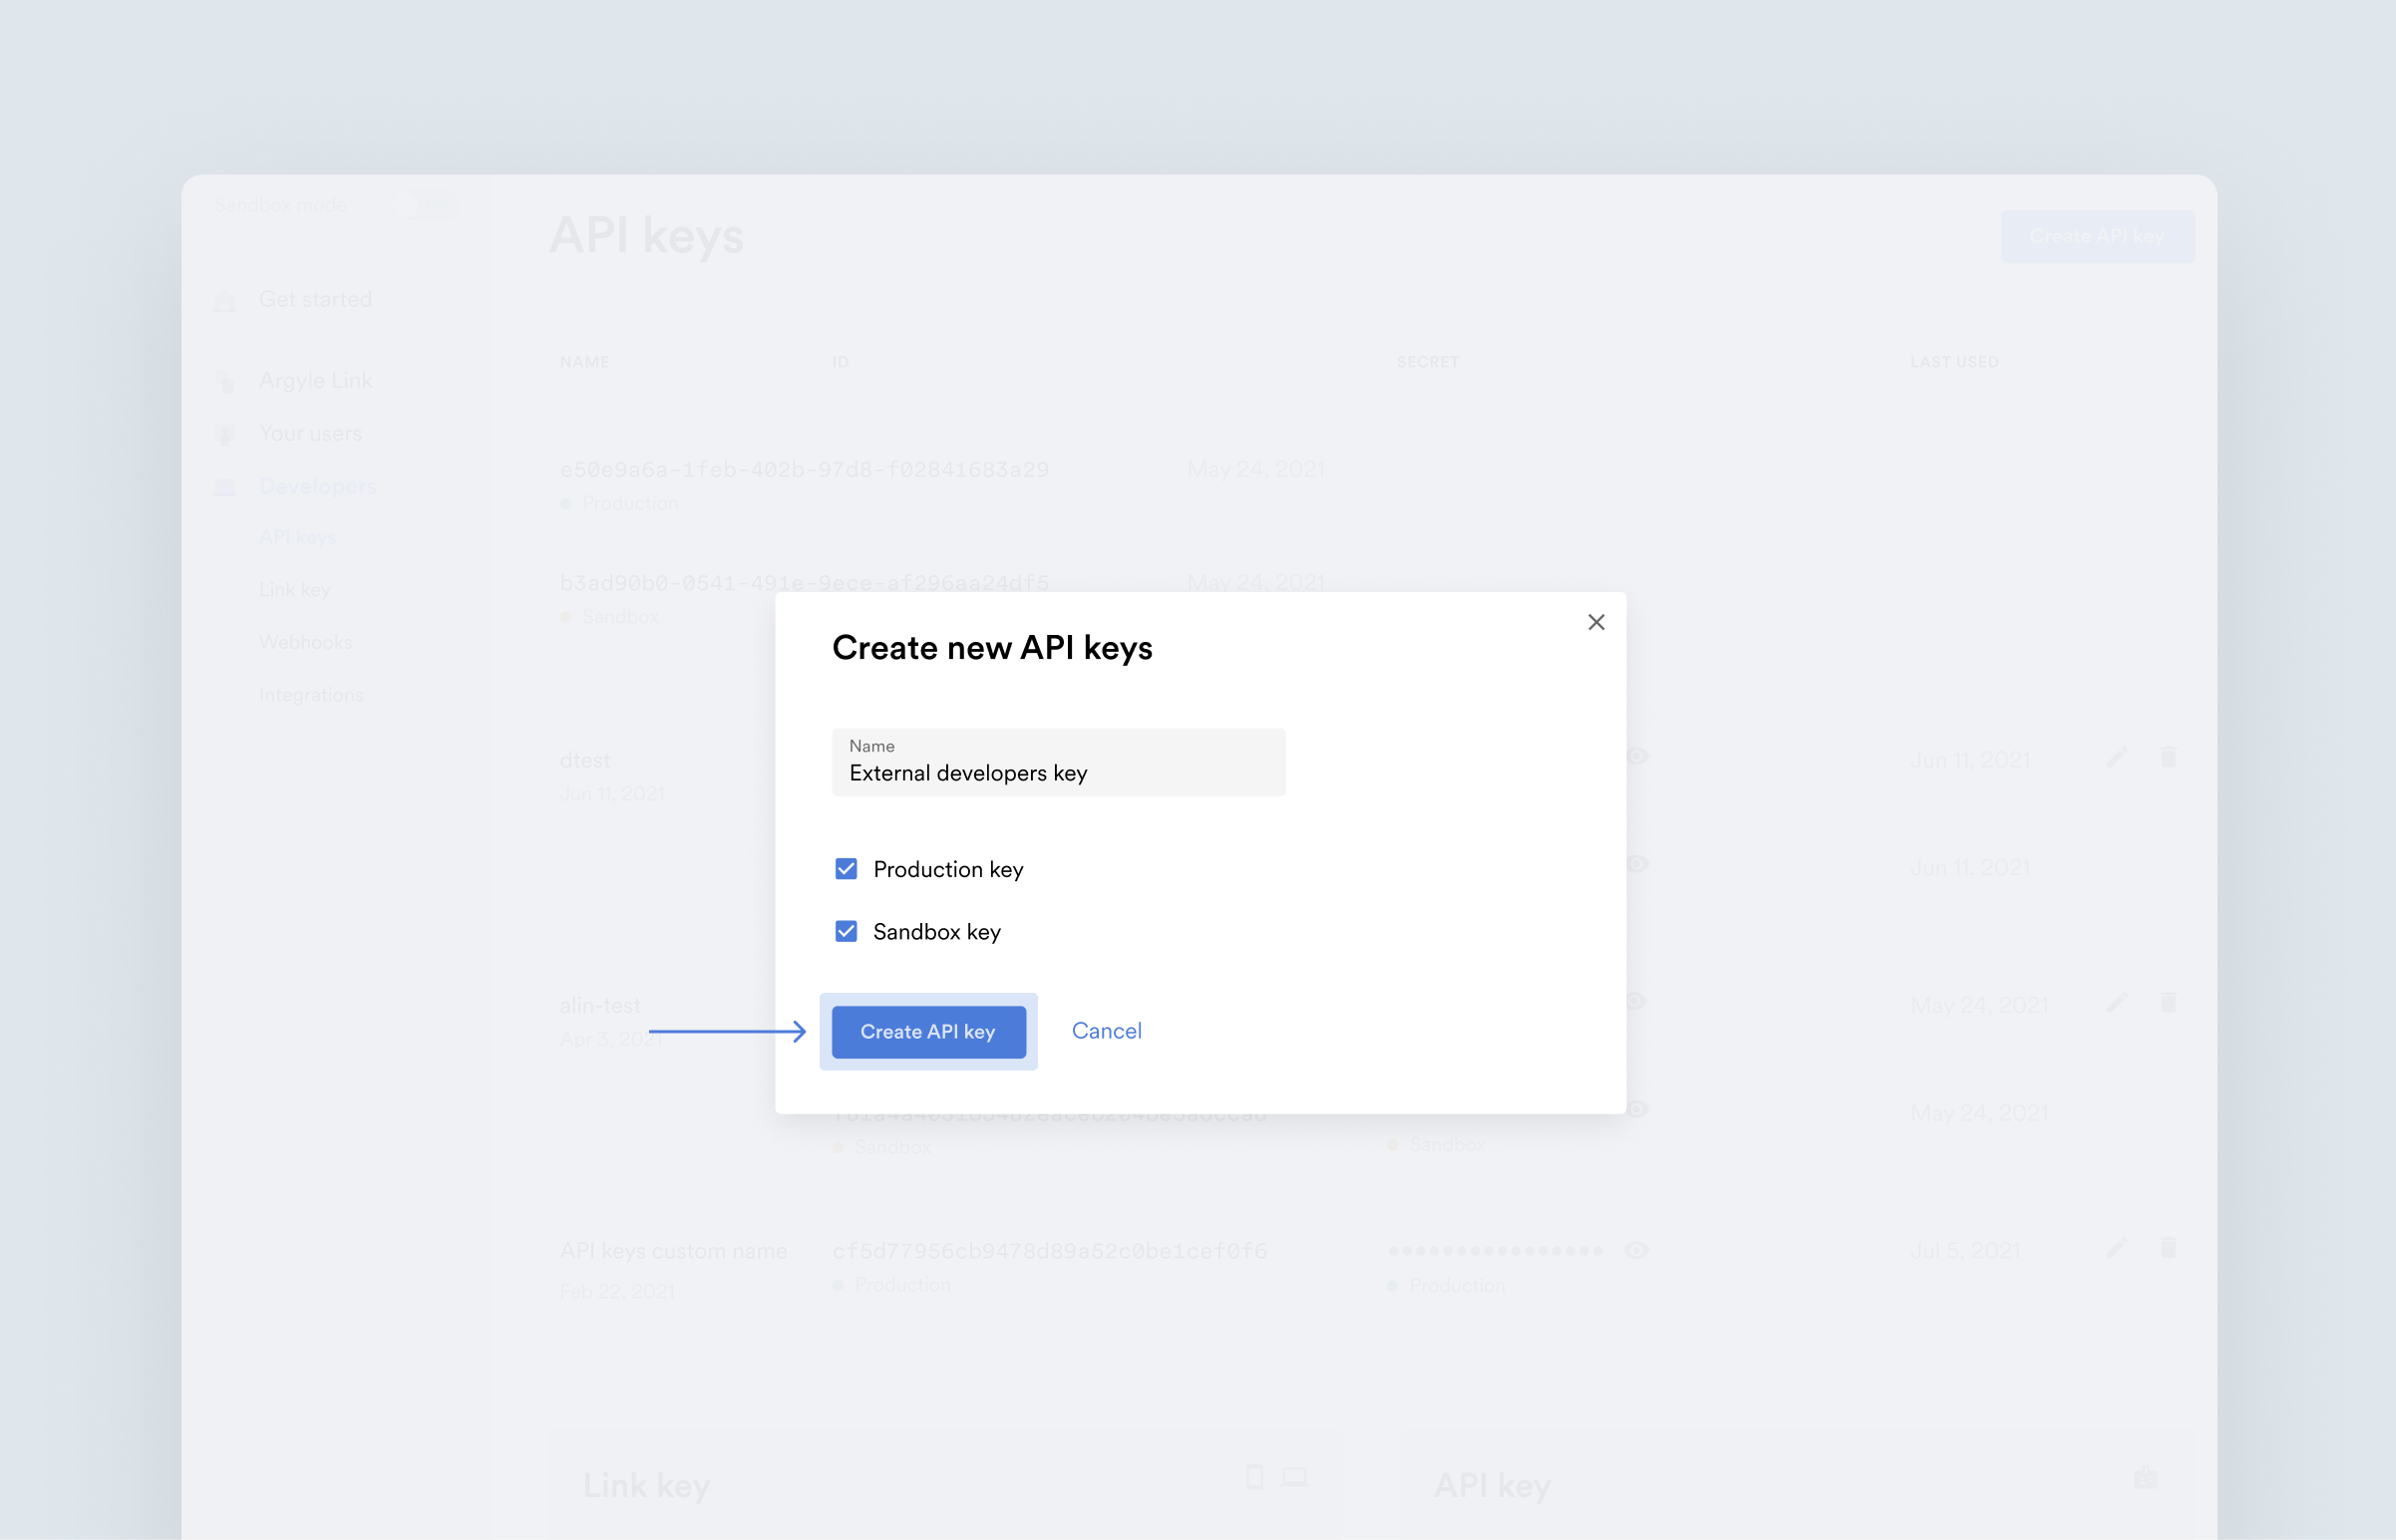
How to generate an API key
- Select API keys within the Developers section of Argyle Console.
- Click Create API key in the upper-right.
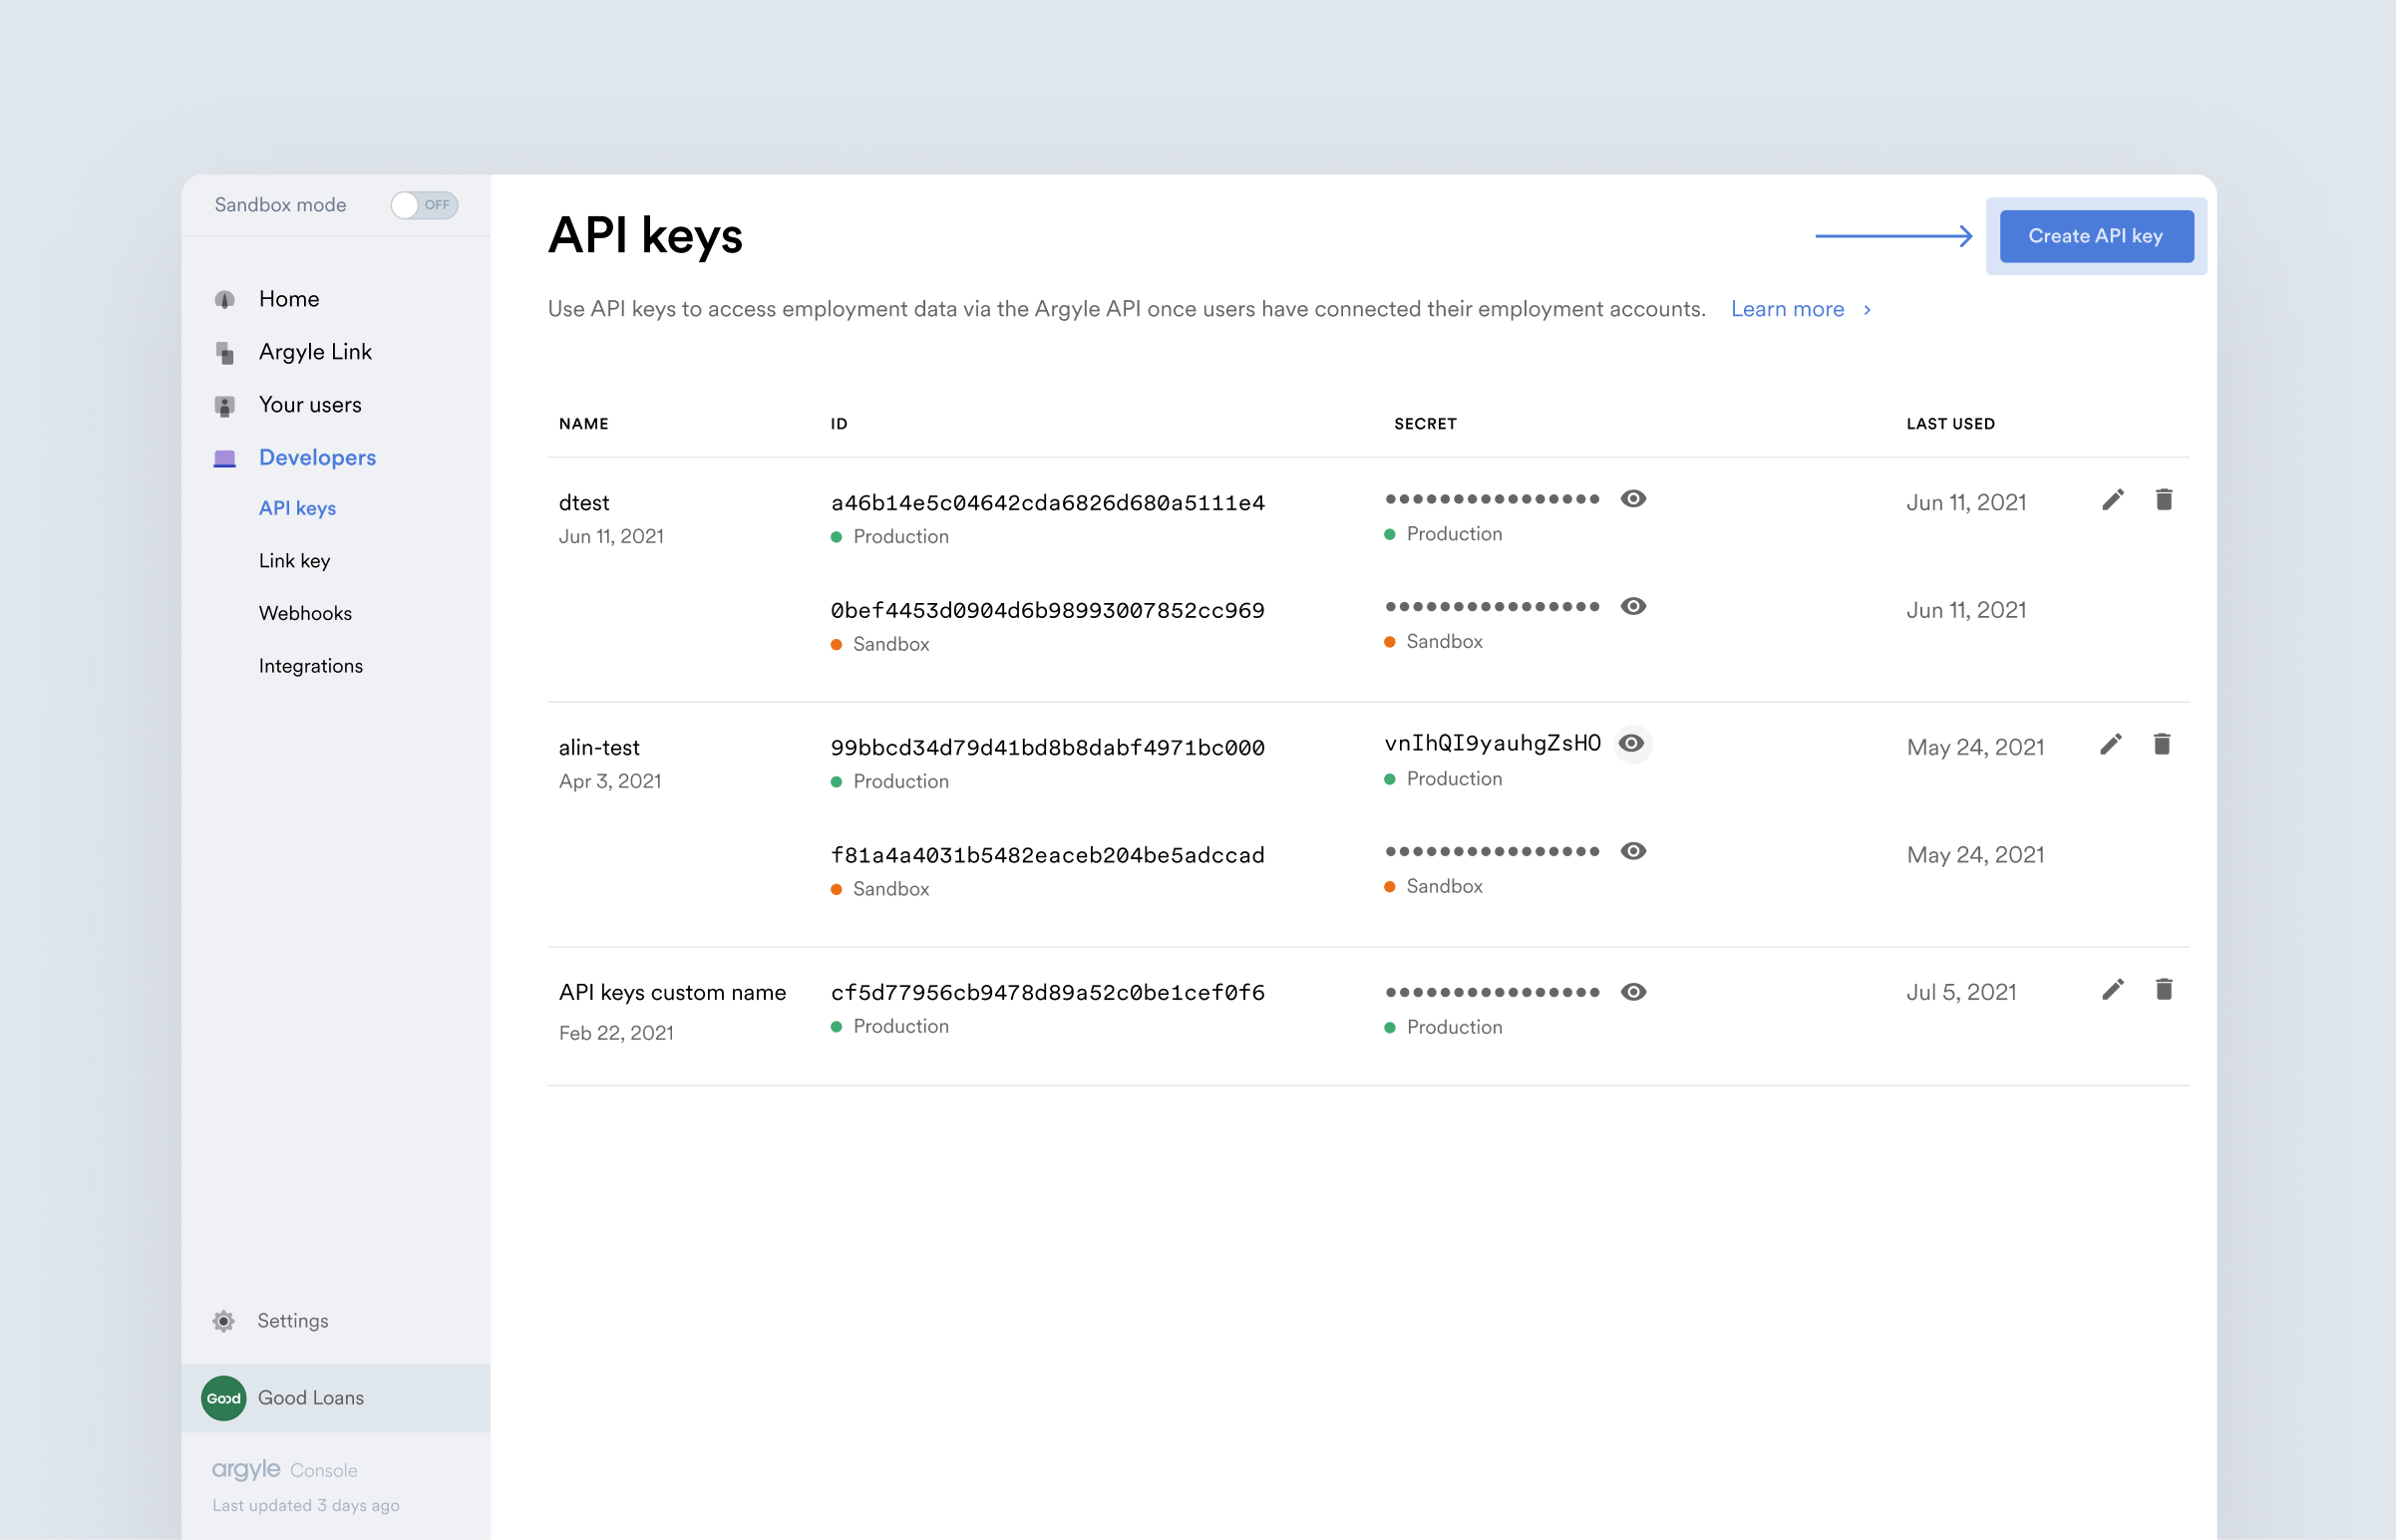
- A pop-up will display. Enter a name that will help you recognize the API keys later in Console, and then select both Sandbox key and Production key if you want to generate API keys for both environments.
Adding your company details
Add your information and upload a circular logo to the Company details tab in Settings.Where to manage webhooks
Visit the Webhooks tab in the Developers section of Console to view and manage your existing webhook subscriptions as well as create new ones.
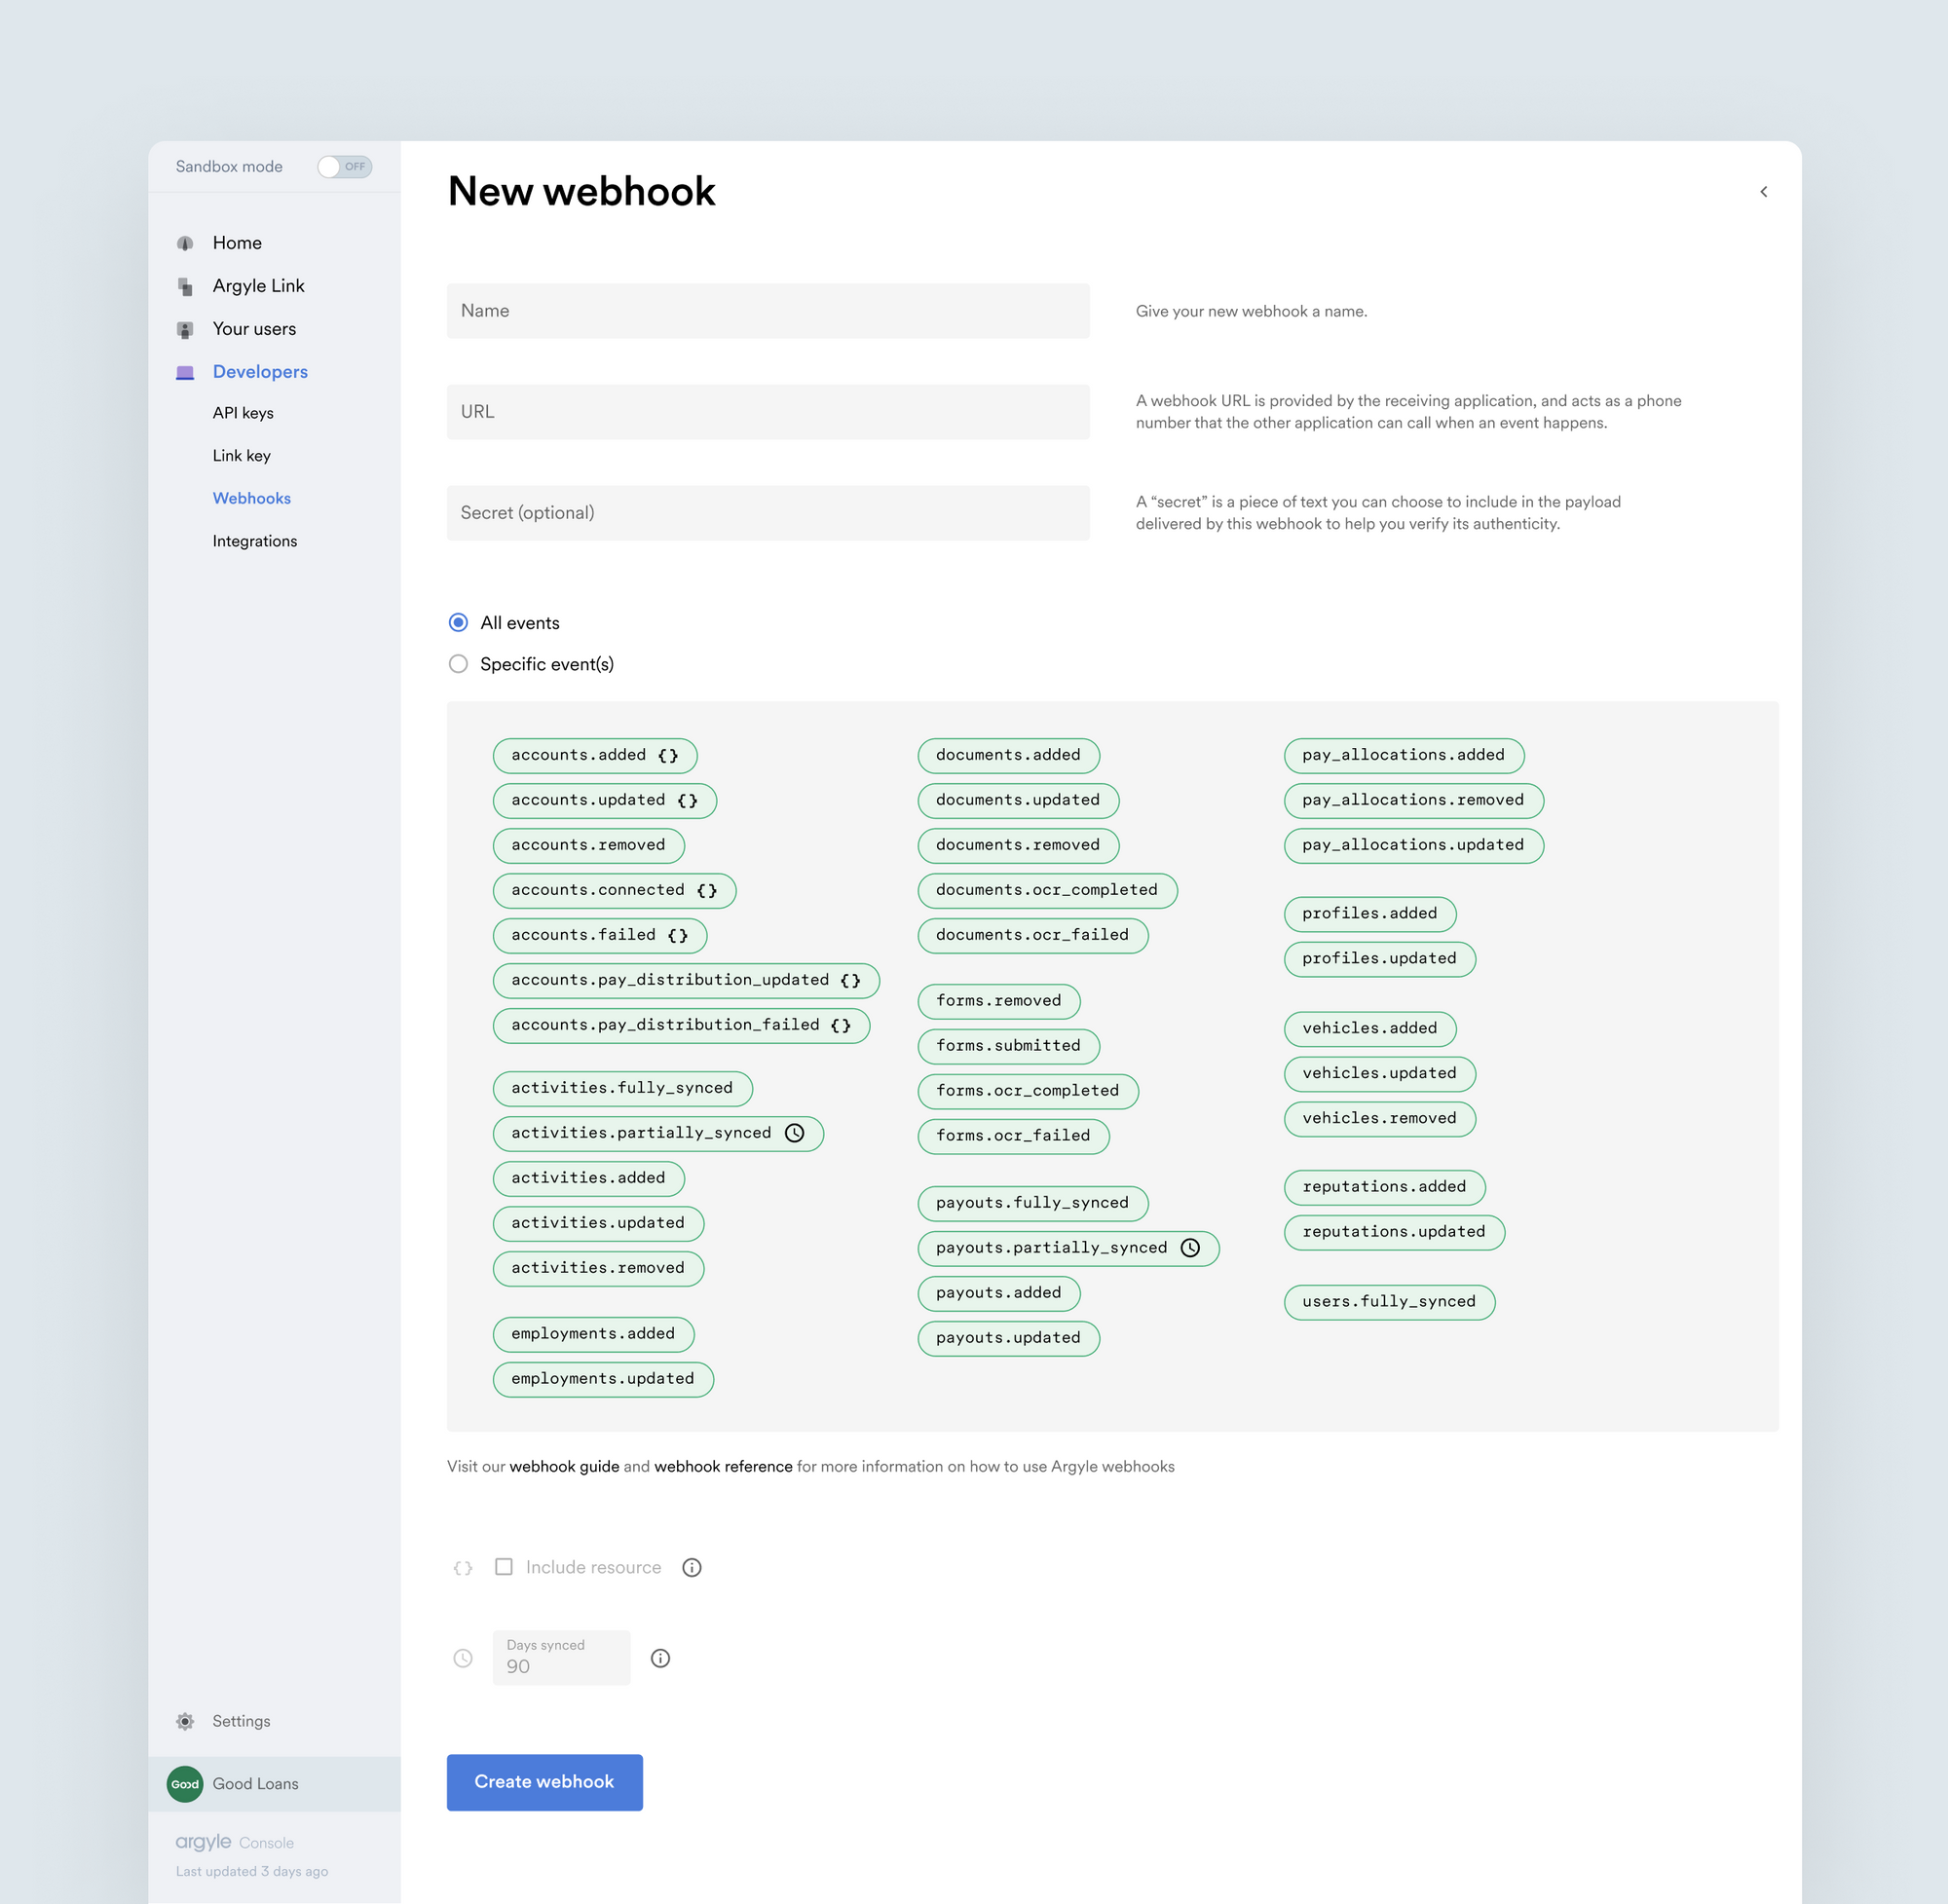
These interfaces provide a simple, UI-based way of interacting with webhooks. You can also use webhooks by interacting directly with the API. Consult our Webhooks Reference for more information.