> ## Documentation Index
> Fetch the complete documentation index at: https://docs.argyle.com/llms.txt
> Use this file to discover all available pages before exploring further.
# Empower (internal)
> Verify income and employment within the Empower® LOS platform.
## Overview
Entirely within the Empower® Loan Origination Platform, you can verify income and employment using Argyle's direct connections to U.S. employee payroll accounts.
* Generate **Verification of Income** and **Verification of Employment** reports.
* Access and view **W-2's** and **paystubs** from connected payroll accounts.
* **Re-verify employment** prior to final closing.
 ## How it works
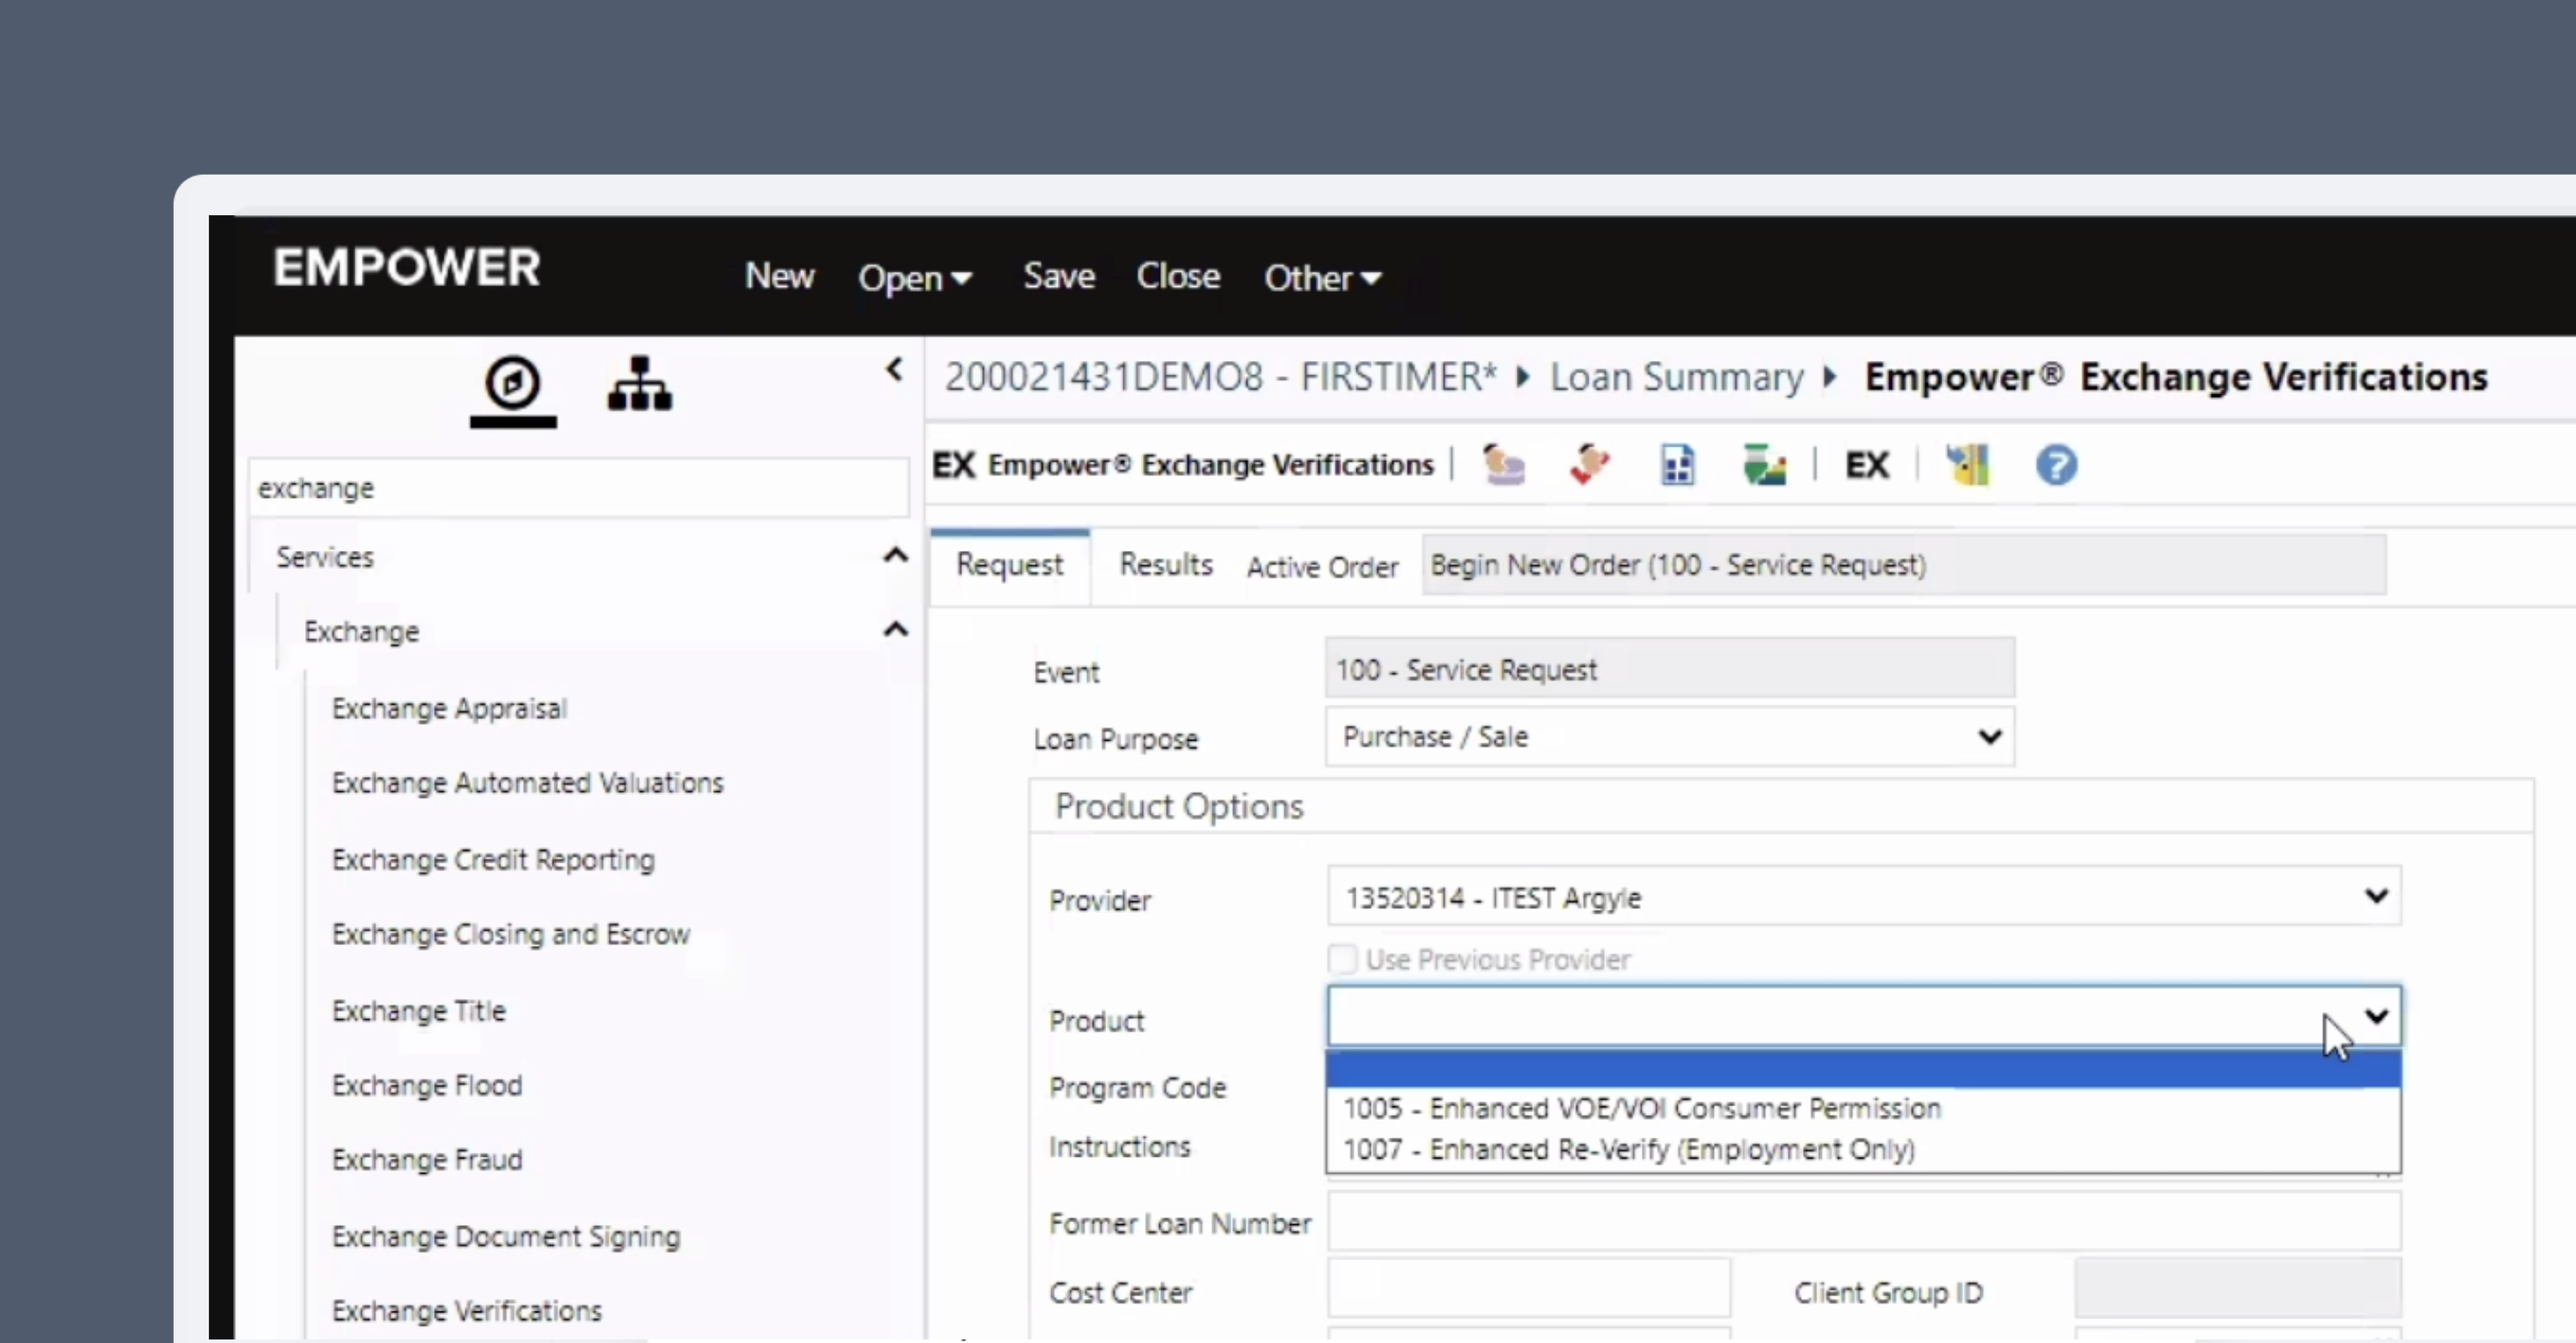
1. Loan officers select Argyle as the **Exchange Verification** provider and choose a product:
* Initial Verification of Income (VOI) and Verification of Employment (VOE)
* Re-verification of Employment (VOE only)
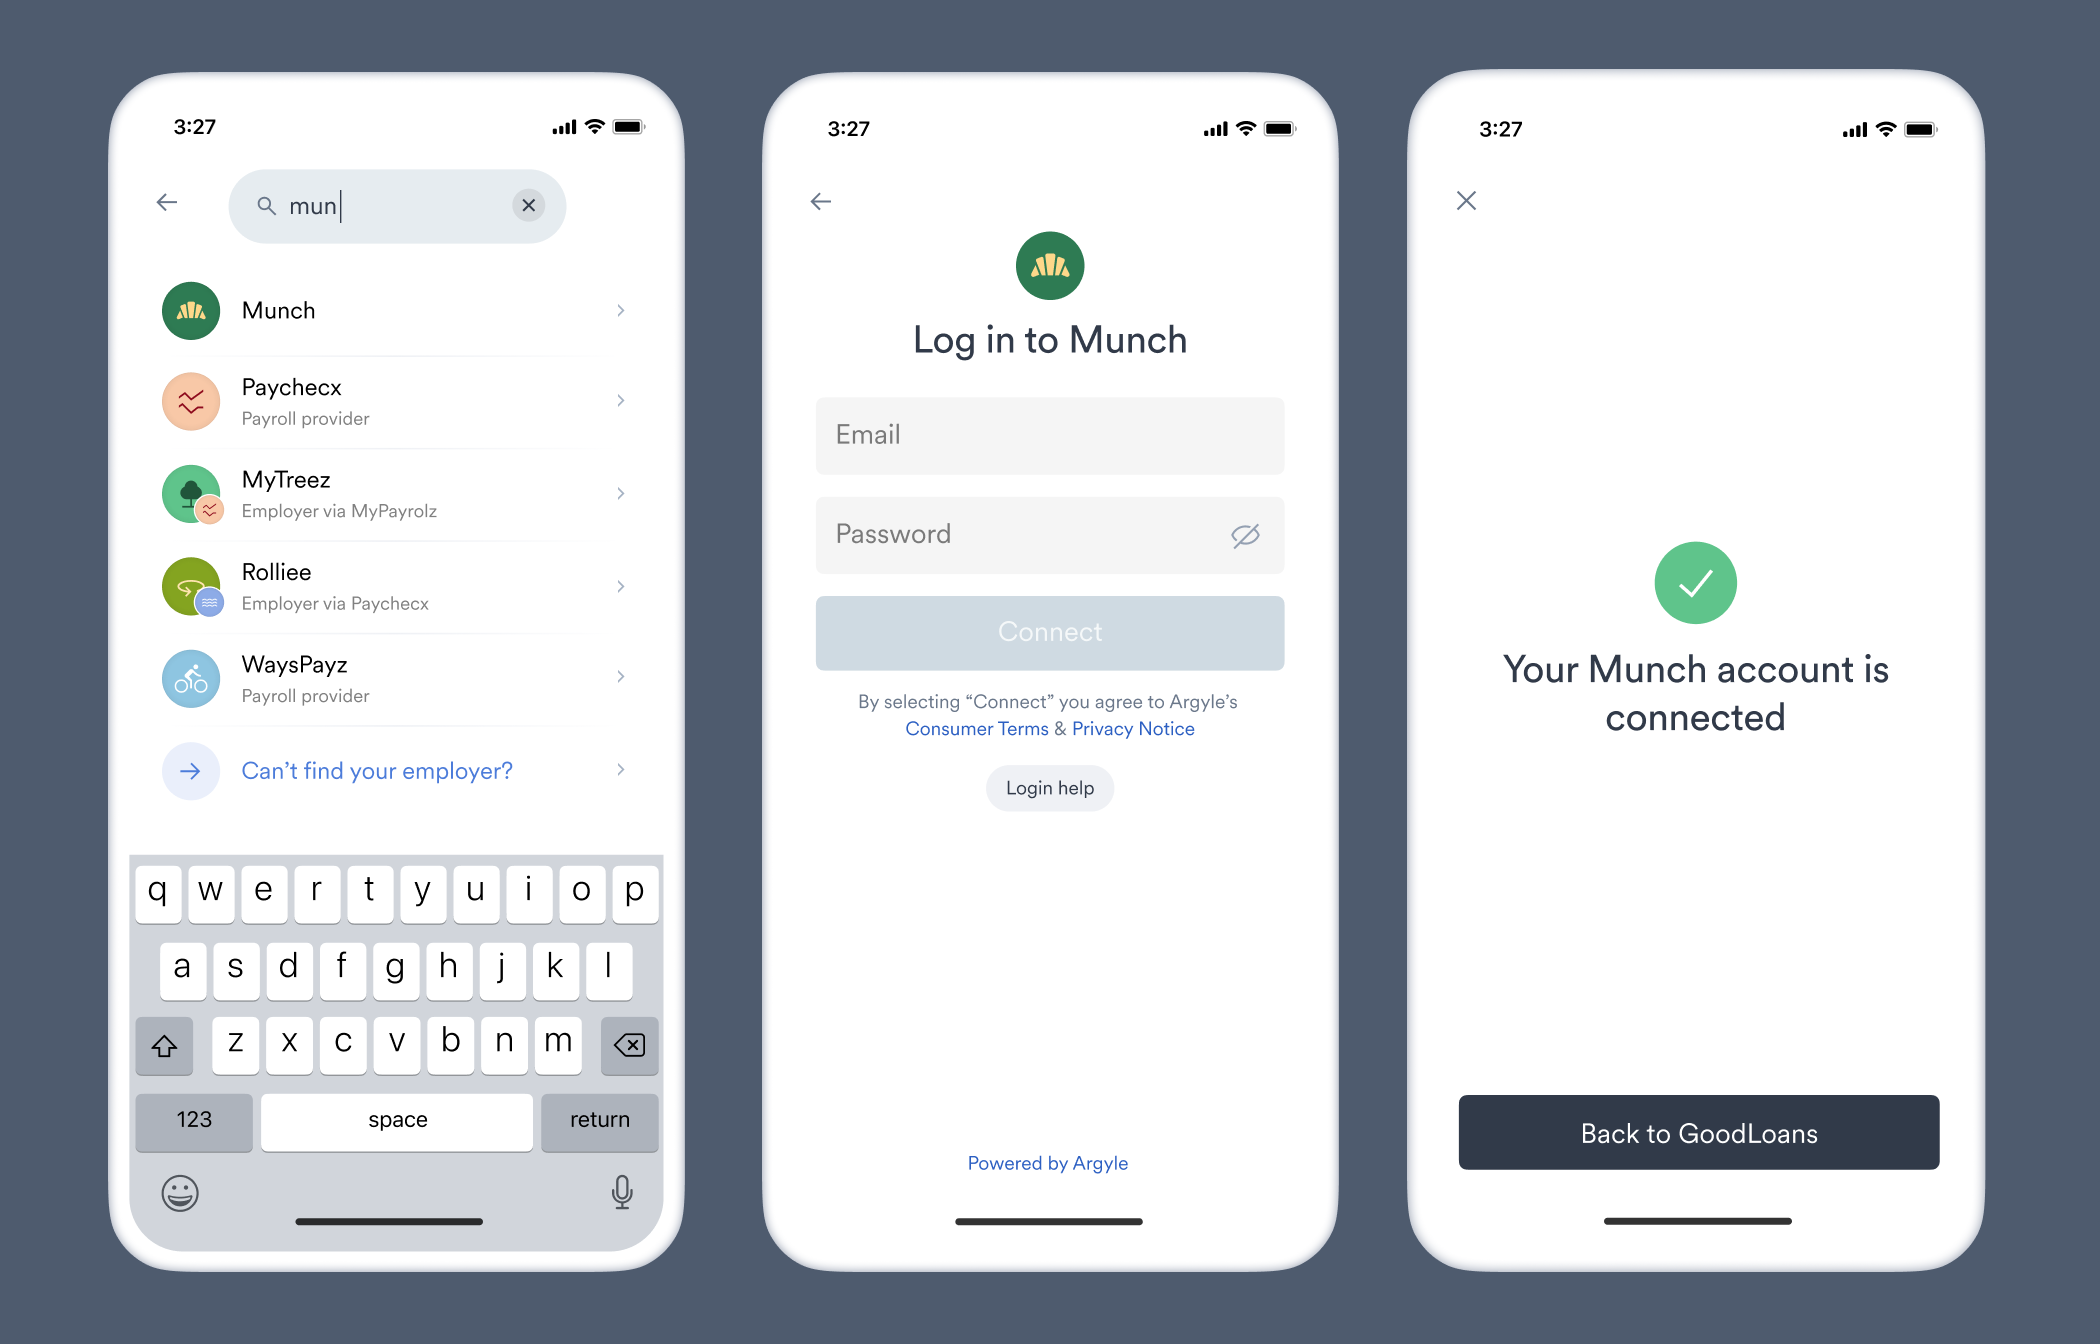
2. After submitting a verification order, the borrower is invited to [connect their payroll accounts](/overview/how-argyle-works#connecting-accounts) through Argyle.
3. The following documents are made available in the Empower® **Document Repository**:
* VOI and VOE report PDFs
* The borrower's last two W-2s
* The borrower's paystubs from the last 30 days
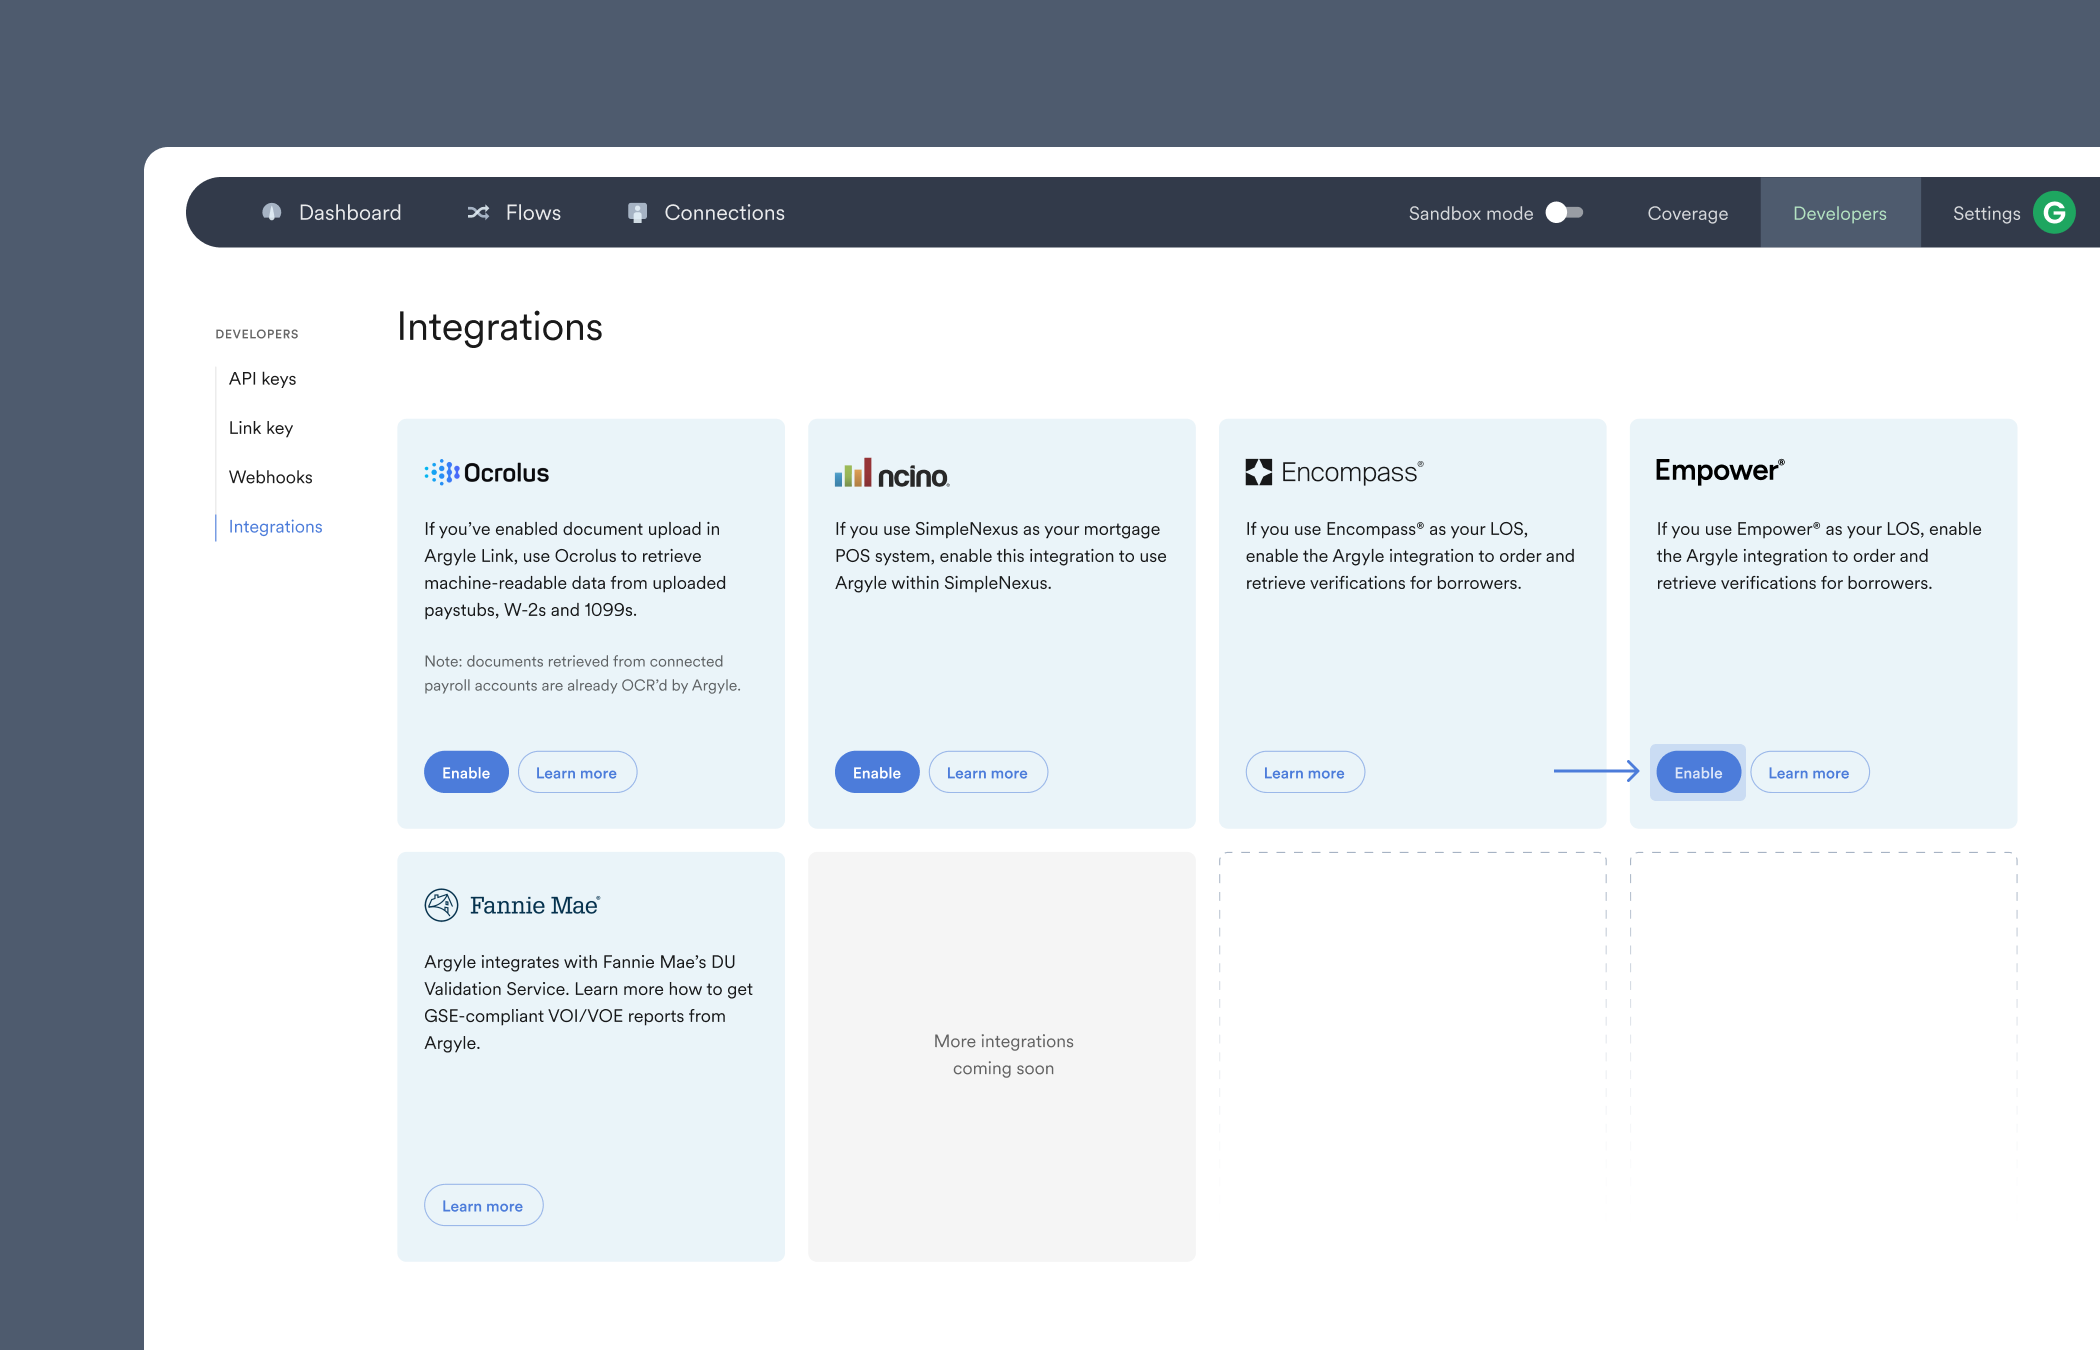
## Enabling the integration
1. Reach out to your Empower® account representative to enable Argyle's verification of income and employment integration.
2. Once you receive your Party IDs from Empower®, go to the Integrations section of Argyle Console.
## How it works
1. Loan officers select Argyle as the **Exchange Verification** provider and choose a product:
* Initial Verification of Income (VOI) and Verification of Employment (VOE)
* Re-verification of Employment (VOE only)
2. After submitting a verification order, the borrower is invited to [connect their payroll accounts](/overview/how-argyle-works#connecting-accounts) through Argyle.
3. The following documents are made available in the Empower® **Document Repository**:
* VOI and VOE report PDFs
* The borrower's last two W-2s
* The borrower's paystubs from the last 30 days
## Enabling the integration
1. Reach out to your Empower® account representative to enable Argyle's verification of income and employment integration.
2. Once you receive your Party IDs from Empower®, go to the Integrations section of Argyle Console.
 3. Enter your `UAT` (testing) and `Production` Party IDs.
4. (Optional) Select **Edit Configuration** to adjust the **Flow** (borrower's payroll connection experience) used in your Empower integration. [Custom Flows](/console/flows/embedded-experiences#customizations) can be created by selecting **+ New Flow** in the Flows section of Argyle Console.
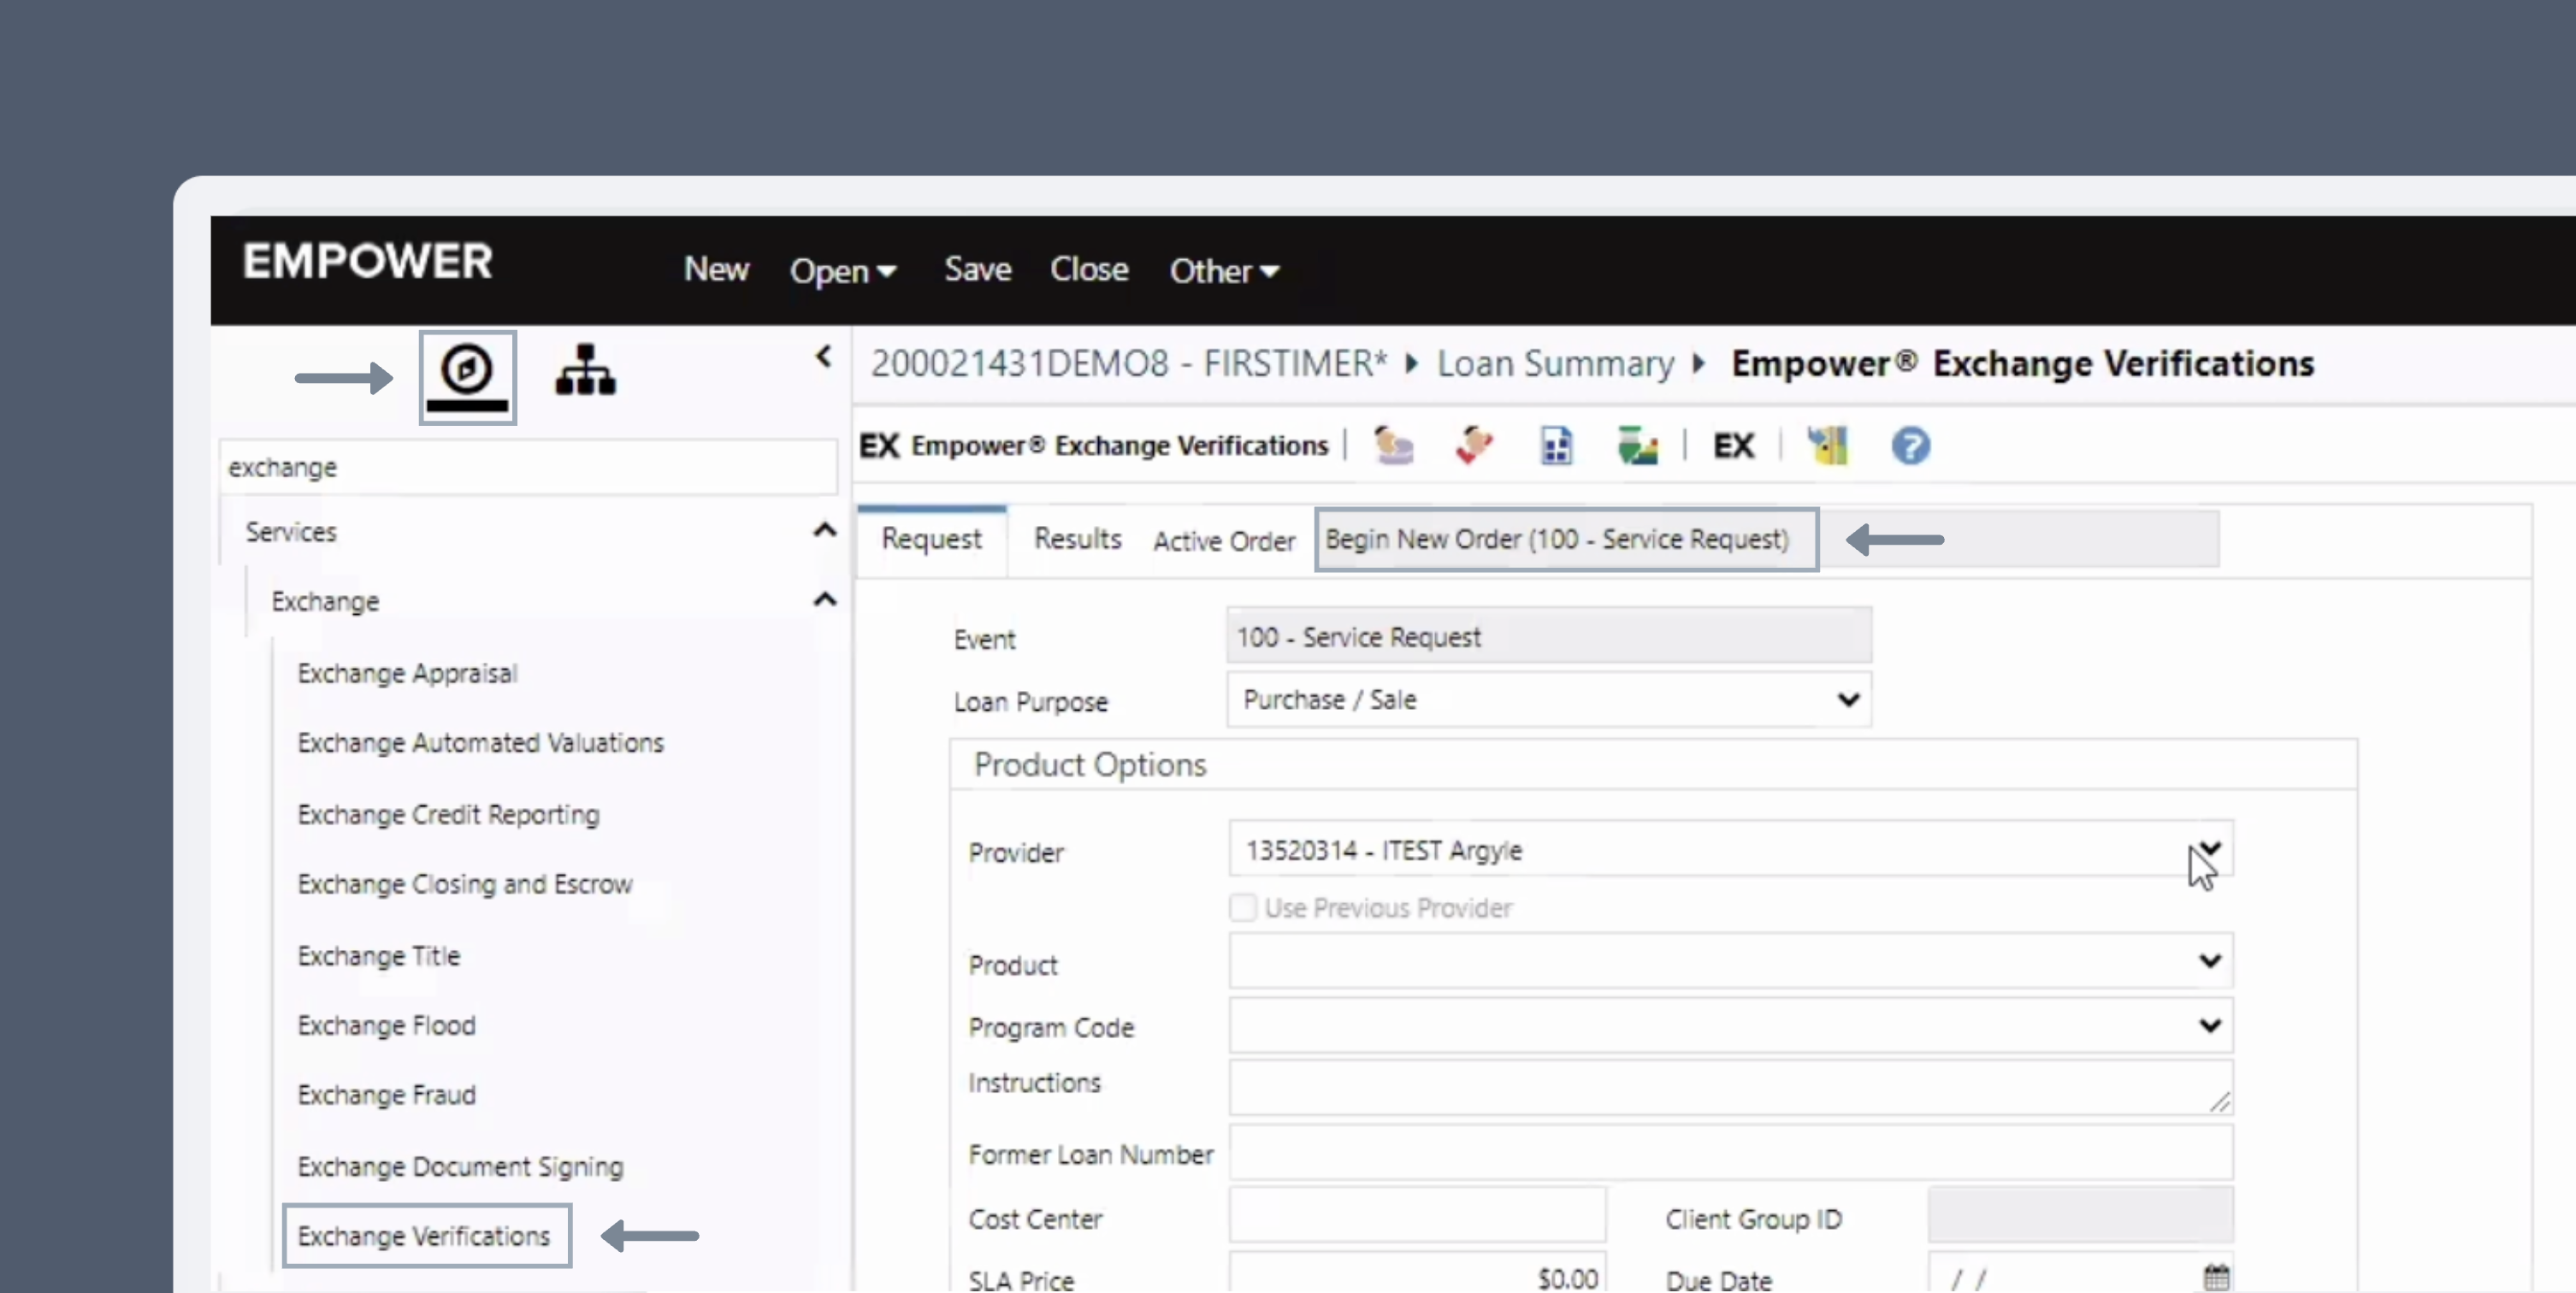
## Ordering a verification
1. Select **Exchange Verifications** from within a loan file and **Begin a New Order (Service Request)**.
2. Choose `Argyle` as the verification **Provider**.
3. Select a verification **Product** — `VOE/VOI` or `Employment Re-verification`.
4. Choose `Conventional` as the **Program Code**.
3. Enter your `UAT` (testing) and `Production` Party IDs.
4. (Optional) Select **Edit Configuration** to adjust the **Flow** (borrower's payroll connection experience) used in your Empower integration. [Custom Flows](/console/flows/embedded-experiences#customizations) can be created by selecting **+ New Flow** in the Flows section of Argyle Console.
## Ordering a verification
1. Select **Exchange Verifications** from within a loan file and **Begin a New Order (Service Request)**.
2. Choose `Argyle` as the verification **Provider**.
3. Select a verification **Product** — `VOE/VOI` or `Employment Re-verification`.
4. Choose `Conventional` as the **Program Code**.
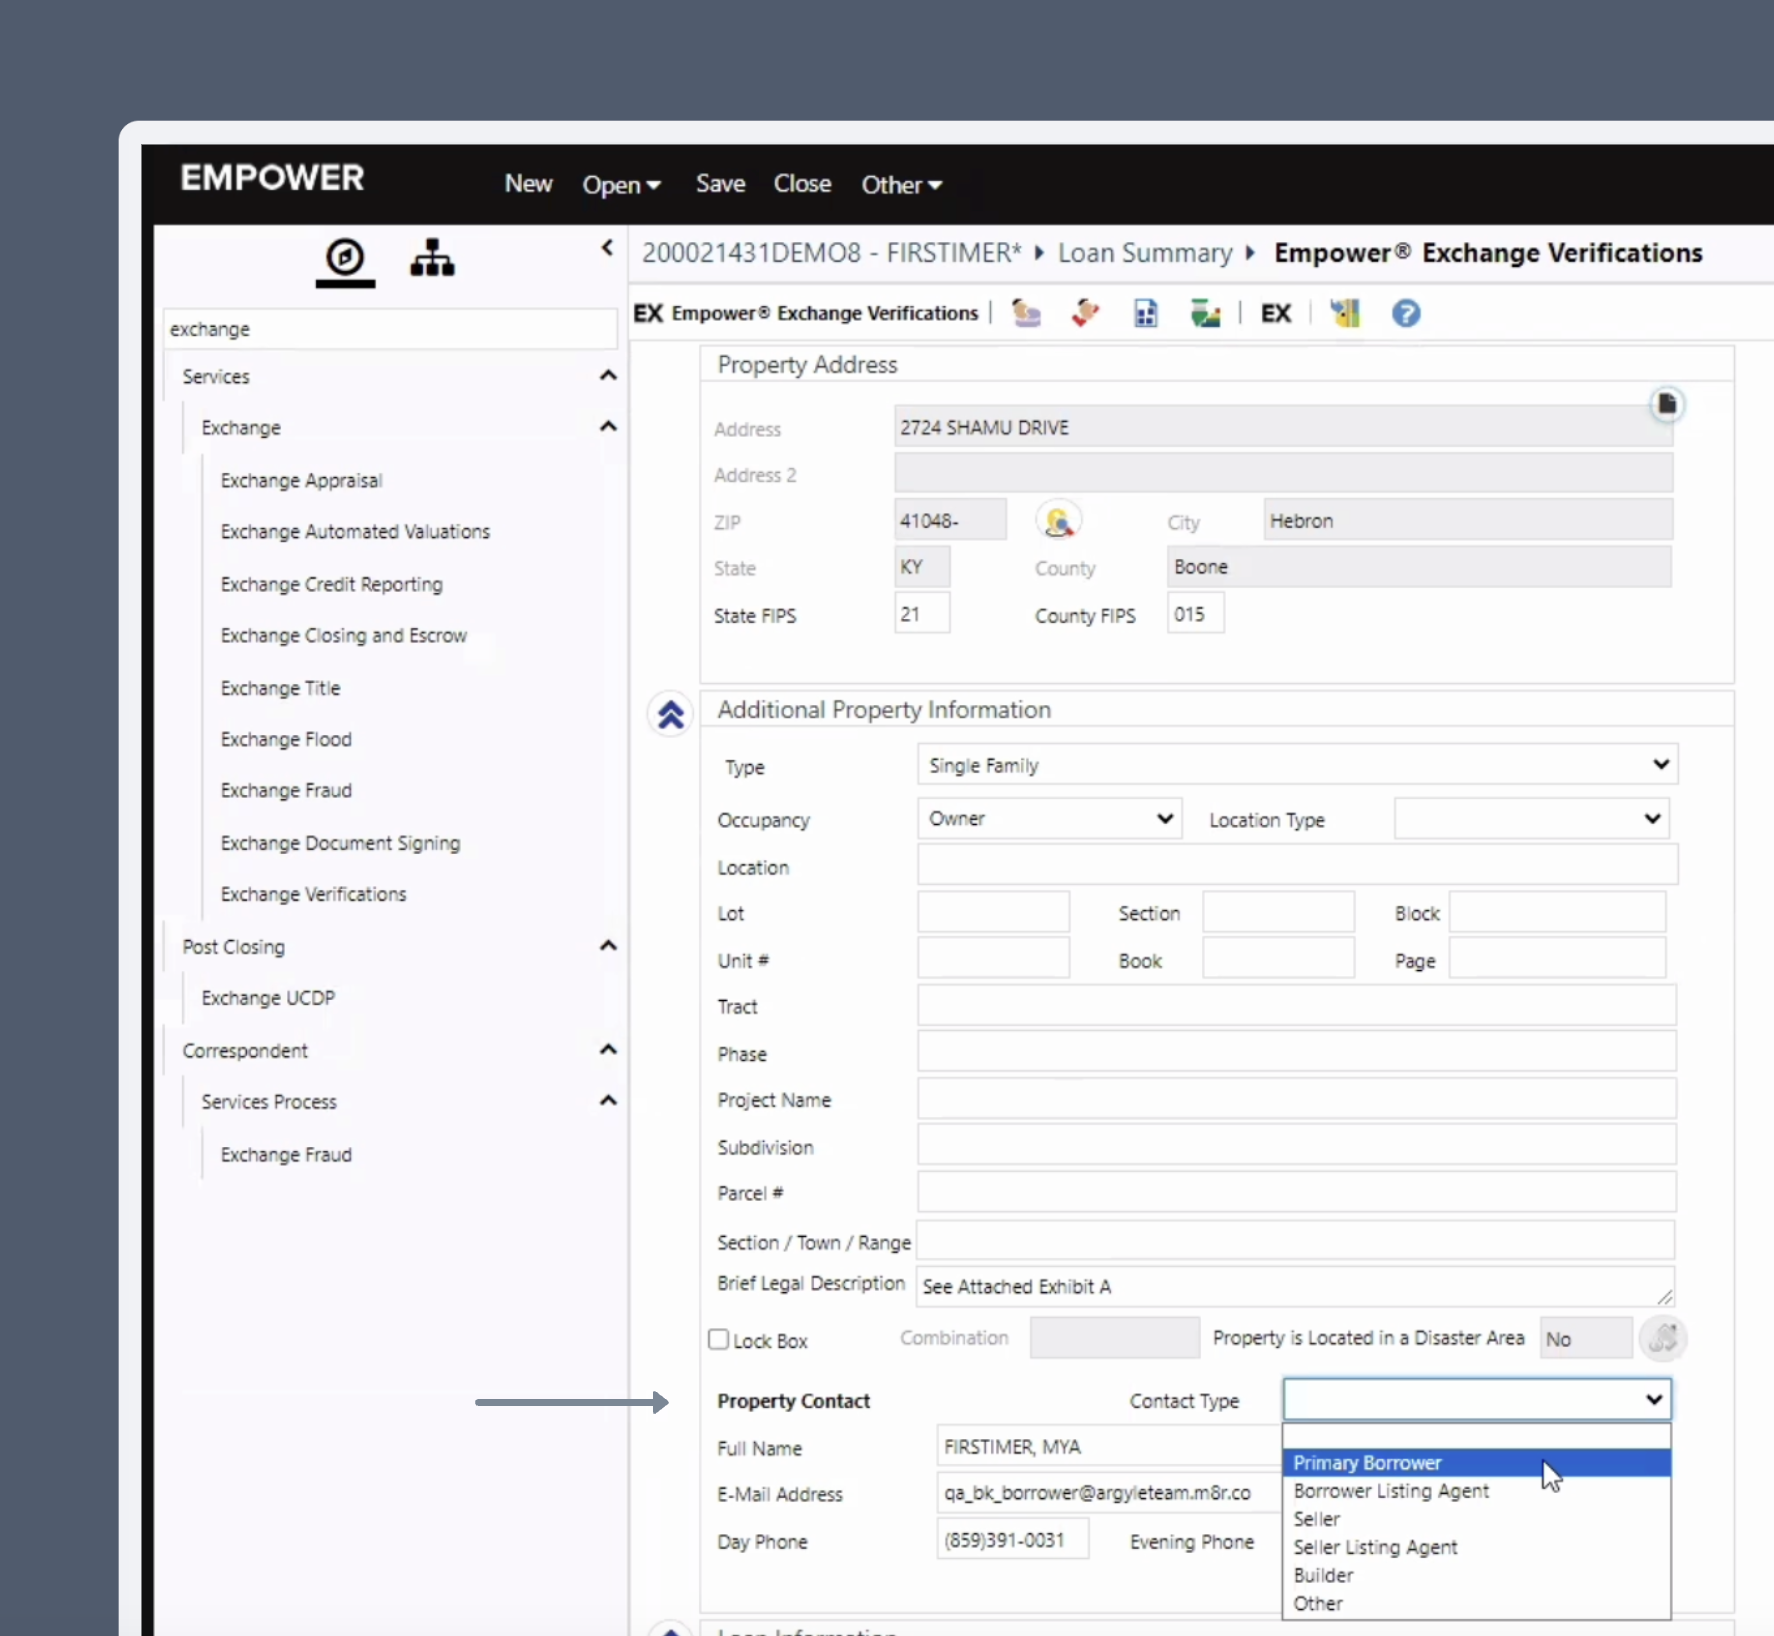
 5. In the **Additional Property Information** section, within the **Contact Type** dropdown select `Primary Borrower`.
Argyle does not currently support multi-borrower orders — we recommend restricting verification orders to one borrower at a time through your Empower settings.
6. Input the **Full Name**, **E-Mail Address**, and **Day Phone** of the borrower (if not already auto-populated).
5. In the **Additional Property Information** section, within the **Contact Type** dropdown select `Primary Borrower`.
Argyle does not currently support multi-borrower orders — we recommend restricting verification orders to one borrower at a time through your Empower settings.
6. Input the **Full Name**, **E-Mail Address**, and **Day Phone** of the borrower (if not already auto-populated).
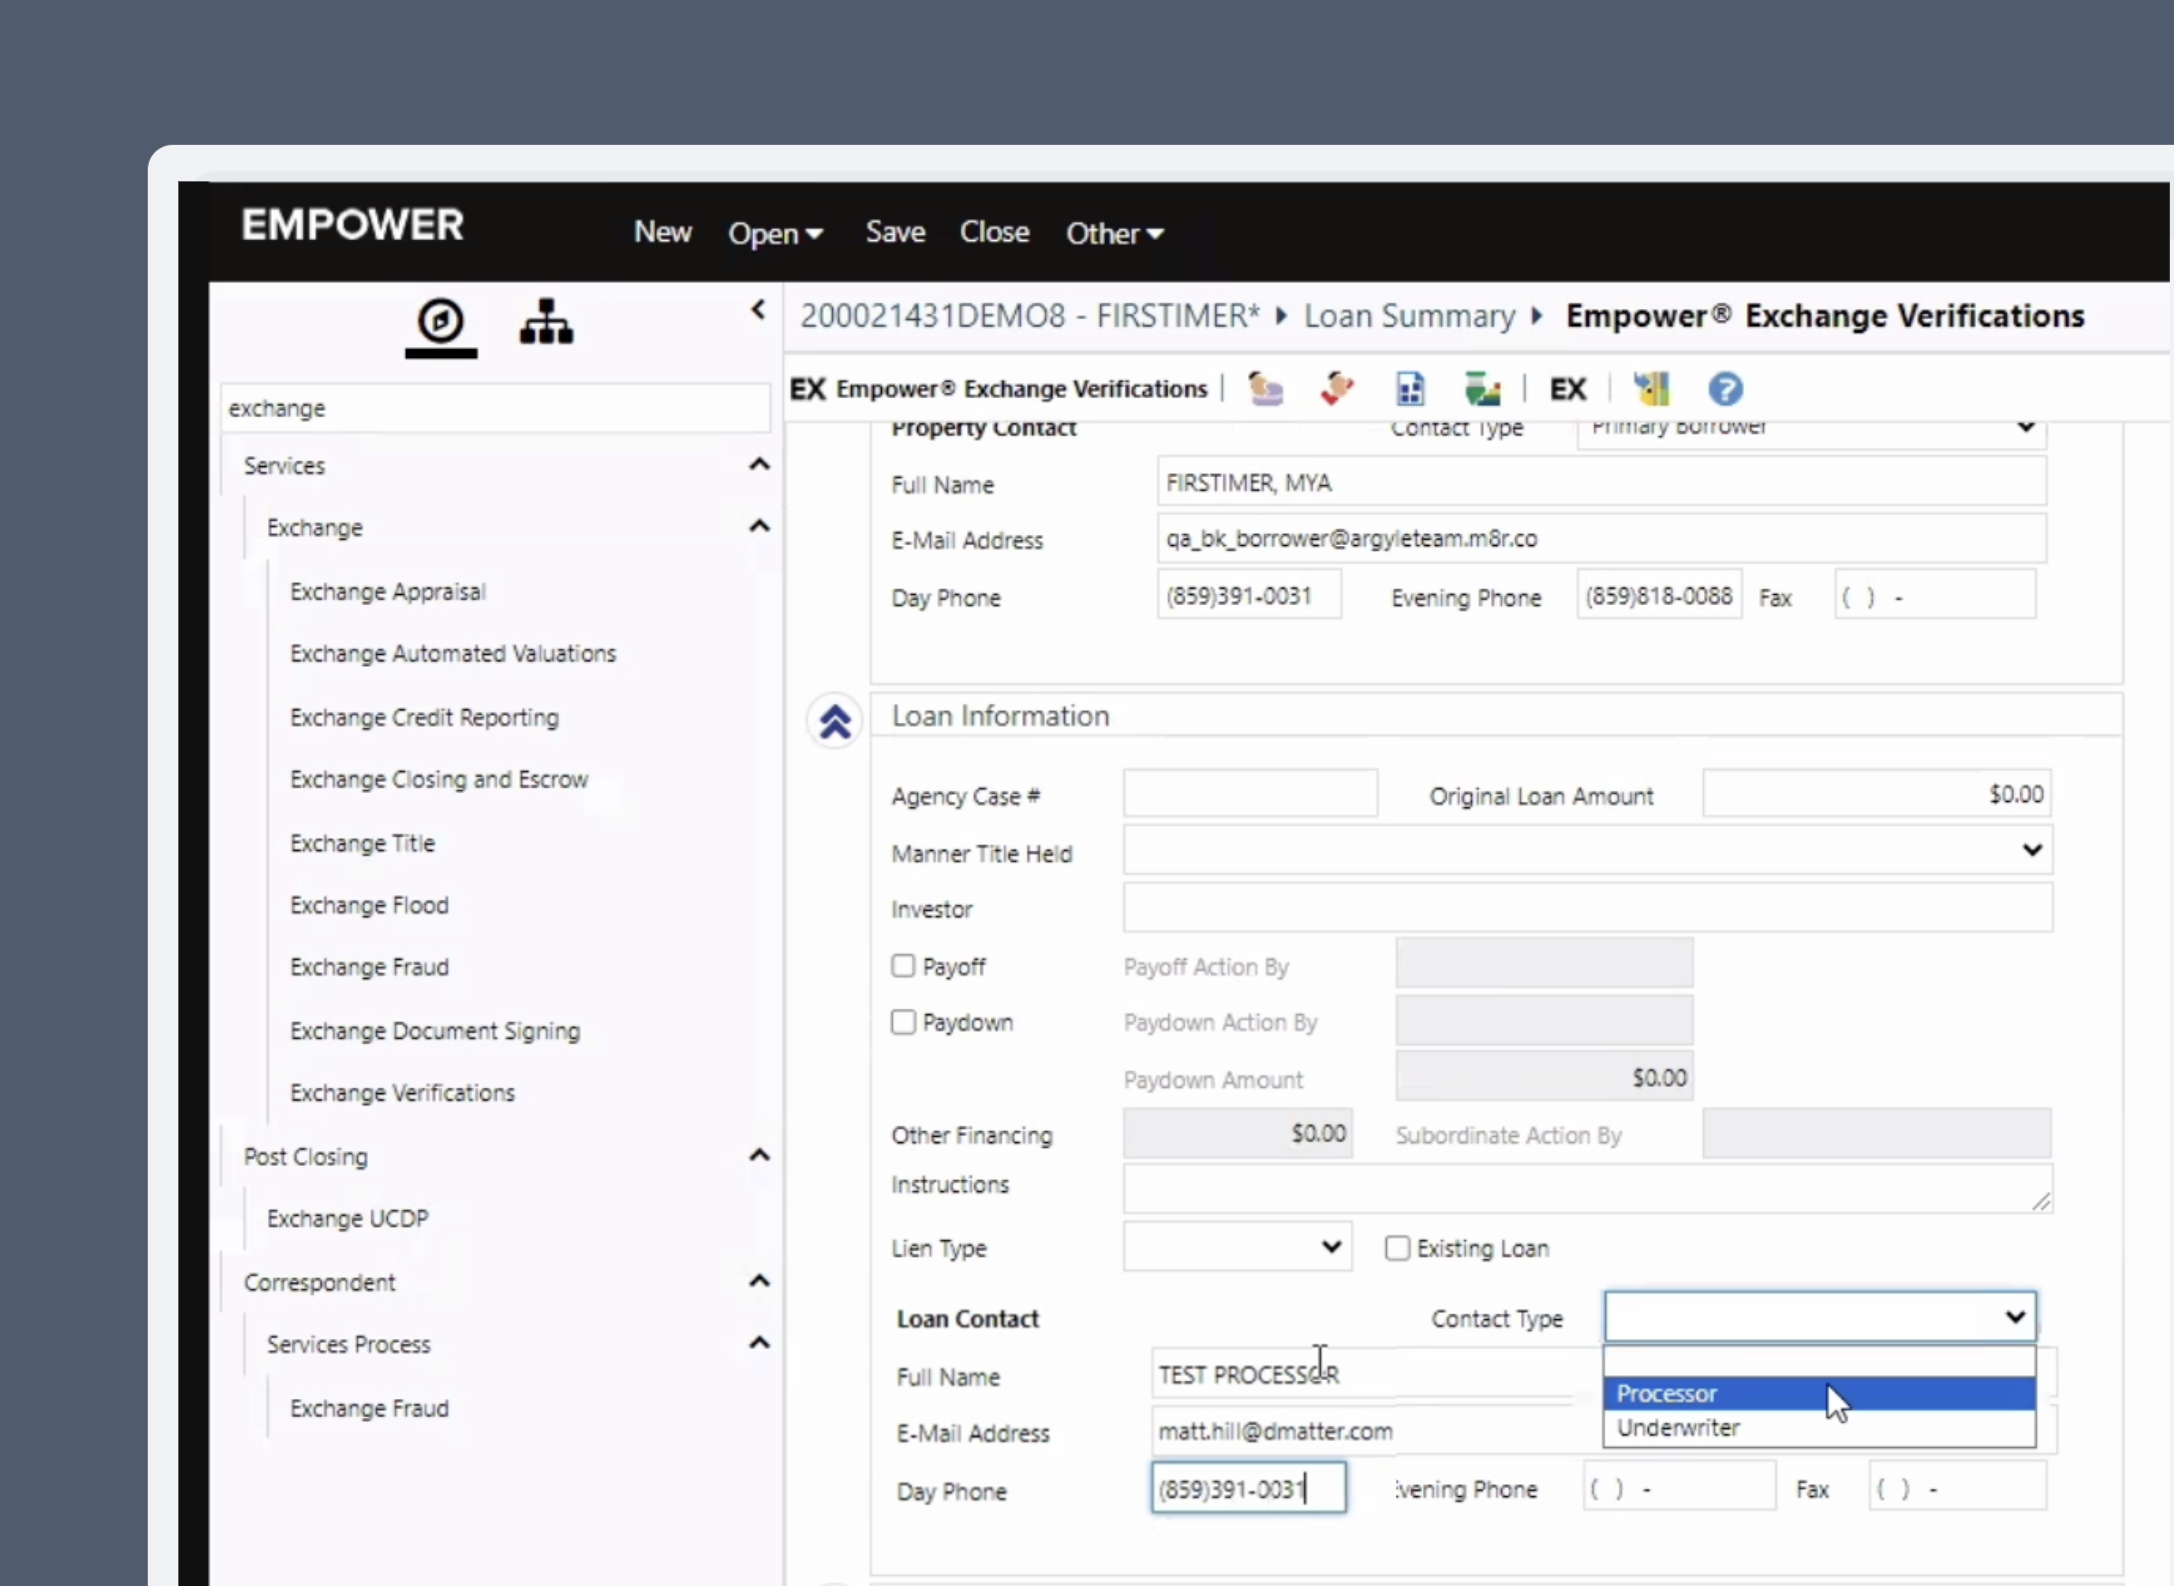
 7. In the **Loan Information** section, within the **Contact Type** dropdown select either `Processor` or `Underwriter` depending on the loan officer's role.
8. Input the **Full Name**, **E-Mail Address**, and **Day Phone** of the loan officer (if not already auto-populated).
7. In the **Loan Information** section, within the **Contact Type** dropdown select either `Processor` or `Underwriter` depending on the loan officer's role.
8. Input the **Full Name**, **E-Mail Address**, and **Day Phone** of the loan officer (if not already auto-populated).
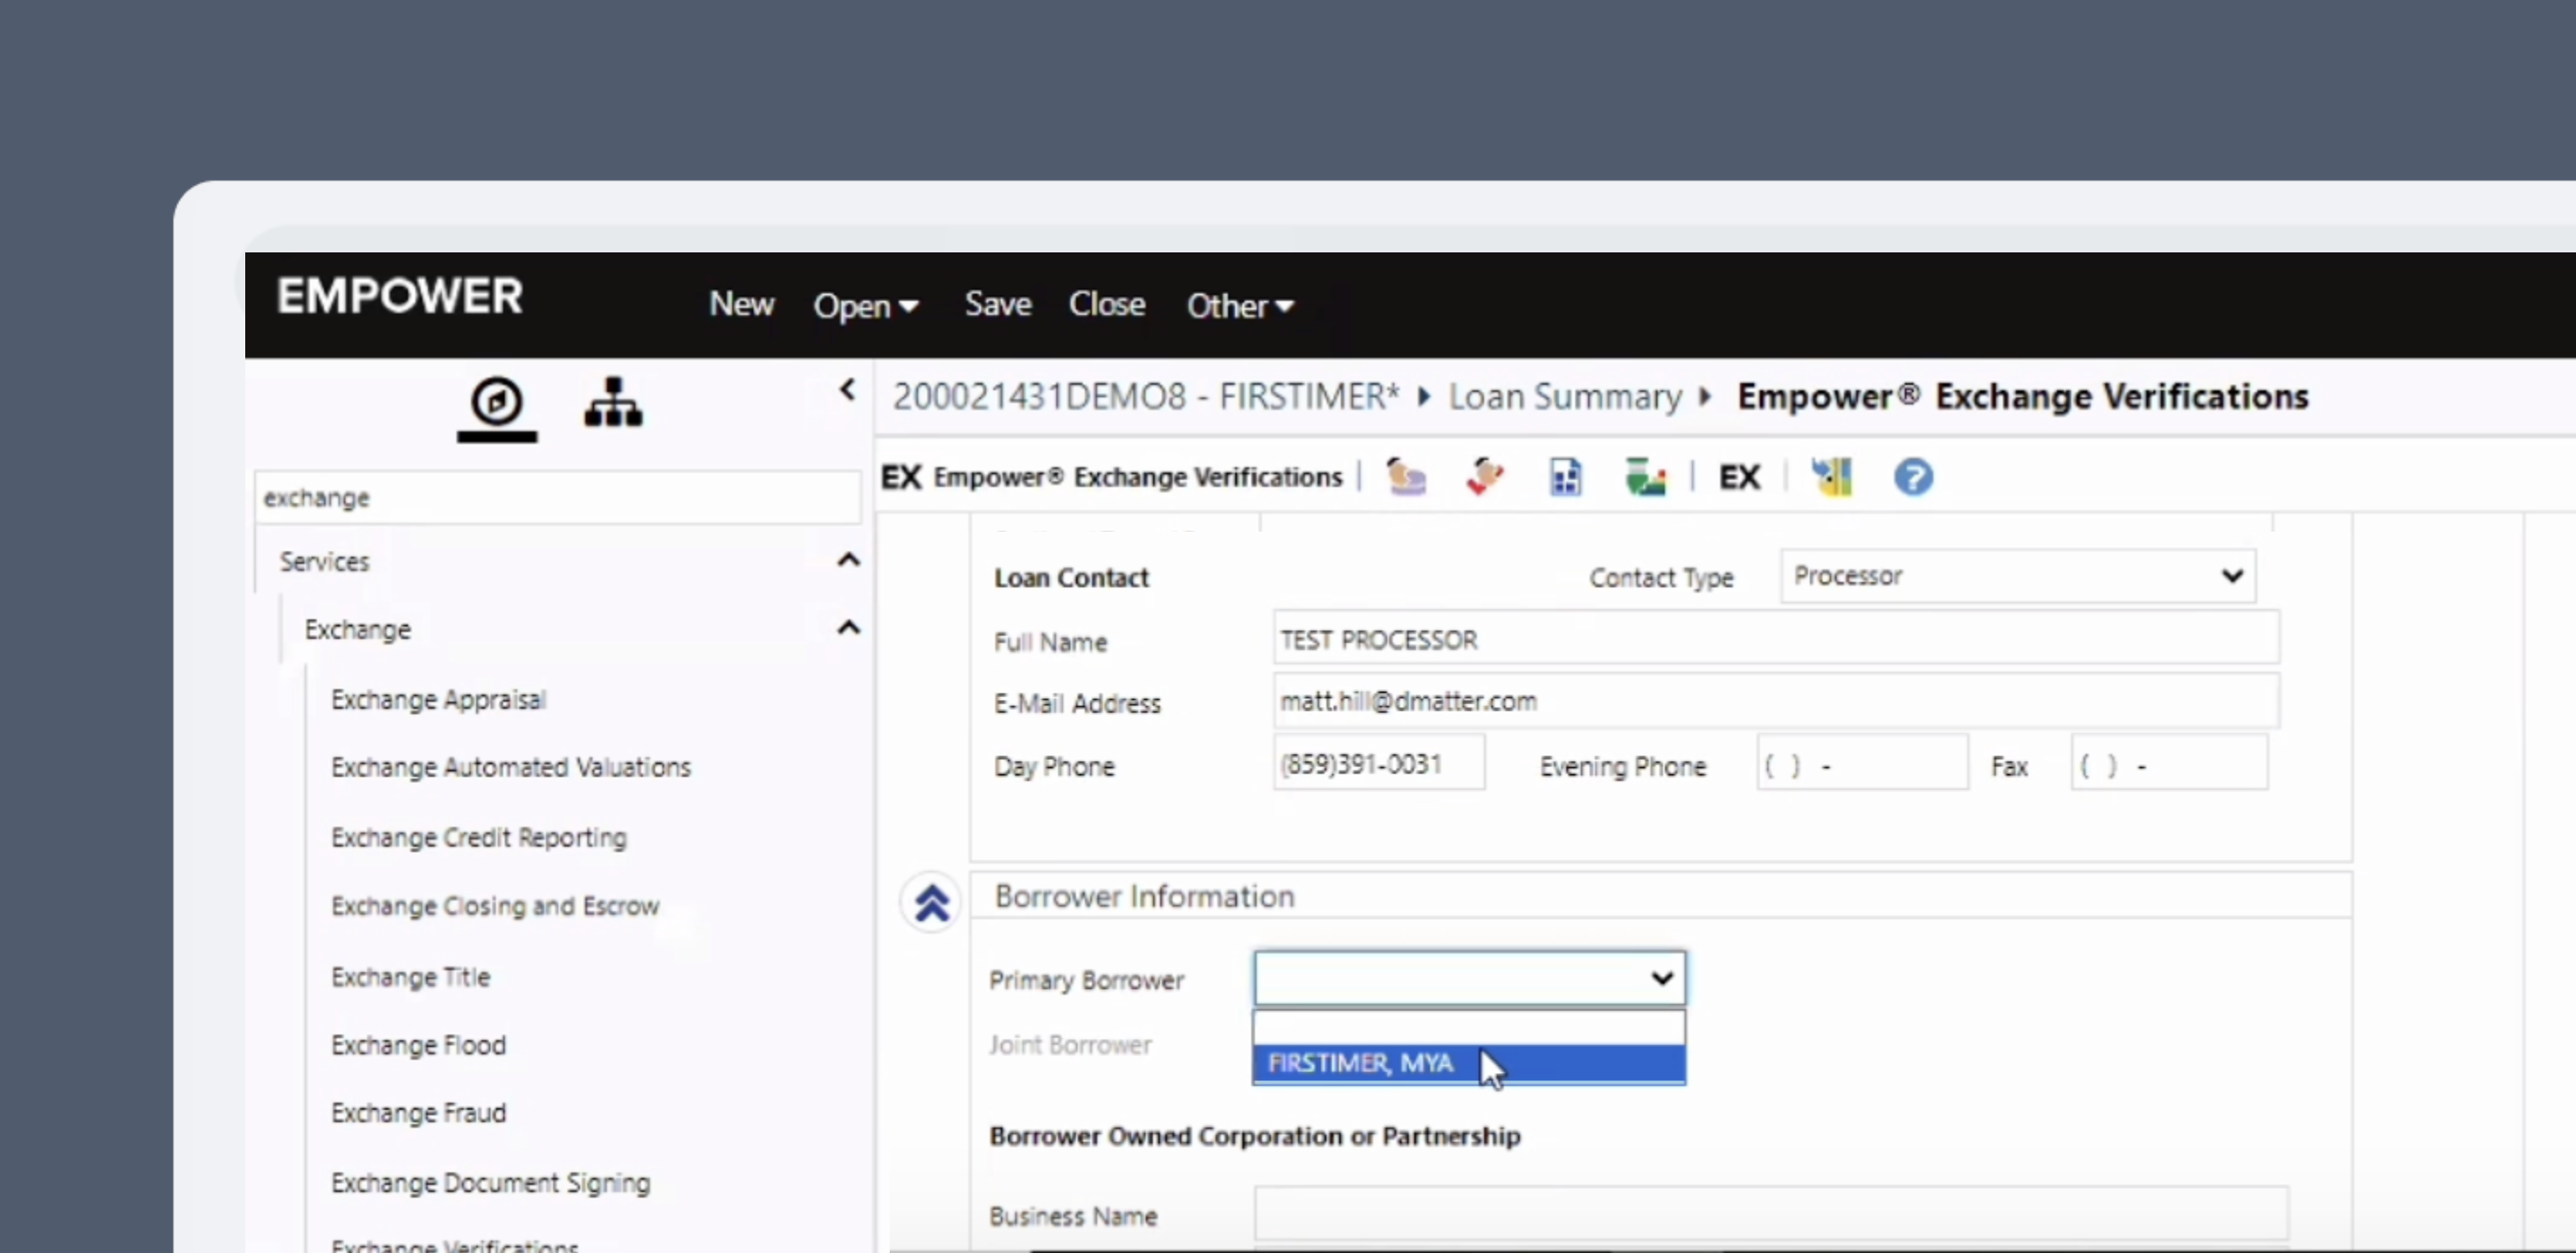
 9. In the **Borrower Information** section, within the **Primary Borrower** dropdown select the `[Name]` of the primary borrower.
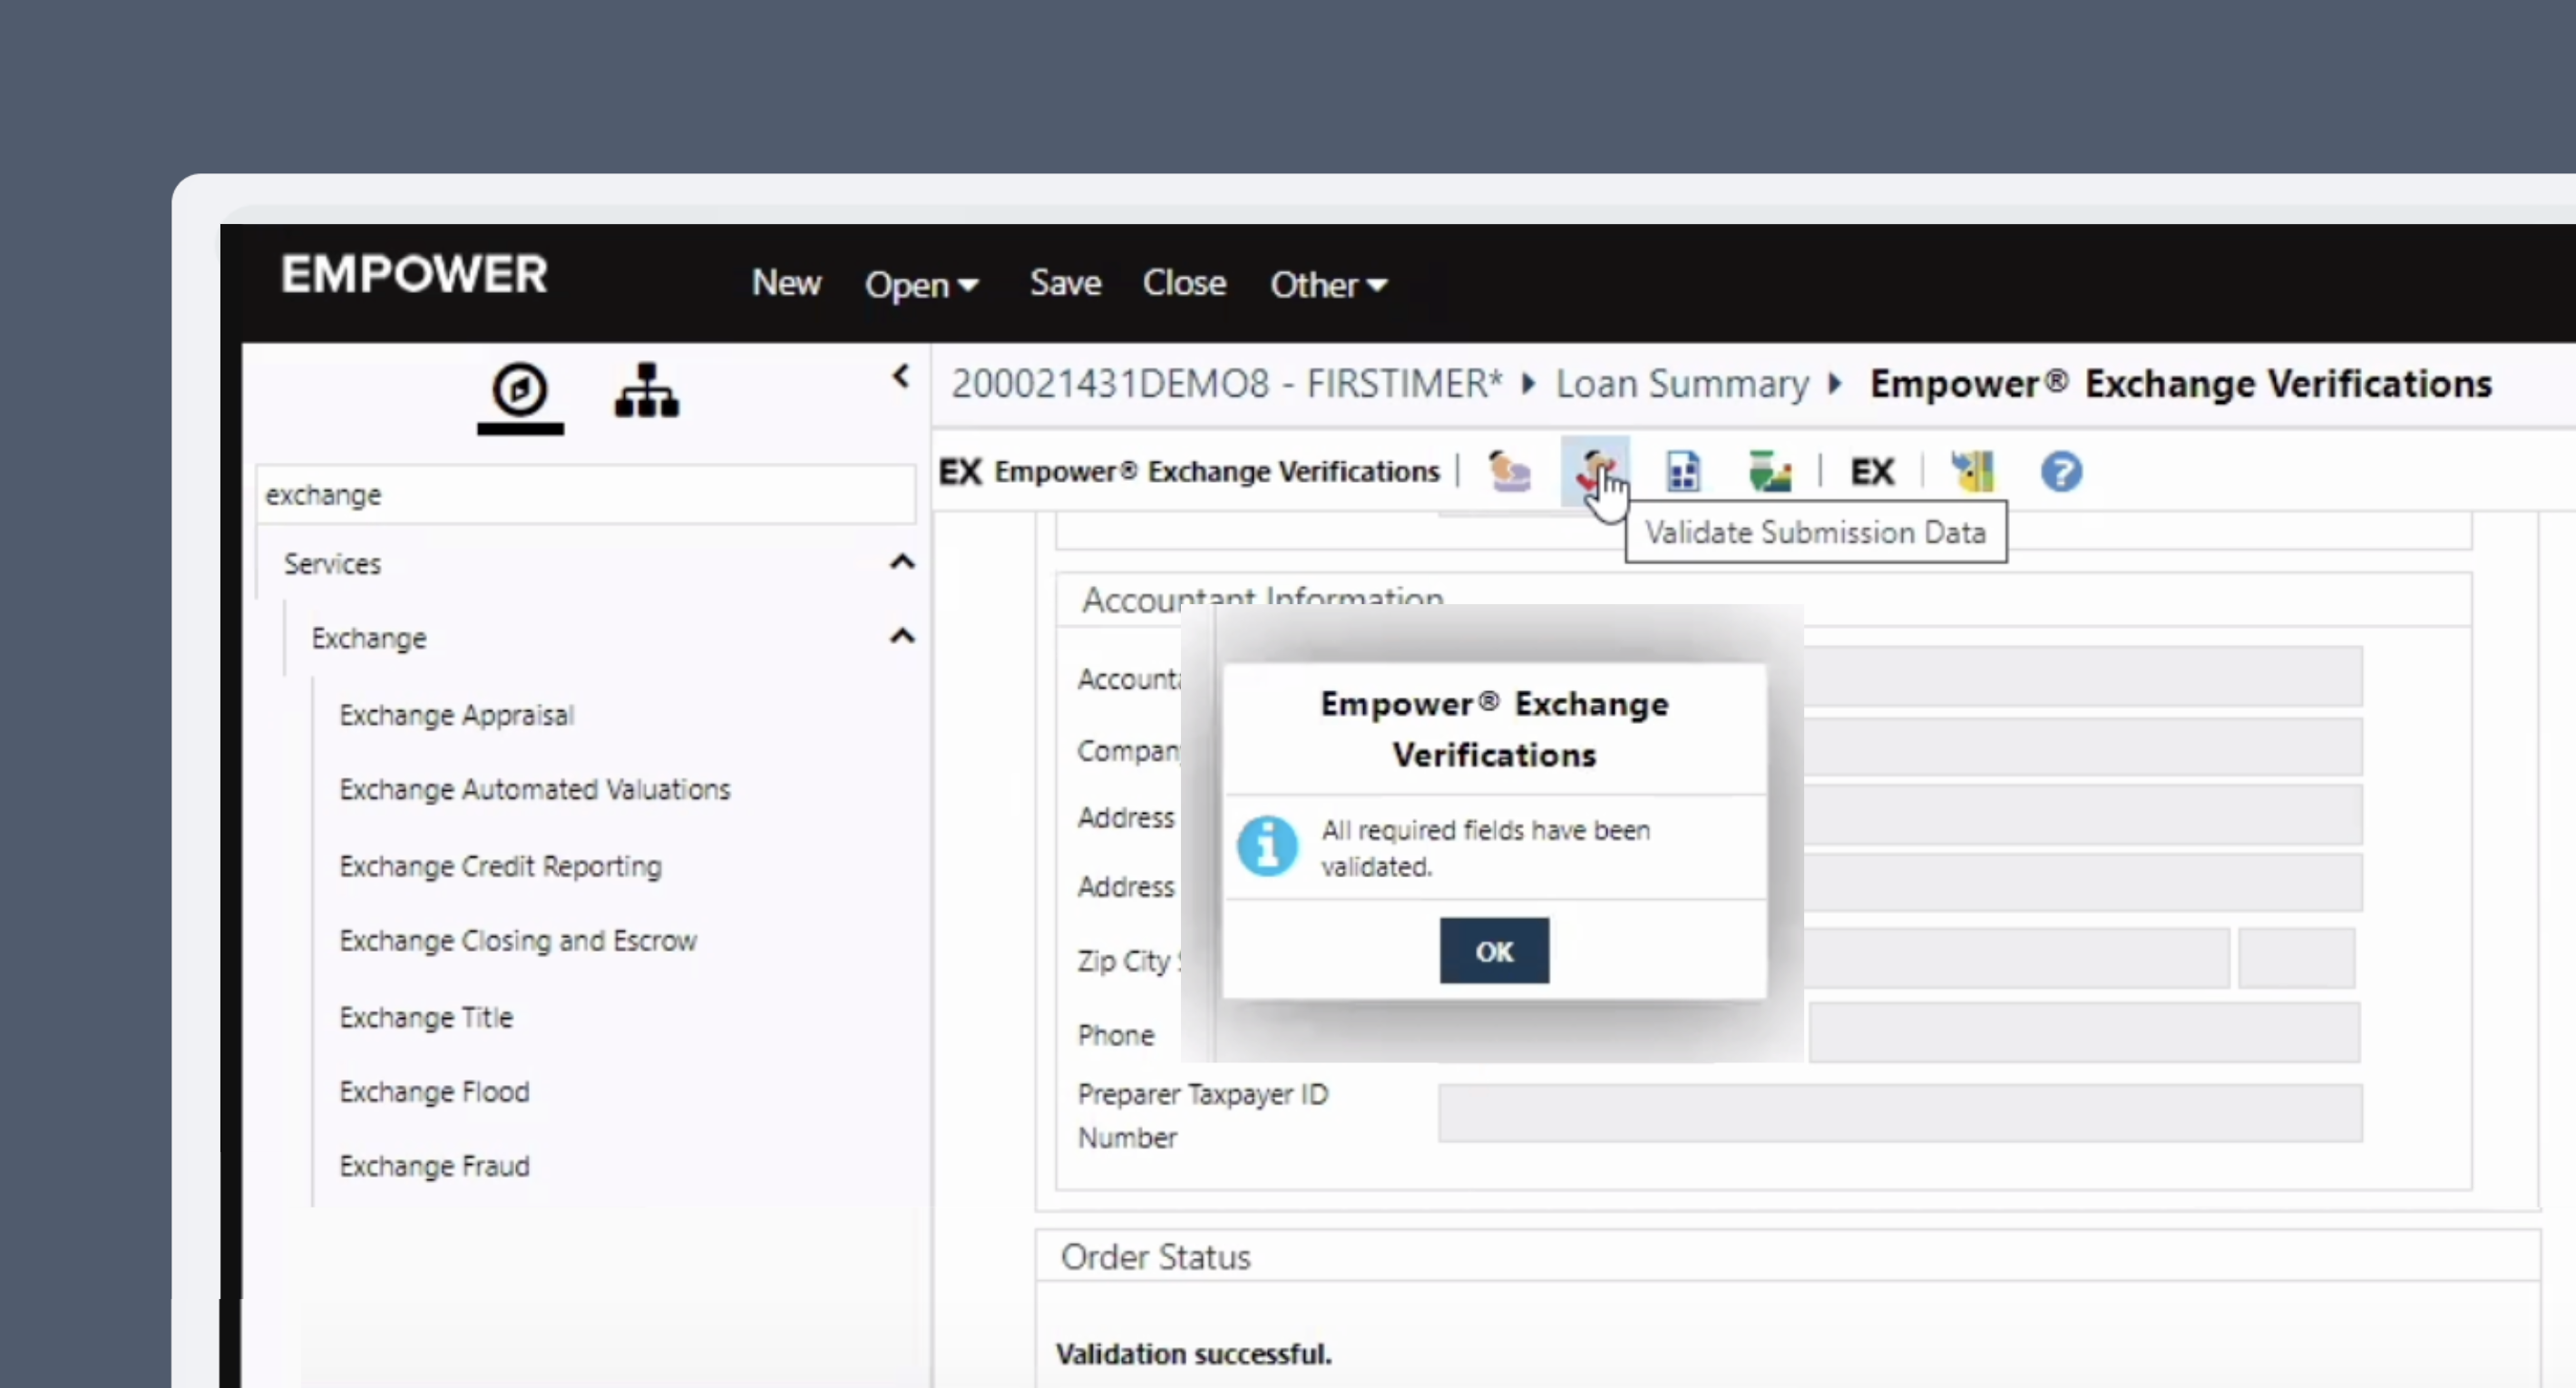
 10. Click **Validate Submission Data** in the toolbar to ensure all required fields have been filled.
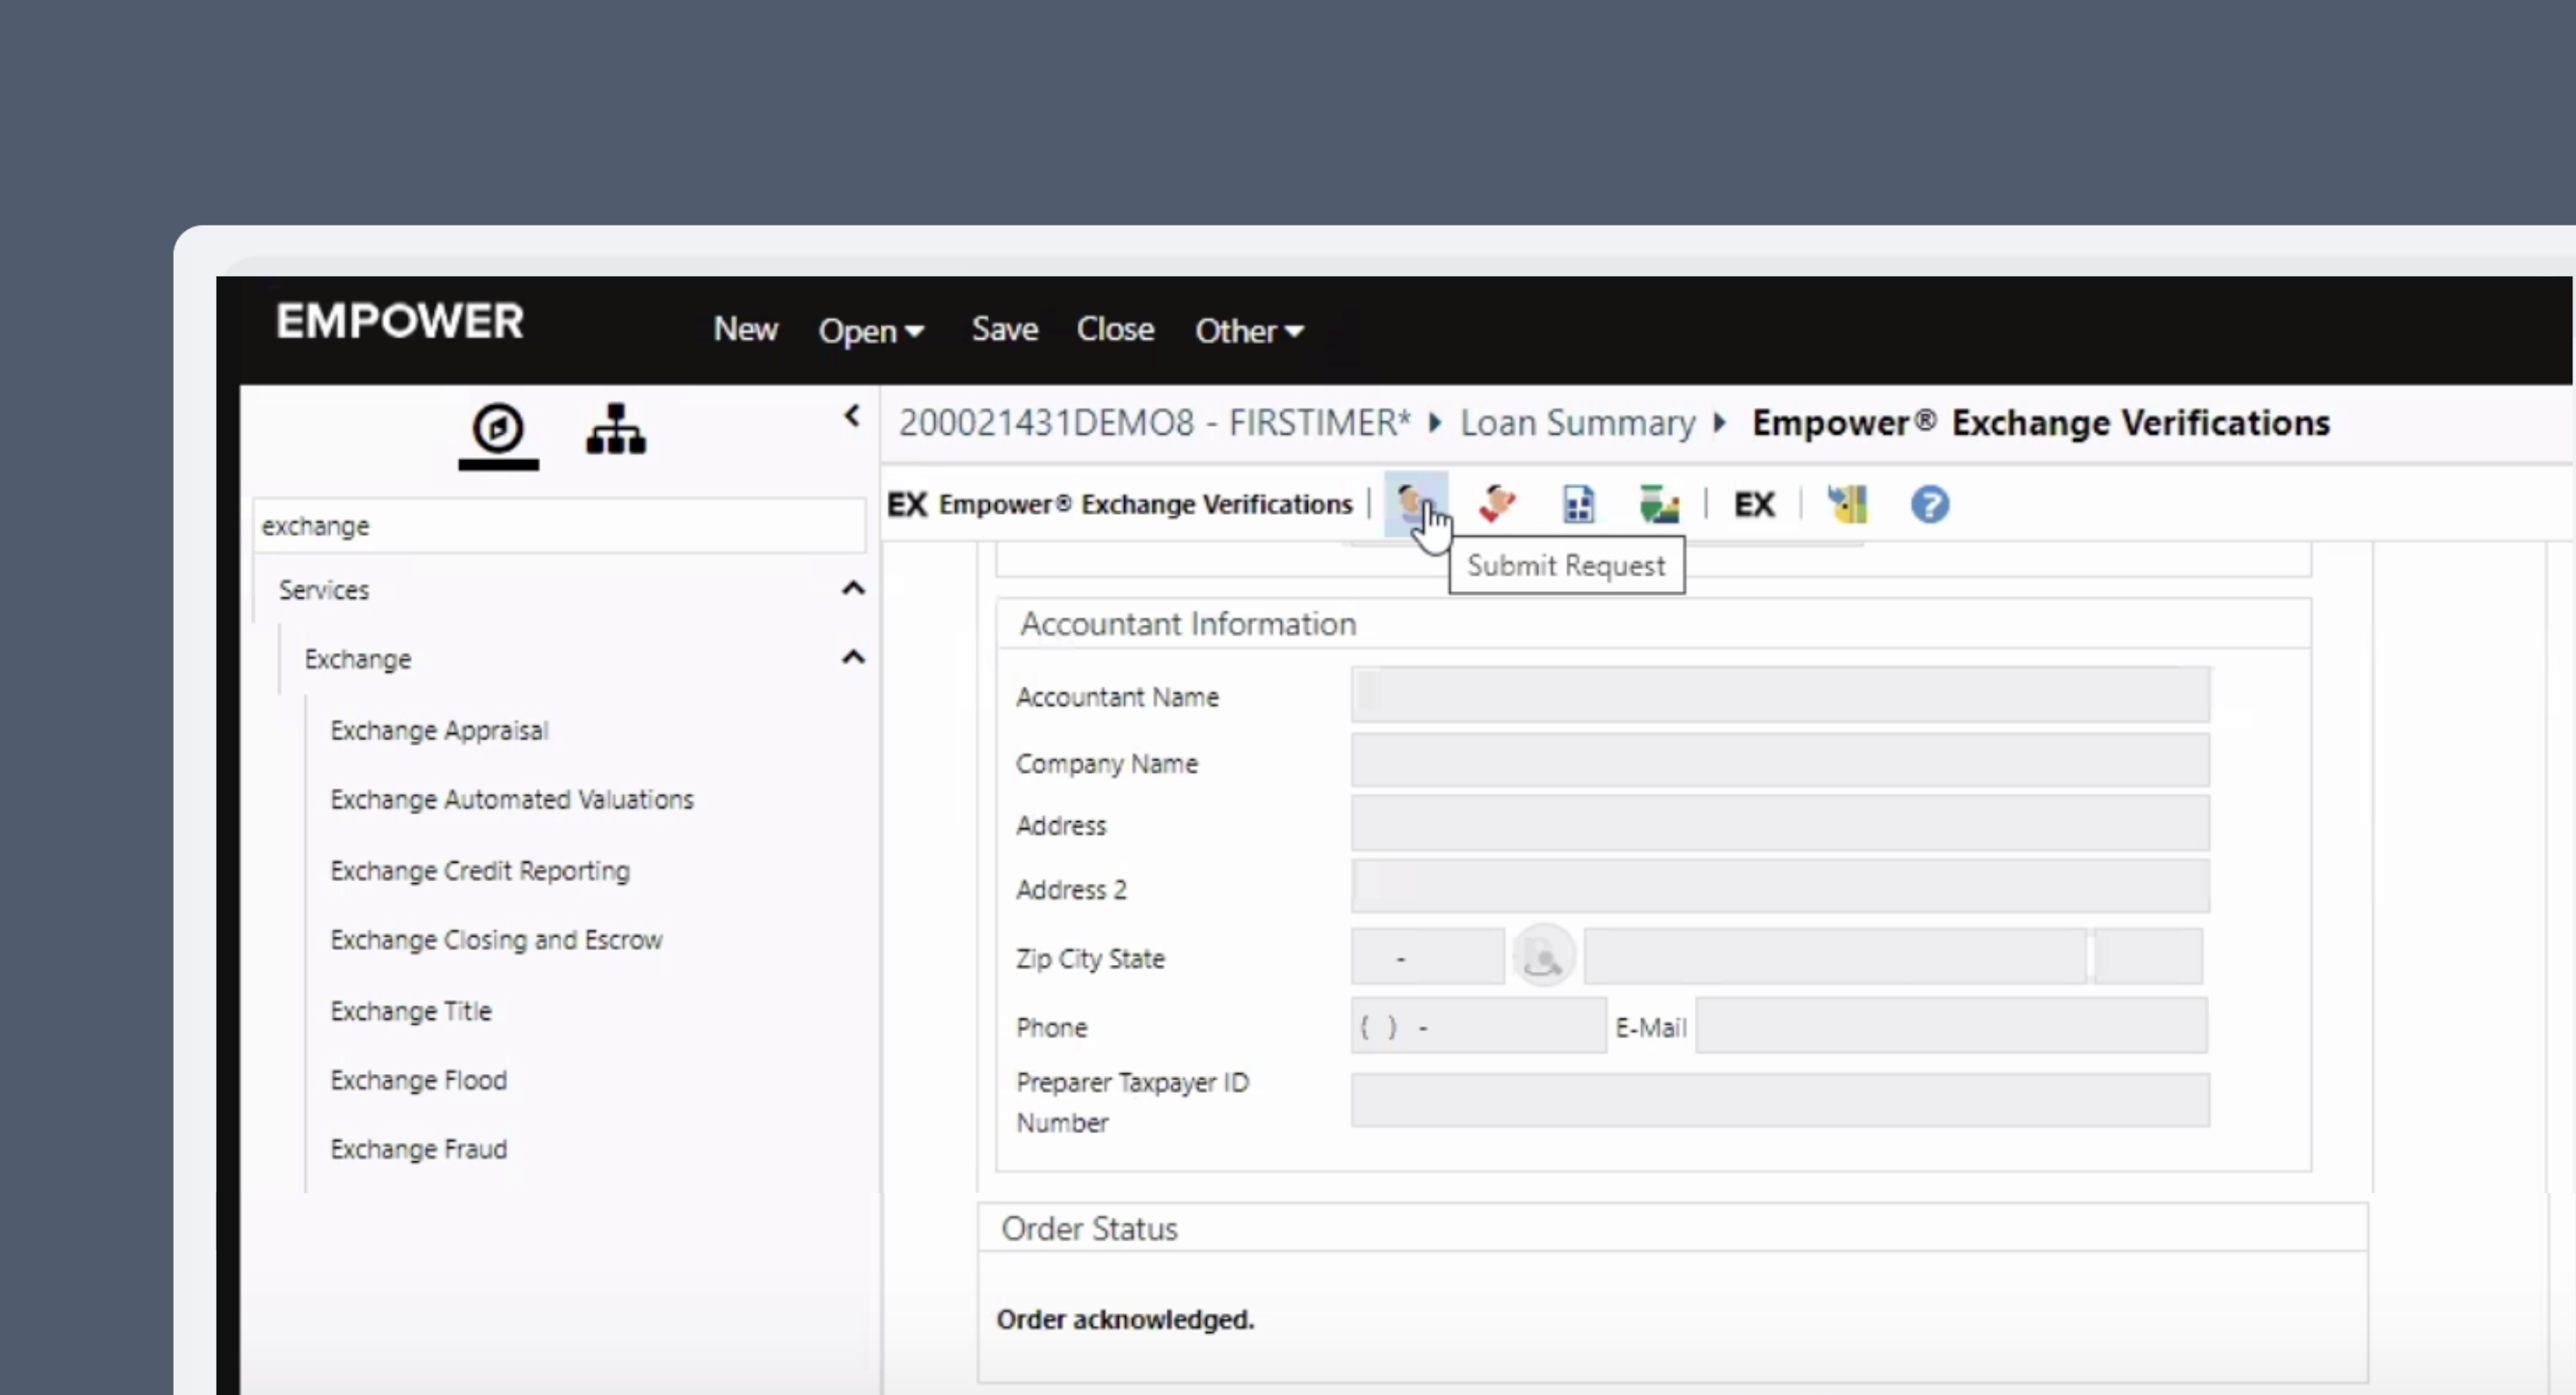
 11. Click **Submit Request** in the toolbar. An **Order Status** of `Ordered submitted` followed by `Order acknowledged` will appear at the bottom of the page.
 12. After an order is submitted, the borrower will be invited via text (SMS) and email to connect their payroll account(s) through Argyle.
 ## (Optional) Event notifications
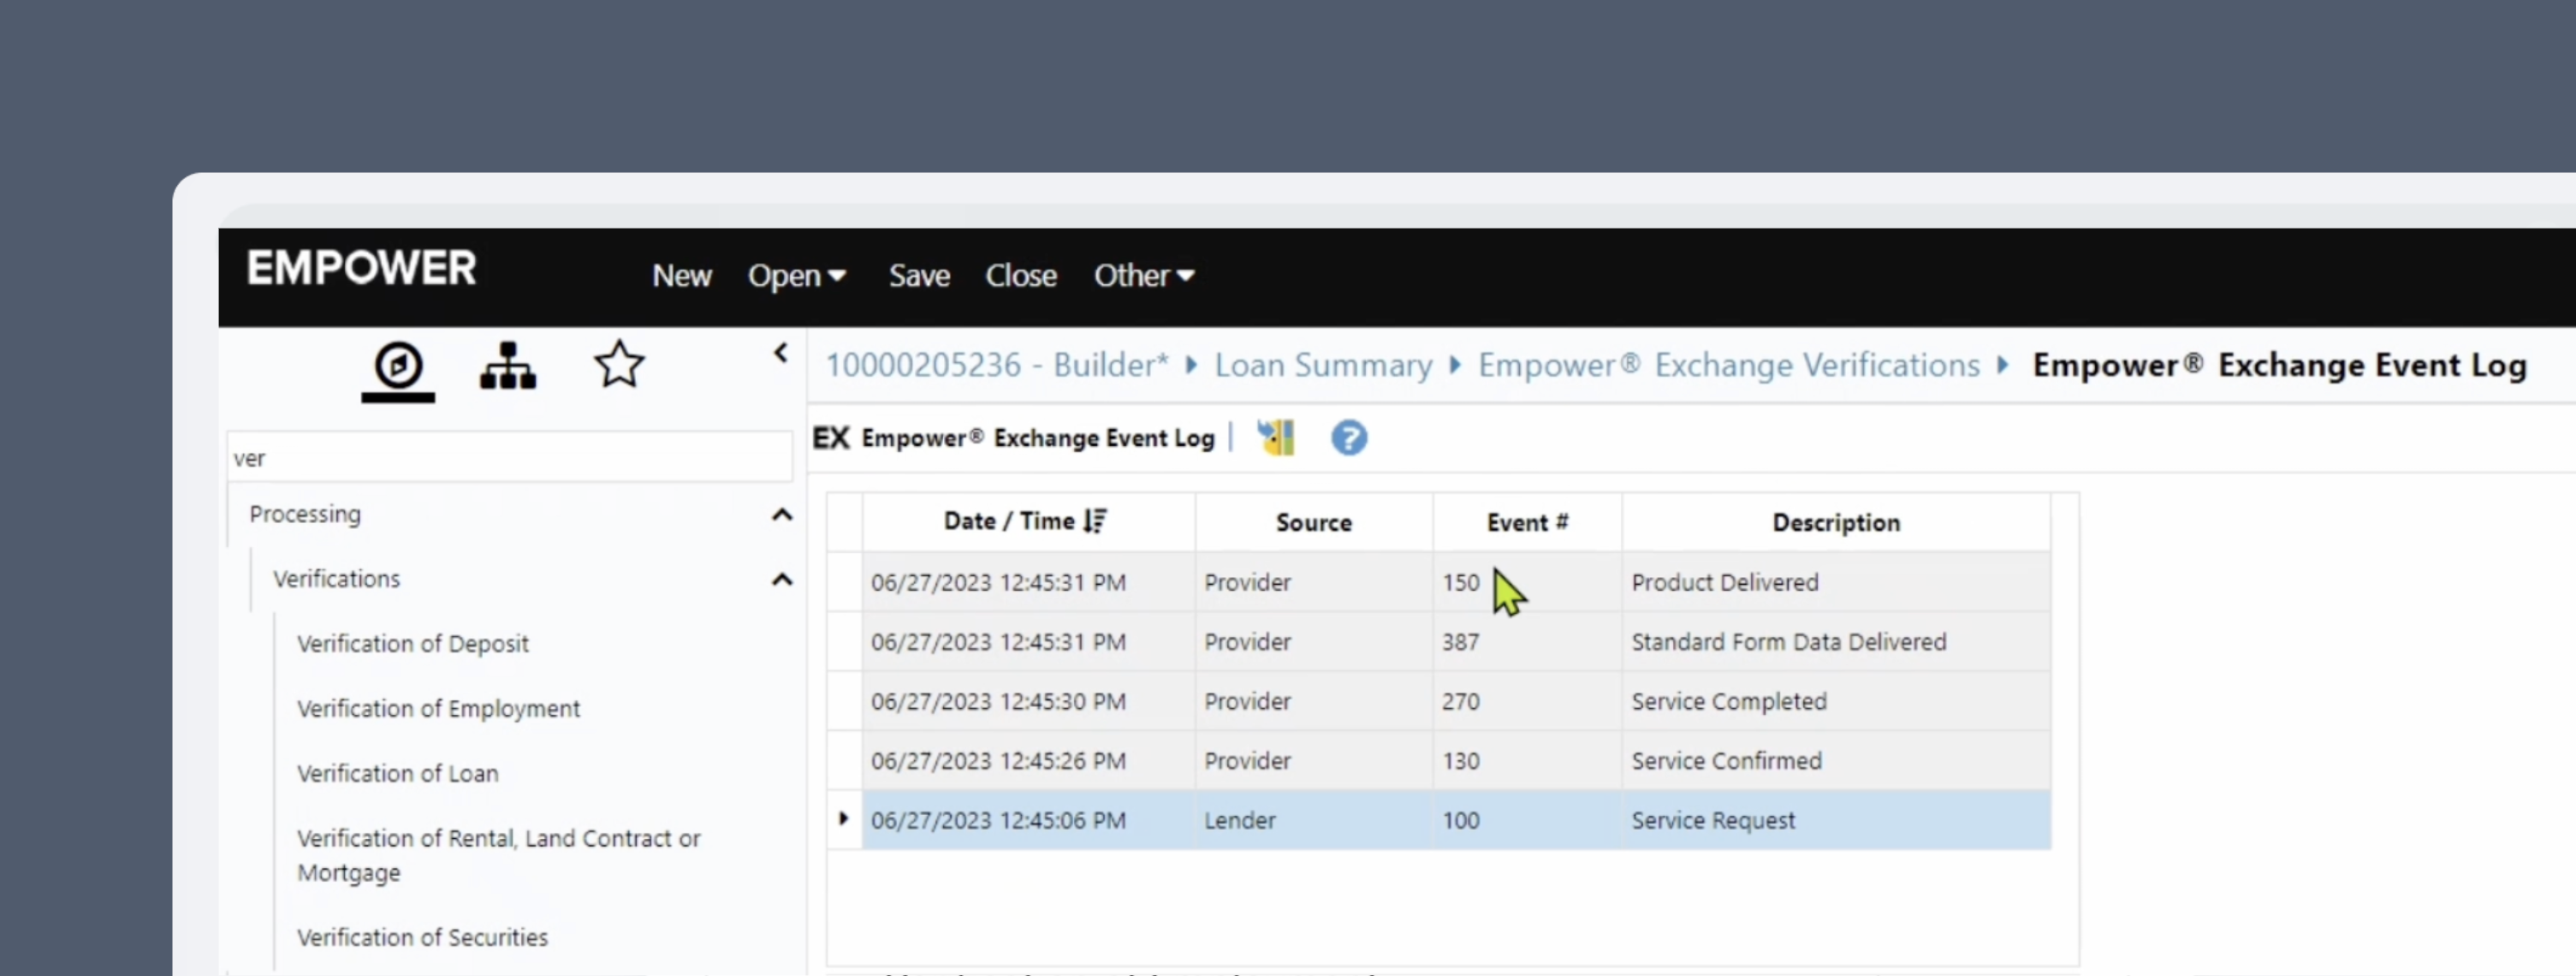
Ask your Empower® admin to set up event notifications, so when different events are received (such as a `150 — Product Delivered` event) loan officers are notified that Argyle verifications reports and the borrower's payroll documents are now available in the Empower® **Document Repository**.
## (Optional) Event notifications
Ask your Empower® admin to set up event notifications, so when different events are received (such as a `150 — Product Delivered` event) loan officers are notified that Argyle verifications reports and the borrower's payroll documents are now available in the Empower® **Document Repository**.
 ## Retrieving reports and documents
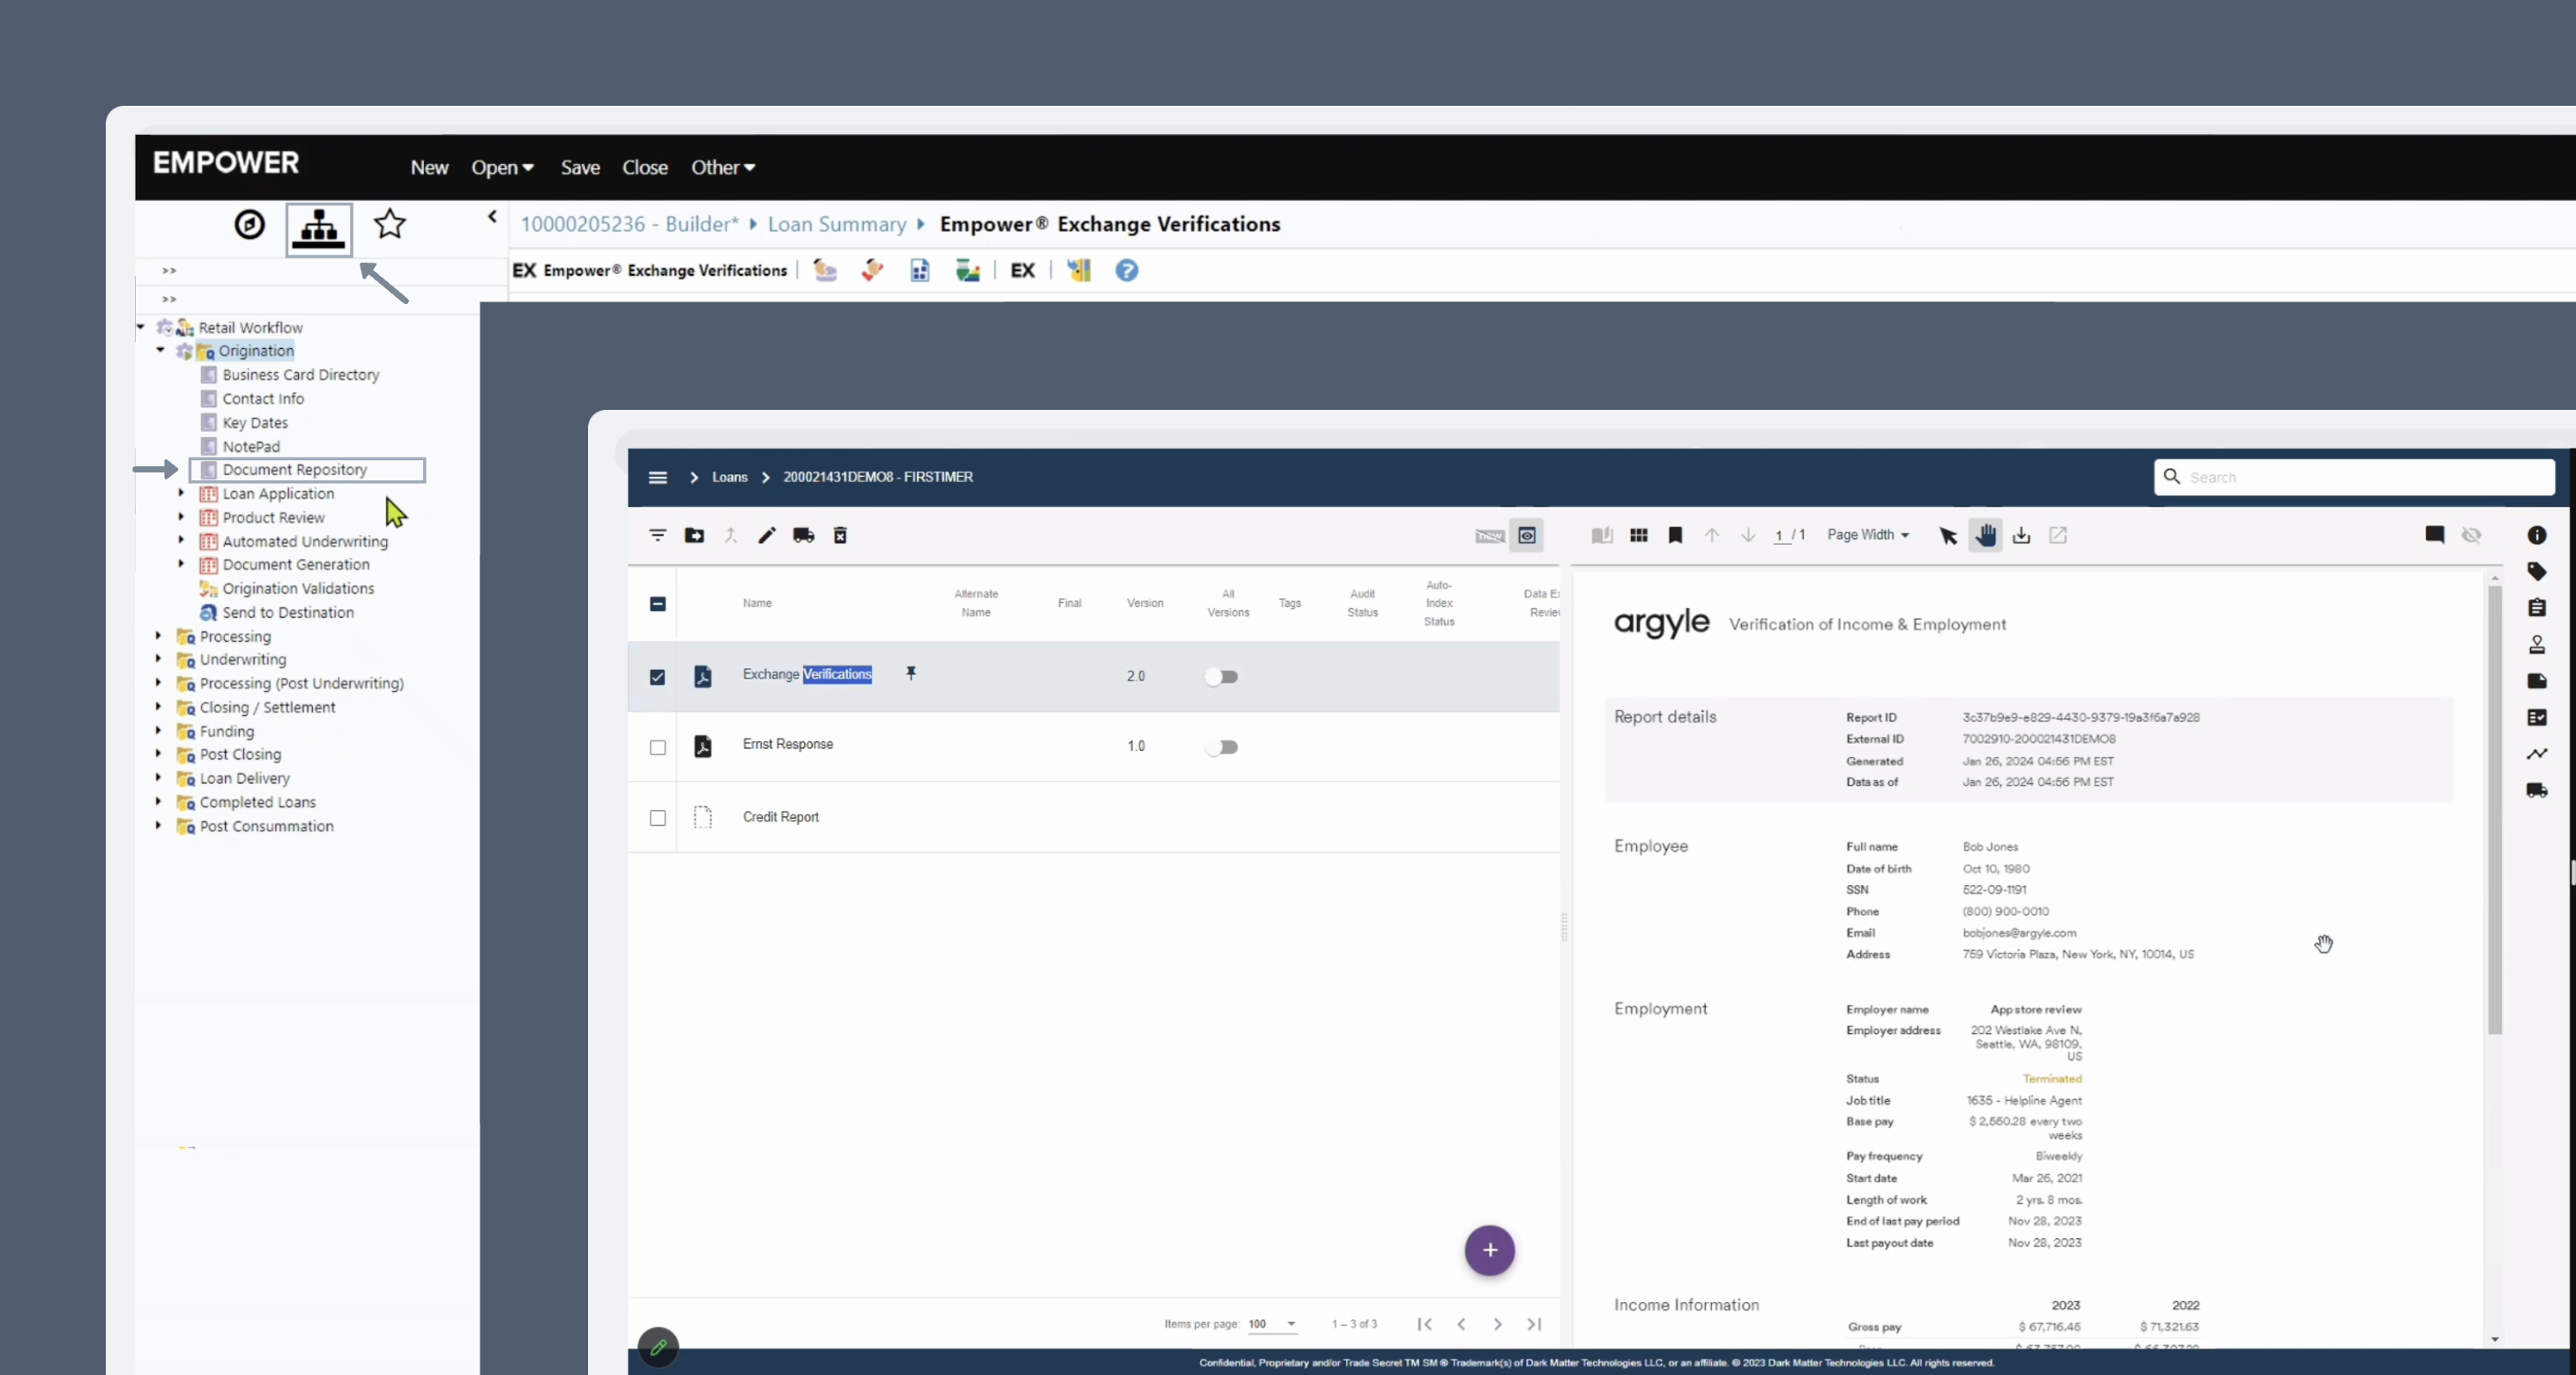
Select `Document Repository` in the sidebar to view VOI and VOE reports, W-2s, and paystubs retrieved from the borrower's payroll account(s) once an order has completed.
## Retrieving reports and documents
Select `Document Repository` in the sidebar to view VOI and VOE reports, W-2s, and paystubs retrieved from the borrower's payroll account(s) once an order has completed.
 ## Day 1 Certainty® and AIM
Argyle's income and employment verification reports provide lenders an automated way to achieve Day 1 Certainty® through Fannie Mae's Desktop Underwriter® (DU®) validation service and assessment of borrower income and employment through Freddie Mac's asset and income modeler (AIM).
Please reach out to your Argyle Customer Success Manager to enable Day 1 Certainty® and AIM for verification reports.
To submit a DU reference number for a loan through Empower®:
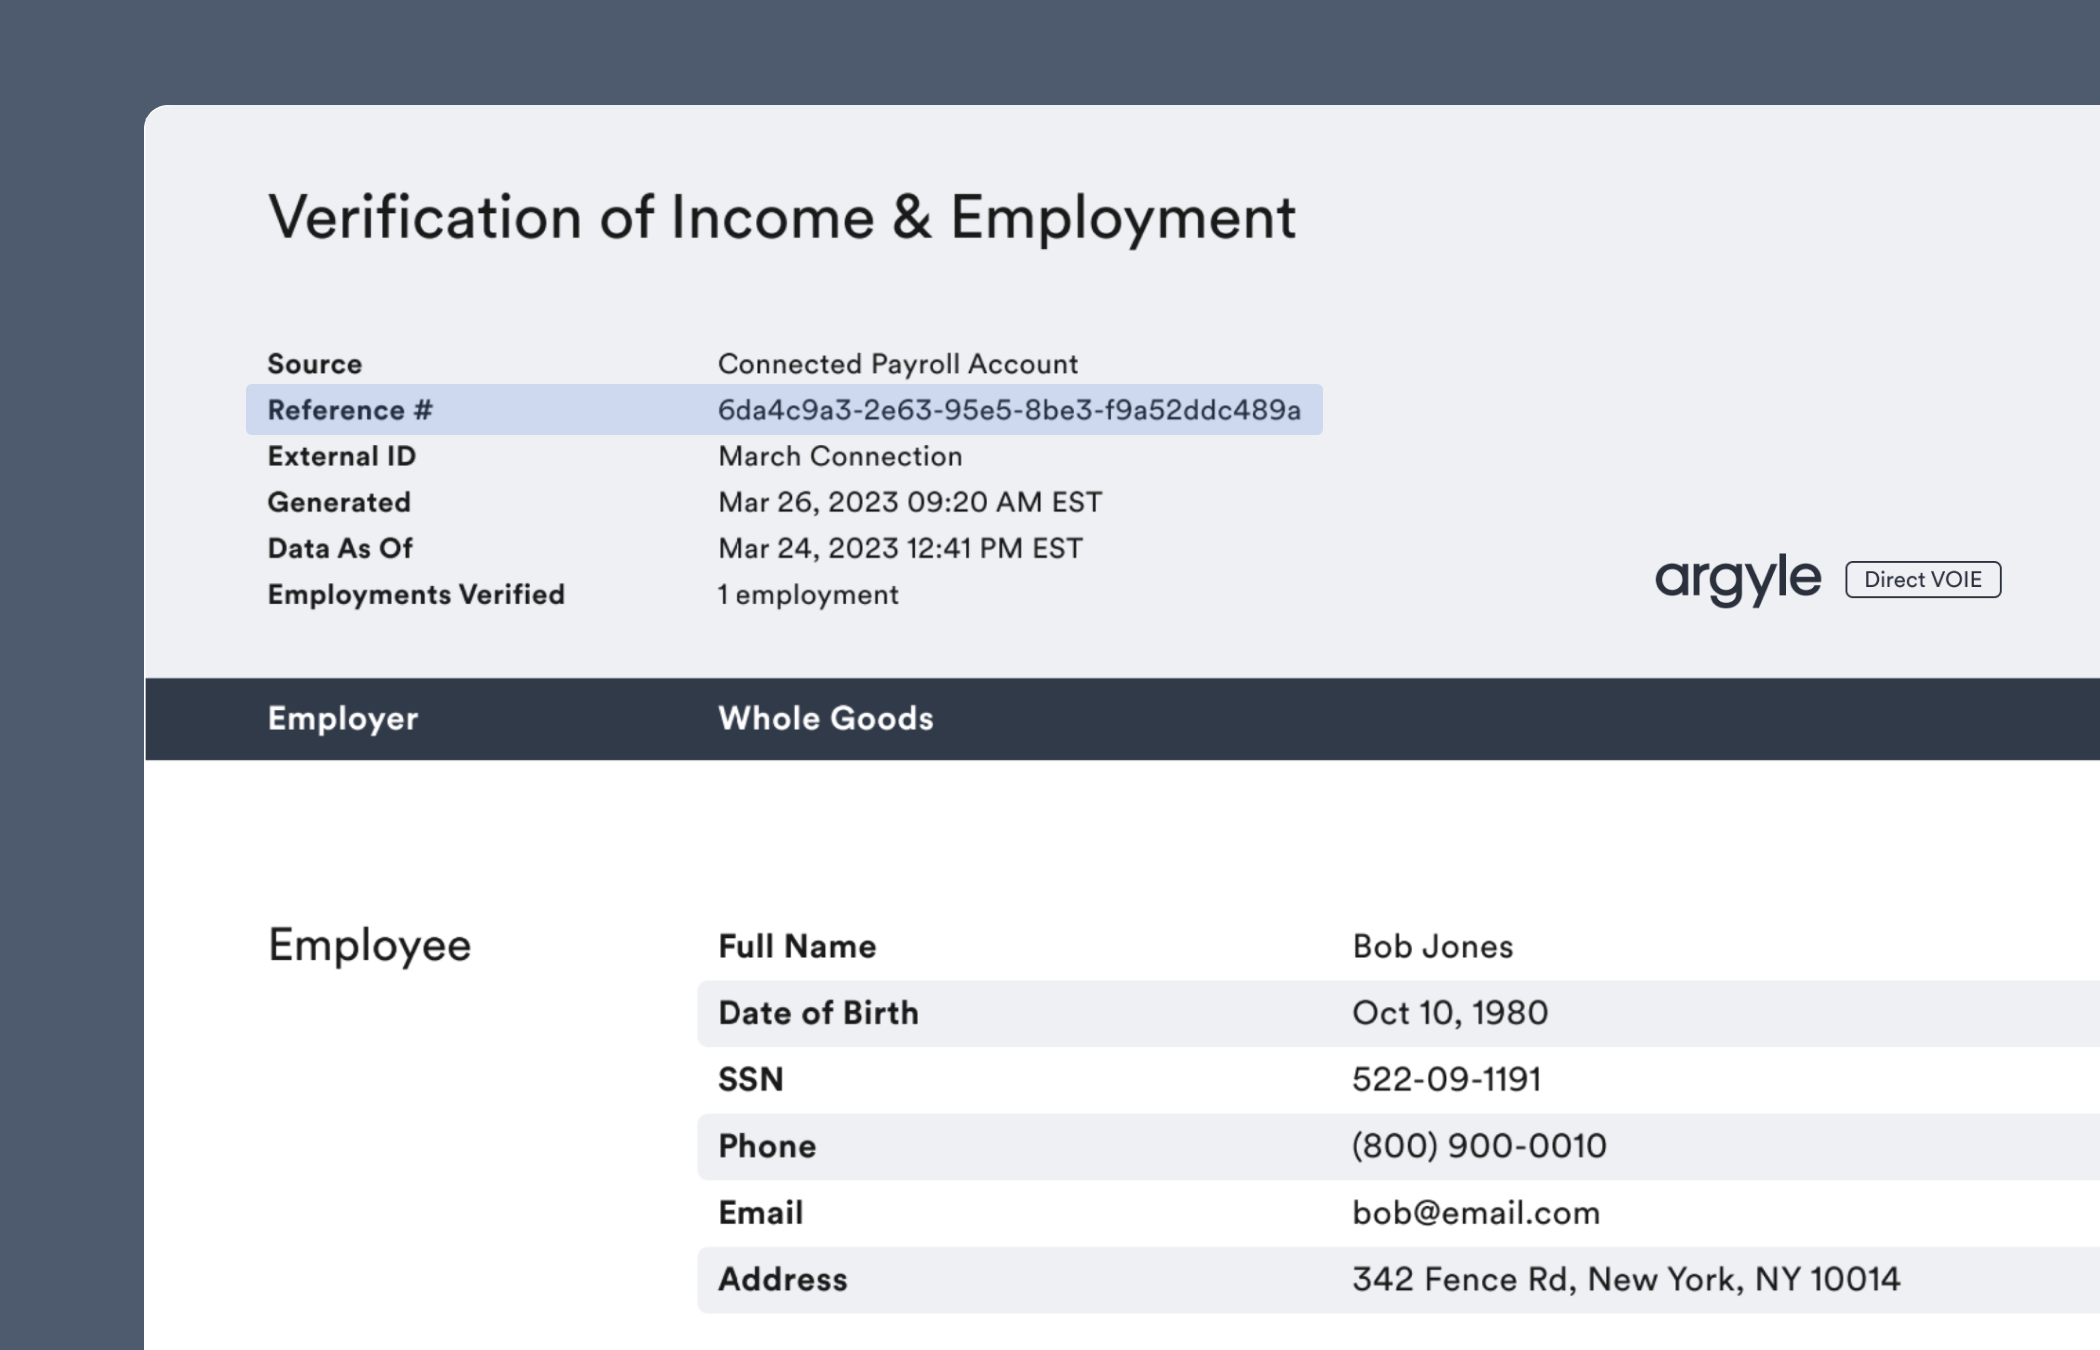
1. If the loan is eligible for Day 1 Certainty® based on the borrower's income and employment data, a `DU reference number` will be listed at the top of the verification report:
## Day 1 Certainty® and AIM
Argyle's income and employment verification reports provide lenders an automated way to achieve Day 1 Certainty® through Fannie Mae's Desktop Underwriter® (DU®) validation service and assessment of borrower income and employment through Freddie Mac's asset and income modeler (AIM).
Please reach out to your Argyle Customer Success Manager to enable Day 1 Certainty® and AIM for verification reports.
To submit a DU reference number for a loan through Empower®:
1. If the loan is eligible for Day 1 Certainty® based on the borrower's income and employment data, a `DU reference number` will be listed at the top of the verification report:
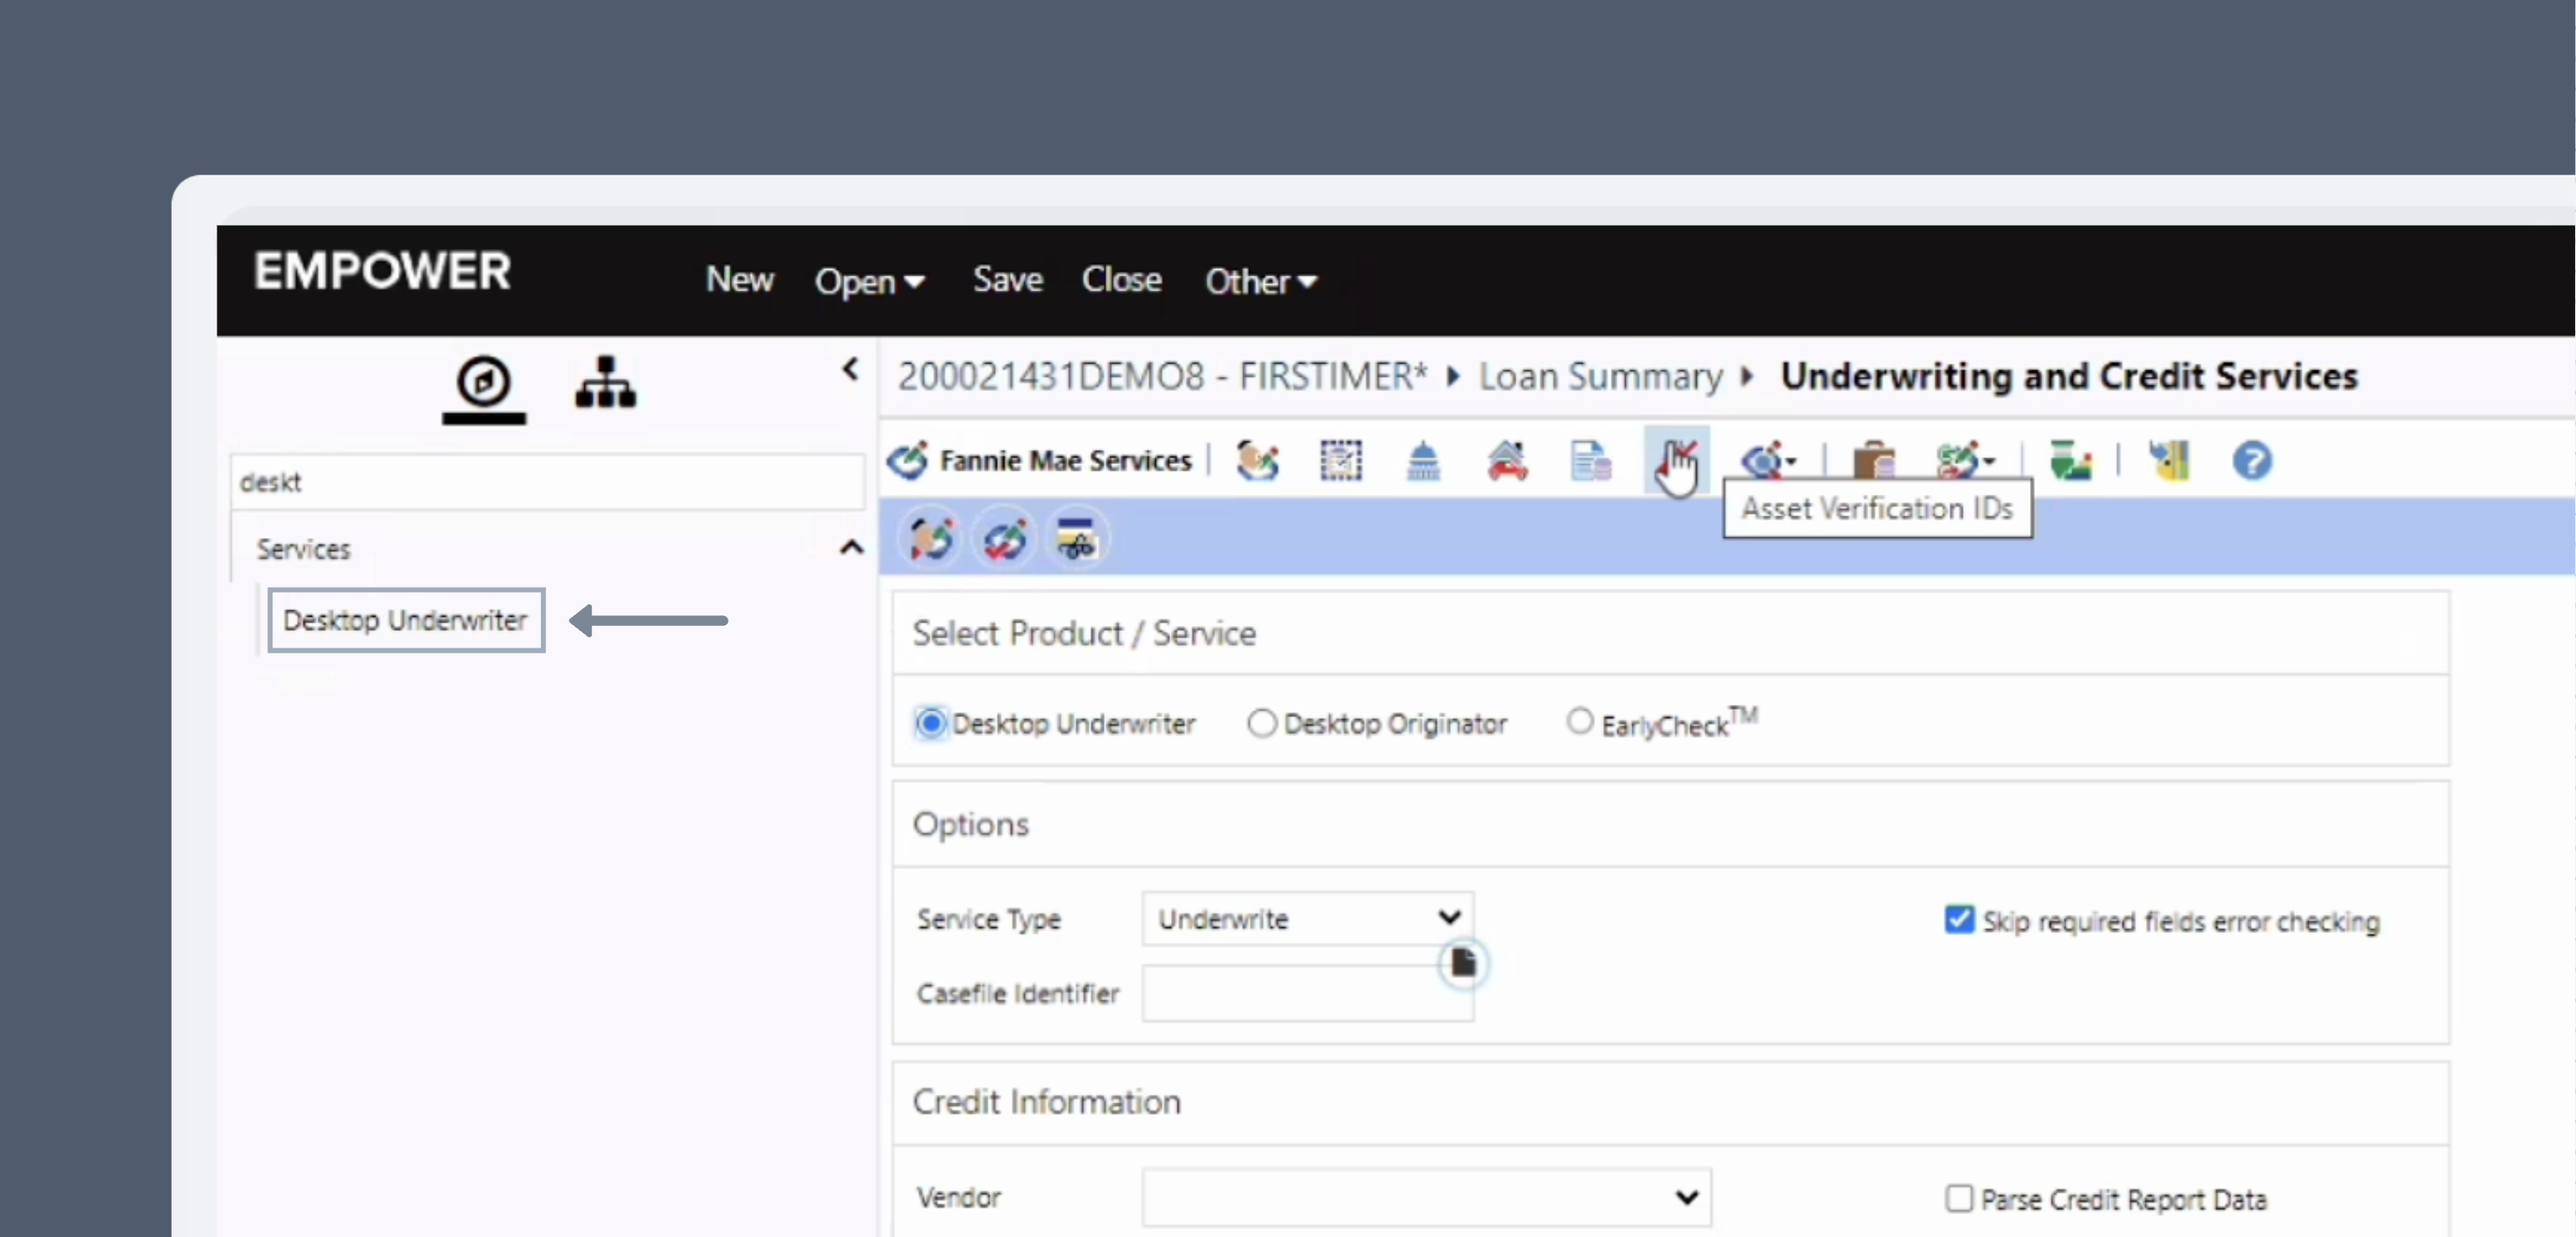
 2. Open **Desktop Underwriter** from the sidebar, then click **Asset Verification IDs** in the toolbar.
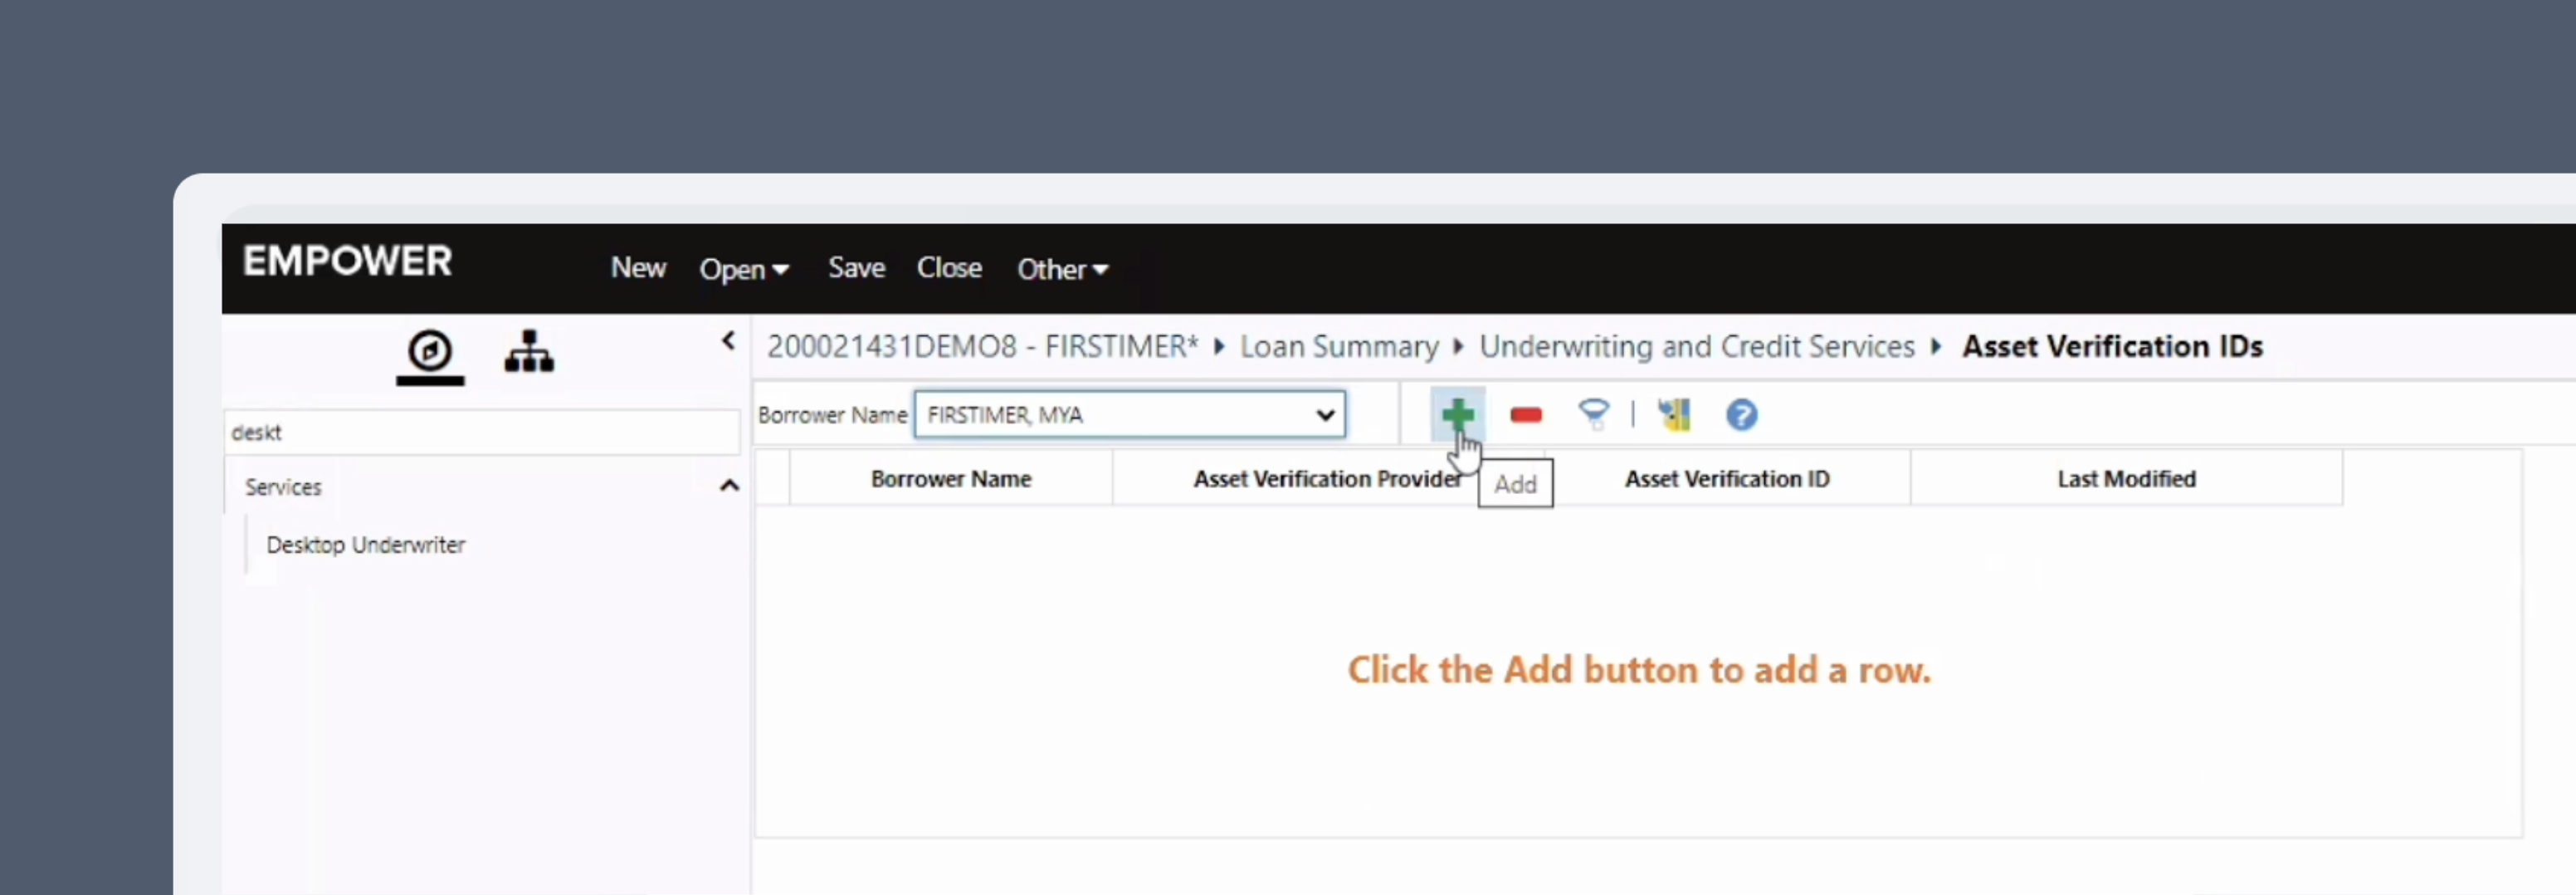
 3. Select a borrower from the **Borrower Name** dropdown, then click **Add**.
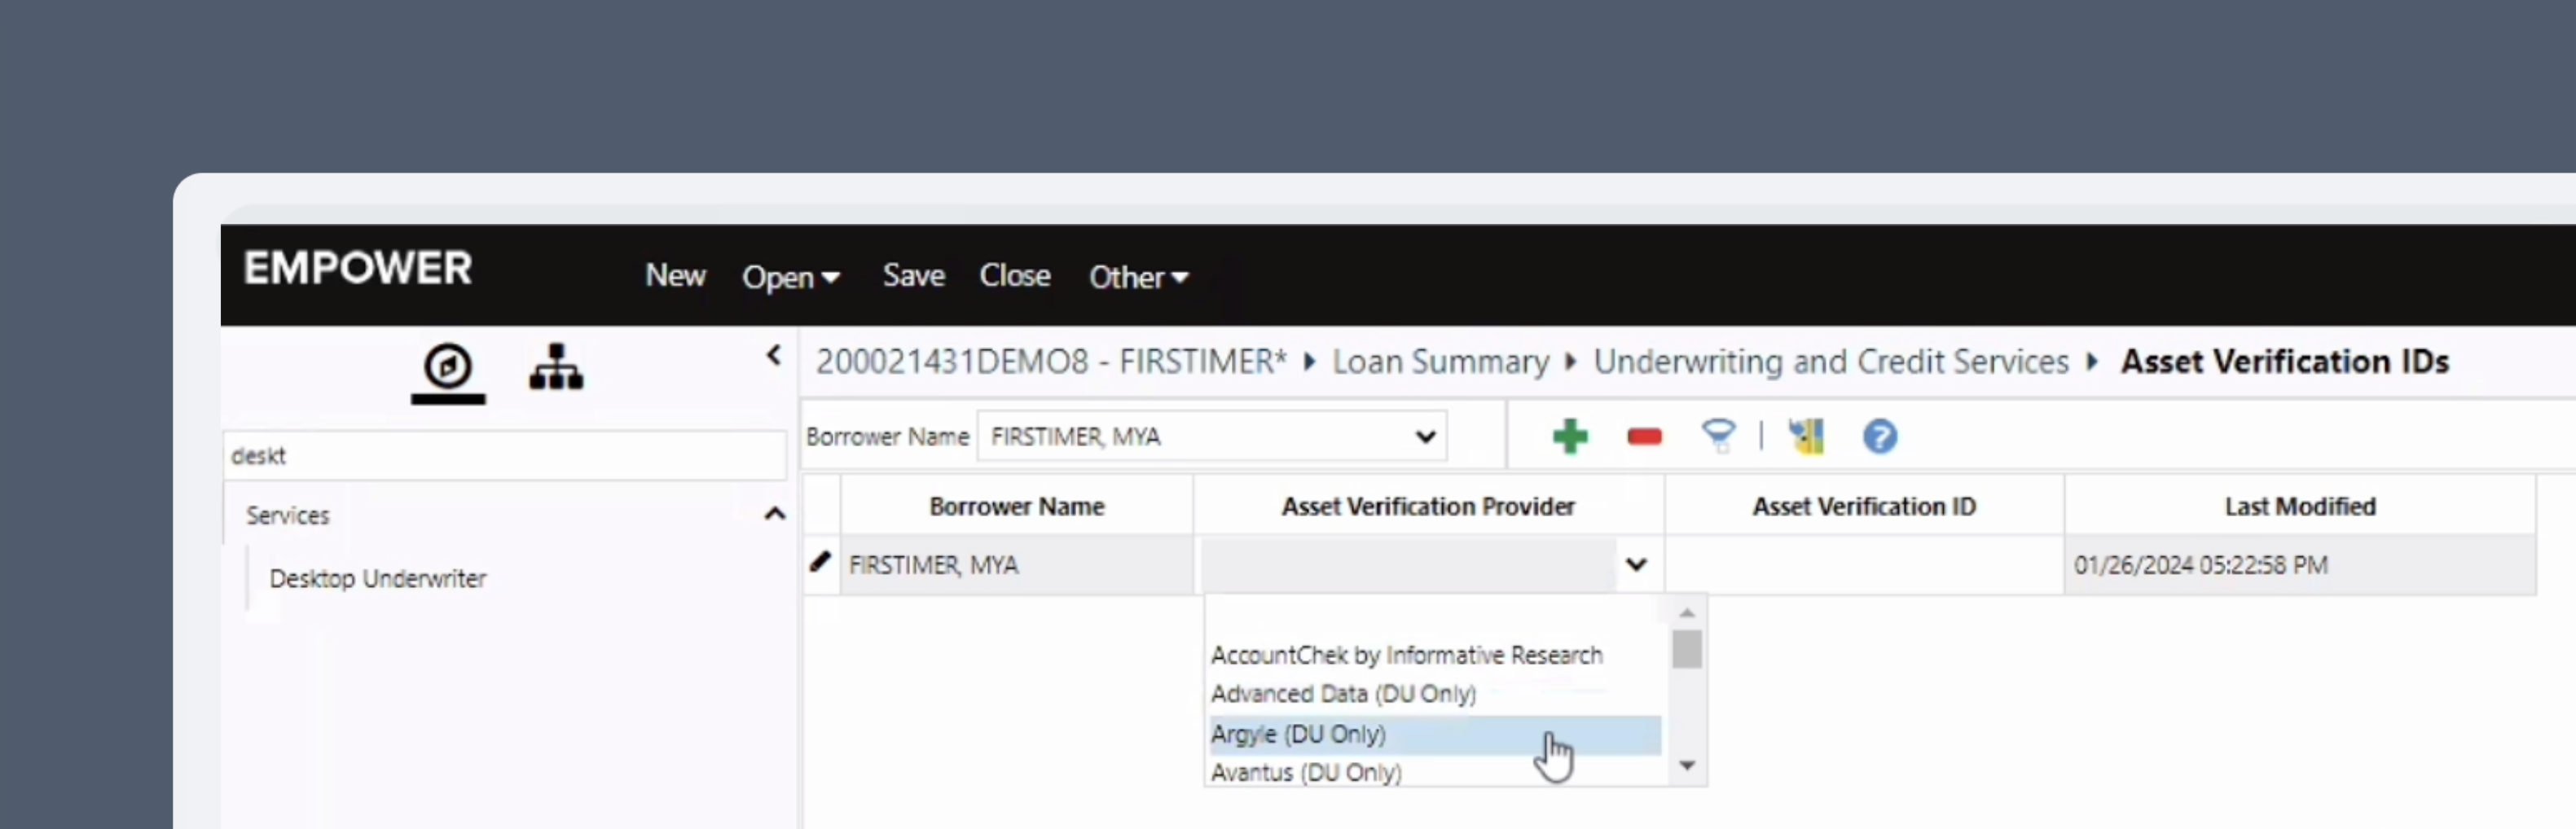
 4. Select `Argyle (DU Only)` from the **Asset Verification Provider** dropdown. Then enter the `DU reference number` in the **Asset Verification ID** field.
 *For further assistance or specific feature requests, please reach out to [support@arygle.com](mailto:support@arygle.com) or your Customer Success Manager.*