> ## Documentation Index
> Fetch the complete documentation index at: https://docs.argyle.com/llms.txt
> Use this file to discover all available pages before exploring further.
# Unit Pay Connector
> Implement a solution for payment reconciliation with Argyle.
We'll be updating our Sample App Github repositories for API v2 and Link 5 in 2023 Q3.
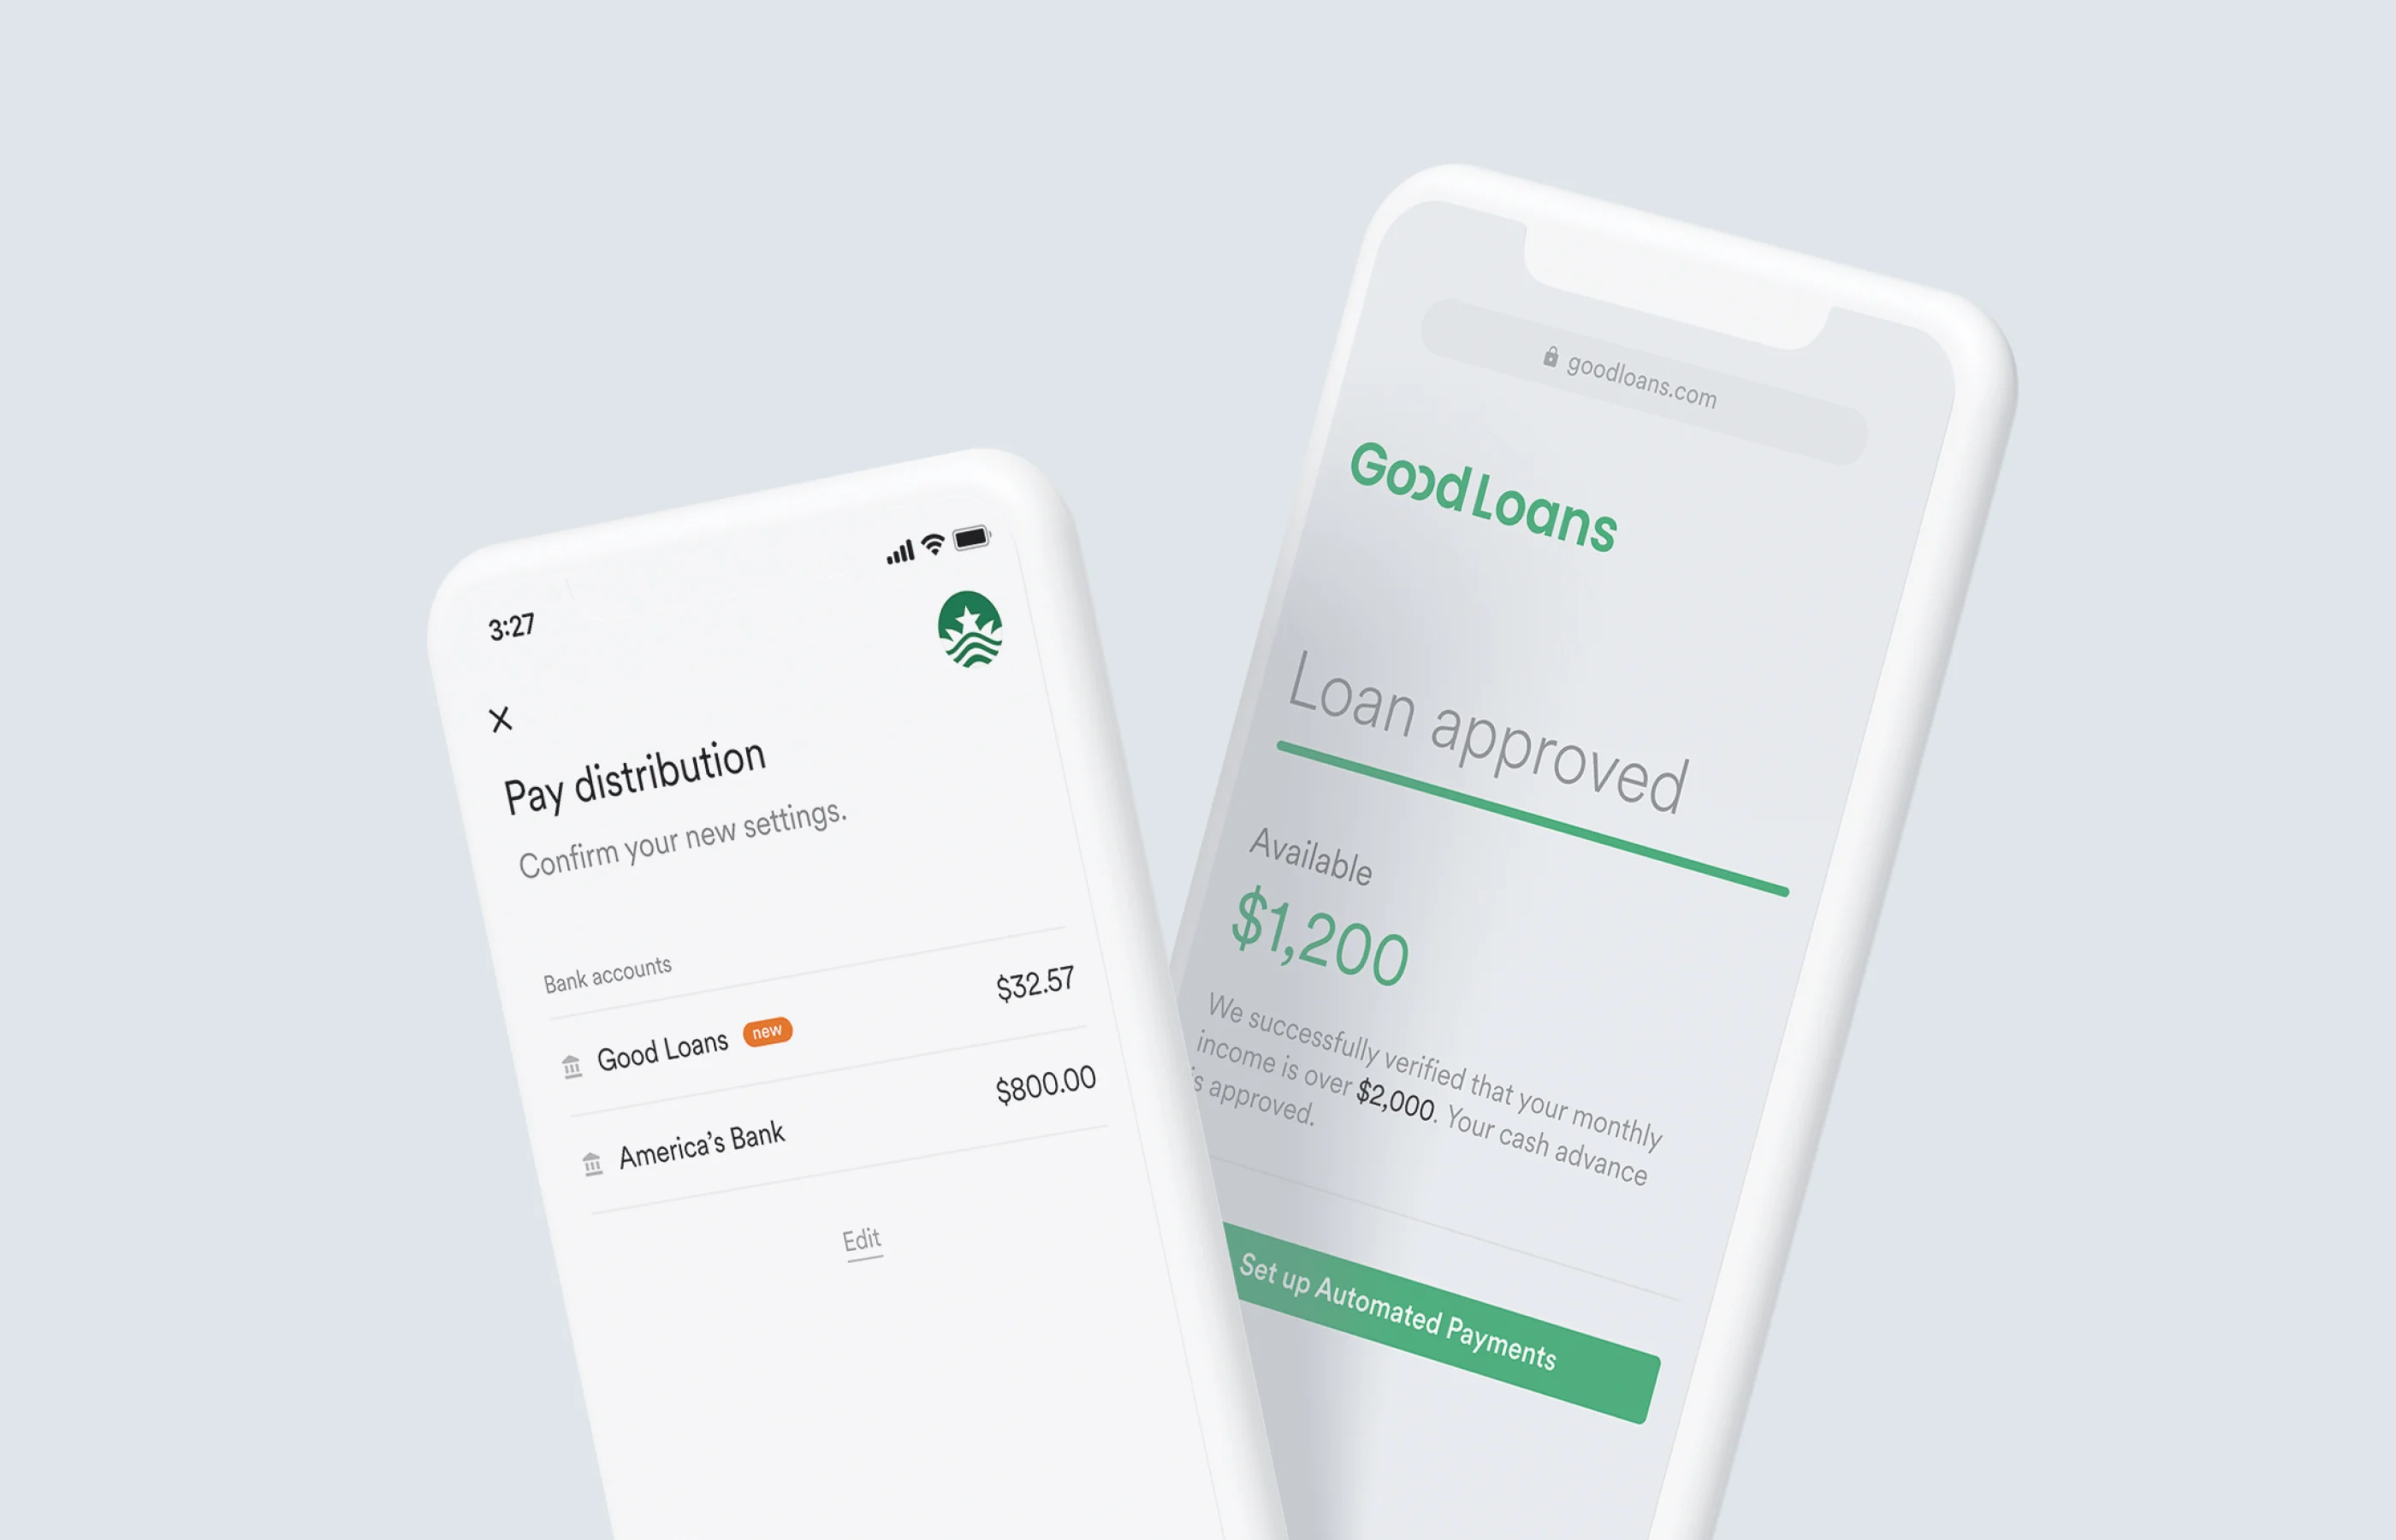
The Unit Pay Connector sample app ([demo](https://github.com/argyle-sample-apps/unit-connector)) creates virtual accounts for payment reconciliation purposes. If you are utilizing Argyle for paycheck-linked lending, you can use this connector to reconcile payments from multiple payroll providers and attribute them to the correct borrowers.
## Unit
This sample app utilizes [Unit](https://www.unit.co/), a banking-as-a-service platform that lets you embed powerful financial features into your product. You will need to sign up for a Unit account to implement this sample app. Your Argyle Customer Success Manager can guide you through the Unit onboarding process so you can get up and running quickly.
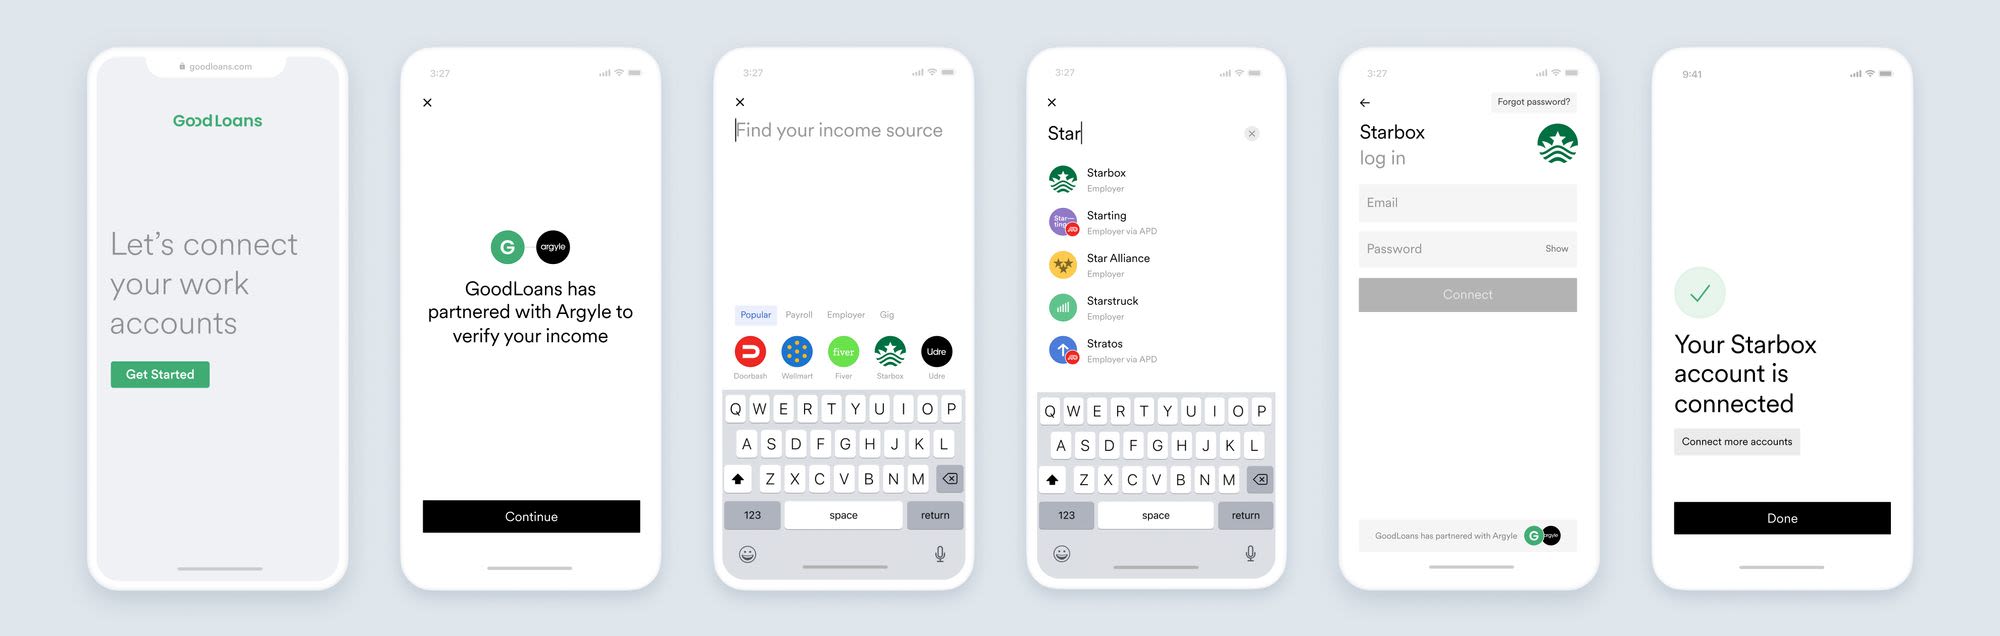
## Connect payroll accounts
Unit Pay Connector fits seamlessly into a workflow for account connection between Argyle Link—a front-end UI element that allows users to grant your application access to their payroll accounts—and a banking application. See the example below to understand how your users can connect their employer or payroll accounts with Link so you can reconcile payments.
## Access payroll data and make a deposit switch
Once a user has connected their employer or payroll account via Link, you can retrieve their employment data via the [Argyle API](/legacy/api-reference/introduction) for loan decisions. You can [initialize Argyle Link for deposit switching](/legacy/guides/argyle-link/flows/direct-deposit-switching#initialize-argyle-link-for-dds) after you have approved a loan.
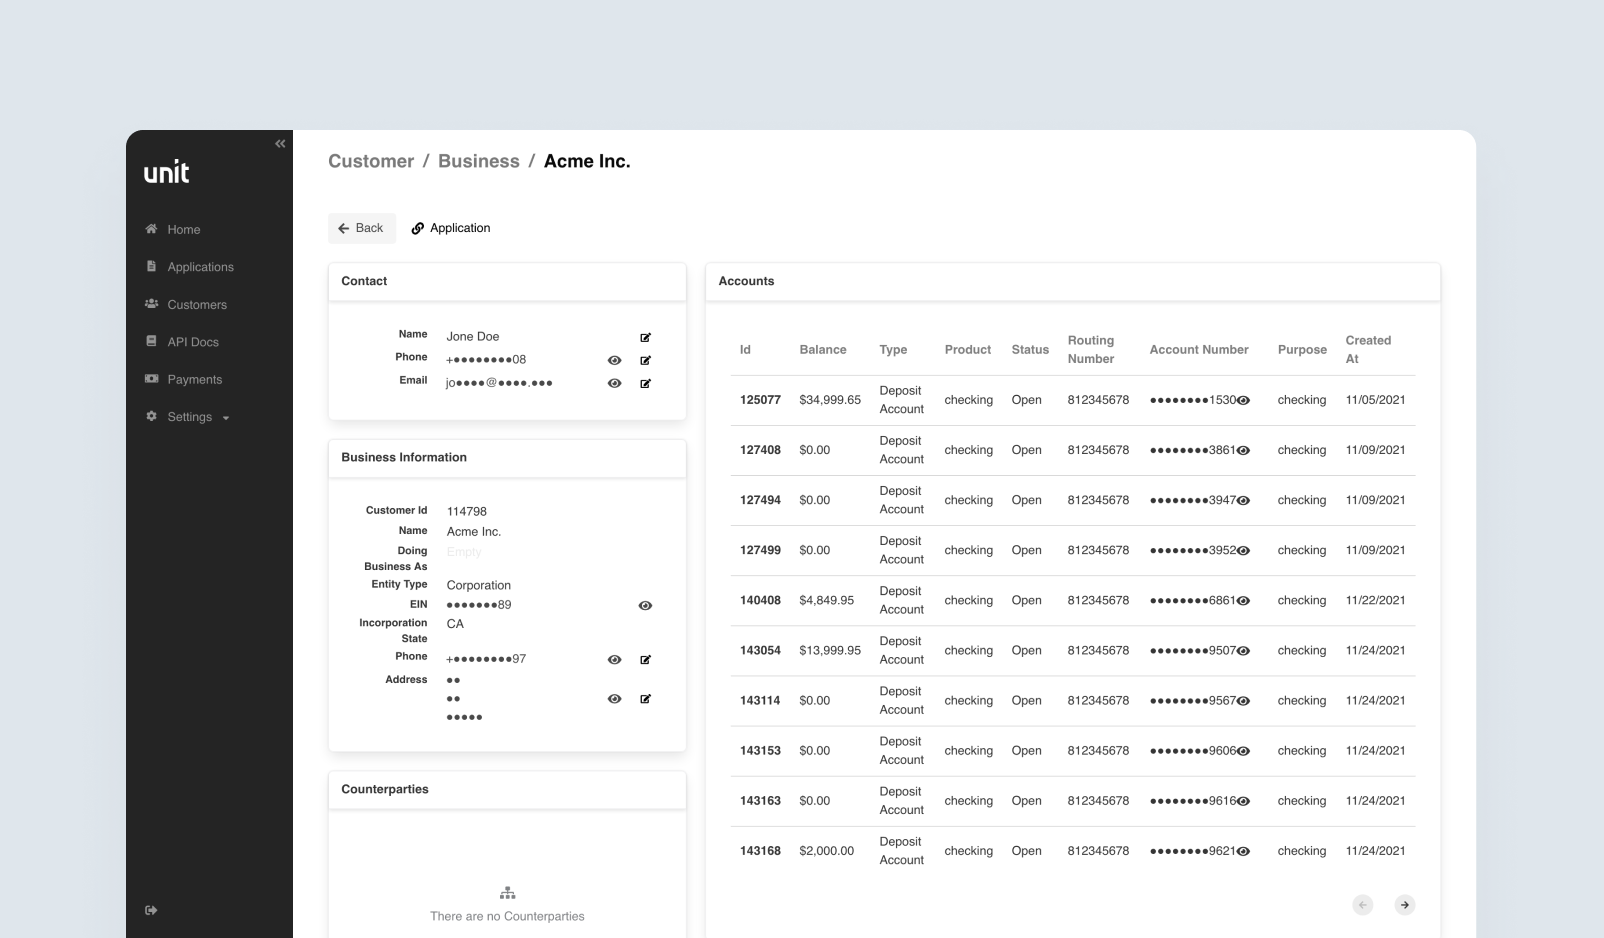
Once you have approved the loan, a new deposit account with account and routing numbers is generated via the Unit API. You can now see this account in the Unit dashboard.
## Deposit switch confirmation
Following loan approval and deposit account creation, the Unit Pay Connector generates a new [DDS configuration](/legacy/api-reference/dds-configurations) that includes the bank account settings. This configuration is automatically assigned to the user's employment or payroll provider account:
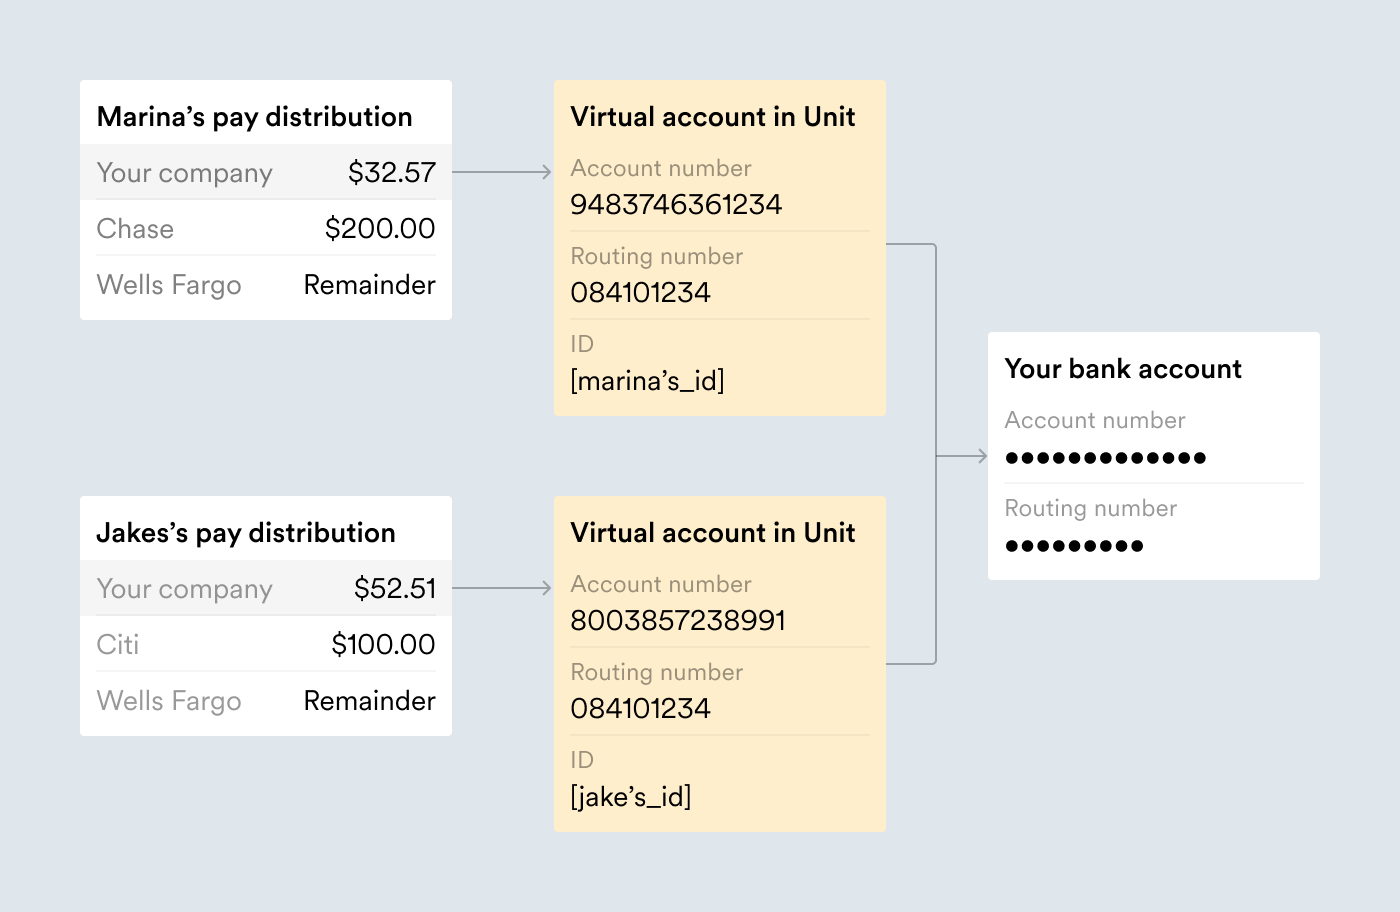
The user selects **Confirm** to accept the deposit account:
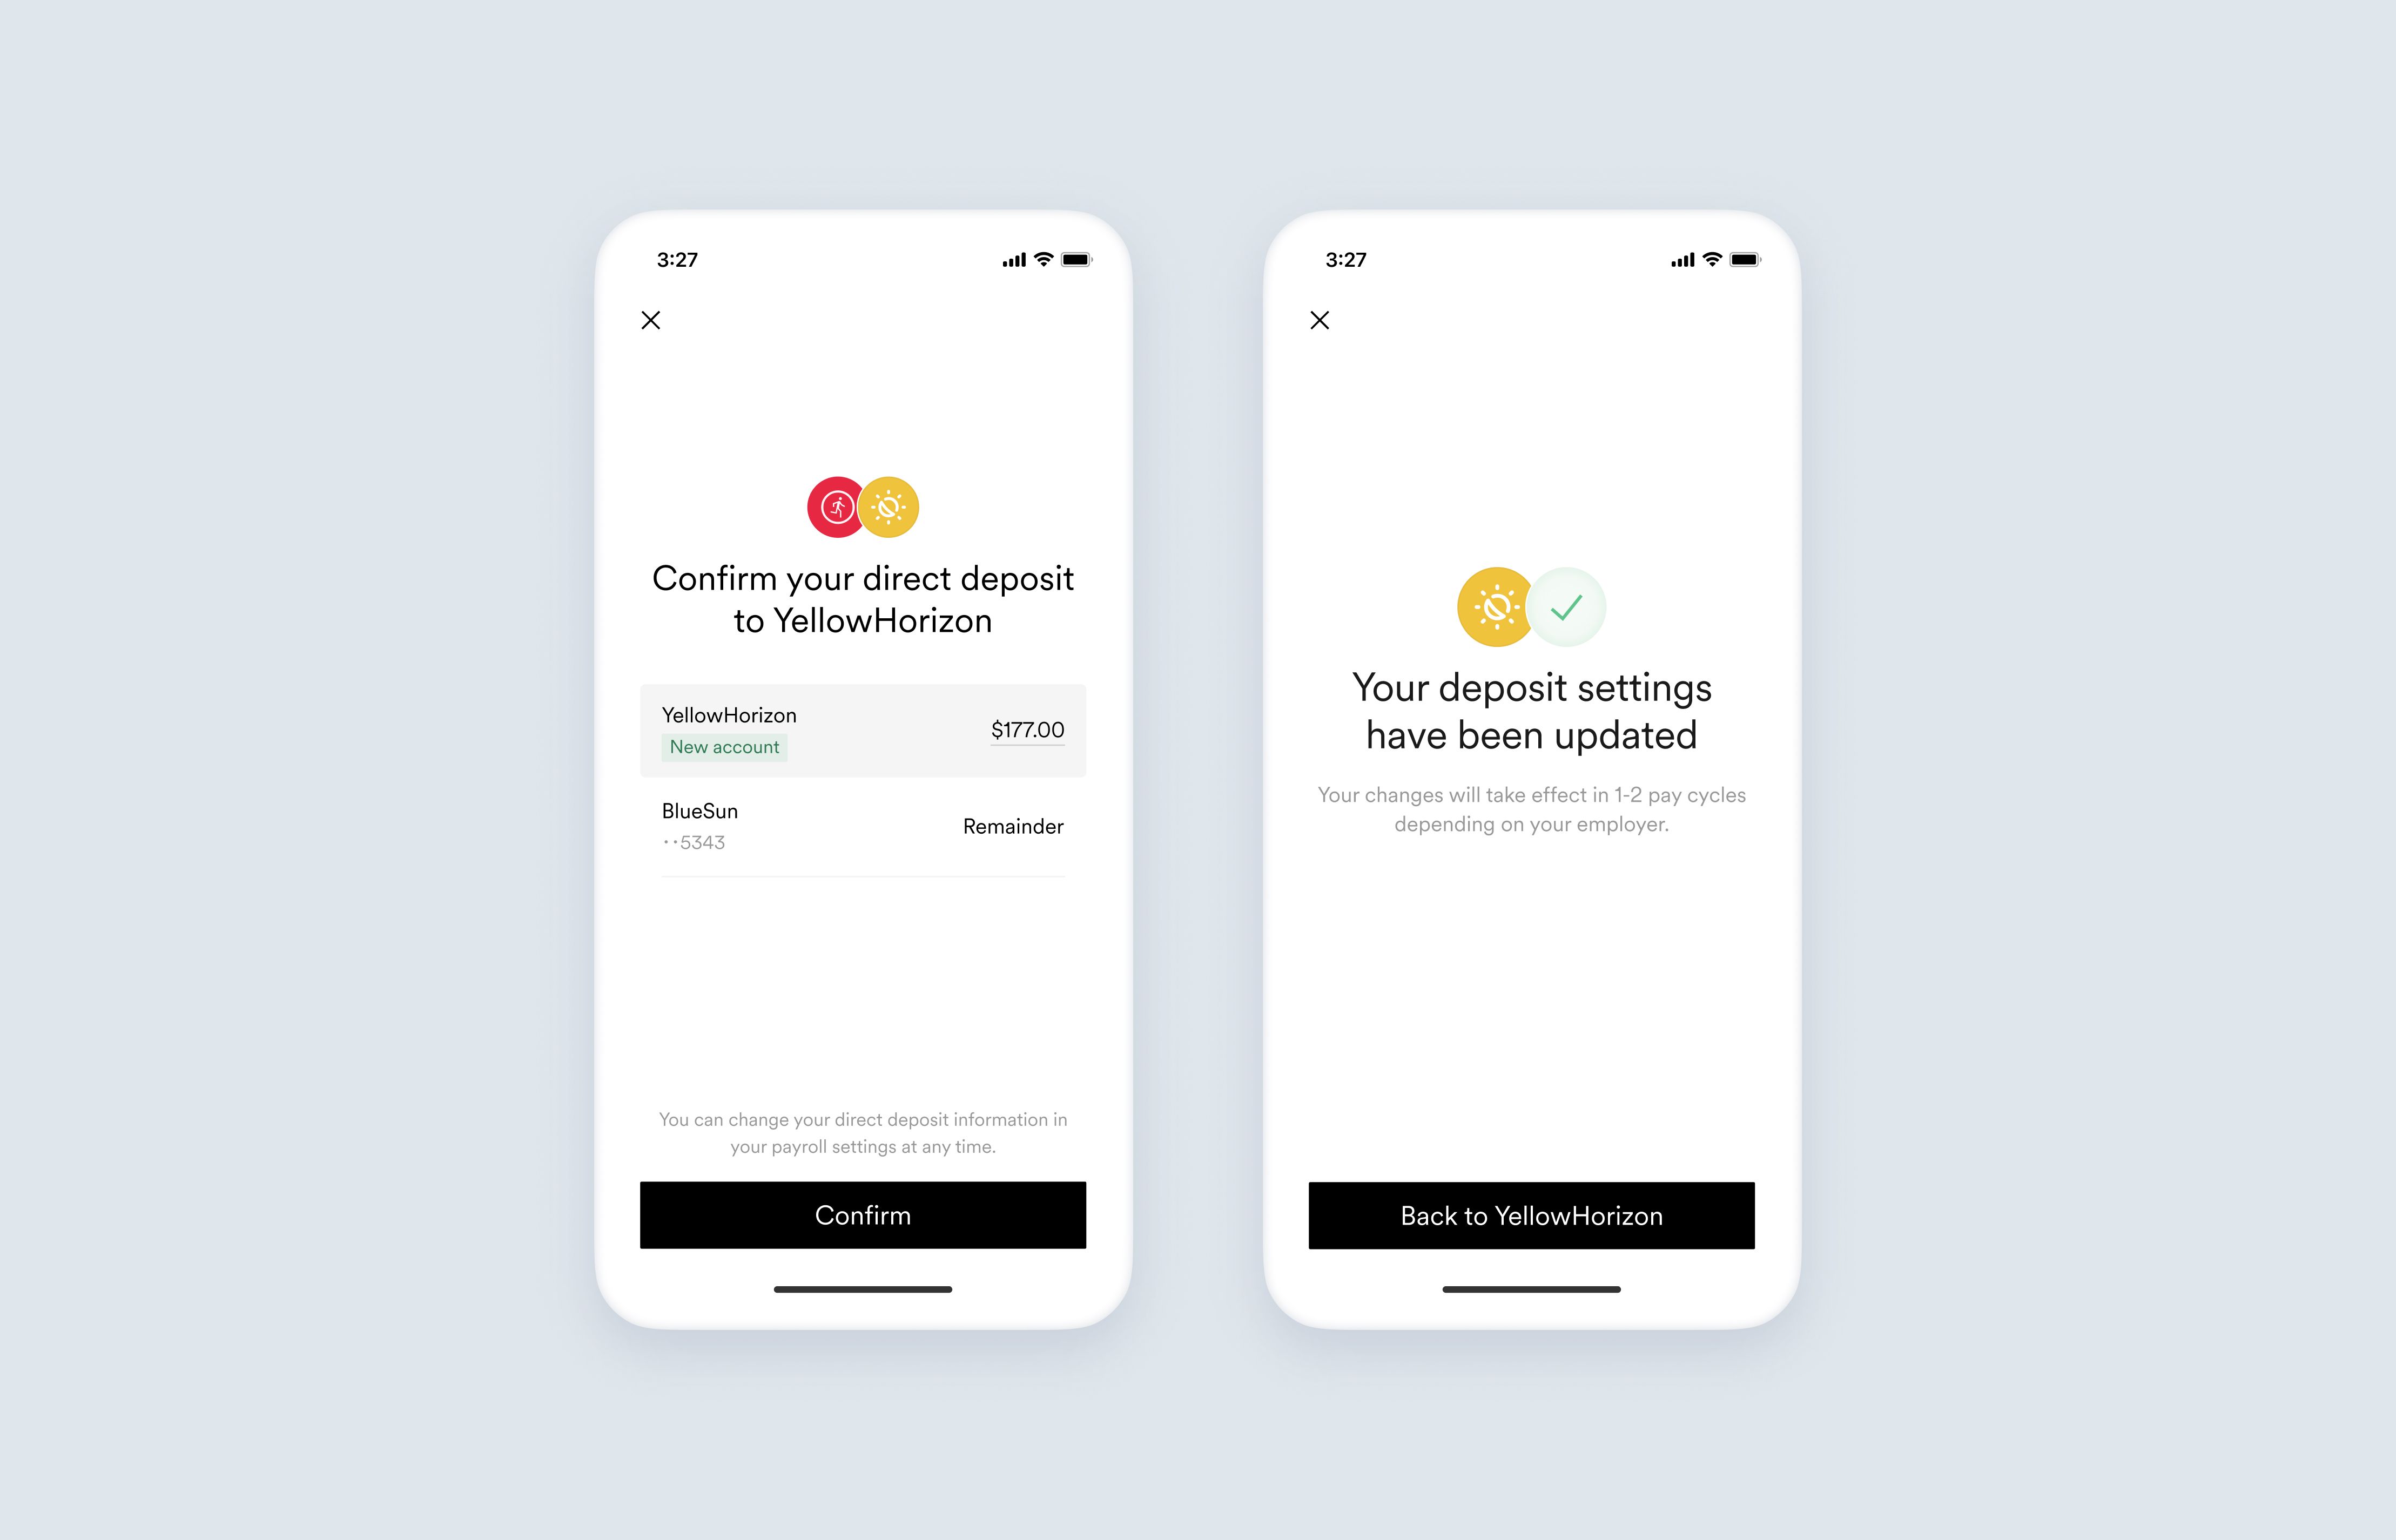
Loan installments are now automatically deducted from the user's payroll. Once the loan is repaid, the user can remove the bank account by [returning to Argyle Link](/legacy/guides/argyle-link/flows/returning-users) and revoking access to the account or [updating their deposit allocations](/legacy/guides/argyle-link/flows/direct-deposit-switching#adjust-existing-pay-allocations).
## Next steps
Visit the [Unit Connector Github repository](https://github.com/argyle-sample-apps/unit-connector) to clone and test the application in your local development environment, or learn more by visiting our [Paycheck-linked Lending Solutions Guide](/legacy/solutions/pll/implementation).
For more details, reach out to your respective Customer Success Manager, Account Executive or the Support team.